|
Today we are checking in on what's going on in the glass studio and mostly we're talking about disasters. When I first started doing glass I agonized over getting pieces perfect but I have since learned that with glass, like quilting, you can almost always fix something or, worst case, use it for scrap. Some of the scrap projects, again like with quilting, are some of the most fun and most interesting. I don't usually share my "disasters" but I've had quite a few lately so thought I'd show them and tell you what I'll do with them. 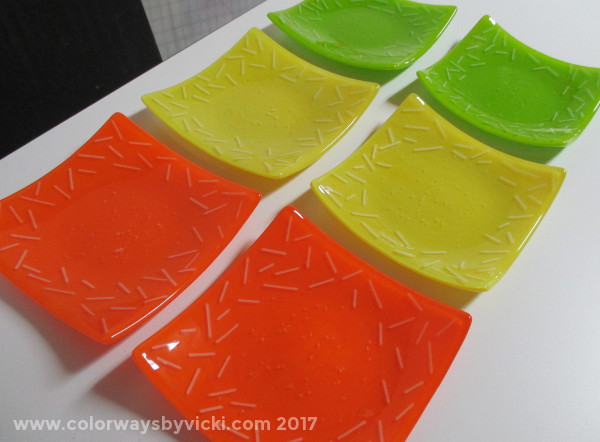 We'll start with the pretty set of sushi plates that I promised for a friend LAST YEAR! I have to get a kiln full of glass to work on these and I can only slump 2 at a time so that's one reason they are taking so long. But I was down to the last orange one this weekend and was looking forward to emailing her this week to tell her they were ready.  Oh my, what the heck is this? The back of the plate has picked up some kiln wash or something and it's permanently fused to the dish. There's a small spot on the front too. So, what to do? I'm going to first run it through a full fuse to flatten it out. Then I will use some wet sanding pads (specifically for glass) to sand the back of the plate and the one spot on the front. Then I'll full fuse it again to bring the sheen back and then slump it. It's got 3 more trips through the kiln before it's potentially done. In all honesty I'm probably also going to make another one just in case the repair doesn't work. Regardless, it's good for me to learn how to fix these problems. 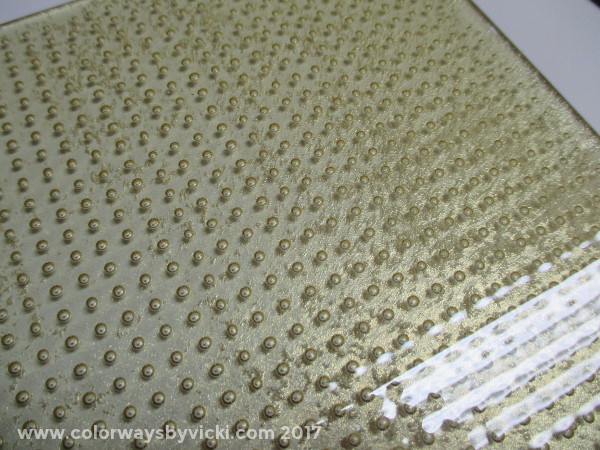 Next up is this bubble plate. It has iridized glass on the bottom and you can see that it's taken on a distracting texture. 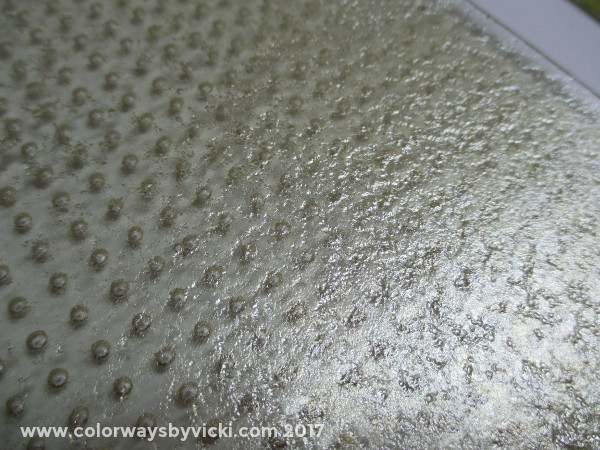 Here's a better look from the back. That's called pitting. I have now learned why this happened and consider it a miracle that it hasn't happened to me before because I've been fusing the irid glass wrong all along! I'm going to send this through the kiln once with the irid side up to see if it fixes itself. If that doesn't work I may grind the irid off to leave myself with a nice amber bubble plate. 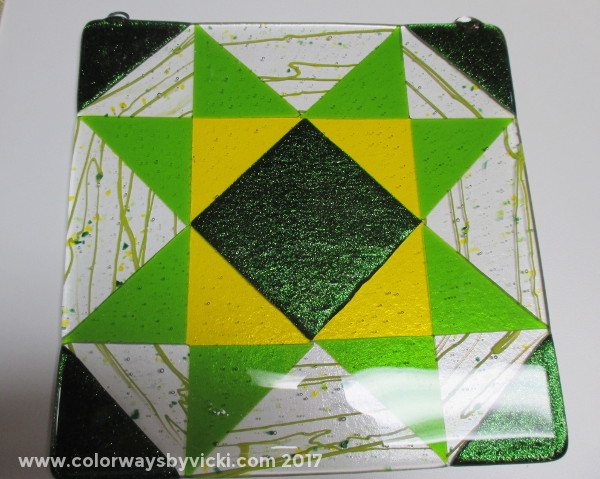 This is one of my quilt blocks suncatchers. I've been working on this thing FOREVER! After the first fuse I felt that the hooks for the hanger were not fused in well enough so I sent it through again to add a bit of clear so they would be seated better. 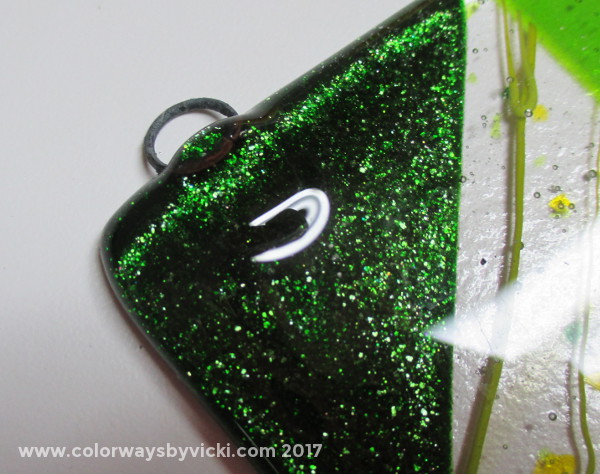 This one worked perfectly. 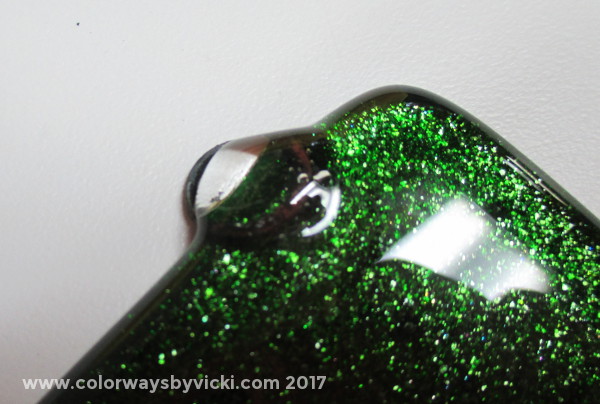 This one not so much! I will need to grind the clear away from the hole of the hanging loop and then fuse it again, hopefully for the last time. I'll use a Dremel with diamond bits for this and I'll keep the surface wet while I'm grinding. 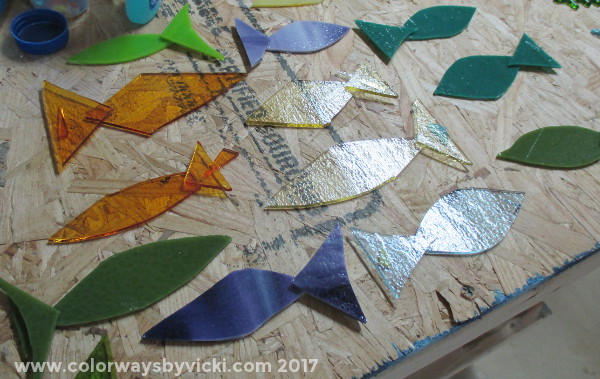 I want the kiln full every time I fire so I got a school of fish bodies ready (tails glued to bodies) and will get them "decorated" so that I can fill in the spaces between my other project with these. All of these fish will be swimming on my dye sink backsplash. 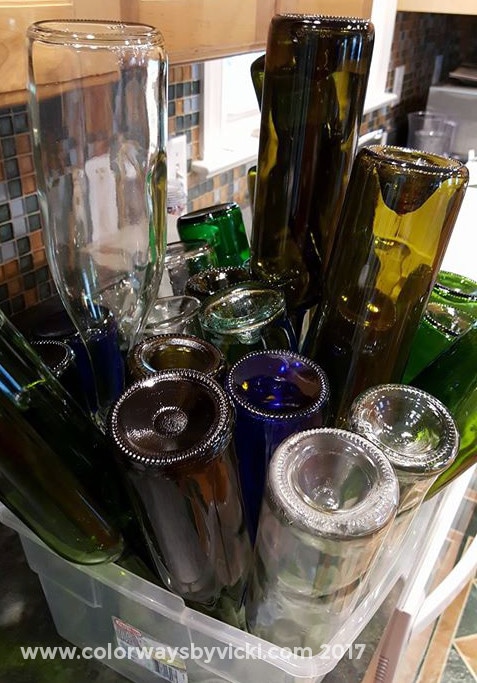 Also, people have been bringing me bottles so I spent a lot of time washing and removing labels from bottles this past weekend. I do these inbetween other firings. This is a particularly good batch. There are lots of clear ones to use with my tree of life and swirl molds.
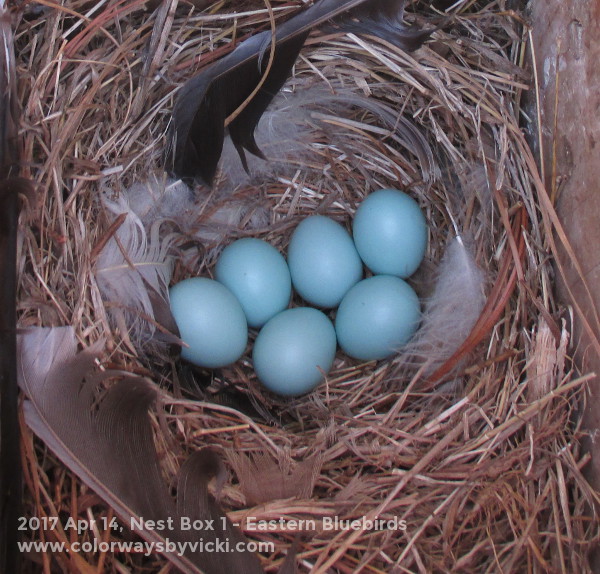
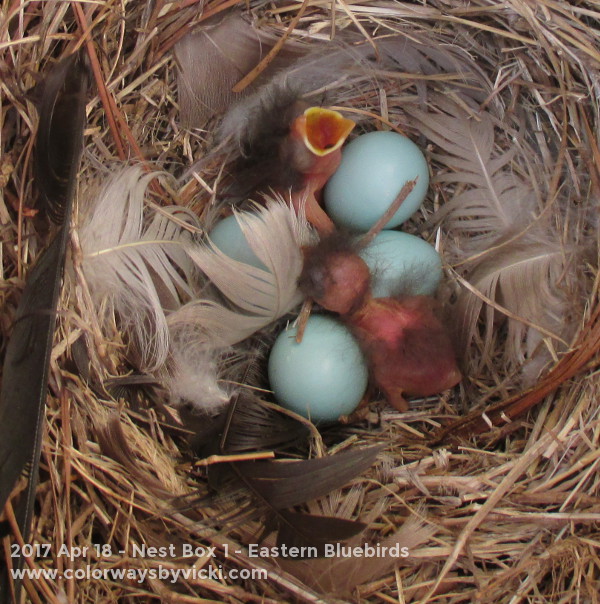 We checked on the nest box this morning and our Bluebirds have started hatching! The one on the bottom is not dead. It just didn't lift it's head for the photo. Will try to get another look this weekend after all six have hatched. 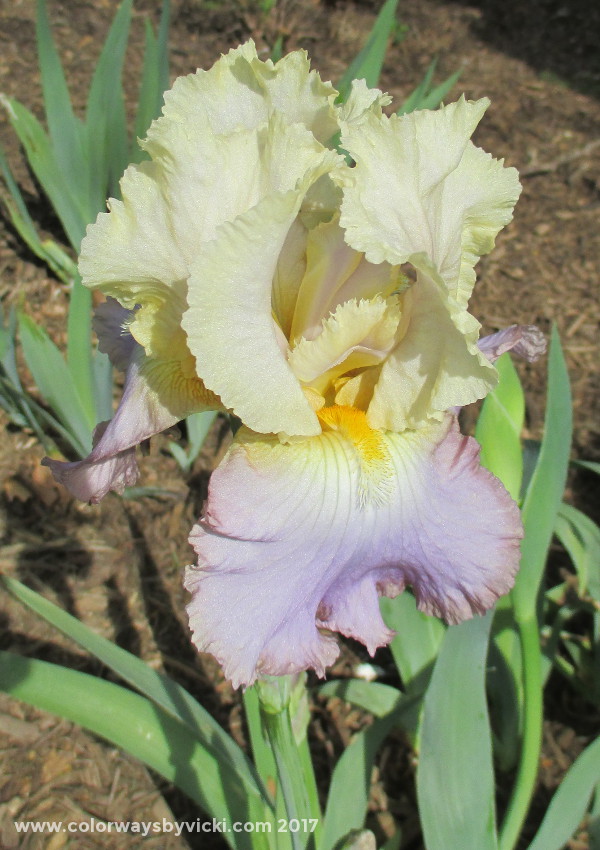 The iris are on the bluebird schedule. I got the first bloom the same day as the hatching. Iris are pretty much the only flowers I plant. They are hearty and require almost no effort. They were also my Grandmother Lura's favorite flower. All of those things make it the perfect flower for me.
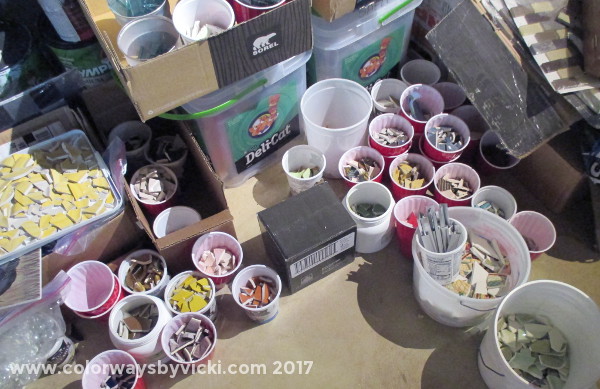 Now that the basement is all nice and clean it's time to mess it up again and there's no quicker way to do that than with mastic and broken pottery. It's time to start the new wall section! My goal with this section it to use up many of the containers of leftovers from the Great Wall. These things are taking up a lot of space and, like quilting, I can't throw out the scraps. So I had to come up with an idea that would use smallish bits. 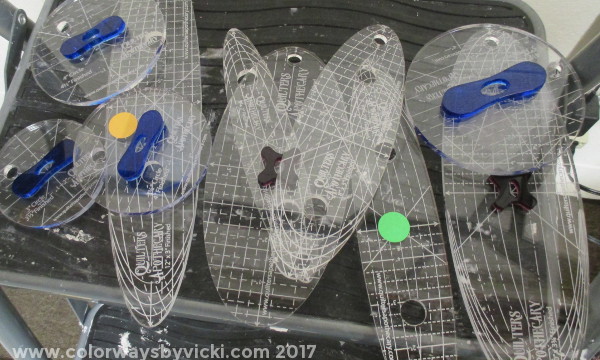 One day while I was working on the Great Wall I started thinking about my longarm rulers and from there the idea was born for the new wall.  I'm going to make a beaded doorway! When these were popular I was still quite young so wasn't of age to have a beaded doorway of my own. But I did think they were cool. Of course I now know that they are a giant pain in the butt. But fixed in place on a wall it could be pretty cool.I drew the lines with a spirit level and the beads are all of the various sizes of rulers that I have from Quilter's Apothecary. There things come in handy for all sorts of uses. 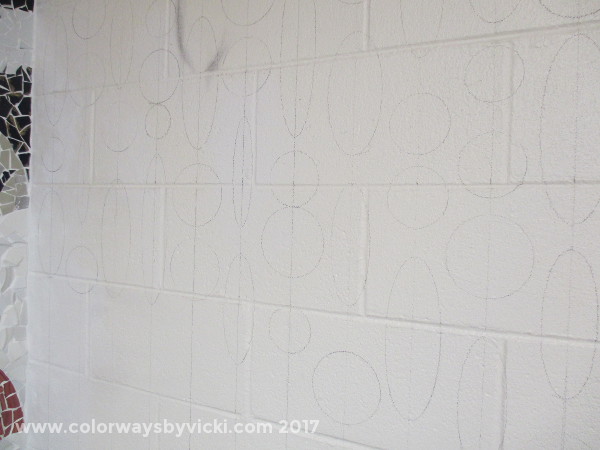 This is the width of the space. I have the beads drawn in for the top half at this point. I want to make sure I have the spacing good before I draw all of them. 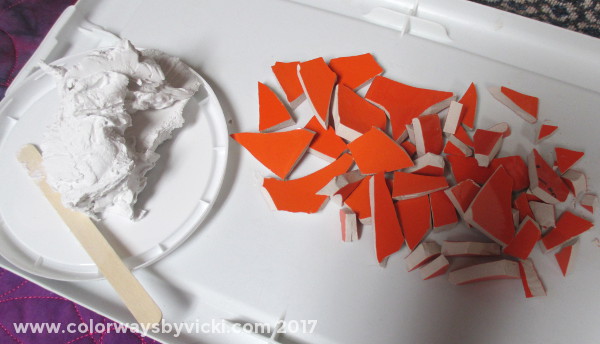 There's no time like the present to get started! This is a small collection of leftover orange bits. The lump of mastic is all that's left from the second bucket that I used on the Great Wall. I already have the third gallon bucket ready to go. 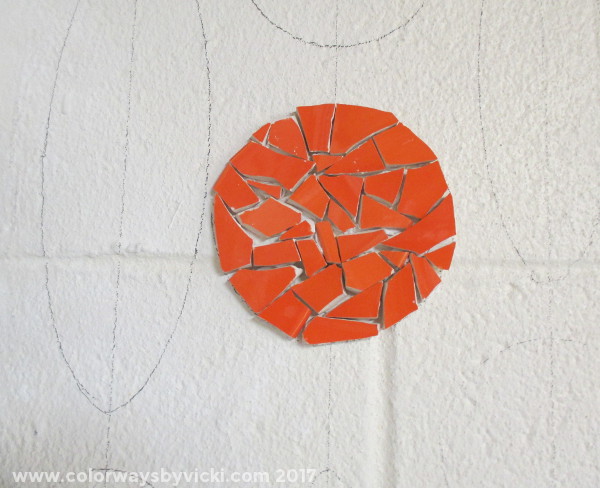 Now it's official. Another wall is underway! The trick is going to be fitting the amount of potter to the optimal bead sizes. I hope to do this wall without breaking into new pottery but that's not going to be a firm rule. 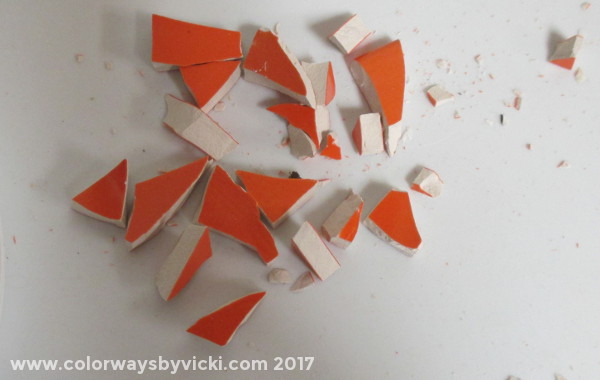 This is all that's left. Do you think I threw these out like I should? Of course not but I'll just set aside one scrap bucket for all of the leftovers, like our quilting scrap bins. That will be an improvement over what I have going on right now. 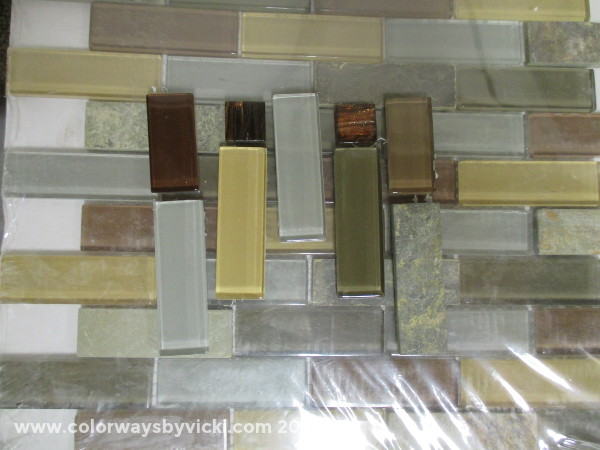 This morning I had a little time to come up with a plan for the "ledge" that the beads will hang from. I think this is going to work fine and I'll have just enough of these tiles to do it. These are leftover from a friend's remodel project.
I'm very excited to have my next wall section underway. 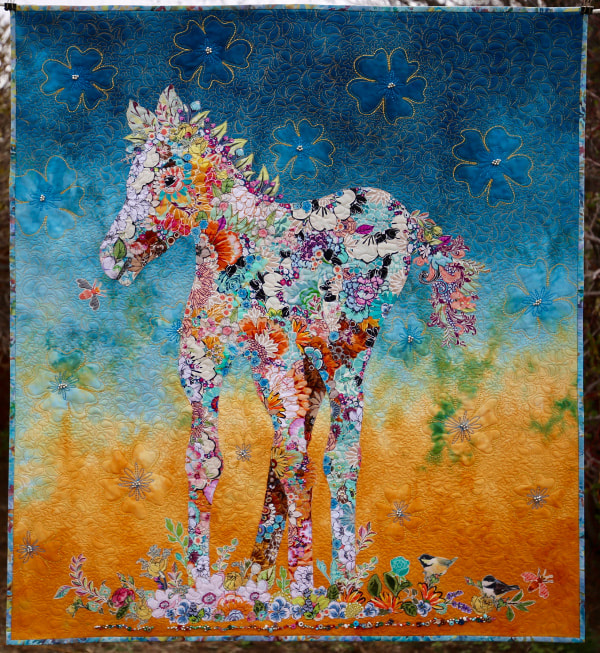 Sun Blossom Pony by Leslie McNeil Leslie McNeil is back with another of her beautiful collage art quilts. She started working with this collage technique a few years ago and has really mastered it. She now teaches it and has patterns available. There's even a pattern for Sun Blossom Pony. This one features the Barrier Island background fabric which has been quilted with a bobbin quilting technique, as well as beading by machine. There are over 100,000 stitches in this piece. 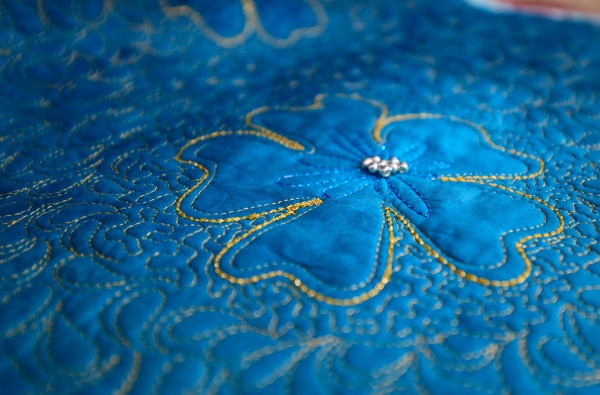 Leslie does all of her quilting on a domestic sewing machine and her stitching is exquisite. She create beautiful texture and is not afraid to use bold threads so that her quilting stands out. 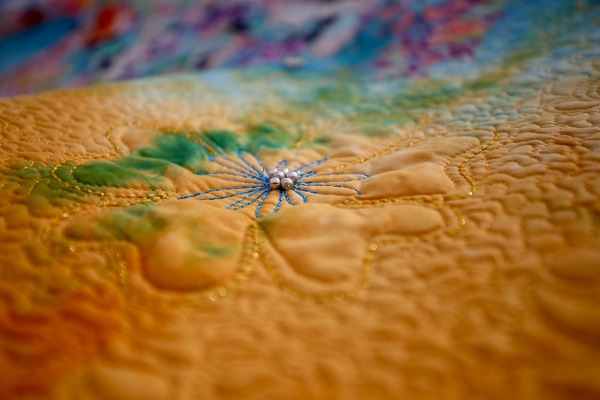 She's a wonderful photographer too! You can see lots more of her work, peruse her patterns and things for sale and find out about her classes on her website.
 Birding season is off to a slow start this year but we finally have an Eastern Bluebird nesting in one of the boxes. In about 10 days we should have some baby birds to watch. The other 2 boxes are still empty but there's an Eastern Phoebe determined to nest above our front door. We let her there last year and that resulted in a snake incident and that means no more birds above the front door! Chris stuffed the area full of styrofoam so there's no ledge but she keeps spreading mud everywhere. Eventually, I suppose, she will get it into her bird brain that she can't nest there and will move on and then we can get out the power washer and clean up the mess. Speaking of cleaning up messes that's what I was up to all yesterday afternoon. Once wood-stove season is over I do a deep cleaning of the basement. There was a time when I could get some help from Chris but with the addition of my glass workstation and the mosaic mess he really only has about 4 square feet of space left in 1000 square feet of basement. 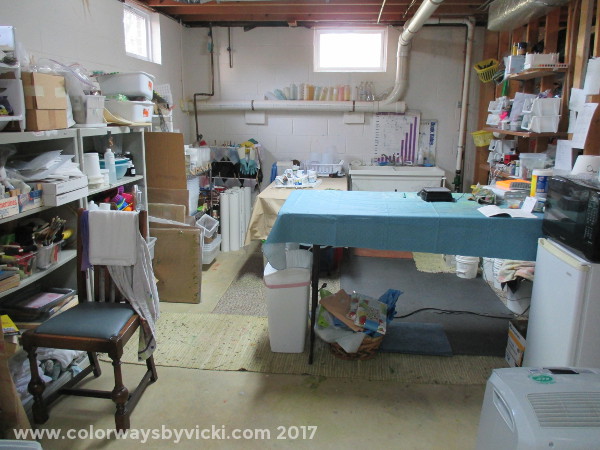 So let's take a little tour while it's presentable. As you come down the stairs the dye studio is to the right. Hopefully by next year that sink against the far wall will have a cool mosaic back splash. When it comes to my work spaces I am 100% function over form. Almost every work surface and cabinet in the basement was gotten cheap or free so when I die someone can just call 1800-got-junk and haul it all out. 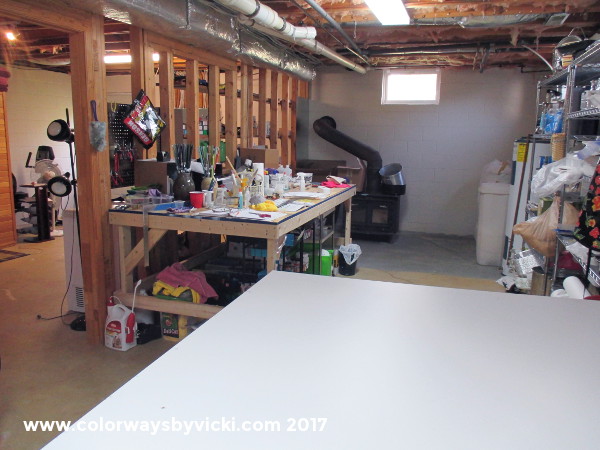 Just at the bottom of the stairs is this big beautiful table that I use mostly for cutting fabric. I did actually buy this and it was worth every penny. Beyond that is the glass department and the woodstove that keeps me toasty warm down here in the winter. That little stove actually heats most of the house all winter and, living in the "country", Chris can always get free wood. 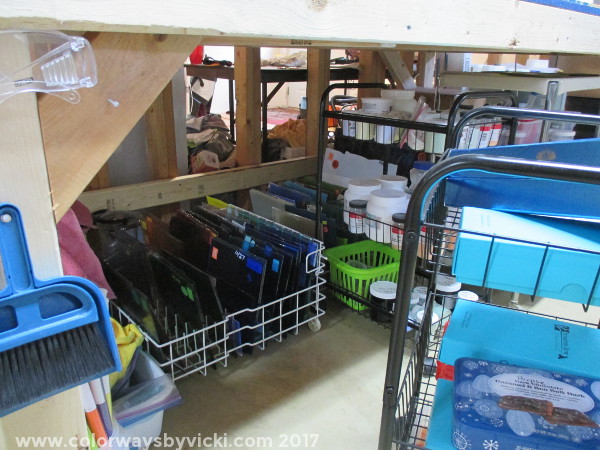 All of my glass is stored under the bench. The scrap, frit and powders are in rolling cards and the glass sheets are in 3 old dishwasher racks. These are my absolute favorite "reuse" items. The have wheels, of course, so I can just roll them out for easy access. 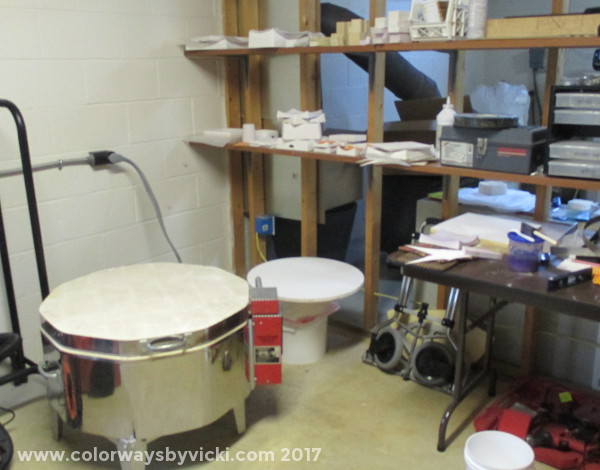 On the back side of the glass "department" is the kiln, all of my slumping molds and a table for setting up things ready to go into the kiln. I plan to be doing some things here this weekend. 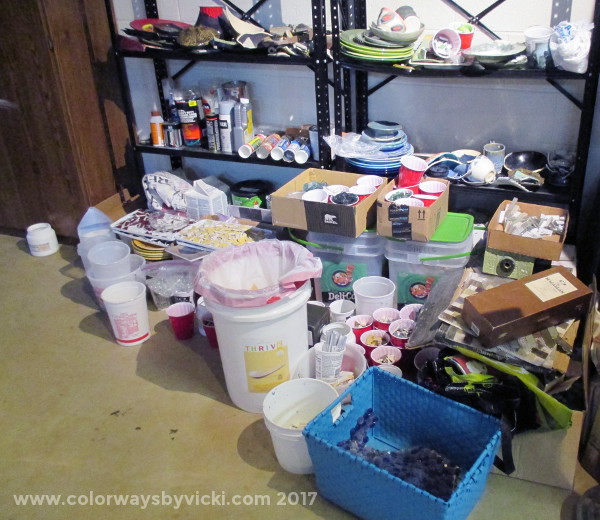 The other half of this back room is taken up with mosaic supplies. Do not get into mosaics because, seriously, this is as neat and tidy as it gets! 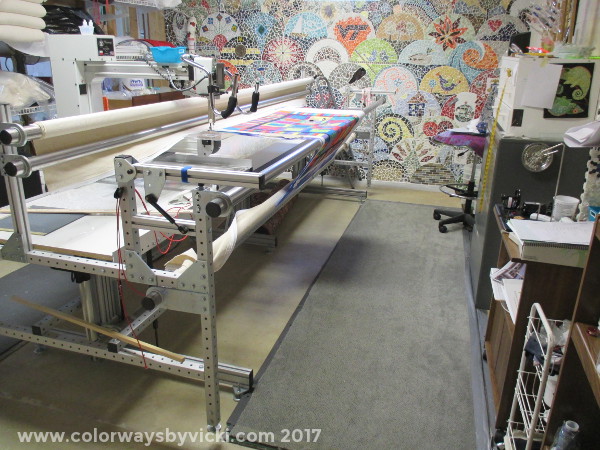 The 4th quadrant, and the 1st that I occupied down here, is where FloMo sits. It's right behind the dye station. When I say I'm all function over form I mean it. That carpet is held down with extra wide duct tape! But for the first and last time this year, that floor is clean enough to eat off of so if you want to have a meal on an ugly concrete floor you better come over soon. It's about to get messy again.
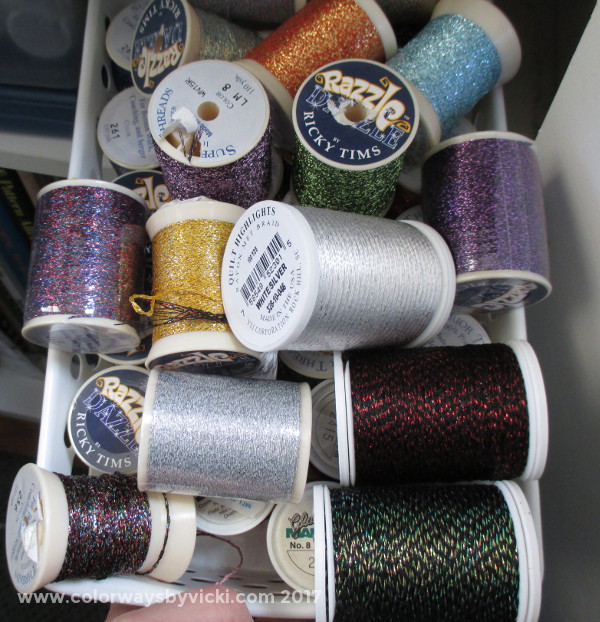
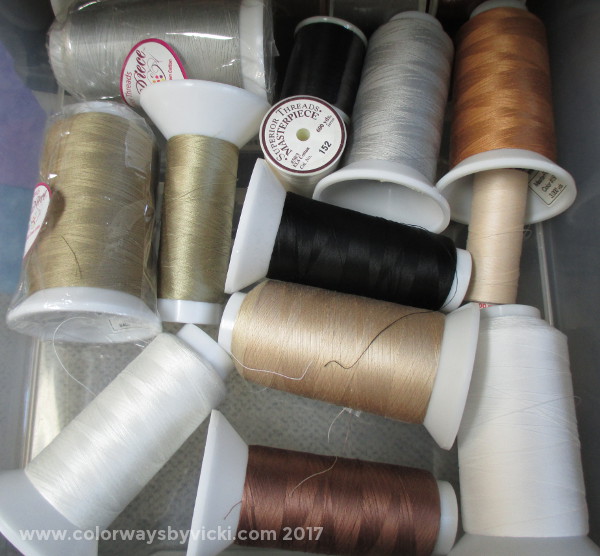
I've been thinking about doing this post for a while but it became relevant when I was working on the sailboat postcard. I needed thread for the edging and wound up checking all of my thread stashes to find the perfect matches. I'm pretty sure that I have more thread than fabric and I'm A-OK with that. I hate starting to quilt a quilt and not having just the right thread to go with it. Thread is like crayons. If you can afford it are you going to buy the Ultimate Crayons or the 8-pack? You are buying the 152 ultimate pack that includes glitter and metallic crayons.
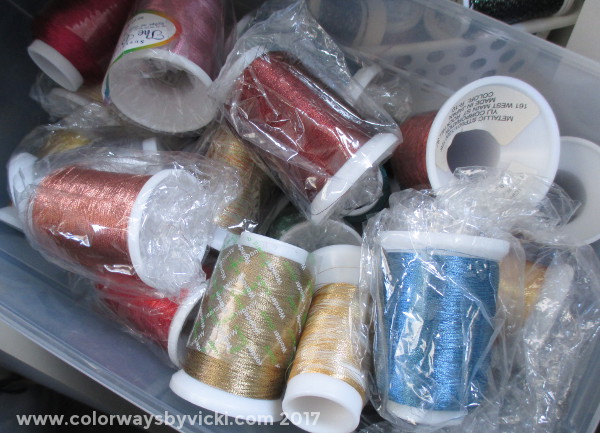
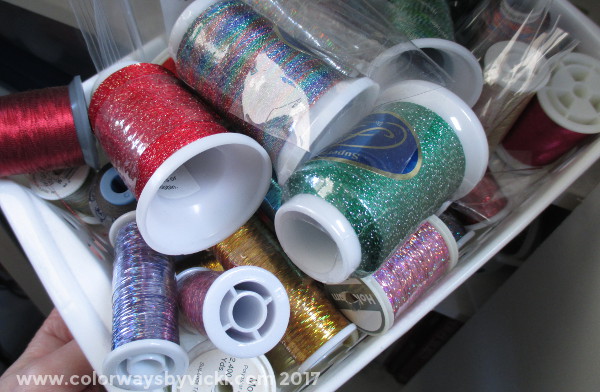
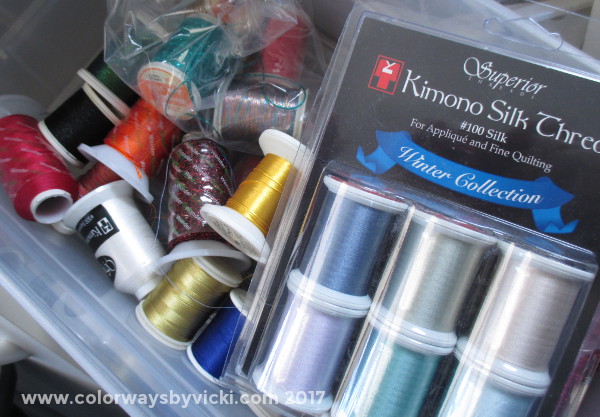
Well, let's start with the fancy metallics, glitter and other special threads. These are in a cabinet right next to my Brother sewing machine (where I make postcards). Like many of my threads, several are in the original wrappers but they were there when I need them! But there's nothing there for my postcards. 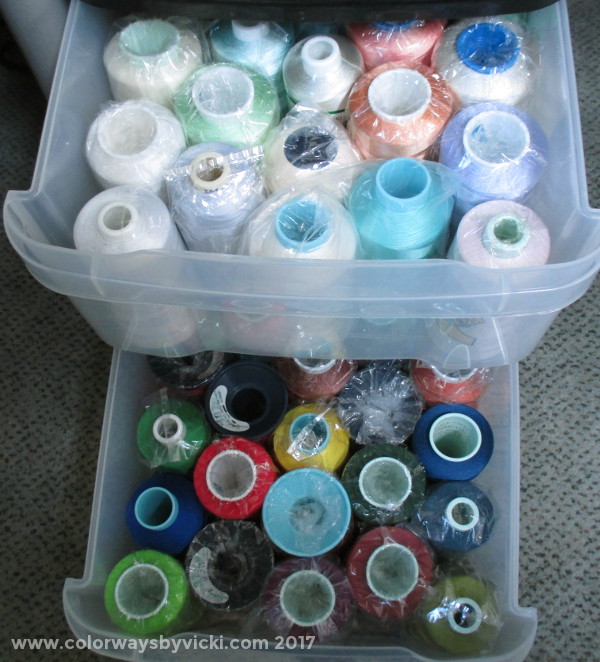 Next stop is these 2 drawers of mostly acrylic threads. These are under the Brother table and I use these a lot on postcards but it runs fine on the longarm too. Many, many years ago there was a website called Lunn Fabrics that sold hand dyed fabrics. Debra and Michael now design batiks for one of the fabric lines. They also sold this thread and when they went out of business they sold off the remaining inventory at deeply discounted prices. I bought over 50 cones but, seriously, this was so inexpensive that I'm sure I've gotten my value out if it now. The colors are beautiful and the sheen is wonderful. But none of them matched my postcards. Down to the basement..... 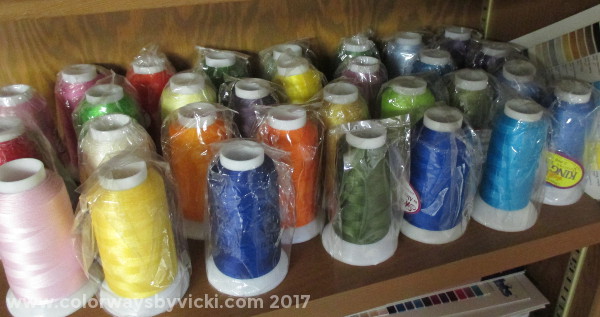 Nothing in the Masterpiece collection matched. I primarily use this as bobbin and piecing thread.
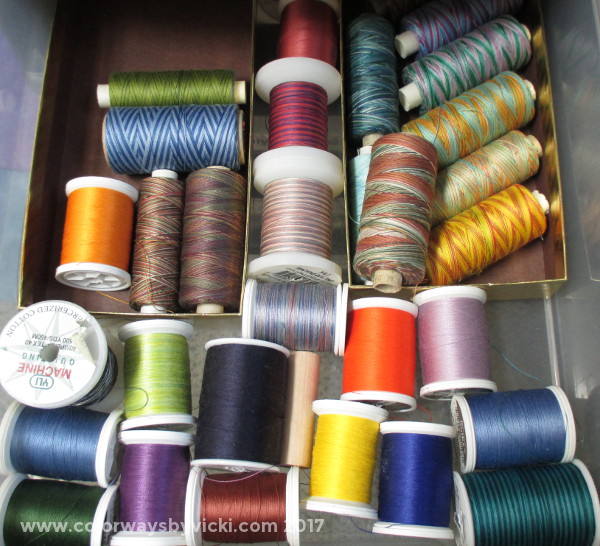
I used a variegated poly threads on the front of the cards but didn't want a varigated effect on the edges so no Rainbows or King Tut. These days I use these threads primarily on charity quilts where I do an all over pattern. I'm using up a lot of King Tut on the veterans quilts. 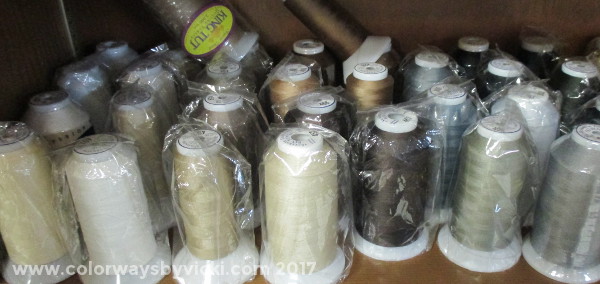 The threads I use most often for quilting are these polyester (not shiny) neutrals and I'm glad I have lots not choose from....but not for these cards. 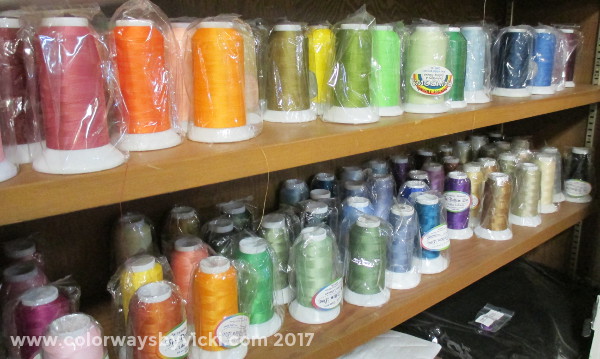 I expected to fin the matches here in either the So Fine or Bottom Line collections but no!
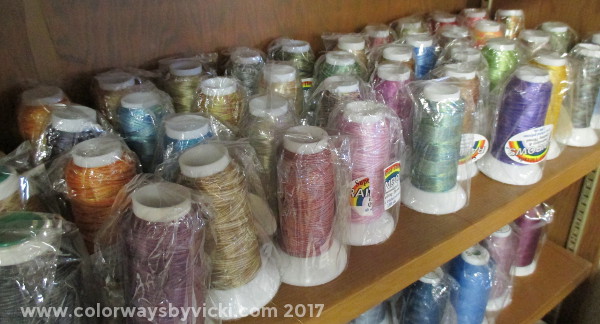
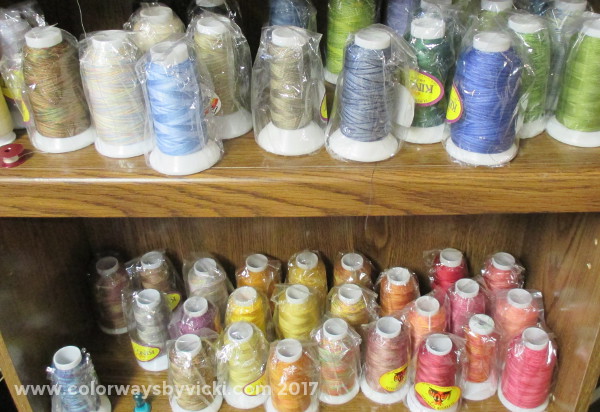
How about the solid polyesters? I love these threads and use them a lot. But no matches here either and I'm running out of options.
Back upstairs I have another cart of thread next to the Juki. The top drawer has my piecing threads. The second drawer has some heavier cottons that are used almost exclusively on postcards but this wasn't what I was going for.  Years ago when I was primarily sewing garments some online store had an amazing price for Mettler thread and I bought every possible color. This supply has come in handy so many times and I consider it one of my best purchases ever. 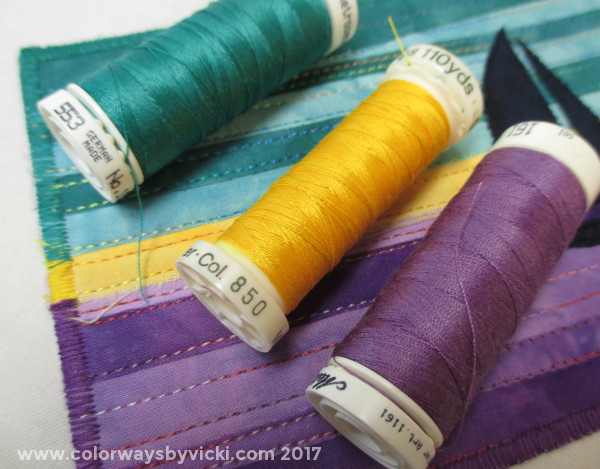 That was doubly true when I made these postcards. Look at those perfect matches!
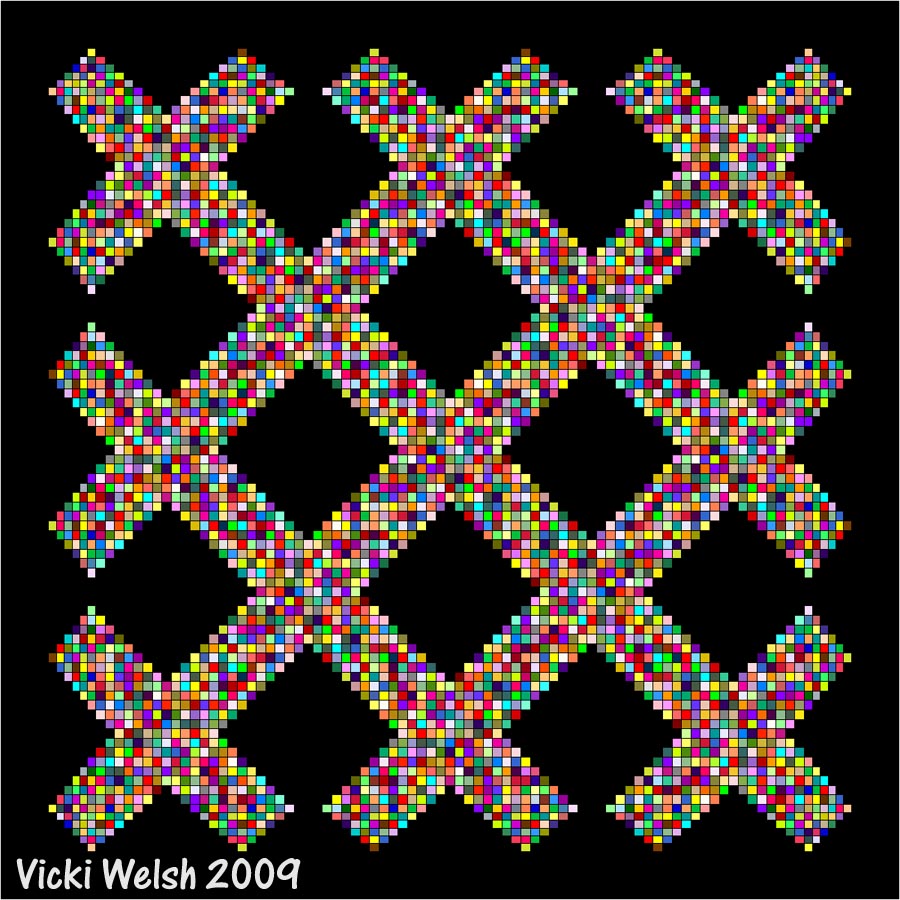
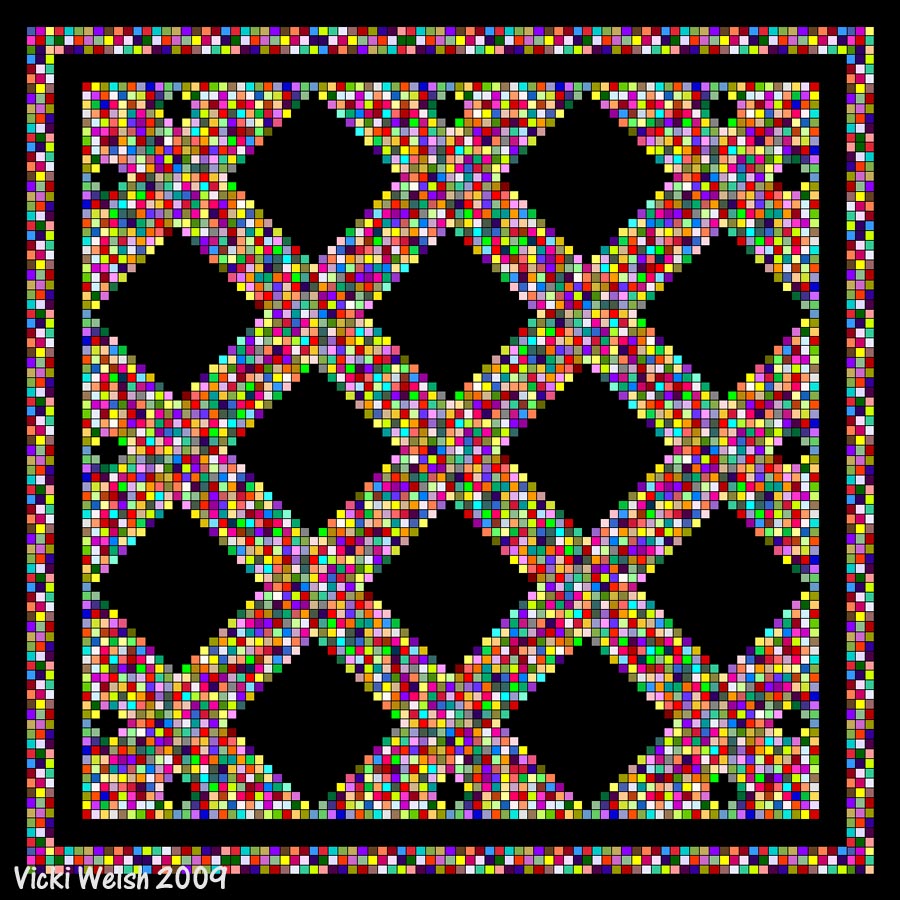
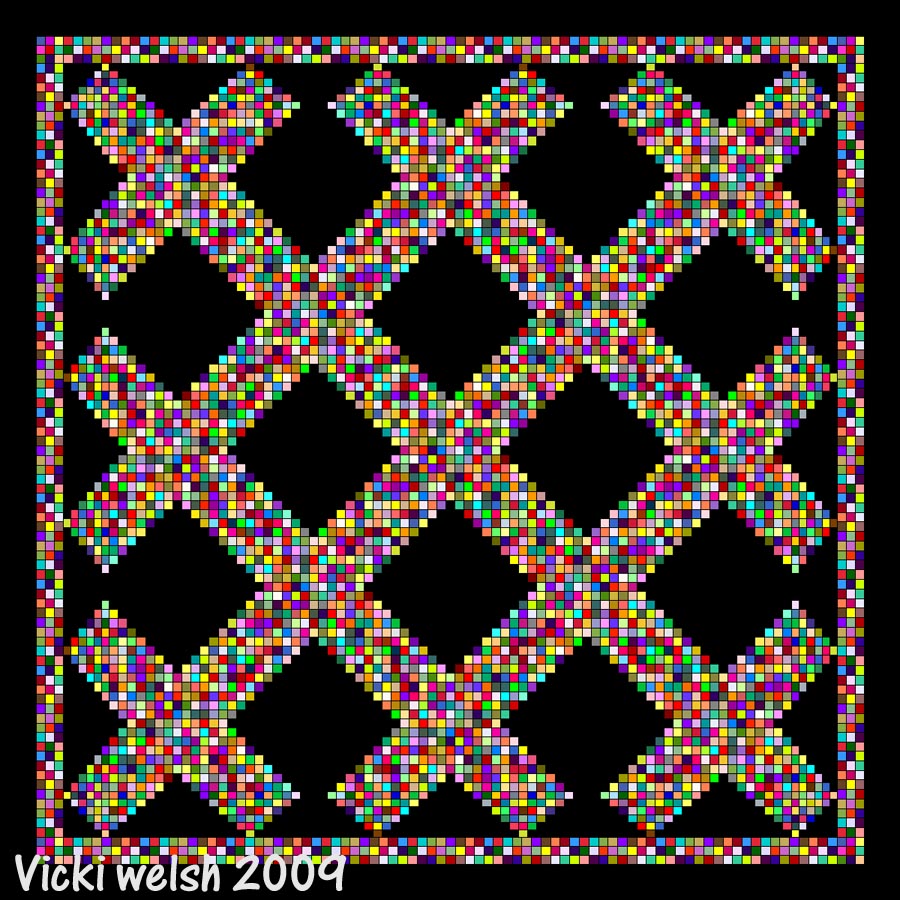
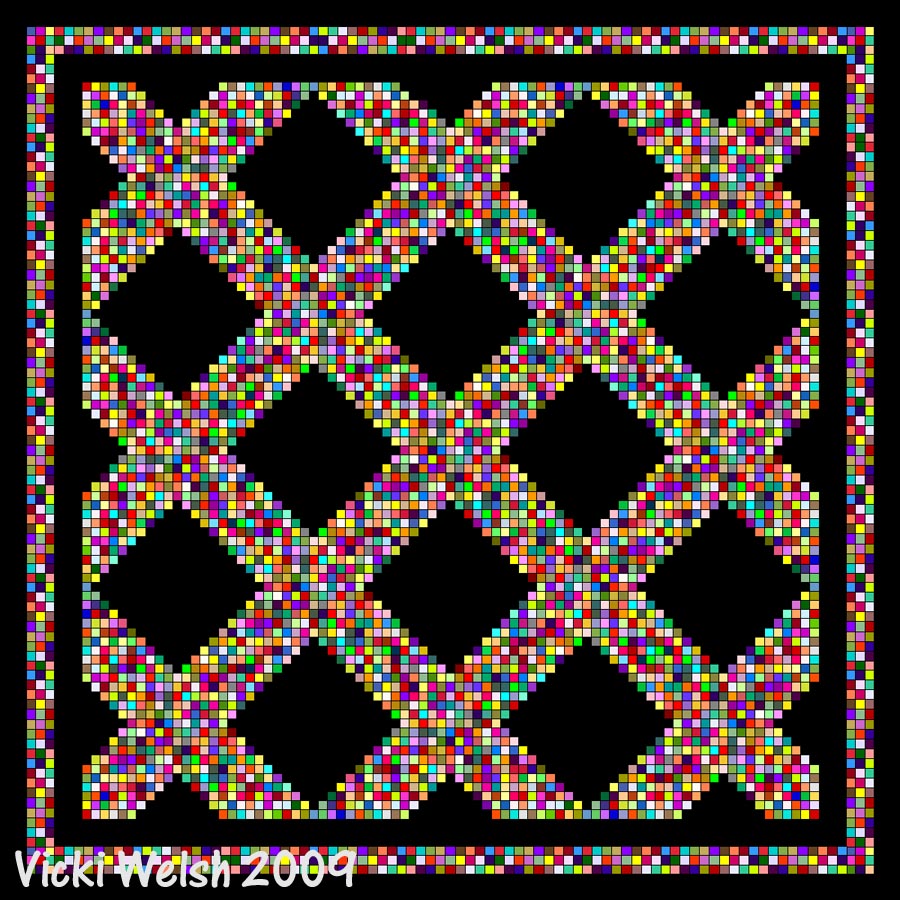
I love my thread collection and wouldn't trade it for anything. I think I'd give away all of my fabric before I gave away the thread. It's my ultimate crayon box just bigger and spread all over the house. At least they don't stain carpets when they are accidentally smushed. 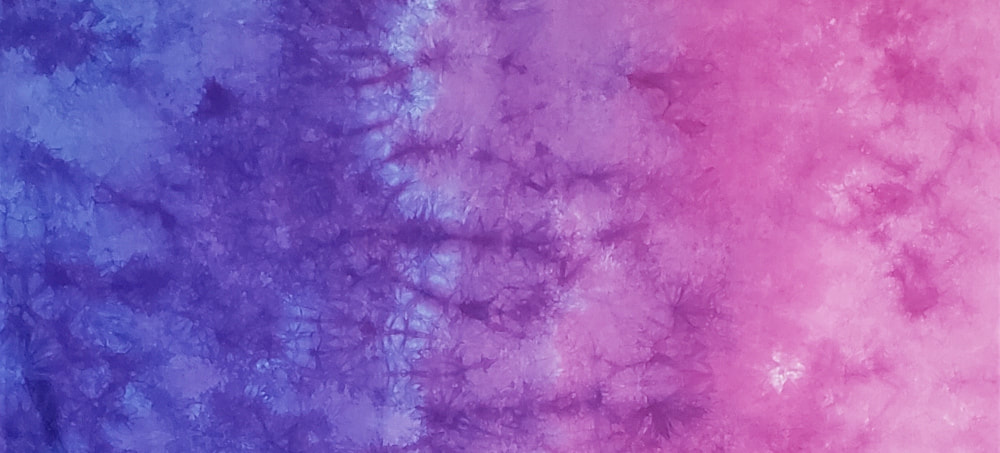 Morning Glory You might recognize the name from a previous Gradient. I felt it was time to update the pattern and I am thrilled with the new version of Morning Glory. This one is a little lighter and a little pinker than the last version. I hope you will like it too! 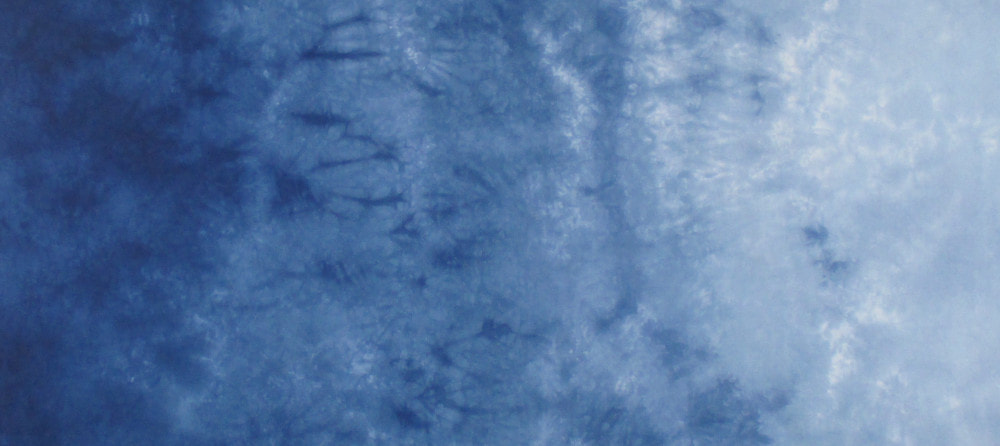 Sea and Sky Also back in stock this week is Sea and Sky. I used this gradient as the background for both of the quilts below. 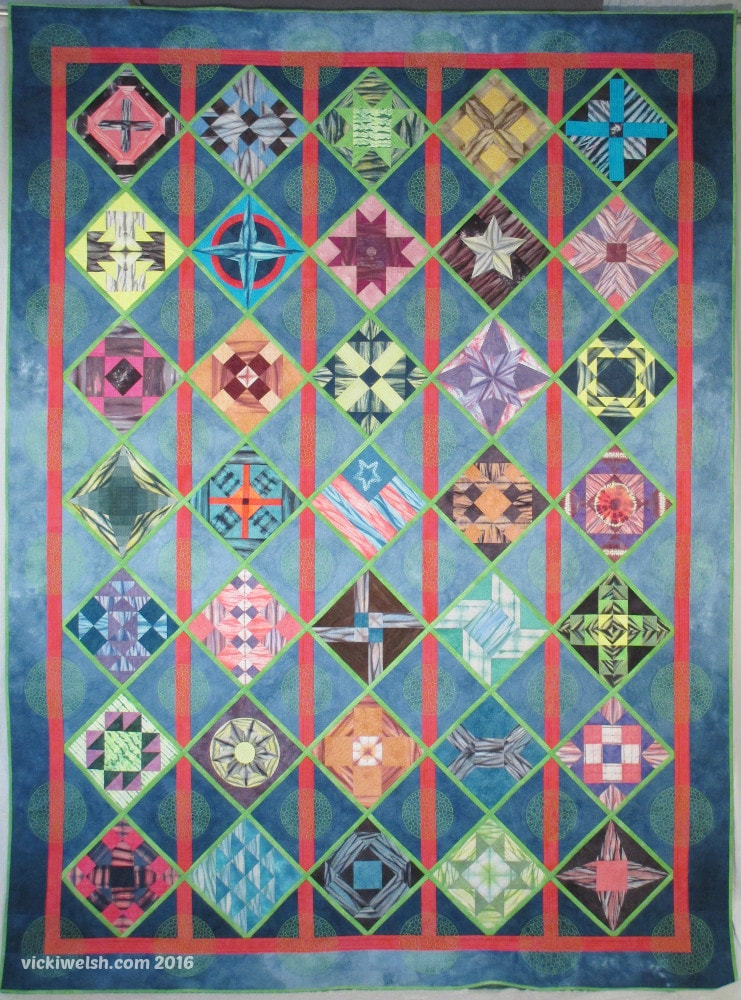 Lura's Choice 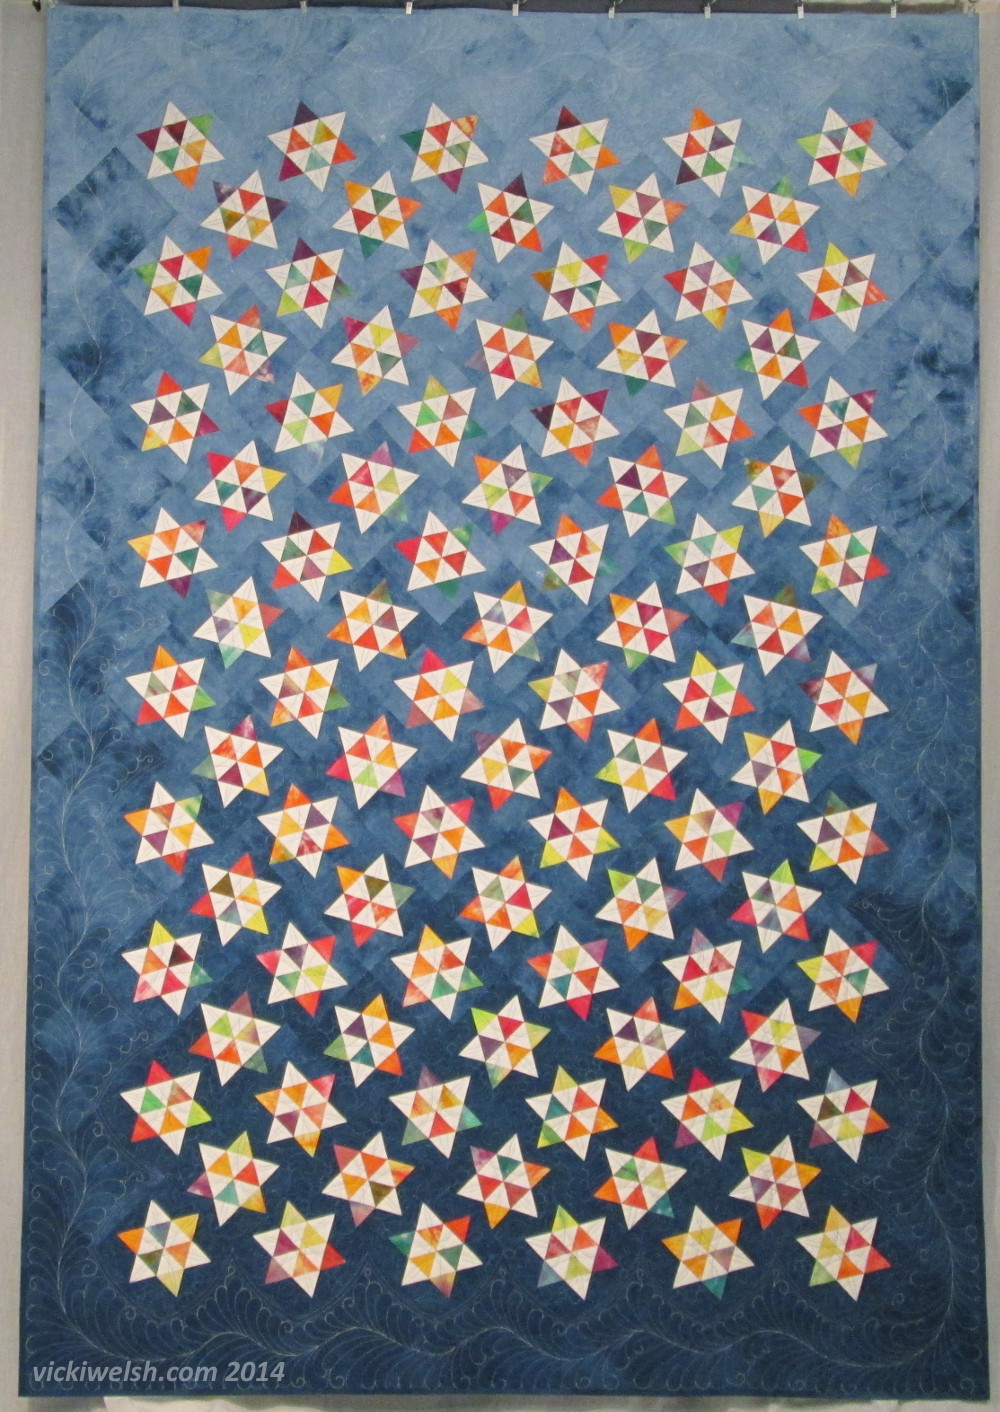 Spinning Stars The postage stamp quilt is packed away until next month and I'm back to working on things at home. 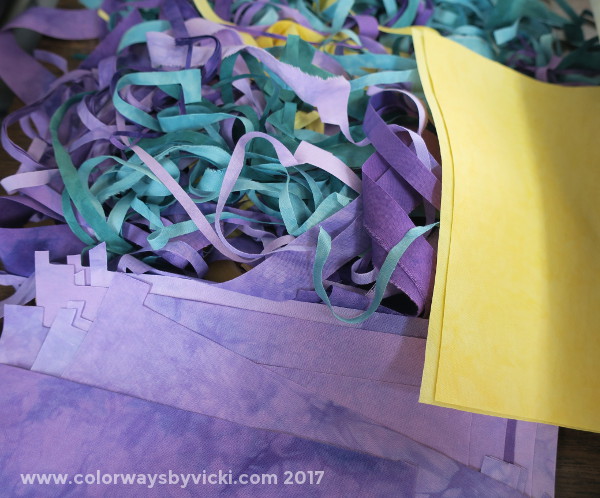 Remember this pile of stuff that should have been tossed in the trash? 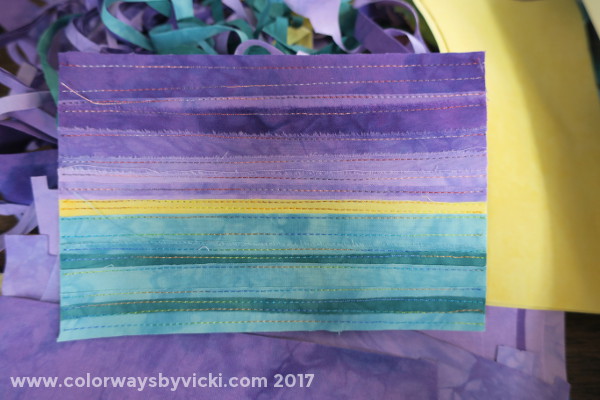 And then I made this? I liked it OK but it's really kind of a nothingburger. Just a ho hum use of scraps. 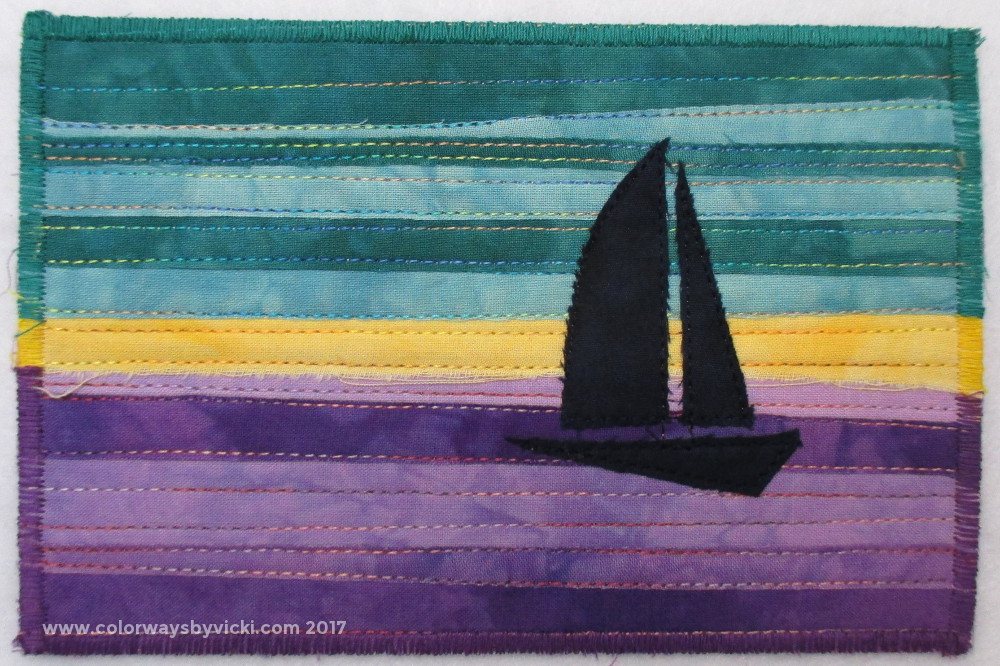 Well turn it upside down and put a sailboat on it and now we have something! In fact, I have 8 of these somethings. How about that perfectly thread matched edging? I've got a little confession about that for Thursday, The sailboat is dark navy. I first tried black but it was way to stark. The blue made a big difference...that doesn't really show in photos. Can you tell that I'm ready for the family beach trip?
I love postage stamp quilts. I love every one that I see and years ago bought a postage stamp top on EBay that I quilted. Then I though it would be a good idea to make one for myself. 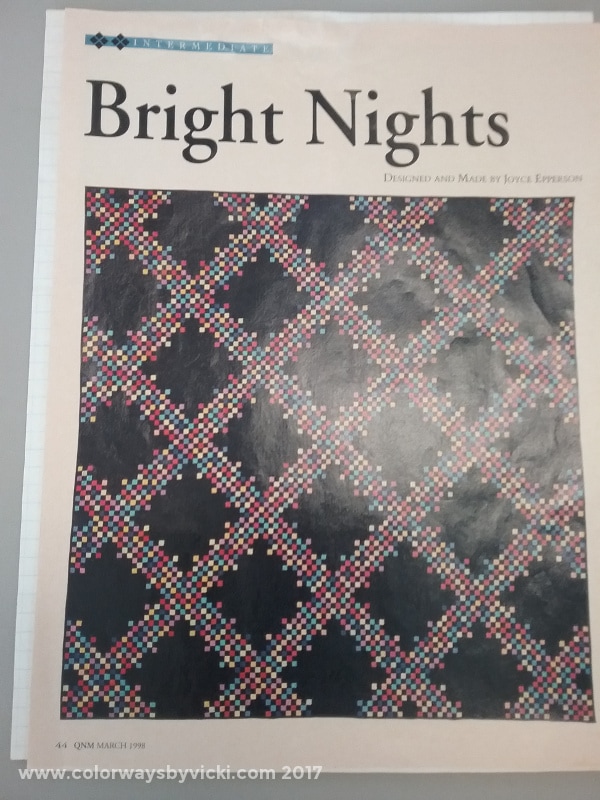 I saw this pattern and my postage stamp quilt was born. 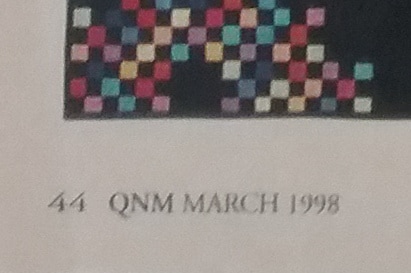 In fact, it was born in 1998 right after we moved to this house! This pattern is based in a 1" finished square and I cut and sewed, cut and sewed...... 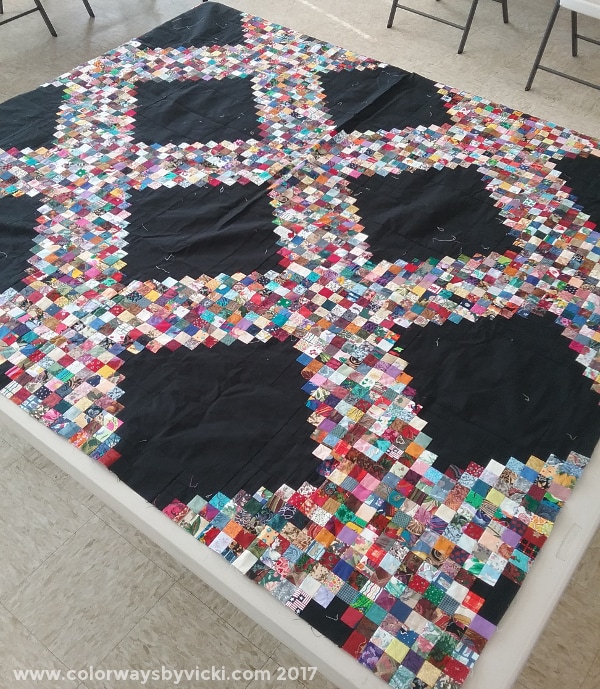 and actually finished the top. Or so I though. You can see that I changed the pattern a lot and once I got it done I realized 2 things. First, it's only 78" square which makes it pretty useless as a bed or wall quilt. It's too small for one and too big for the other. Rats! 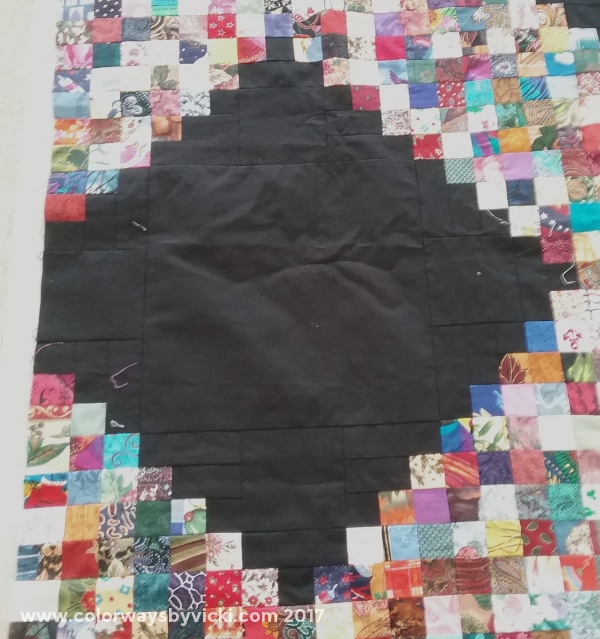 The other problem is this edge. That cut off diamond annoyed me no end. I think it looks like I got lazy and gave up and apparently that's exactly what I did. Then apparently I got interested again in 2009 and spent a lot of time in EQ drafting up border ideas. They all make a huge quilt and I like each version. I seem to remember posting this on the old blog and soliciting opinions. 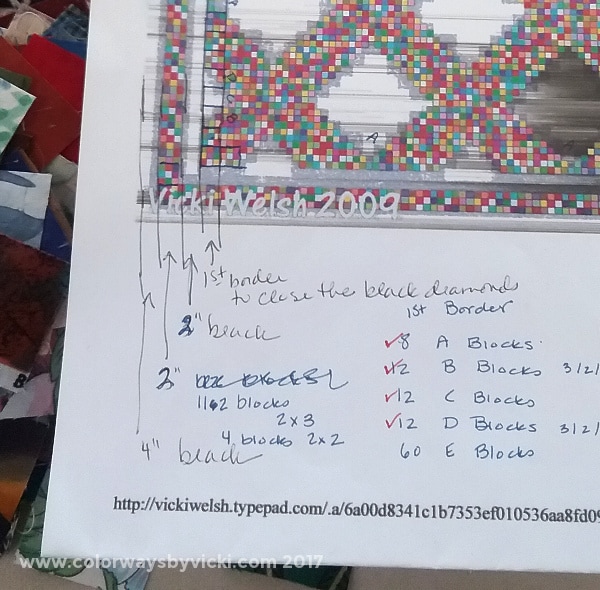 Apparently we all selected one because I printed it and made some notes. I also dated it or otherwise I'd never have found the old layout images! Now we will fast forward to Friday. I took this to CSQ sewing and within about a hour I was able to interpret my notes, verify everything, do some block calculations, change the borders a little and get started. The first border will add a row of 9-patches all around to close off the edge diamonds. Then I'm going to add a 2" black border, then 2 rows of postage stamps and then a 4" black border. Of course I don't have enough black fabric but I do have enough to finish the first and second borders. I'll buy more for the outer border and binding. I feel confident that I can get something close enough to work for this. How it will look after 20 years and some fading is going to be someone else's problem.  I seem to have plenty of pre-cut squares to finish this quilt off. I started sewing but quickly remembered to test the seam allowance. The quilt was sewn completely on my Juki machine and I use my little Janome Jem Gold at sewing. The seam allowance was way off! I spent another half hour fiddling with shims to get that set correctly and then I was on my way. 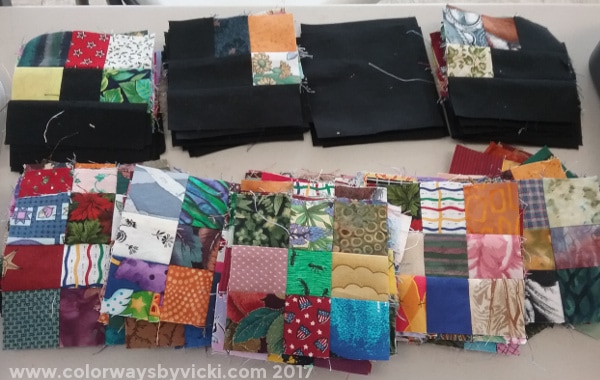 By the time I left Saturday (and I was the last to leave) I had all of the blocks done for the first border! Next month I can get that border sewn on and maybe also the 1st black border. I guess I need to get busy shopping for solid black fabric.
Even though this quilt is almost 20 years old I still love it. I think using the black fabric kept it looking modern and the dated fabrics in the postage stamps just look like sparkling jewels. It's going to be about 98" square when it's done which is a little too big but I'll try to use a cotton batting and maybe it will shrink up to the perfect size for my bed. But I'm getting a little ahead of myself. Maybe I should just focus on finishing the top for now. 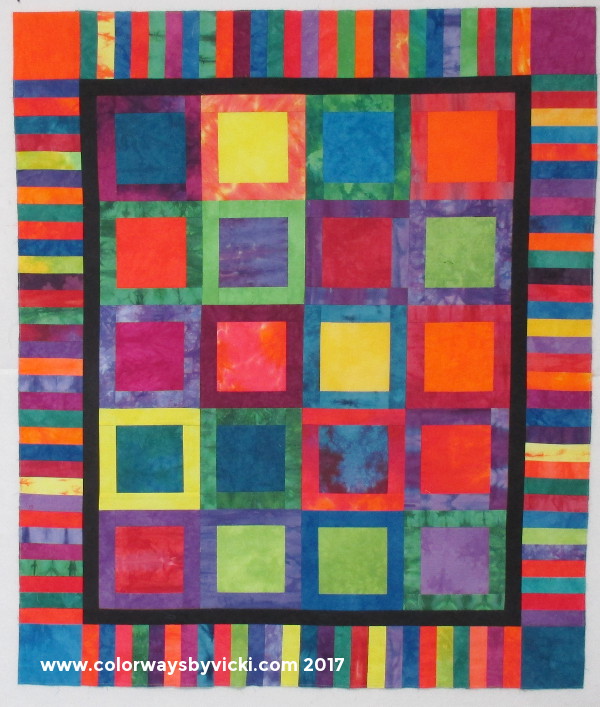 This is the third, and supposedly last, quilt from the rainbow quilt fabrics. It used the last of the blocks and a bunch of 1.5" strips for the border. I'm not sure I'm thrilled with the black stop border but I think it will look fine with a black binding. I have this on FloMo right now for lots of ruler work. It will be the class sample for the class I'm teaching at The Longarm Network. 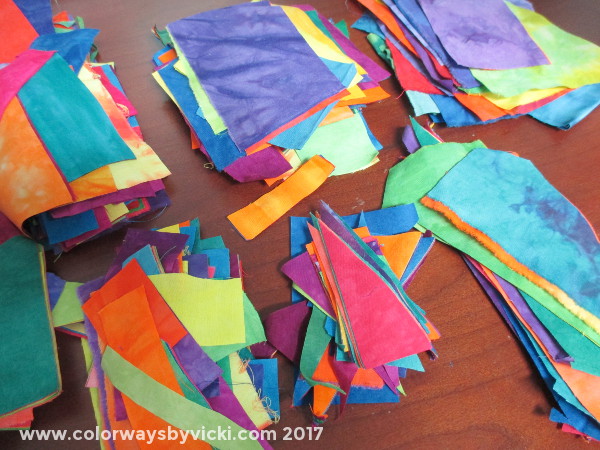 After I finished the small quilt I decided to sort through the scraps and see what I had. There are tiny scraps, medium chunks, some triangle shapes and some large chunks. The intention was to make some placemats. Simple right? 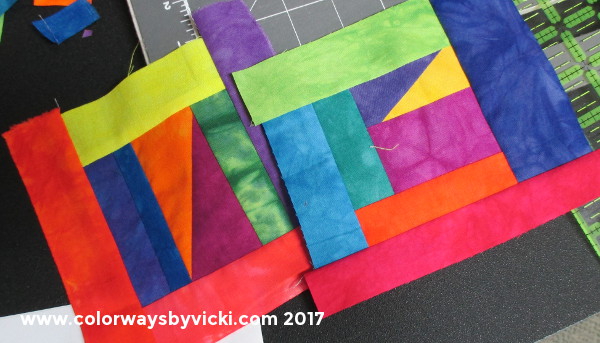 The easy place to start was to sew all the small pieces together into scrappy blocks. I think I ended up with about 20 of these which is a great starting place for placemats. Then I started looking at the other piles of scraps to see what they might want to be. 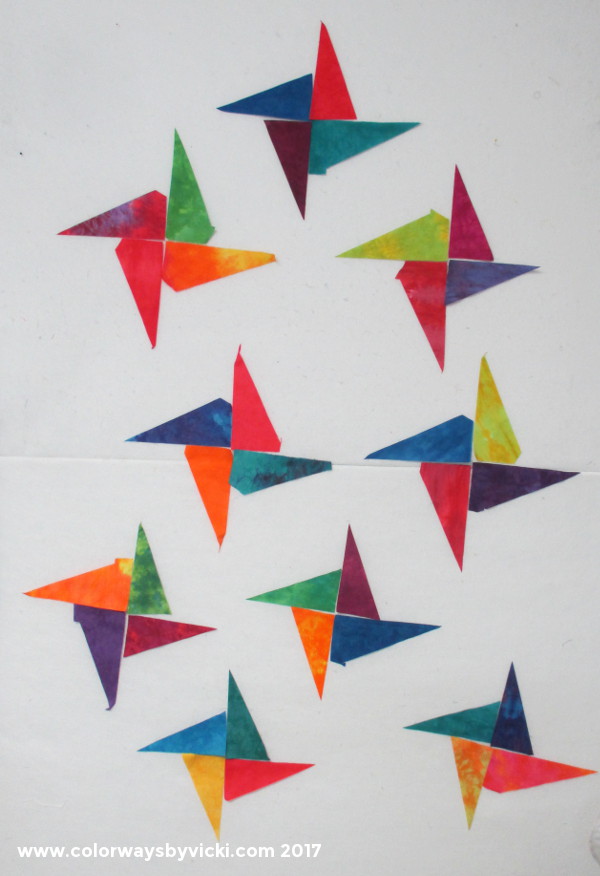 I pulled the odd triangle shapes next and that was the end of the placemat idea. This is heading in the same direction as this quilt from leftovers. I'm possessed, just like with Fractured Fragments. 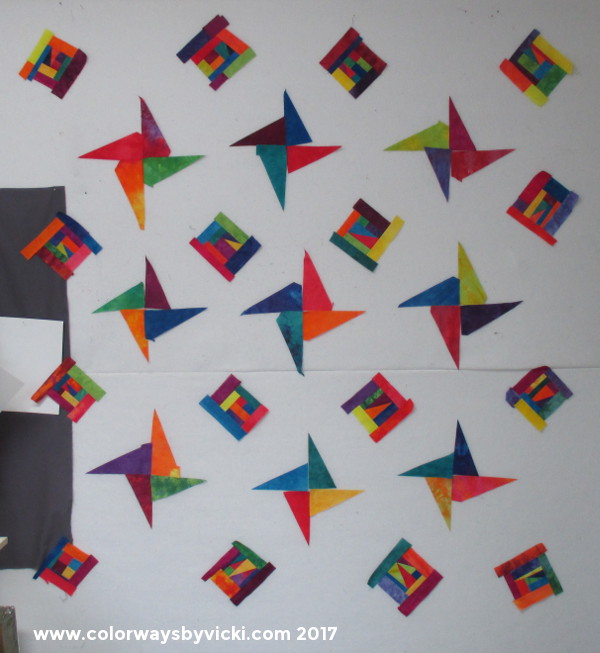 Here's one possibility but probably not the final layout. I'm going to work on wonky pinwheel blocks next and see where that goes. Unlike all of the rainbow quilts, this one will be set in white so that I'll have a lot of fun quilting space.
Like I said, it wasn't my intention to make another quilt but sometimes you've just got to go where the fabric leads you. More updates to come. |
FeedsTo subscribe click the RSS Feed button and copy the URL of that page into your blog reader.
In Bloglovin you need to search "Colorways By Vicki Welsh" to find the blog. About Vicki
I'm Vicki Welsh and I've been making things as long as I can remember. I used to be a garment maker but transitioned to quilts about 20 years ago. Currently I'm into fabric dyeing, quilting, Zentangle, fabric postcards, fused glass and mosaic. I document my adventures here. Categories
All
Archives
April 2024
|


 RSS Feed