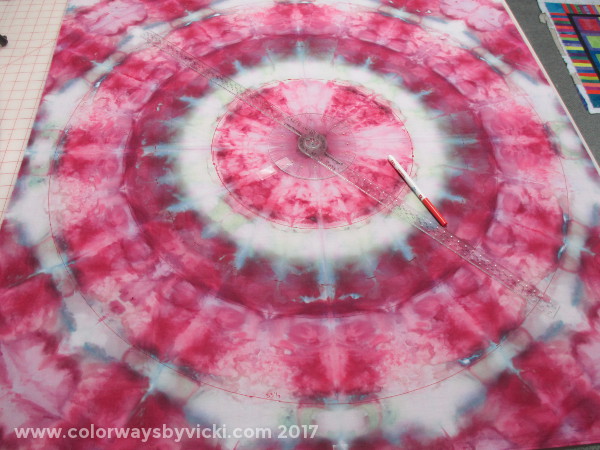
 Last month I showed you this mandala that I was marking to get it ready for quilting. As I was marking it I decided that I wanted to use some threads that I hadn't used on the longarm before and I felt like I needed to test them. I had a little fat quarter mandala that's been hanging around my sewing room for a while and decided that it could be my practice piece. It was in the same colors so I could test the threads. 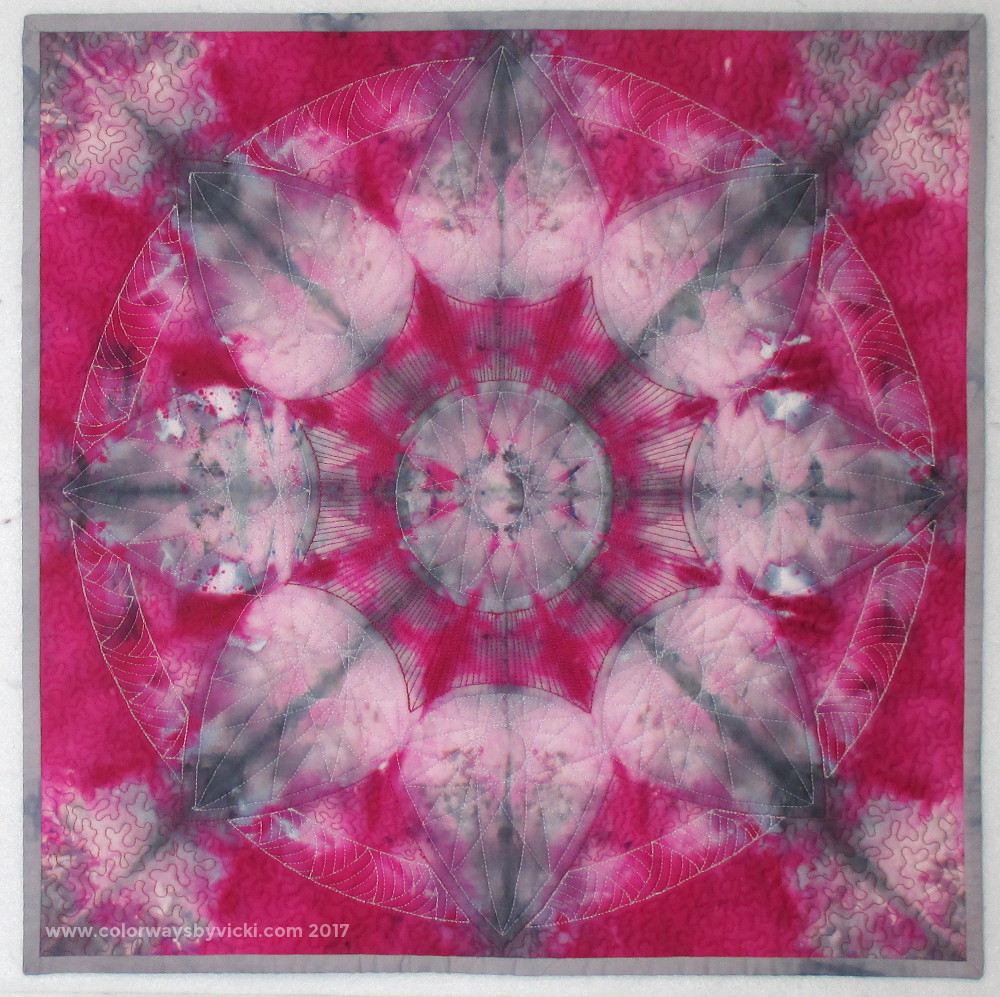 Mini Mandala - 17" square Boy am I goad I did this! You can take all the classes in the world, like my awesome ruler class next weekend, but nothing beats loading a quilt and practicing. Over the past year I've pulled this out several times and started marking all over it in Crayola Washable Marker. I think I had 5 or 6 different ideas marked on it. It was kind of a mess but I left it and just started quilting and tried to ignore the marker. 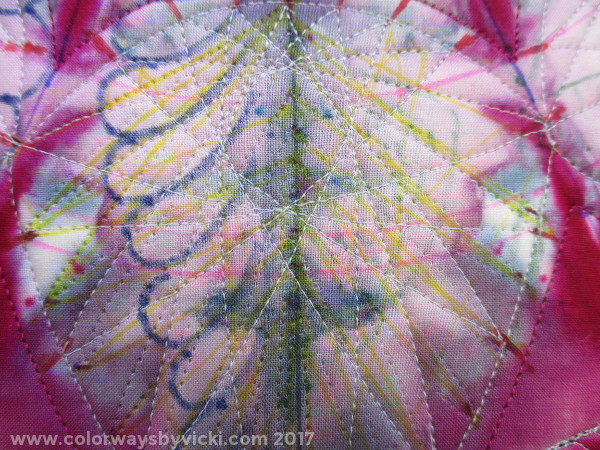 I marked the petal shapes in one design, quilted in another and hated both. Then I ripped out the stitches. 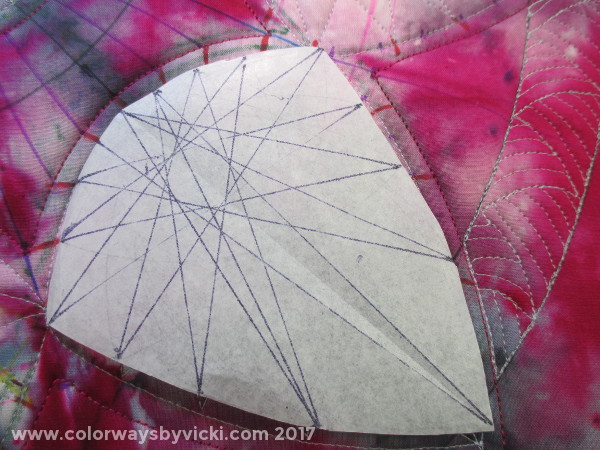 Then I got smart and traced the shape on paper to work out a design that I liked. 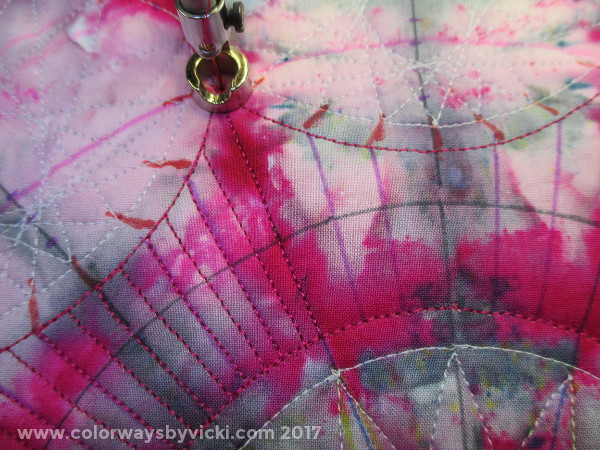 To quilt the ring of red around the center I marked guidelines for every other stitched line. 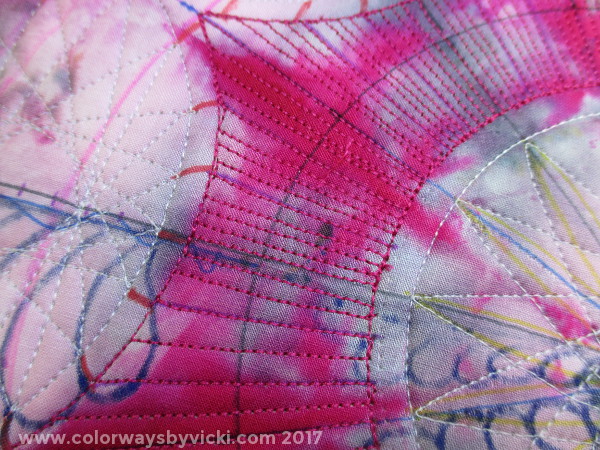 But that wasn't enough so I went back and added even more lines. They aren't perfect but from viewing distance they look just fine. 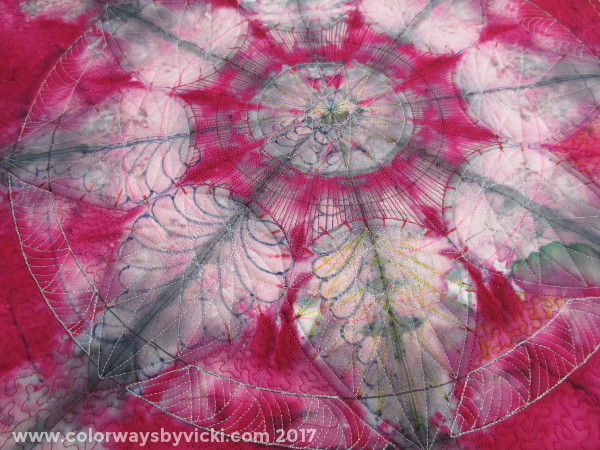 This is after quilting and before washing. There's so much marker on it that when I soaked it the water turned dark purple....and it wasn't from the fabric bleeding! 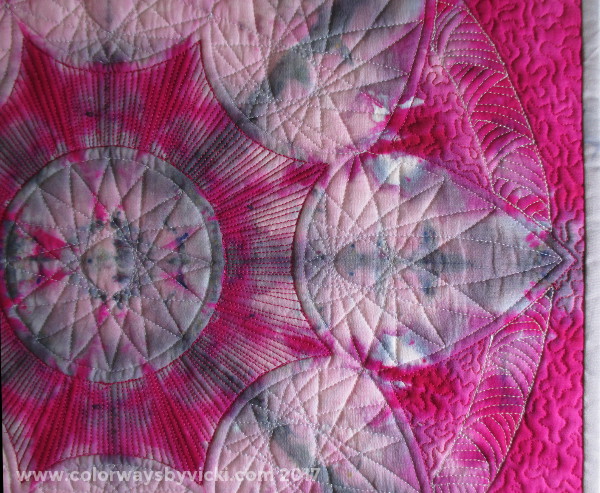 This photo shows off the quilting best and helps show some of the things I learned: - the acrylic thread runs beautifully on the Innova so I can use it on the next quilt confidently - but my color choices need some reconsideration. Those Spirograph shapes are really cool and you can't see them! I should have quilted those areas in dark grey or black. - I love the effect of the white stitched ring behind the petals. The back stitching shows but not as bad as I expected. But, you know what I really, really love? 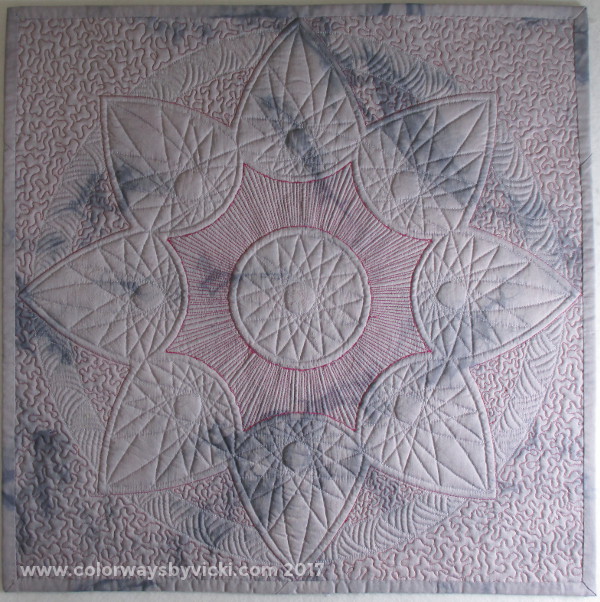 The back!! I hand stitched the binding just so I could display it from the front or back. 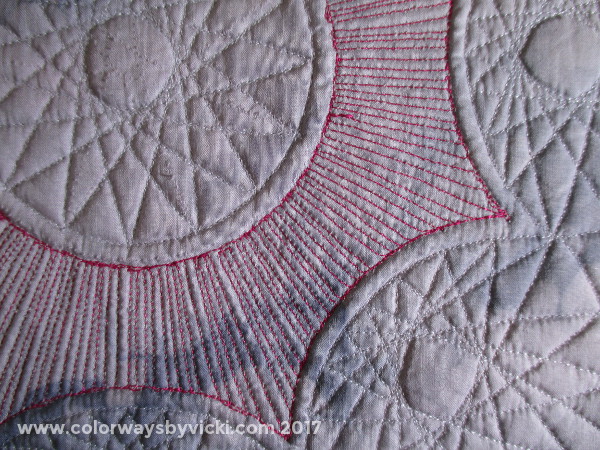 There's one more lesson back here too.
When I did this I used the same thread top and bottom throughout to see how it behaves. I think that I should not use the acrylic thread in the bobbin. I'll use one of my "normal" threads. I also learned that I wan't the quilt to show well on the back so I'll use a solid for the back of the next quilt and I can't wait to get it loaded and started. 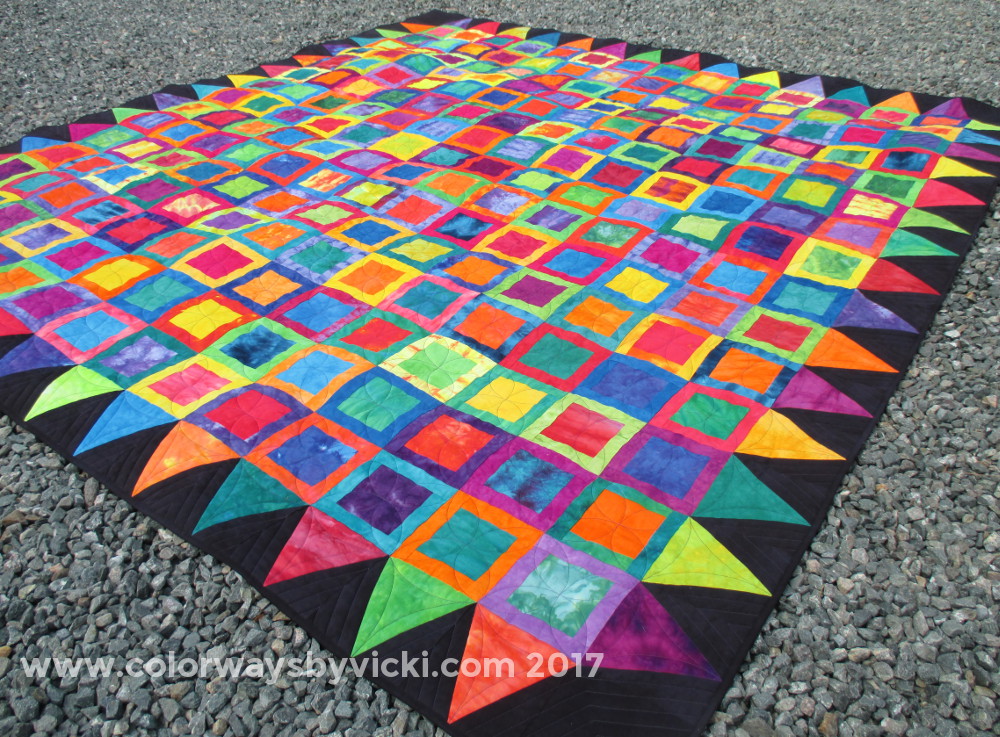 Ashley's Rainbow Just in time for end of the month accounting I’ve finished a project! The King Sized Rainbow Quilt is officially done except for the label. But I’m counting it for this month and I know I’ll have the label done by May 20 because that’s when I deliver it to Ashley and James. As the newest member of our family I wanted Ashley to have this quilt as her own and that’s why it’s called Ashley’s Rainbow. Get the Rainbow Quilt Pattern here.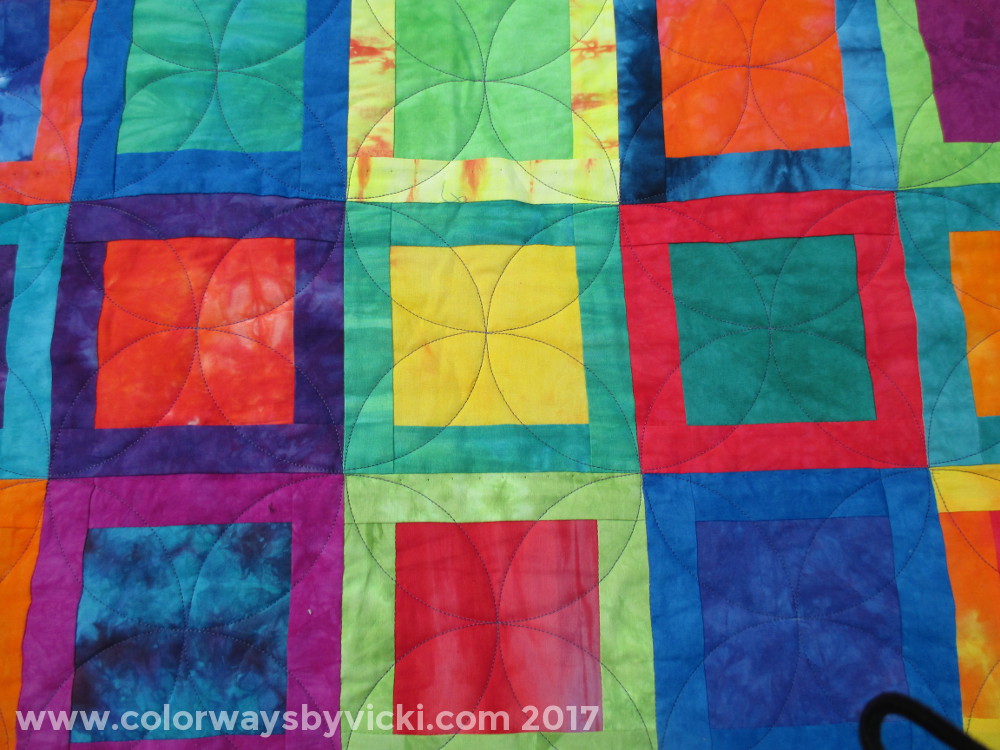 This quilt is HUGE but it came together pretty quickly. The quilting was fast and the binding is done all by machine. I expect this quilt to be a “blanket” for them so I’m not at all concerned about a machine stitched binding. For the quilting I did ruler work but I used a 6” circle ruler and traveled quickly across the rows in a continuous curves path. Just Google continuous curves longarm quilting and you’ll find lots of tutorials to see what I’m talking about. 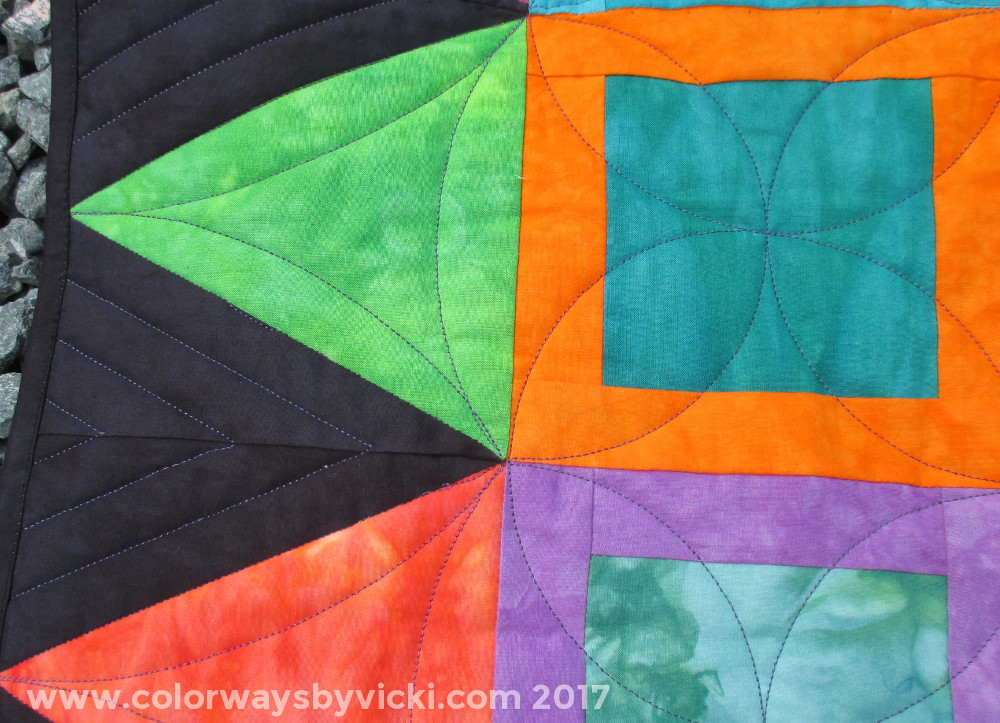 For the border I did some CC in the triangles using a couple of different ovals and I did straight line chevrons in the black areas ¾” apart. The thread is Rainbows on top and So Fine in the bottom. 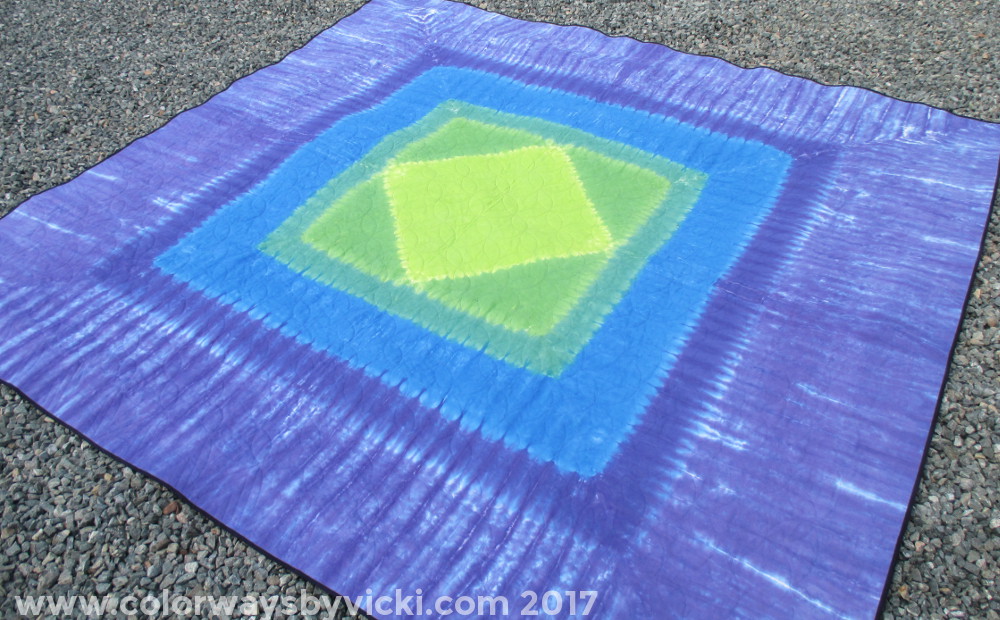 I’m really happy about the back. I had dyed this back for another project but it didn’t work out. It’s been waiting for a home for a long time and was just barely big enough for this quilt. 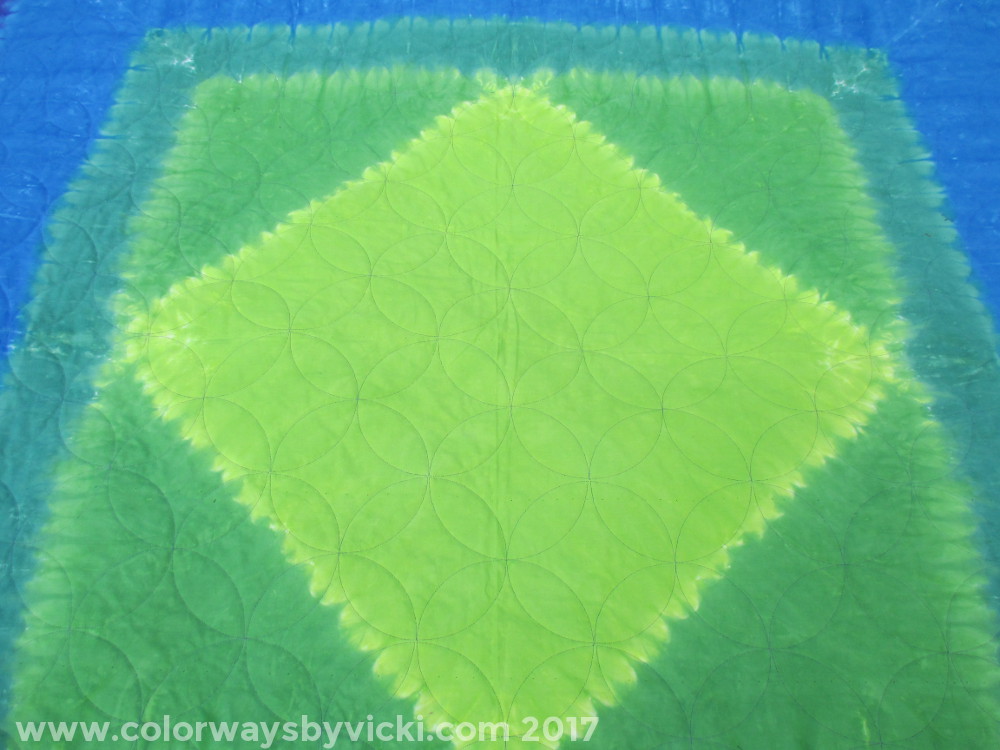 I took the time to center it and you can tell by the quilting motifs that I got it pretty darned close to perfect. I have a lap quilt version and a baby quilt version of this pattern left to quilt…someday. Get the Centering a Quilt back on the Longarm tutorial here.2017 got off to a very slow start for me. I had big plans to have so many things done by now but my immune system had other ideas. Maybe a late start makes the first finish more enjoyable because this feels like a big accomplishment. 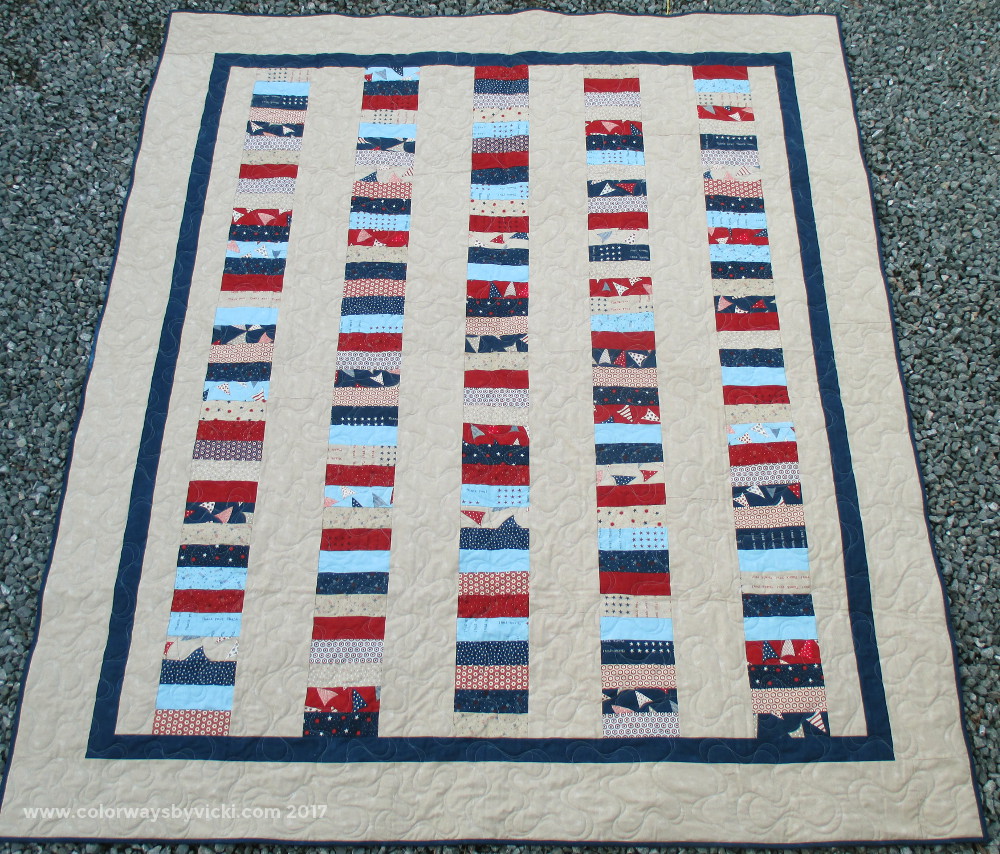 This should have been my 3rd QOV for 2016 because all that was left was the binding. But I'm not delivering it to a QOV coordinator until next month so it matters not whether it was a 2016 or 2017 finish. It was just another pile in the sewing room needing attention. This quilt is made with the leftovers of my first 2016 QOV. I also made a veteran's size coins quilt. By the time I was done with those I was completely fatigued by these fabrics and gave them to a friend in my quilt club and she made 2 more veteran's tops. I think those fabrics are truly done now.  My patched binding looks just fine. If the recipient notices they will just think that they discovered a secret and will proudly point out their astute discovery to their friends. 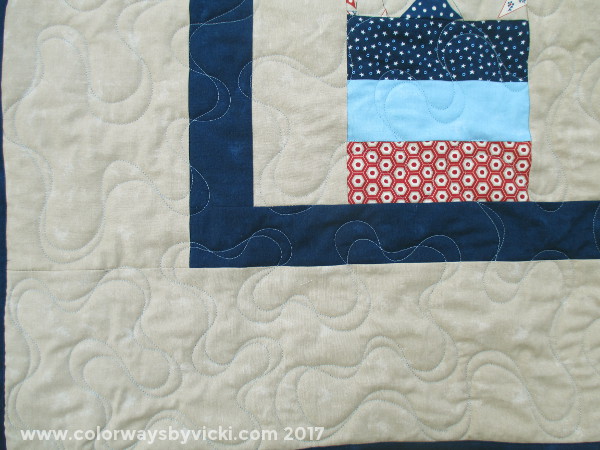 The quilting is a simple double stipple or ribbon. This goes so quickly, keeps the quilt soft and is great for masculine or feminine quilts. 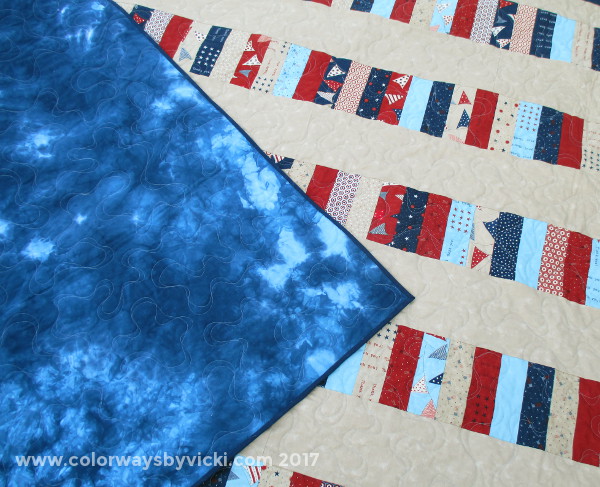 Of course I had to add a little of myself with a hand dyed quilt back. I love this mottled blue. You can see there there are some very dark areas and I cut those from my scraps for the binding patch.
This one is washed and ready for a label and then I can deliver it and my other QOV next month. Time to start thinking about another QOV quilt to do. |
FeedsTo subscribe click the RSS Feed button and copy the URL of that page into your blog reader.
In Bloglovin you need to search "Colorways By Vicki Welsh" to find the blog. About Vicki
I'm Vicki Welsh and I've been making things as long as I can remember. I used to be a garment maker but transitioned to quilts about 20 years ago. Currently I'm into fabric dyeing, quilting, Zentangle, fabric postcards, fused glass and mosaic. I document my adventures here. Categories
All
Archives
April 2024
|
 RSS Feed