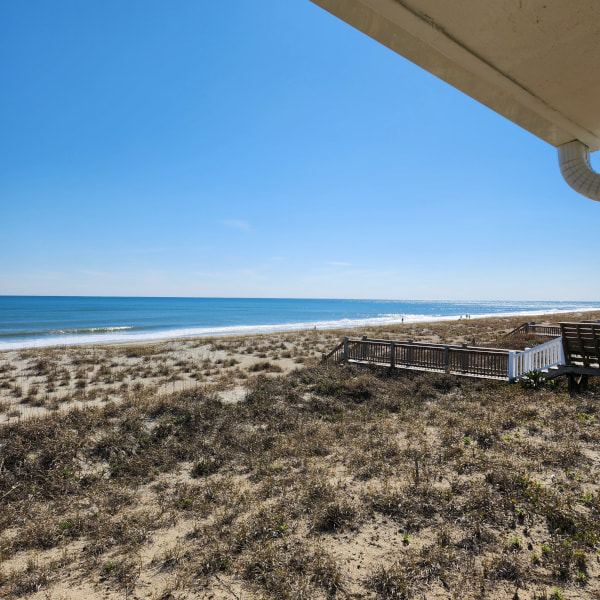
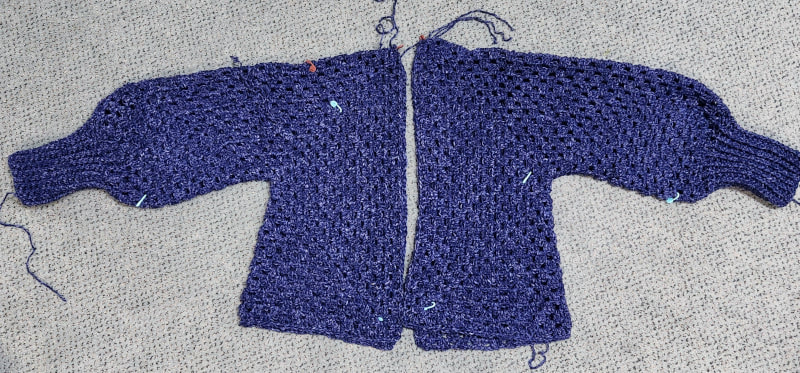
 We made it to the beach yesterday and we are very happy with the house and location. You never really know if a house is going to look like the photos but this one is just as advertised. It has a nice big table for sewing that we will set up today and lots of natural light. Today will be the coldest day all week so we probably won't spend as much time outside. It will get warmer as the days go on so I'm hopeful for some beach reading time. We did have a nice walk on the beach and I felt rejuvenated just getting my bare feet on the sand. 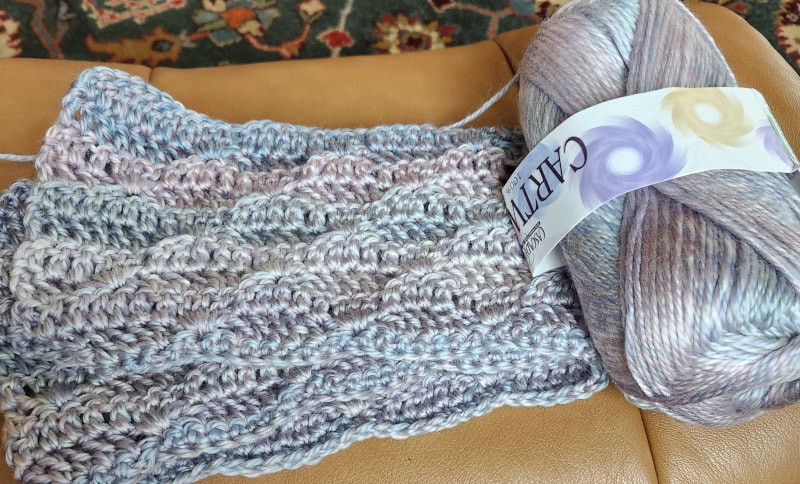 I spent most of the weekend preparing and packing but I did get to a couple of projects. I started the penultimate blanket with this yarn/pattern combo. I think this might be my favorite color of the yarn so far! 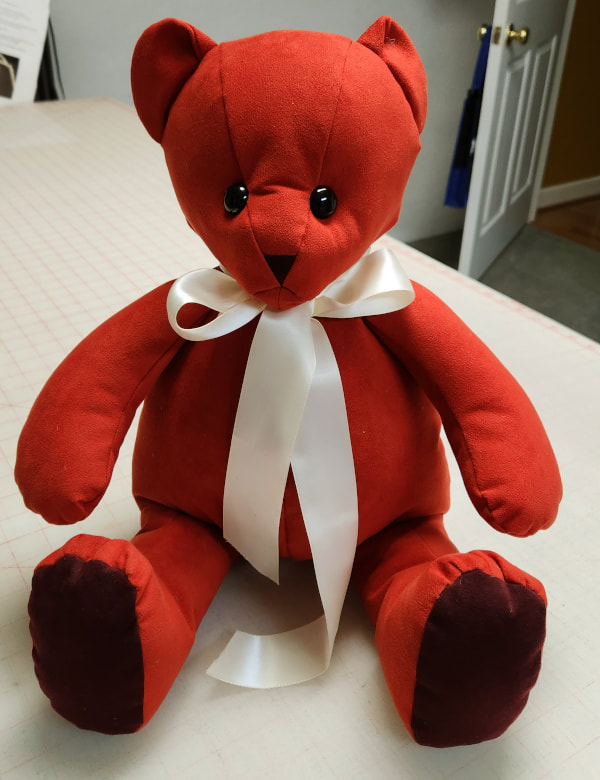 The first project I have to do when I get home next week is to make a teddy bear out of a vintage quilt. Since it's a special quilt I wanted to give the pattern a dry run and I had the not-so-brilliant idea to use some very old Ultrasuede from my stash. That stuff was not designed for making toys! But it did work and I like the pattern. Making the quilt version will be much easier. You might not be able to tell from this photo but the bear is orange with maroon foot pads. Once I finished it I realized that I had made a Hokie bear! I immediately got on the internet and ordered some Virginia Tech ribbon for it's neck. The first Hokie friend to have a new baby in their family will get this as a gift. His legs might not look properly stuffed but I had to remove some stuffing so that it would sit up on it's own. Stuffing was a real balancing act with this bear.  Here's a little PSA for you. Hand sewing Untrasuede is a nightmare. Avoid it if you can.
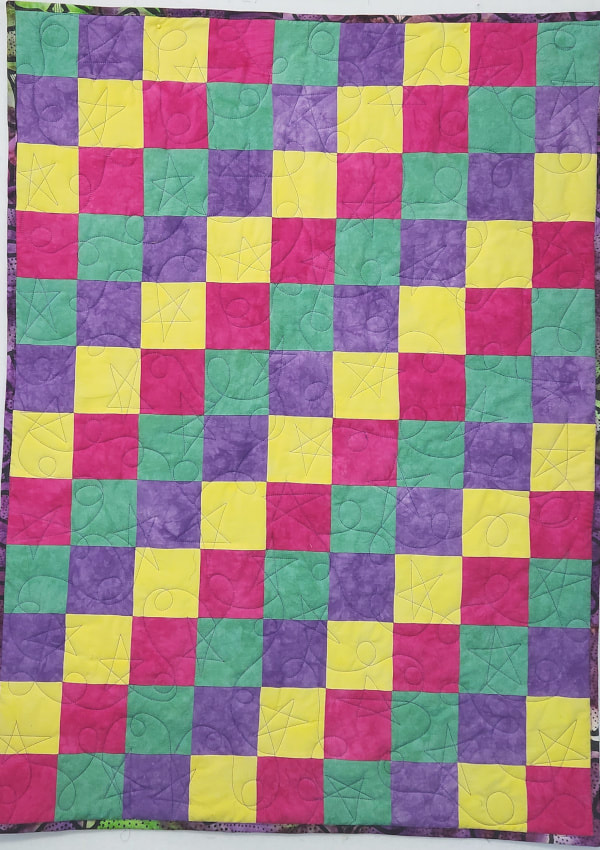
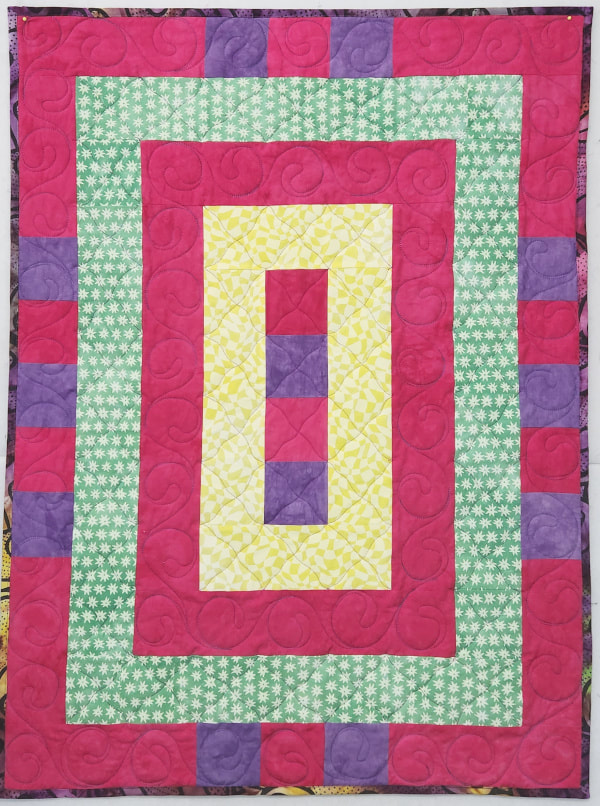
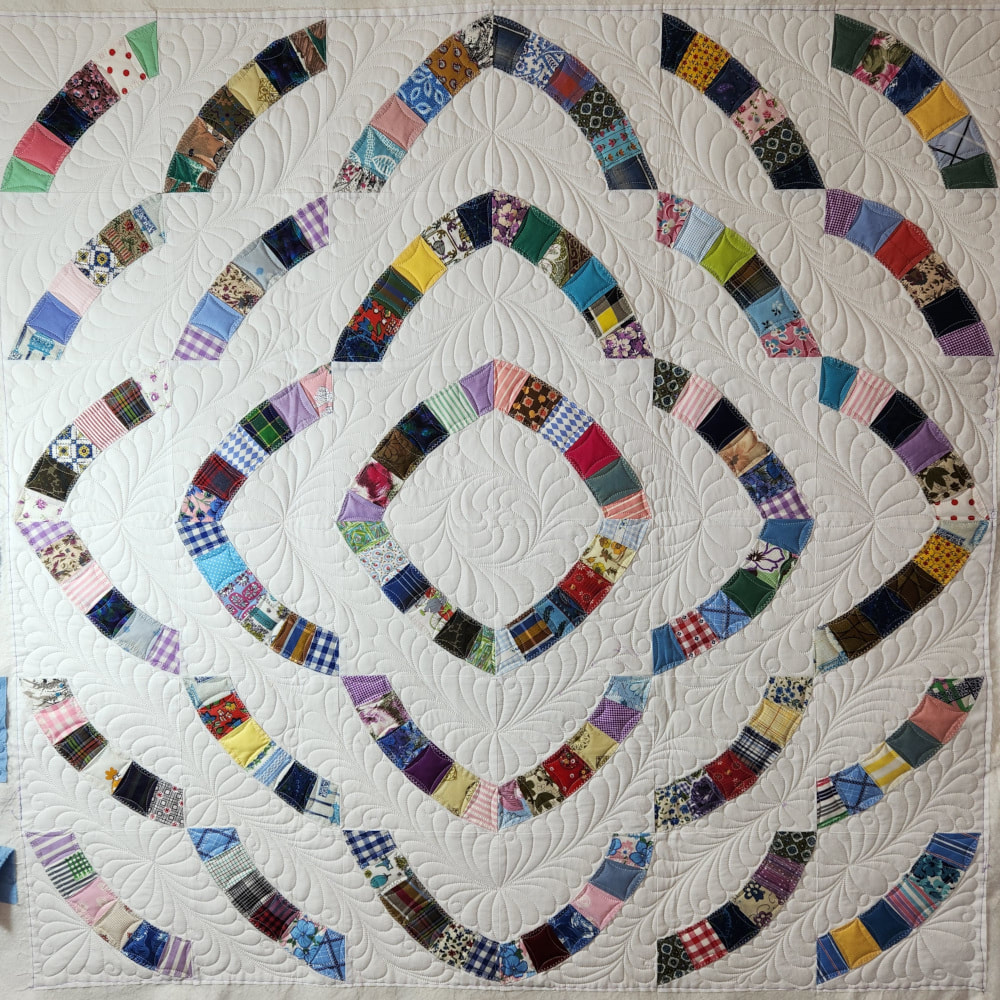 I am so excited to share this little project. It's got a backstory so have a seat and I'll tell you all about it. My Mom's Grandmother, Flora, was a quilter and we got all of her UFOs. I've quilted many of her tops and those have been gifted to various family member in Mom's generation. Mom has made several quilts from her blocks and I've made a few myself. My favorite project is this one, where I saved the quilt she made for me using blocks from her UFO pile. This is another of the Flora quilts. It is a baby quilt for my cousin's first grandchild. There's probably a good chance that this might be her only grandchild.  Flora was best known for her double wedding ring quilts. She made them for every newly married couple. When she died in 1968 she left a pile of arcs. Mom has tried over and over to fit them together for a DWR quilt but the arcs weren't consistent sizes. After a group discussion in quilt club, she decided to applique them to blocks. She's made two veterans quilts with them and still had lots left over. Once we found out about the new family arrival coming in May, she decided to make a baby quilt with them. She folded under the raw edges of each arc and appliqued them to a square of fabric. I think it made a great design. 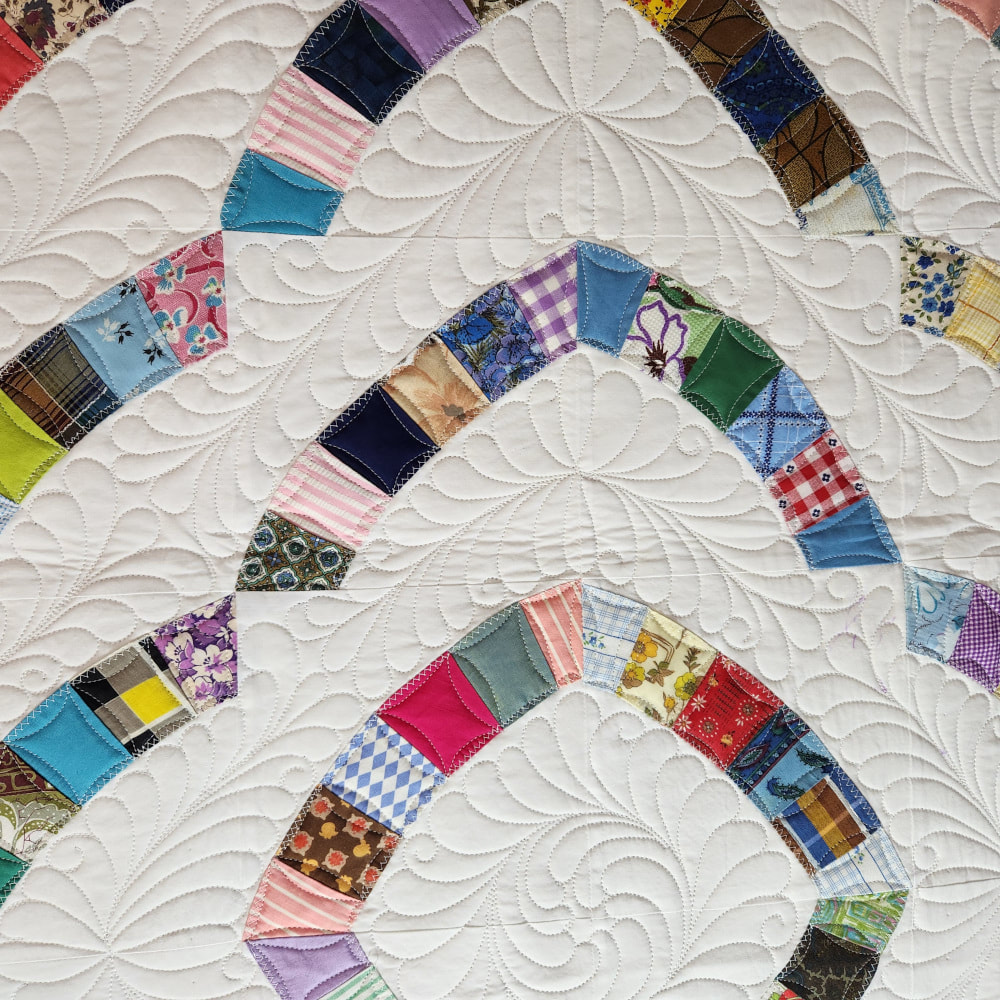 I was a little stressed about quilting it but I needed to get it done before I leave for the beach Sunday. There's nothing like a deadline to make you stop dithering and get to quilting. I haven't had an opportunity to quilt feathers in a while so I had a great time quilting this little quilt. 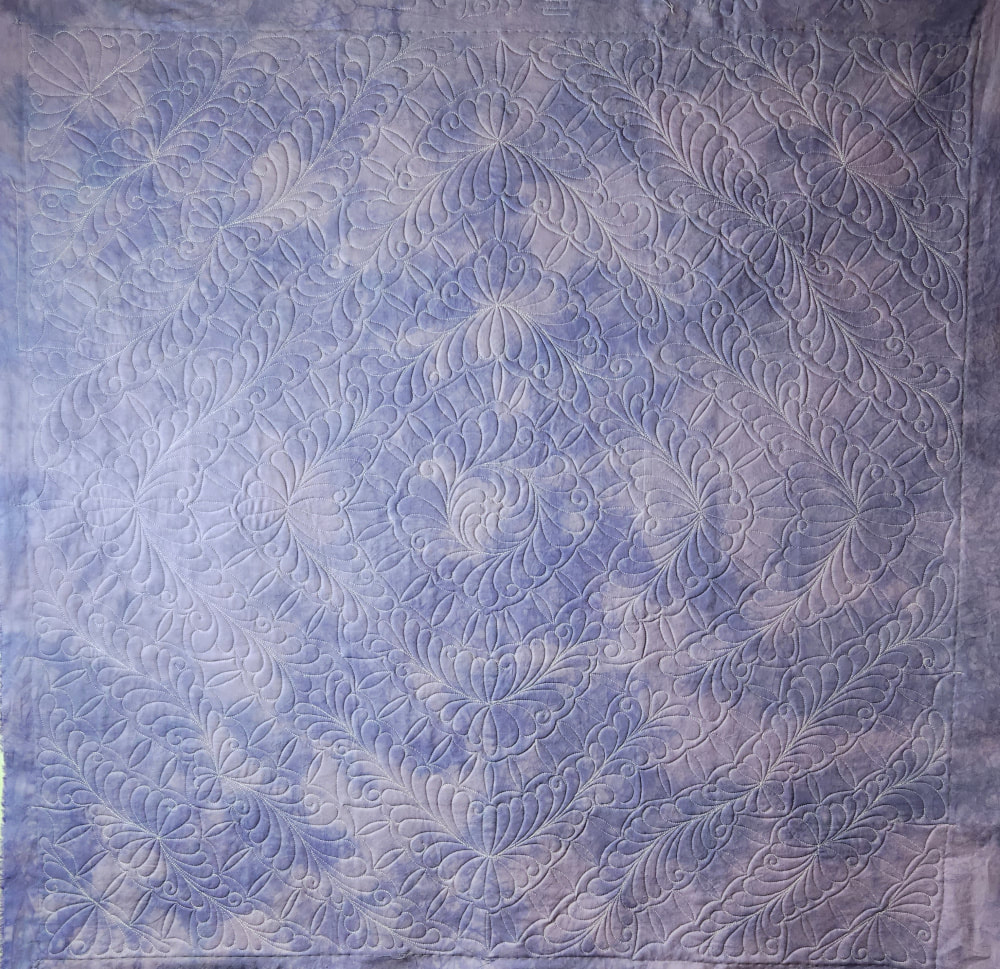 Mom's mother's, my Grandma Dove, favorite color was light purple so I dyed the back to match the light purple colors in the blocks. So when the baby receives this gift it will be labeled that it was made by his/her Great-great-great Grandmother, Great-Grandaunt and First Cousin twice removed. I think that's pretty cool. We hope that the baby will actually use the quilt and not put it away to "save" it. There's another project for the baby that I'm doing and I'll have that to share in a couple of weeks, I hope. 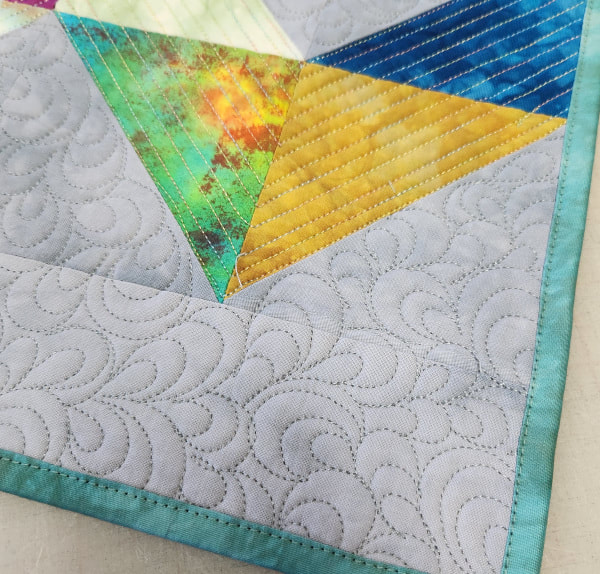 In other news, I got the binding on the placemats! I still have to dye some matching napkins so I'll save this project to save until the napkins are also done.
I'm packing projects for the beach getting ready to leave Sunday. I'll be back on Monday with a beach report. We aren't expecting really great weather so there should be lots of sewing and crochet with a great view.  The first blanket that I made like this was for Chris. Then I made 3 more, one for each of my brothers. I bought enough yarn to make 8 blankets! By the time I finished the ones for my brother these had become blankets only for the men in my life. Number 5 was made for my cousin's husband. This one is #6. It doesn't have a destination yet but I'm sure it will. I only have yarn to make 2 more. I'll kind of miss them when the yarn is gone. I've really enjoyed making them. One of the next two is already assigned but it will be nice to have 2 in the closet for emergency need. Of course, there are loads of yarns that will work for this pattern. Premier Puzzle comes to mind right away. 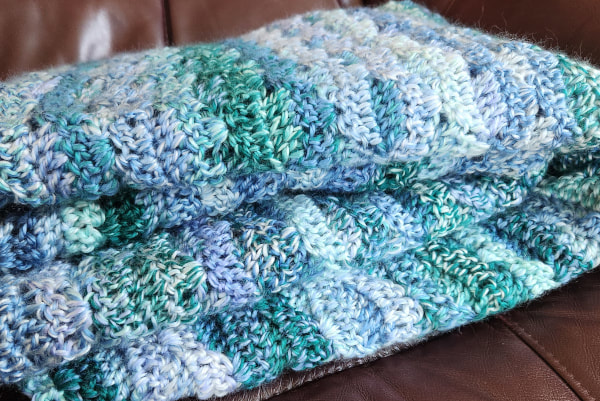 This one finished about 48" x 64" Cascade Cartwheel Yarn, 7 balls, color 3, Seattle. Pattern from BagODay Crochet, pattern repeat is 8 stitches plus 3 I used a K hook and chained 147 stitches (with an L hook) 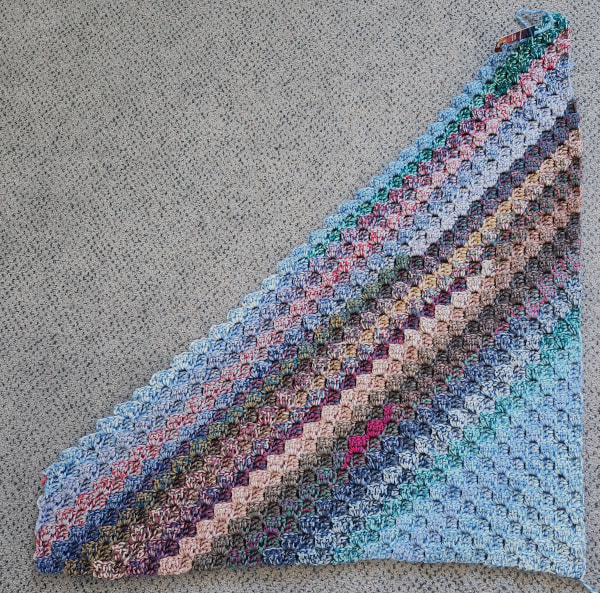 I do not like having scrap yarn so when I finish a project I immediately add the scrap to one of 3 corner-to-corner scrap projects. This one might end up being good enough for a wheelchair blanket but I expect that most of them will be pet blankets. Anything that will avoid having a bag of scrap yarn bits. I have an overload of scrap fabric. I sure don't want the same situation with yarn.
I haven't quite decided on sewing/quilting projects but I'll get that figured out Friday. 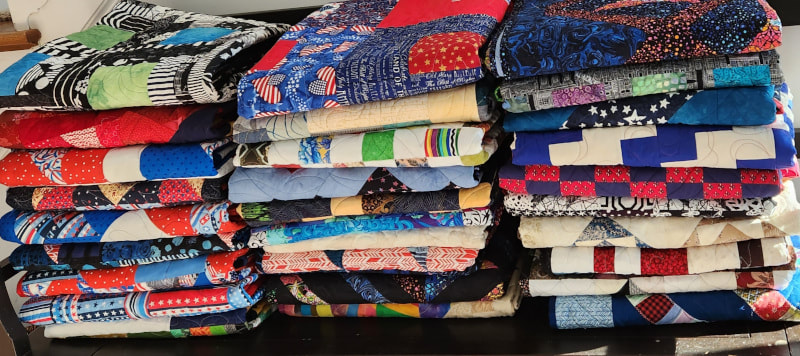 I thought I'd share this photo too. This is the first delivery of 29 veterans quilts for 2023 from my quilt club. It's so nice to be a part of this amazing group of ladies.
 I spent a lot of hours the past few days getting a presentation ready for my quilt club. I try to commit to doing one program each year and this year I put together a presentation of some of the veterans quilts that we have made, hopefully to give people ideas for new quilts. I did the presentation last night and if you have time to kill and want to see some of our veterans quilts, you can see the presentation here. After I ran through it in the morning I had a few hours free and decided to load and quilt the newest placemats. I'm so glad to finally have my machine adjusted because it quilted with the trilobal polyester threads perfectly! I'm also really comfortable doing any adjustment on my machine now so it should never be frustrating again. I found a leftover backing strip that was the perfect width for me to be able to load and quilt all 4 placemats at the same time. I've mentioned this before, but I'll say again that I use old (clean) flannel sheeting for the batting on placemats. I don't like my placemats to be puffy. I want them beefy and flat. The flannel works perfectly and I have a closet shelf of flannel available for free. 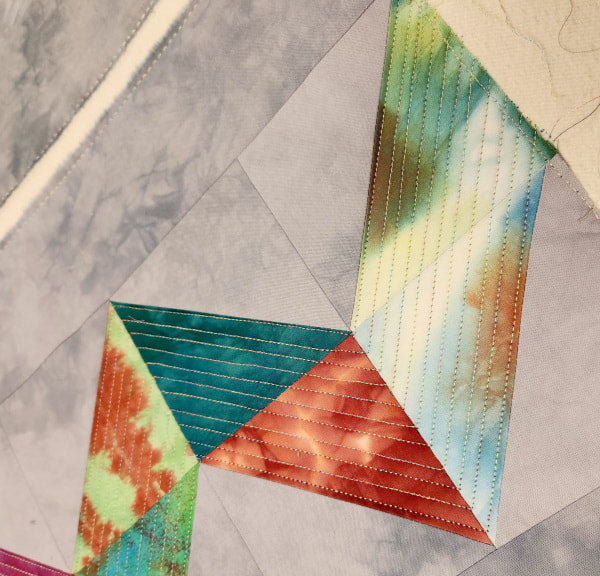 I started with ruler work in the chevron. I just love ruler work. It's my comfort blanket of quilting. 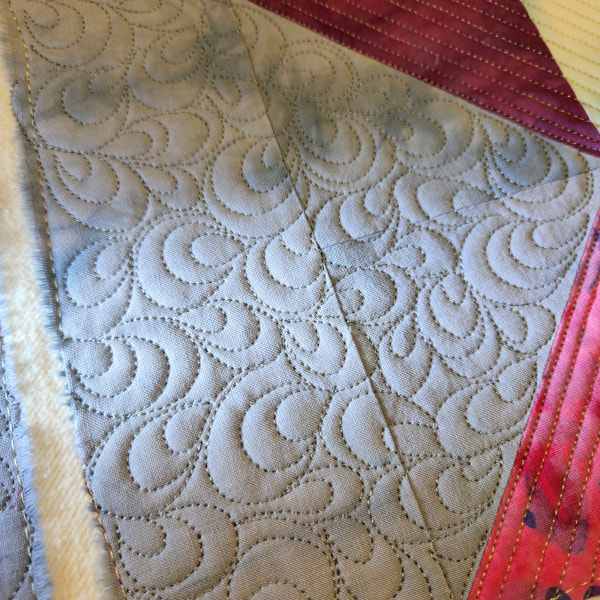 My other quilting crutch is free-motion filler so I decided to do fillers in the gray background. I did a different filler on each placemat. This is the first one and it's one that I turn to often. 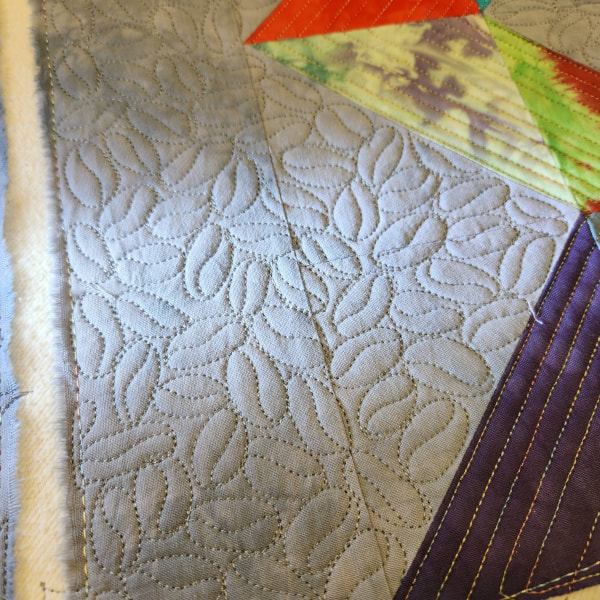 The second one is this one that's called coffee bean. It's a lot of fun to stitch. 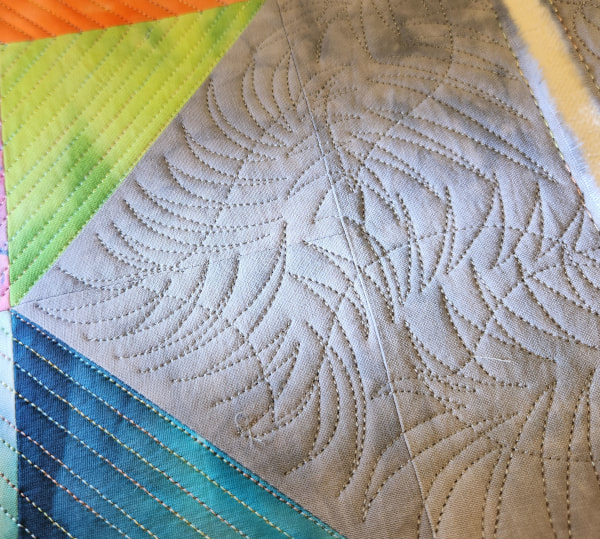 The third design is one that I've never done before but it was a lot of fun to quilt. You stitch the line first and then do the crossing stitch back and forth. Super fast. 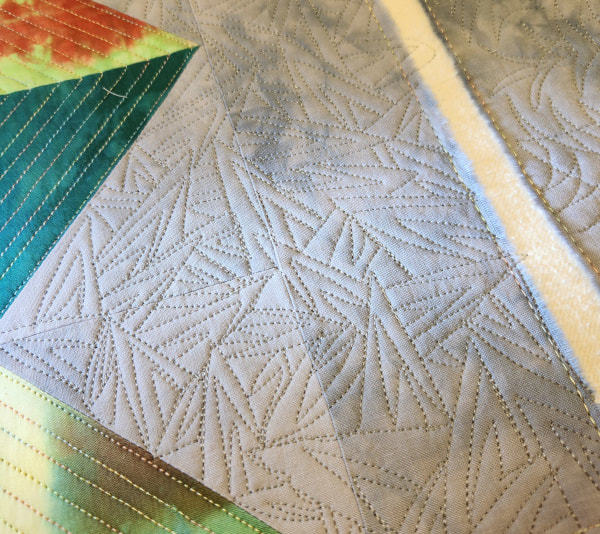 This was the last one and my least favorite. Placemats are so perfect for practicing because any crappy quilting will likely be covered by a plate or spaghetti stain. Today I will load and start quilting the baby quilt and will try to get these trimmed and pick a binding fabric. In a few weeks I'll dye some napkins to match. 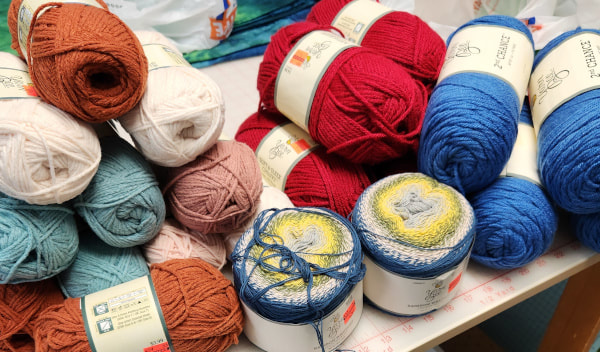 On Monday I went to Hobby Lobby to look for some fabric for a quilt project that I'm going to take on vacation. I actually did buy 3 yards of fabric (at 40% off) but a stroll through the yarn aisle revealed that they were having a 75% clearance! This even usually happens in June but, for whatever reason, it's in March this year. Last year I only bought 2 different yarns but I got a few more this year. The big pile on the left is a yarn that's exactly like Lion Brand Feels Like Butta. It's perfect for chemo hats and it was .99 a skein. I got all of it except white and gray because I have plenty of those colors. The red and blue are acrylics for donation blankets. The 2 in front are a 1 weight. I want to try crocheting with a 1 weight yarn but it's often kind of expensive and I think my chance of success is 50/50. These were only $2.50 so if the project is a fail I won't feel so bad.
No more yarn needed! I did finish another of the big blankets. I'll try to get a photo today to share tomorrow.  Lately I've been thinking a lot about why I don't sew so much when I am home. I find myself heading to my crochet chair when I have time to make. Yesterday while ironing fabric for the shop I finally figured it out. My fabric shop activities have taken over my sewing room. I might start on a project but about half way through I have to stop, clear everything off and iron and package fabric. It makes me not want to start anything. While I am on vacation next week I'm going to give some thought to how I might rearrange my sewing room to better separate my business and sewing activities so they can coexist better. But when I'm away from home with a sewing machine I get lots done! That was the case this weekend. We had sewing club Friday and Saturday. On Friday I got this veterans quilt top done that I started last month. Working with all the seams on the 4" HST blocks is kind of a PITA but I can't stop using them because I like the results so much. I don't know where I saw this quilt. I'm certain it wasn't an original idea but I'm glad I mocked it up in EQ so that I could make one. 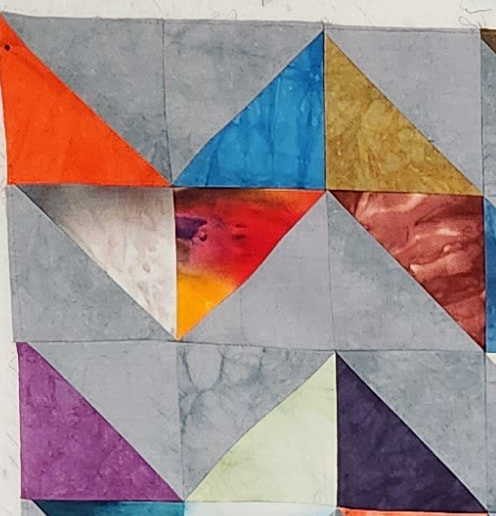 This is the block. What makes it work is that every other block is turned upside down. For this quilt I made 40 blocks for a finished size of 48" x 60".  I finished that on Friday after lunch and I immediately started in on the next kit. Once I pulled out all of the pieces I realized that I had cut enough for 2 quilts! That seems a little overly ambitious but I'll roll with it. I started off by making the 24 square-in-a-square blocks and had to finish them up Saturday morning.  By the end of Saturday I had made 4 blocks and sewn the first row with sashing. I'll probably continue to make blocks and rows in chunks so that I don't get too bored with one step. They actually go together pretty quickly. 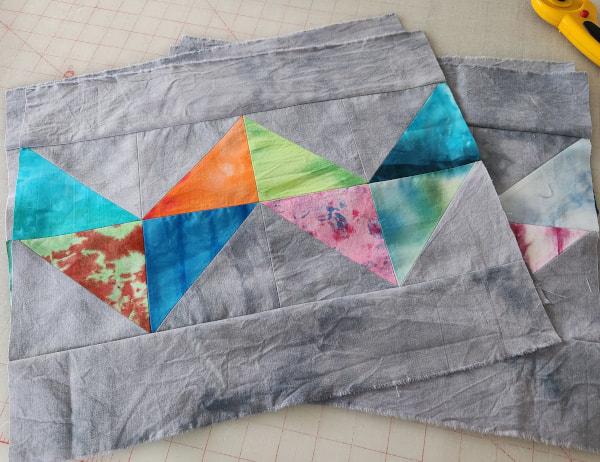 When I got home Saturday I was putting everything away from the first top and counted the leftover blocks . I had 32, just enough for 4 placemats. The universe had spoken so before dinner I pulled out more of the gray backing scraps and got these pieced in no time. I may try to get them quilted this week too. I'll do them on the longarm so it will go faster. Later I'll need to dye matching napkins but there's no rush.  I also need to get the baby quilt quilted this week too. I got the purple dyed for the backing. I was trying to match the purple in that top ring and I think I cam pretty darned close!
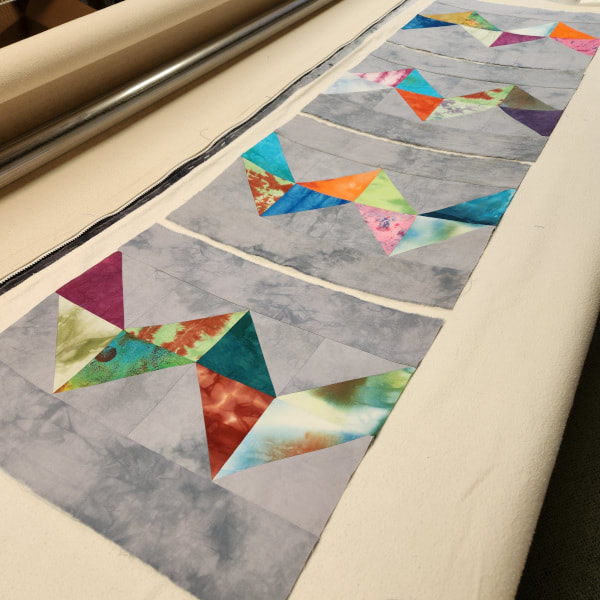
So my goal is to spend my week with the longarm while I get my sewing projects ready to head to the beach on Sunday. 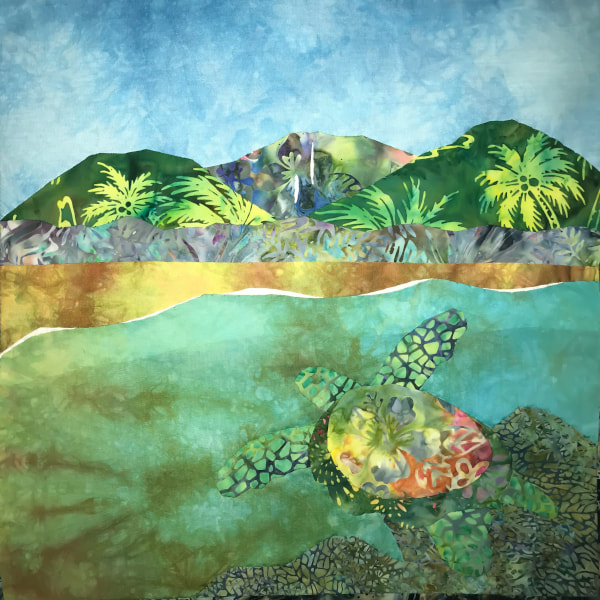 Kauai Sea Turtle by Ann Jensen Ann Jensen is back this week with another of her Hawaii-inspired pillow covers. Each pillow cover is hand appliqued with batiks and gradients on a gradient background. She is masterful at fussy cutting the gradients to get just the effect that she wants. I believe that she used Monterey Bay, Niagara and Sugar Maple in this one.
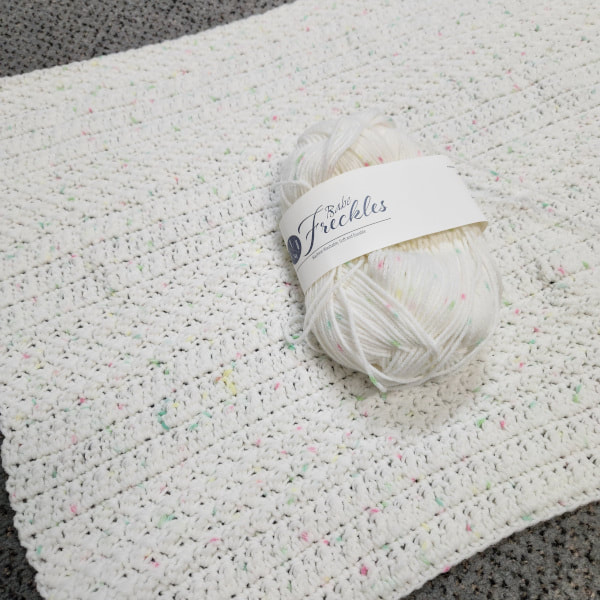
For sharing, Ann received a 20% coupon for the shop that's good for 3 months! If you have made anything with my hand dyed fabric I hope you will consider sharing it in the Customer Gallery. The only rule is that projects have to be complete. It doesn't have to be made totally from hand dyed fabric, just include a recognizable amount. 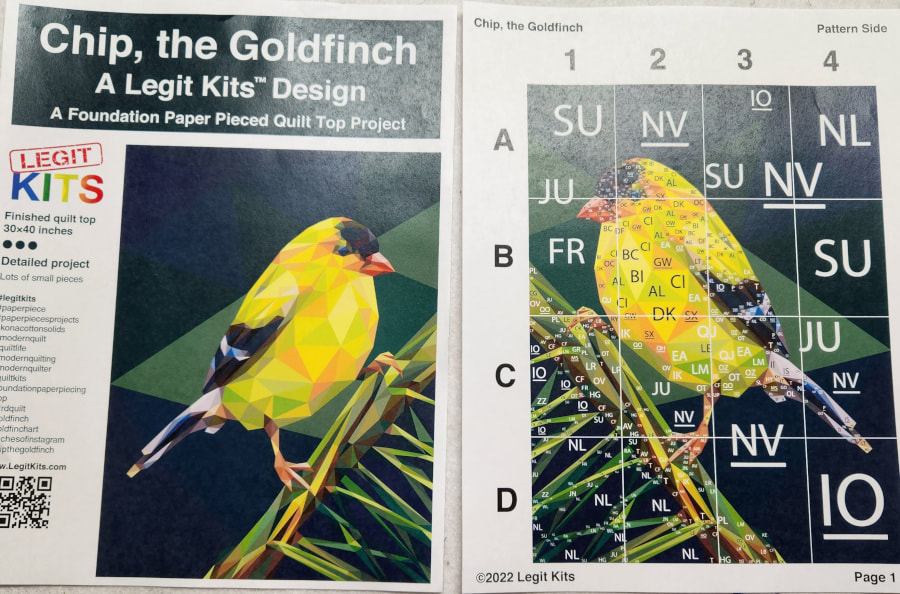 Yesterday I had hoped to start sewing more little blankets but I had to do a lot of dyeing and by the end of that I was spent. So today I thought I'd show you what in the new pattern that I got after the Mid-Atlantic Quilt show. While at the show there was a new vendor called Legit Kits. I was totally enamoured so I decided to give one a try. They have a lot of different designs and these patterns are in the same price range as the Judy Neimeyer patterns. They come as pattern packs or full kits. I chose a smaller pattern to try out and I got the pattern only because I want to make it with my hand dyed fabrics. On the right you can see that the pattern is pieced in rectangle shaped blocks. For example, A1 is one block. The pattern comes with LOTS of paper....let's take a look. 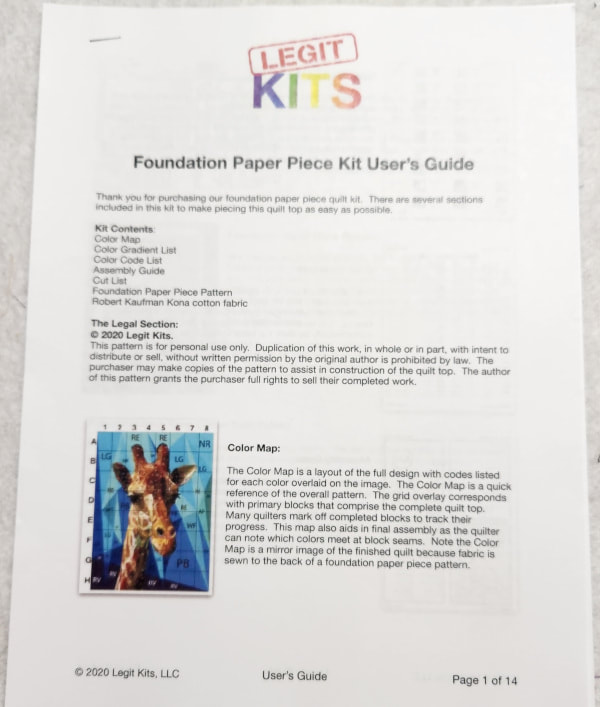 It comes with a detailed 14 page instruction manual. I need to sit down and read through all of this. 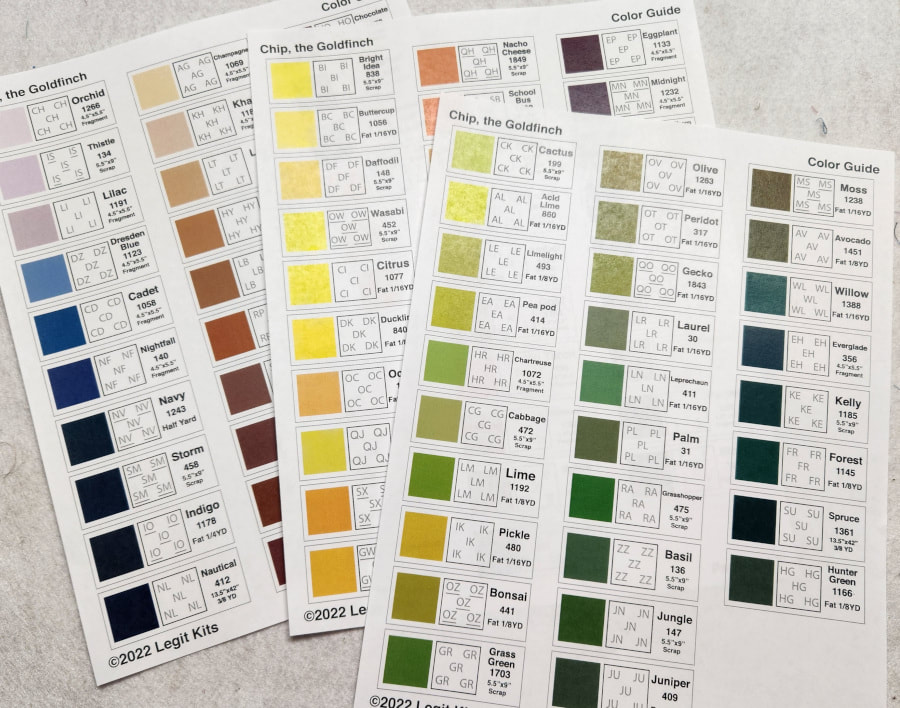 For this small pattern there are 3 pages of fabric requirements! This explains why the full kits are so expensive. I think the fabric included is Kona cotton. I'll be pulling from my stash and from gradients. For example, I'm going to create the background totally from my Jenny Lake gradient. I think it will work great. But it's going to be an exercise to match up all of the fabrics for sure! 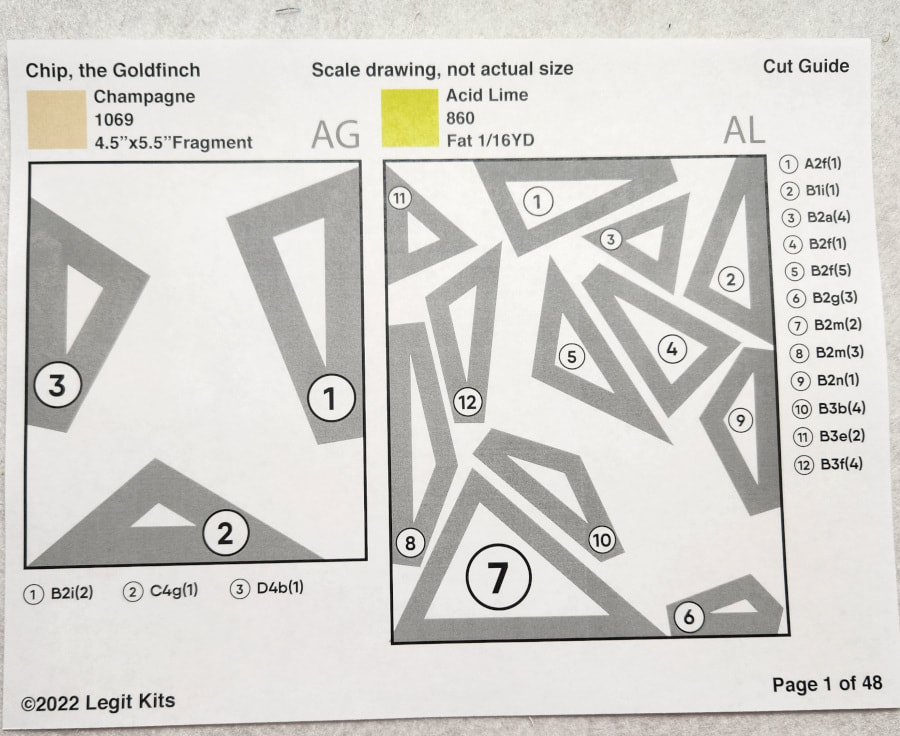 For every color there's a chart like this to indicate which pieces are cut from each fabric. 48 pages of the kit makes up the "cut guide". I'll probably attach my fabrics to these pages to keep track of them. 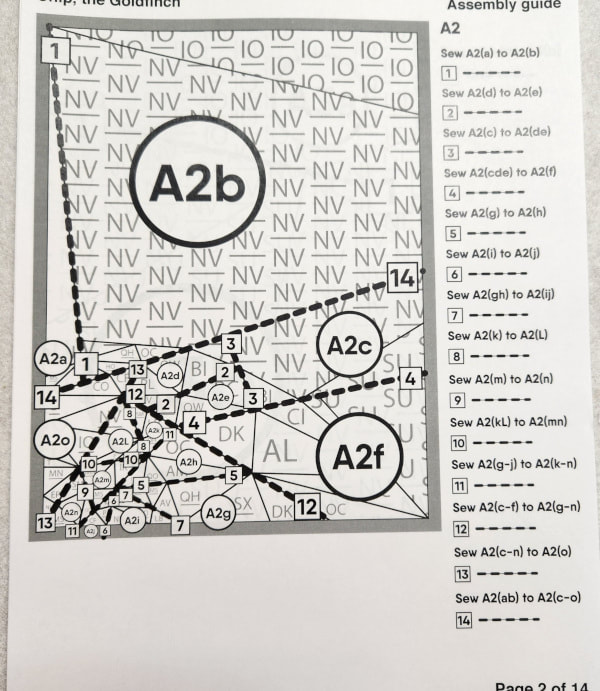 For every block in the quilt there's a piecing guide like this. 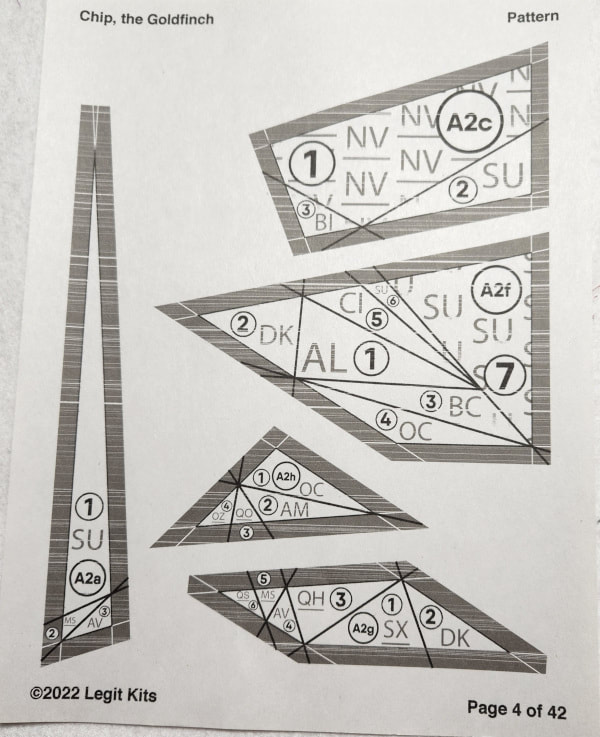 Finally, we're at the good stuff, the foundation papers! There are 40 pages of foundation papers printed on newsprint, just like the Judy Niemeyer patterns. I think this pattern is going to be fun for me and I'm excited to get started. But there are a few other projects that have to get done first. 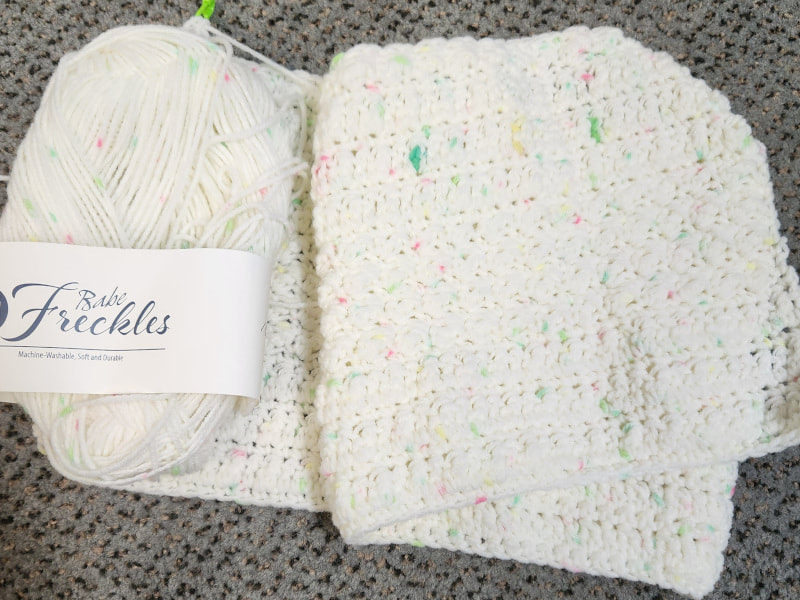 In the evenings I'm continuing on with my crochet projects. After I finished the past shawl I decided to start a new baby quilt. This is some yarn that I found on sale for half off when I was in Maine last summer. It's a very nice and soft yarn and this one is coming along pretty quickly. There's a possibility that I'll need to buy a solid color for the border because I only have 4 balls of the yarn.
I'll worry about that in a few weeks. Today I have loads of fabric to wash out and another truckload of mulch to spread. Hopefully I can get something creative done as well. As a refresher, I'm making a group of small cuddle quilts from some dye sample fat quarters that have been languishing in my sewing room for years. Many years. From the Heart uses these 27" x 36" as cuddle quilts for kids getting cancer treatment. They aren't meant to be blankets. More like "blankies". I've made and delivered 8 so far and these 4 will make 12. I have enough fat quarters to make about 28 of them. They aren't all playful colors so some will be donated as wheelchair blankets, which are the same size. 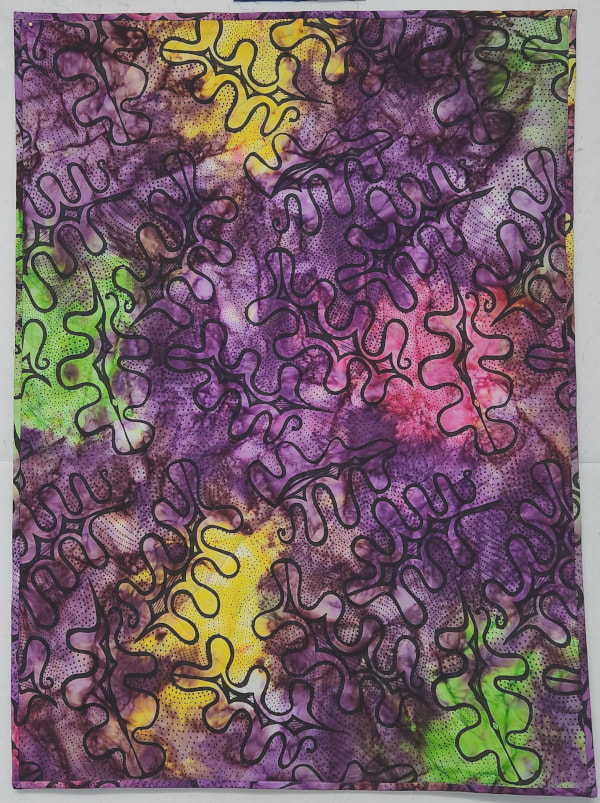 Because they are 36" long, I can use standard fabric for the backing so I'm using this as an opportunity to clear some yardage from the stash too. I try to coordinate the back to the tops so that I can use the extra backing fabric for the binding. This set of quilts started with this batik. I bought 5 yards of it at a quilt show many years ago and, I think I remember that it was a bargain fabric. I think I thought of it as backing fabric but I've never used it until now. Each of the 4 quilts have this as the backing and binding. Here are the 4 little quilts.
They wanted bright quilts and that's what they are getting! The two photos below show the quilting a little better than on the quilts. I will not be using these for my botanical class practice anymore. I determined that these need to be as soft and cuddly as possible so dense quilting isn't optimal. 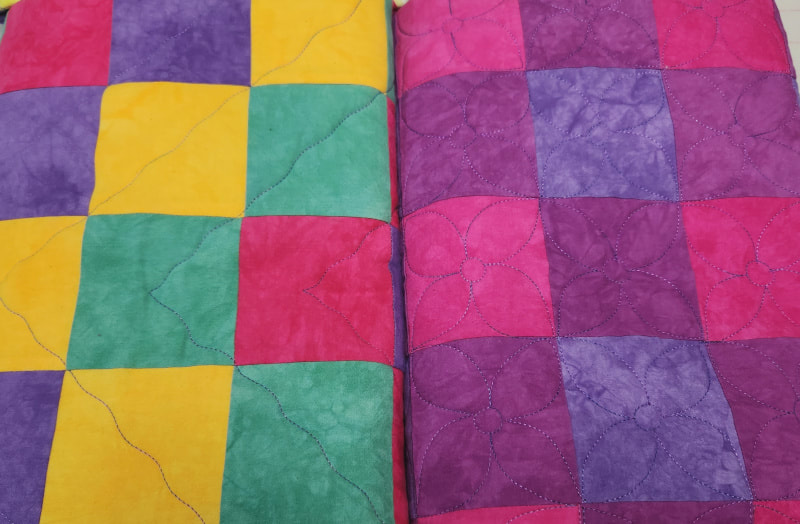 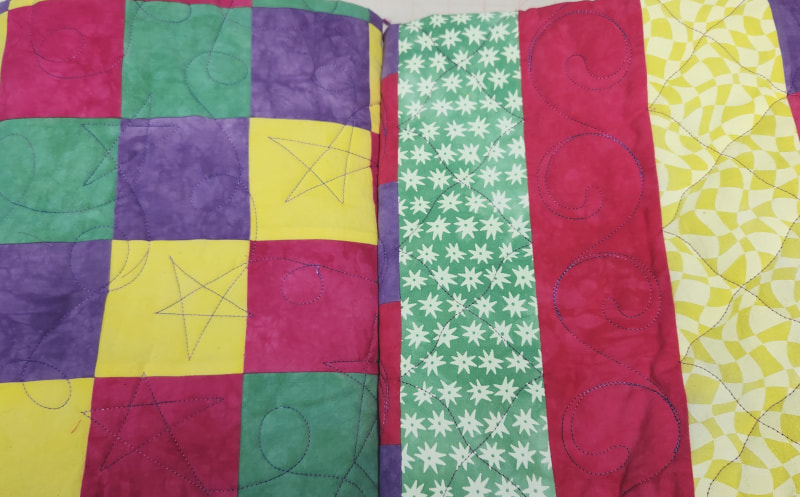 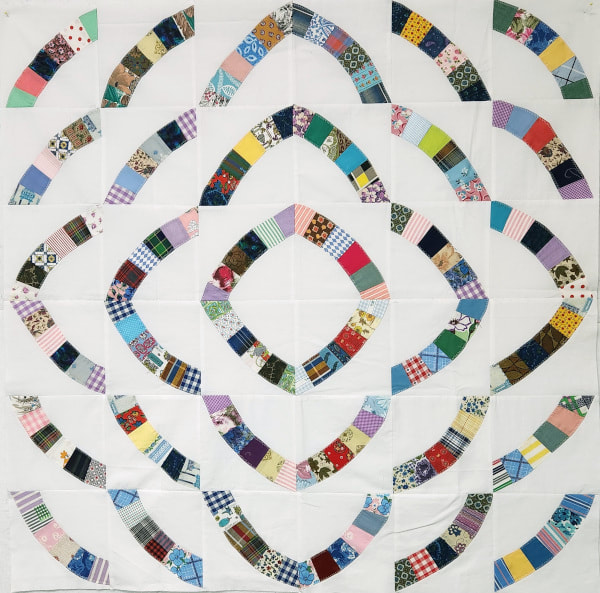 Next up is this baby quilt that Mom made. It's for my cousin's son and has a cool story about it. One I get this quilted I'll tell the whole background. I'm going to get the backing dyed today if I can settle on a color. I hope to get it quilted this weekend so I can get it to Mom Tuesday.
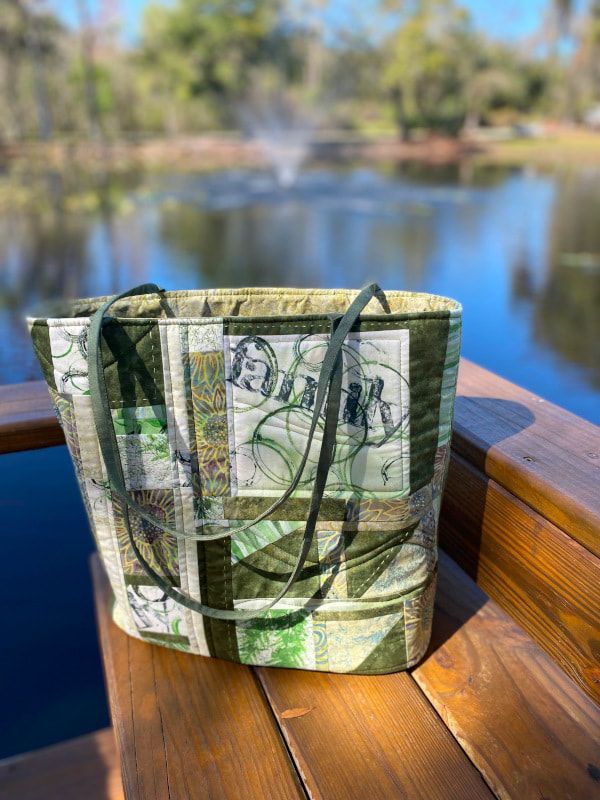 Handbag by Lisa Wiebe This week's inspiration is a handbag made by Lisa Wiebe. She used the Woodlands Gradient in a course by Brandy Maslowski; Quilter on Fire, for the base of a bag that used three different piecing techniques and fabric painting. I love the printing that she did on the gradient before cutting it up and piecing it into the bag.
For sharing, Lisa received a 20% coupon for the shop that's good for 3 months! If you have made anything with my hand dyed fabric I hope you will consider sharing it in the Customer Gallery. The only rule is that projects have to be complete. It doesn't have to be made totally from hand dyed fabric, just include a recognizable amount. 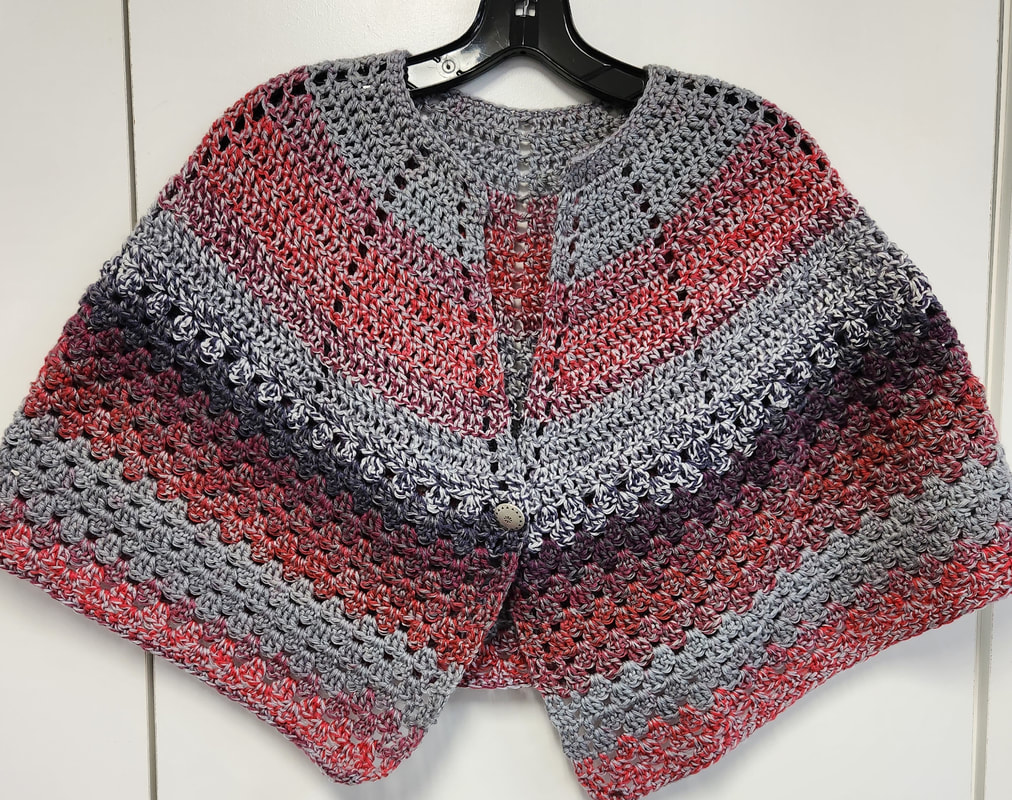 My second version of ths shawl is complete! From The Heart organization specifically requests wrap around shawls for donation to assisted living and nursing home facilities. The shawl that seems to be most popular is a free one by Susan Coes. That one is OK but I wanted more wedges. Then I found this one by Carrie Penny. That was great except that I wanted a neckline so that the shawl set more forward on the body. I also thought that it wasn't necessary to keep increasing for the full length. I melded what I learned from those two and created my own pattern that also happens to be pretty fast to stitch up. 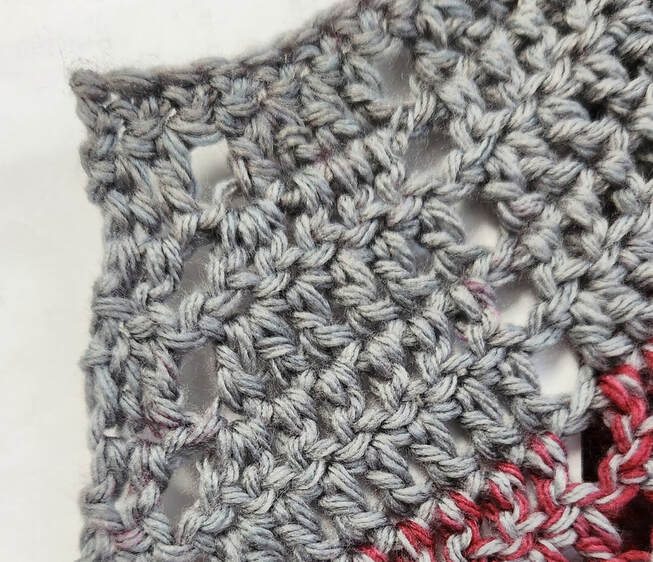 I also wanted it to have a bit of a decorative edge and a single crochet neck edge for a little nroe neck stability. I have written up the "pattern" and you can download it here.
I am not a pattern writer and it has not been tested so try it at your own risk! If you find errors please let me know and I'll fix it. Once you get going it's really simple and it's easy to make up for an missed increase on the next row so you don't have to frog much. If you do try it out please let me know if there's anything I can do to make the pattern more understandable. |
FeedsTo subscribe click the RSS Feed button and copy the URL of that page into your blog reader.
In Bloglovin you need to search "Colorways By Vicki Welsh" to find the blog. About Vicki
I'm Vicki Welsh and I've been making things as long as I can remember. I used to be a garment maker but transitioned to quilts about 20 years ago. Currently I'm into fabric dyeing, quilting, Zentangle, fabric postcards, fused glass and mosaic. I document my adventures here. Categories
All
Archives
April 2024
|

 RSS Feed