|
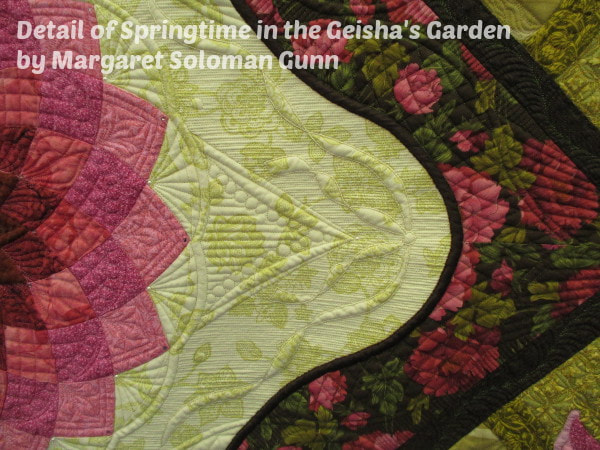
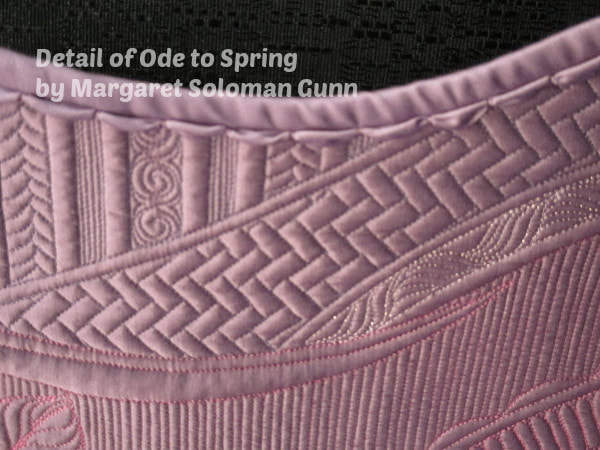
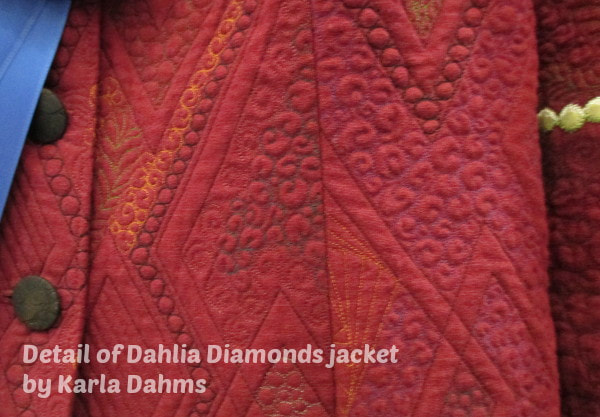
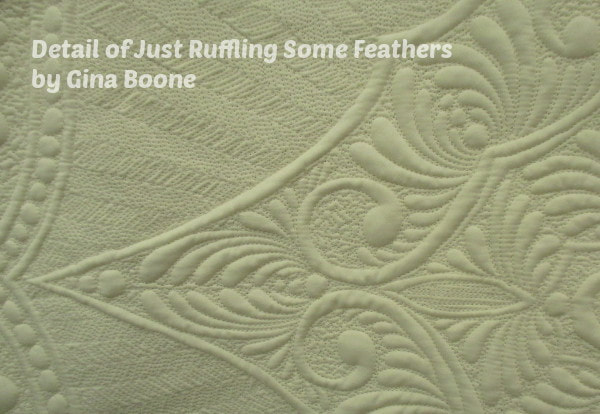
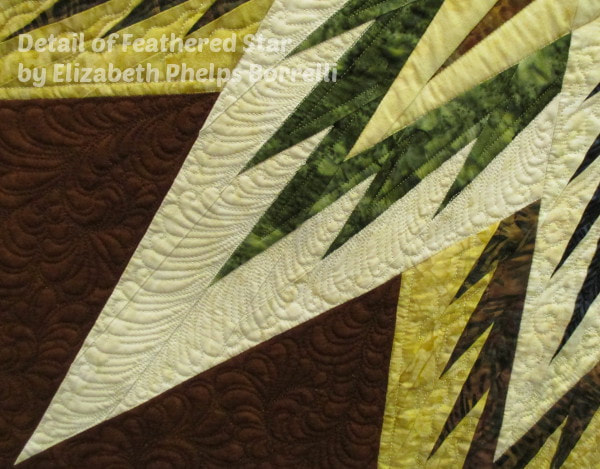
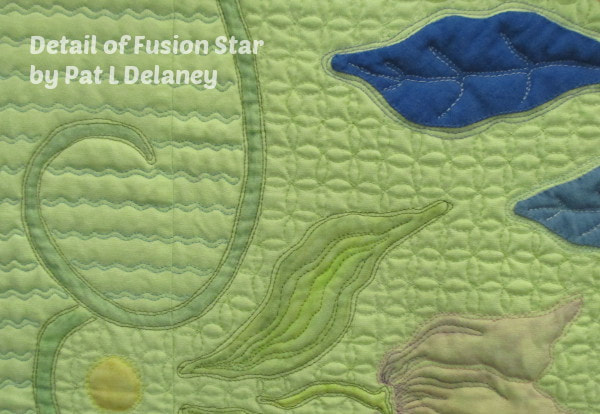
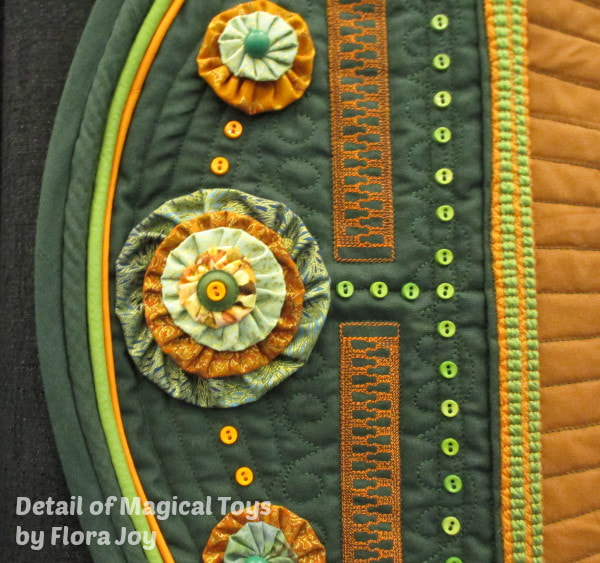
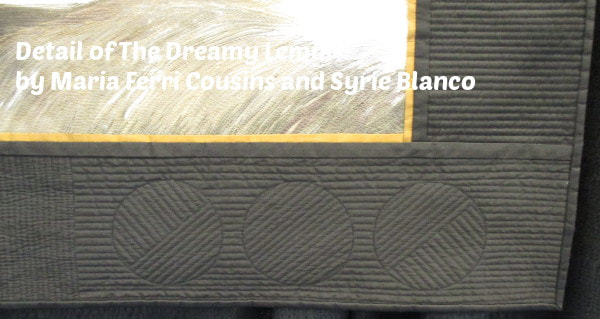
So, you've been practicing your quilting and are getting more comfortable with your machine and starting to really like what you are quilting. Then you go to a quilt show and see this. These are photos of quilts that I took at the Mid-Atlantic Quilt Festival in 2016. I like to collect photos of details instead of whole quilts to store up quilting motif ideas. But the risk of doing this is that you start comparing your quilting to these and think you will never be this good. Don't compare your quilting to others. Only compare your next quilt to the last one. Back to the car analogy, NASCAR drivers didn't become NASCAR drivers in high school. The spend hours and hours working to build their racing skills. The same applies to the award-winning quilters. We tend to forget that they have hundreds of quilts under their belts that they had to quilt to be able to do the one that won Best of Show. That quilt that you are looking at didn't just take the hours they spent on it. It also took the two hundred quilts that came before it to be able to do it and a few of those were probably simple stippled quilts. I have a quilt planned that I want to do some complex Spirograph motifs on. The thought of jumping in on that quilt overwhelmed me. 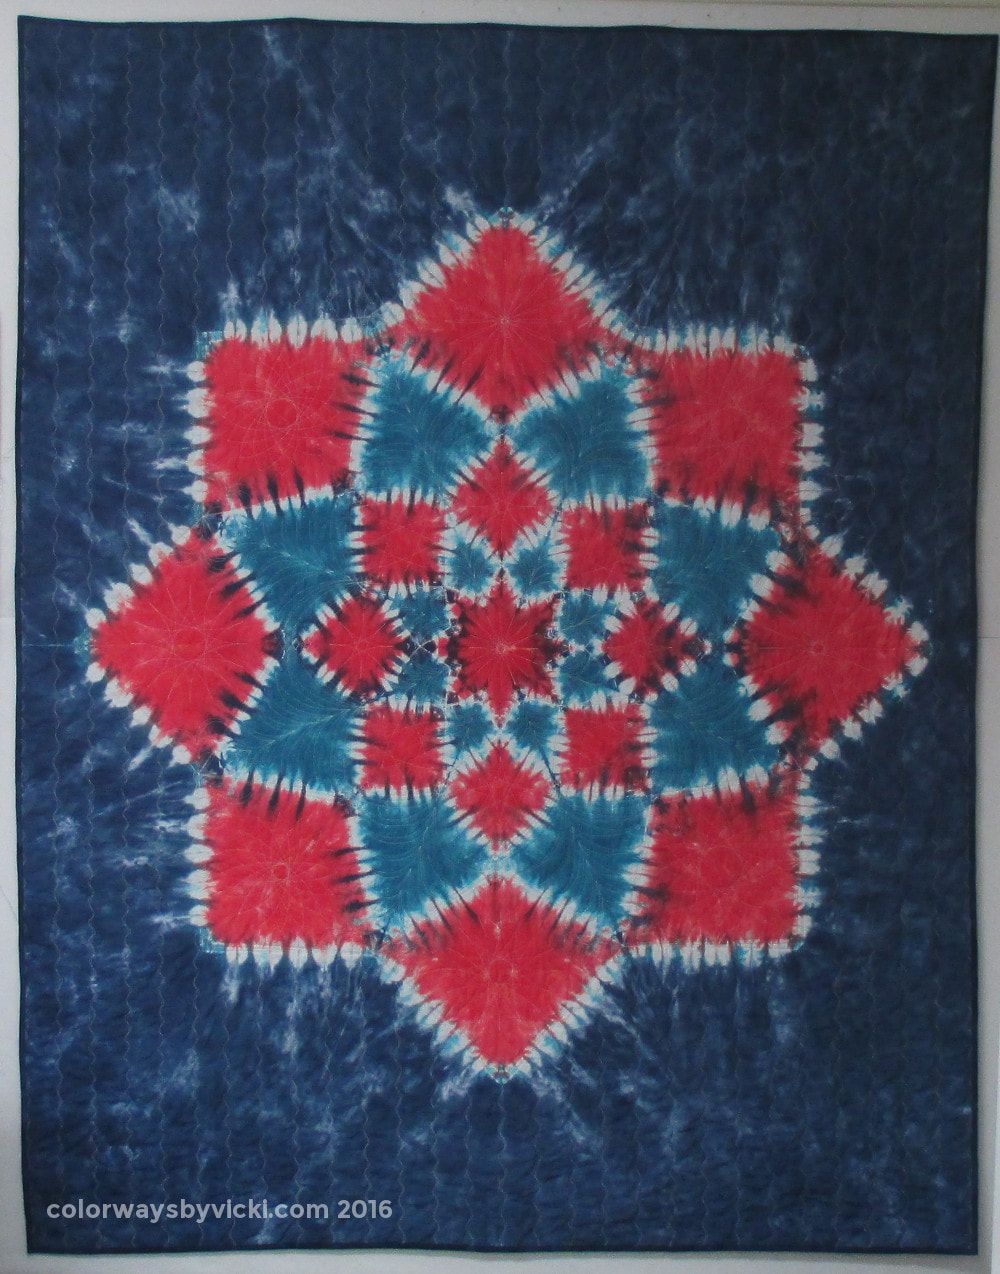 I decided to start easy with this Quilt of Valor. (I practice a lot on charity quilts.) 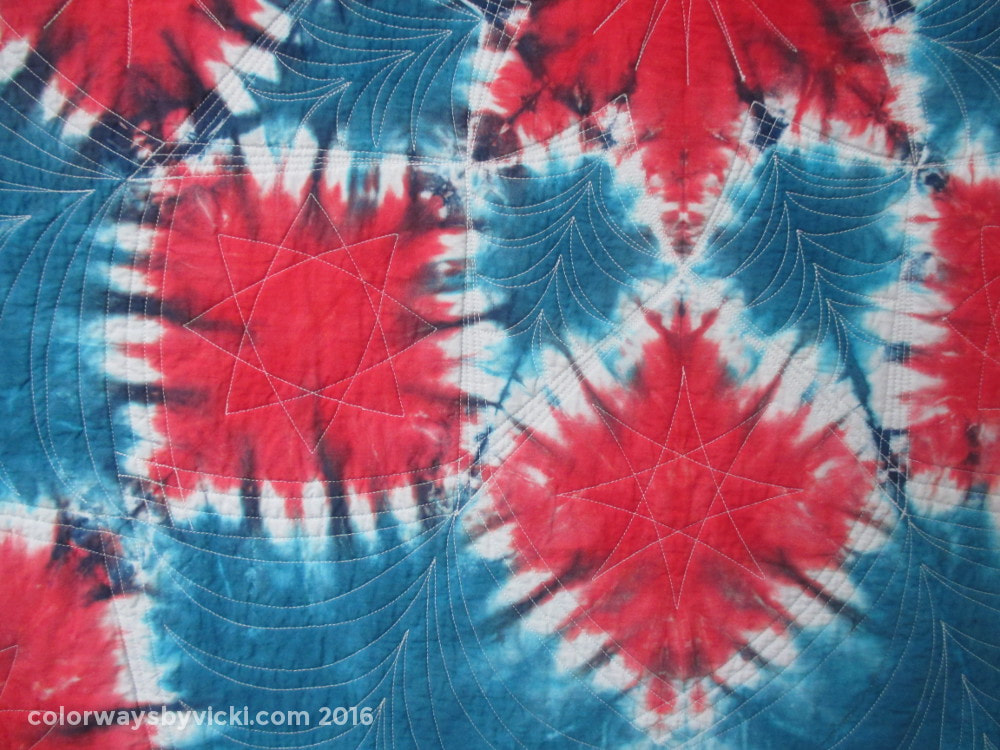 I started with some very simple motifs to get some experience with different ruler sizes and controlling my movement of the ruler. 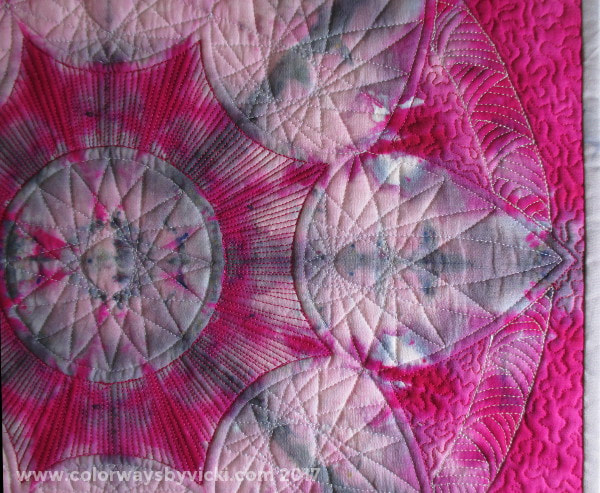 Next I did this little quilt that has a little more complex motifs. Then I'm going to do a larger mandala and THEN I'll be ready for the "real" quilt.
If you are contemplating a quilt that you are procrastinating on that means that you aren't quite ready to do it. Write down the elements that you want to put in the quilt and identify the ones you aren't yet comfortable with and then pull out some of those blankets (or charity quilts) and start building the skills. When you are at shows take all the photos you want for ideas but don't ever compare your work to theirs until you are at a point of preparing to enter shows yourself. Hopefully after yesterday's post you have accepted that it's OK to practice on some of your real quilts. Today we are going to talk about some tips to make practicing as stress-free as possible and we are going to start with my personal quilting motto. Crappy quilting, done consistently, looks great!I know that sounds funny, but it's true. Let's say that you are practicing spirals but your spirals are more square than round. No worries. If you will follow these simple tips for your practice pieces your quilt recipients will never know that you were learning on their blanket. 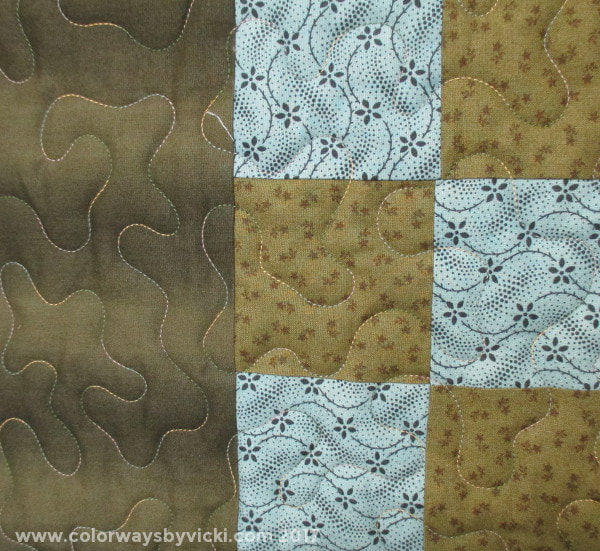 Pick a thread that blends and start with "easy" threadsWhen you are first starting out and practicing on your blankets, don't make the thread a feature of the quilt. Select a thread color that blends so that when the quilt is washed you will just see texture. Also don't get carried away trying a lot of different kinds of threads. Remember, your focus is on learning the machine and building brain and muscle memory. Don't add any other unnecessary complications like finicky threads. Great threads to start with include: Wonderfil MasterQuilter Superior Omni Superior SoFine Signature 40wt Fil-Tec Glide Polyester threads don't break as frequently as cotton threads and a thinner thread will not be as visible. Don't rip out mistakes, no one else will notice them.Unless you can see the mistake from 5 feet away no one else will notice it. For the first 5 years of my quilting I ripped out every tiny bobble. You can imagine how long it took me to quilt a quilt! After giving away a few quilt blankets and hearing what people said about them I realized that no one looked at my quilting. They cared about the color and snuggle-ability and that's it. You already know how to rip out stitches so unless the tension is way off or the mistake is an accidental 10" line across the quilt, leave it and continue working on what you wanted to learn. Add a skill with each quilt.Don't try to learn 15 new things with every quilt. Add one new skill with each quilt so you can focus on that particular skill. Let's say that your first quilt was straight lines and now you want to start moving the machine diagonally. 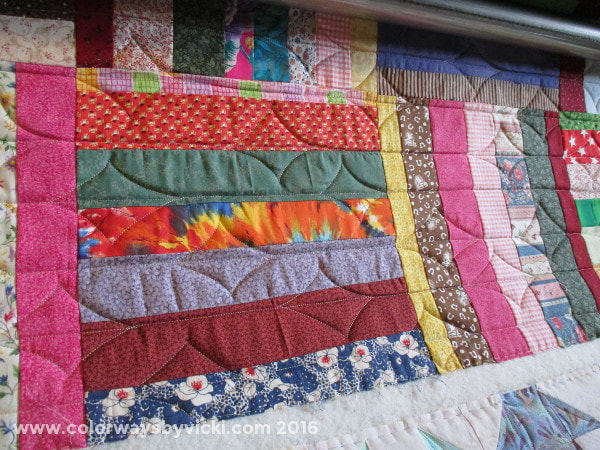 Then for your next quilt you can add some diagonal lines to the straight line. This pattern is really simple and is a great one to practice diagonal movement, getting sharp corners and meeting lines at a point. Think about the "real" quilt that you want to do first, identify all of the skills you will need to quilt it the way you want and then plan enough blankets to build the skills to quilt that quilt. Once you and your longarm have become one with each other you might want to do a quilt with stitch in the ditch and feathers. I'd apprach that by loading one quilt that square and SID the whole thing. The load another quilt and feather it to death. In both cases pick threads that will blend and don't sweat the mistakes. DO NOT POINT OUT YOUR MISTAKES!Yes, that's in all caps and I'm yelling it. Do not ever give a quilt to someone and start pointing out all of the things that are wrong with it. 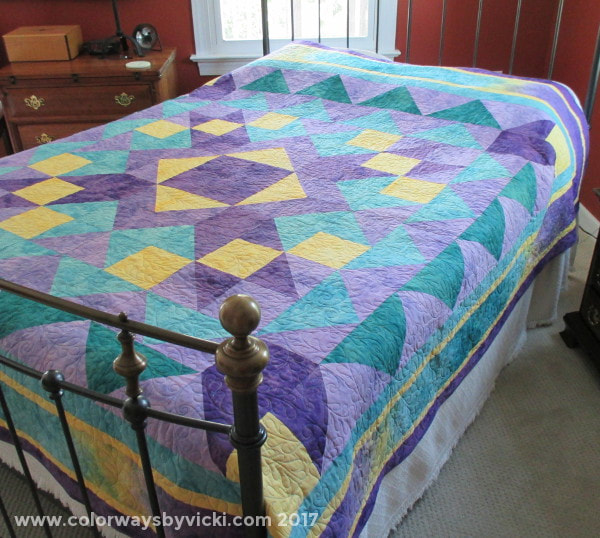 Mom and I made this quilt for a wedding gift for my nephew and his new wife. When I quilted it I did a poor job of basting and wound up with 2 big pleats in the back. I did not rip out the stitching. I hand stitched down the pleats and gave the quilt to the young couple. They loved it. Maybe they will someday find the pleat, maybe not. It doesn't matter. By then they will have turned it into a blanket and it will be like my blanket that I shared Monday. They will love it flaws and all.
Don't point out your mistakes at guild Show-And-Tell either. Tell people why you quilted it and what you learned and be proud of a finish. Before I talk about my second nugget of advice we first have to talk about blankets and quilts. I have heard many quilters get incensed when someone calls a gifted quilt a "blanket". I remember reading a blog post from a quilter who declared that she would never give a family member another quilt simply because the recipient referred to it as a blanket. Memes with the similar sentiments pop up on Facebook from time to time. 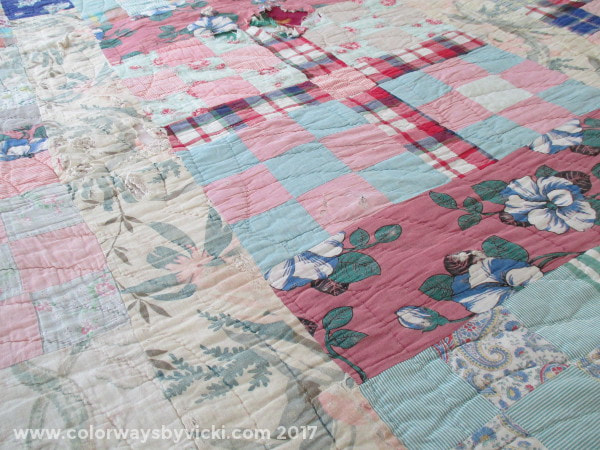 This is the quilt that my Great-Grandmother made for me when I was very young. She made quilts for all of her Grandchildren and Great-Grandchildren. 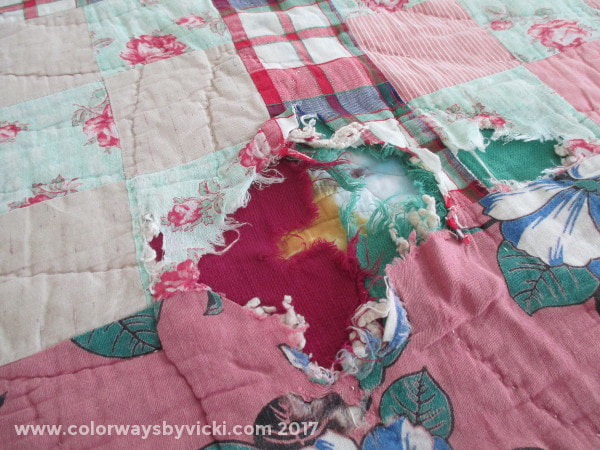 This quilt was on my bed every day from the time I received it (in the early 1960's) until I went to college. It was my blanket. It is the reason that I remember my Great-Grandmother as a quilter. Even worn and tattered I can't get rid of it. I think of her every time I see it. It's not a masterpiece but it's more special to me than any piece of art I own. I will, someday, think of some way to cut it up and make something from the remaining good parts. My brother continued to use his until it completely wore out. I had to put a new binding on it around 1999 and he finally had to give up on it about 5 years ago and start using a new quilt that Mom made for him. To me quilts are precious but blankets are love. When I give quilts to people I tell them that my wish is that they use the quilt to death. I want them to need the blanket when they are sick, to nap on it with their pets and kids and I want the kids to drag their blankets around everywhere until their parents are sick of seeing it. The cool thing about making blankets is that we also don't have to be precious about how we quilt them. Of course they need to be well constructed but they don't need quilt show quality quilting. Practice on blankets, not practice fabric.As quilters we are often afraid that we will "ruin" a quilt with our not-so-stellar quilting. Well, I have yet to meet a quilter that didn't have a stack of quilts meant to be gifts. Wouldn't it be better to quilt these and gift them so that some of them might eventually become blankets? It's a lot more fun to quilt a quilt than to practice over and over with muslin. No one is in a hurry to get to the machine to quilt a piece of muslin. 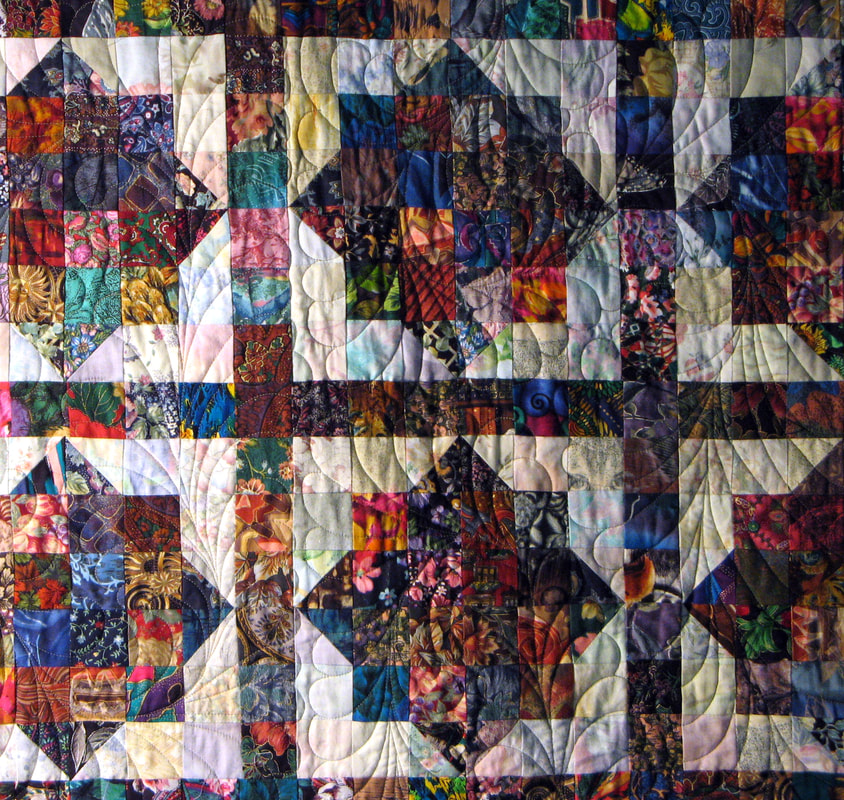 Several years ago I was finally ready to start learning to quilt feathers. A piece of muslin wasn't going to be enough. I needed a LOT of practice and a whole quilt was the best way. I found this one in my stash of tops, picked a blending thread and quilted feathers over the whole surface. The feathers were garbage at the beginning but by the end they looked much better. I didn't need a class, I needed practice.
This quilt is now owned by my youngest brother and it's his sofa blanket. He curls up with it to watch TV and nap in the winter. If you called him today he could not tell you how this quilt was quilted He likes it because of the colors and because it's soft and warm. Get the color right and make it soft and no one will even notice how you quilted it. Practicing on quilts has 3 big benefits:
This week I'm hijacking my own blog with a series of posts that I've been wanting to do for a long time. When I bought my first longarm in 2005 it was shipped to the end of my 600' driveway. I had to drive down in the pickup truck, load everything off the delivery truck and onto my truck. Chris and I then hauled all of the parts to the basement and I spent the next 2 days putting it together. At the end of that process I was suddenly a longarm quilter. I had no classes and no dealer to call for help. I did have the web and that was very helpful but for the rest I just winged it. Before the longarm I had owned the earliest version of the HandiQuilter frame and I had my Juki TL-98E on it with a whopping 9" of throat space. Because of that I knew some basics but there were a lot of things I learned the hard way. 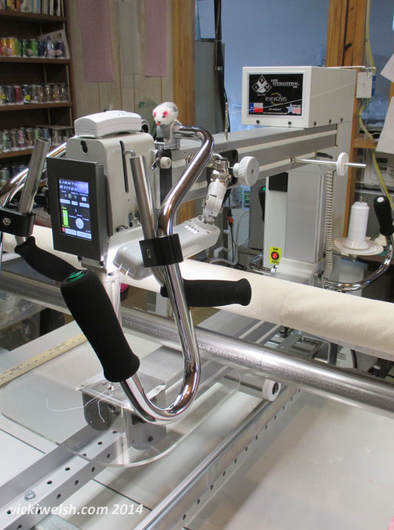 By October 8, 2014 when my beloved FloMo arrived I was a pretty seasoned quilter and I almost didn't take the free new owners class that Virginia Longarm offers. But I felt that, at a minimum, it would give me a chance to get to know my dealer better. Of course the class was a lot more than that. I became much more comfortable with the machine and how it operates. I learned the benefits of basting my quilts instead of doing a full floats and I learned a LOT about managing tension.  I fell so in love with the machine that I was constantly emailing Val photos of my beautiful, perfect stitches. Through building the relationship with Val and Michele at Virginia Longarm/The Longarm Network, it eventually came to pass that I started teaching a day of the new-owner training. They had decided to add a day that focused on using the machine free motion and I was, and am, excited to be able to teach it. But that one day class is not just about free-motion quilting motifs. It's also about removing fear so that the quilter can get to quilting. I designed the class to be the class that I had needed when I started quilting. The first part of the class covers my advice nuggets for new longarmers and I'm going to spend this week discussing those nuggets int he hope that it might help other new owners out there. Nugget 1 - Take time to get yourself and your body comfortable with the machine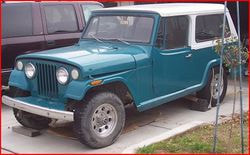 When I first learned to drive my Dad insisted that I learn on a stick shift Jeep that looked a lot like this one. That car was hard to drive for a seasoned driver but he told me that if I could drive it then I would be able to drive anything. He was also a wise teacher. He took me to a farm where the only thing I could hit was a cow and they were smart enough to stay away. For hours I drove back and forth learning how to change gears, how to turn around and how to drive in reverse. My left leg was sore from working the clutch the first time. Dad did not expect me to drive on a highway, on a windy road or at night. He made sure that I started by simply becoming comfortable with the car and training my body to coordinate the movements I needed for driving. That's exactly how we need to approach quilting on a new longarm. As new drivers we did not expect to enter a NASCAR race the week after we got our license. So why do we expect to quilt perfect quilts right away? Maybe it's because we are already seasoned quilters and maybe even great free-motion quilters on our domestic machines. But the longarm is completely different. It's like going from a bicycle to a car. It's a totally new things and you have to honor the learning curve. When you get your new machine you need to first learn the machine and start building some muscle memory. You have to get comfortable threading it, setting and maintaining good tension, winding bobbins properly and learning to quilt and walk at the same time. You also have to learn some ergonomics. When I started learning to drive I kept a death grip on the steering wheel because I didn't want the car to get away from me. As a result I built up a lot of tension in my body in those early sessions. But as I got more comfortable with my driving ability I was able to relax a bit behind the wheel. The same applies to the longarm. New owners tend to hold on way too tight so they build up a lot of tension in their shoulders, arms and backs and their quilting lines are not smooth. As with driving, it simply takes practice for you and your longarm to become one together. So what's a good way to learn your new machine? Start with lines
Quilt your first quilt (or quilts) with lines. Straight lines or wavy lines, whatever makes you happy. Ergonomically you will be forced to relax. You cannot quilt good straight or soft wavy lines if you are tense.
Quilting is a balance between the brain setting up the pattern and the arm following it. New quilters are often out of sync between brain and arm and it's usually the brain that's following behind the arm and that always leads to quilting we don't like. We have drawn lines all of our lives so this give the brain a chance to get to know what the arm is doing and to build that communication path. It also give you time to get to know the machine. Ripping out one line of stitching because of bad tension is easy compared to ripping out a row of swirls. Quilting a whole quilt walking back and forth quilting lines will help you get to know each other and start bonding. You will get used to the sounds of the machine, your posture, the connection between you and the machine and start to get comfortable managing threads and tension. 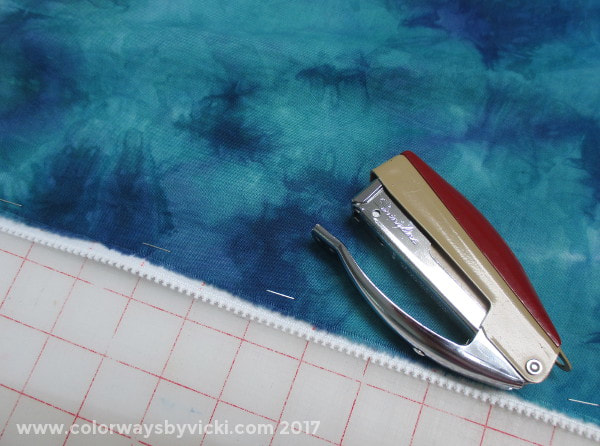 Today's post is for the longarmers, especially the new longarmers starting to use zippered leaders. I posted last month about how I use a stapler to load my quilts to the longarm leaders. 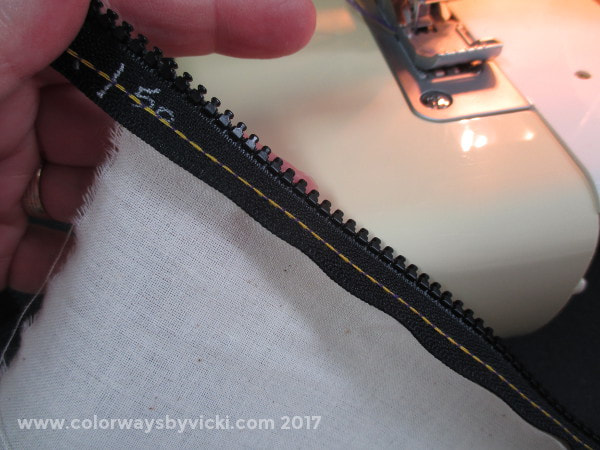 When I teach at Virginia Longarm I have to bring practice quilt sandwiches. At the end of class I take the practice pieces off the zippers for the students to take home. Removing staples takes a bit of time but, more importantly, they aren't particularly thrilled to have staples loose in the showroom. There's a risk that one finds it's way in the middle of a customer quilt.
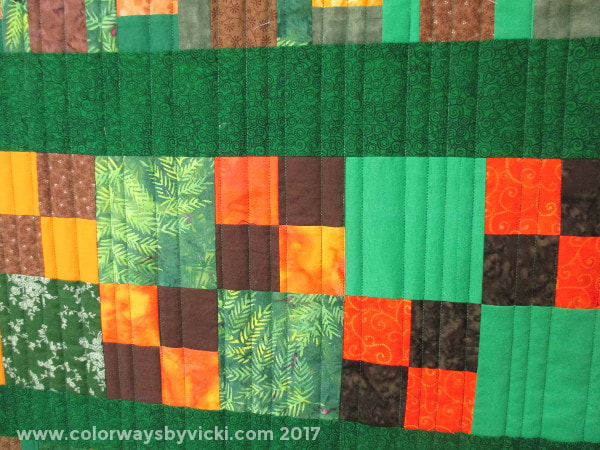
I needed to come up with a better way. I remembered that my serger has a chain stitch and that would be perfect. Today I posted a little tutorial for how I use the serger (or a regular sewing machine) to stitch a quilt back to leaders. Press the button to read the tutorial if you are interested. Since I teach some beginner longarm classes at The Longarm Network I use the veterans quilts to practice and develop new quilting patterns that will be easy for beginner longarmers. The one I have today is an even simpler version of the Wavy Crosshatch, my favorite go-to quilting motif. 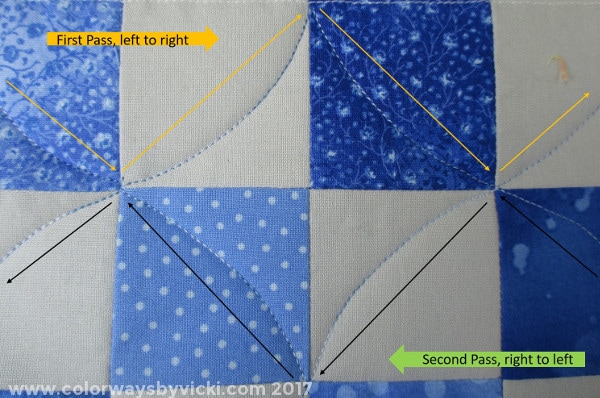 It's so simple that you can figure it out from this photo. This quilt is made from 4-patches and that's usually a direct call for the Wavy Crosshatch but I wanted something even simpler. This is just a free-motion option to ruler work straight lines. Quilting a curved diagonal line is much easier than quilting a straight diagonal line. In this case I curved the lines down on left to right passes and curved the lines up on right to left passes. For a beginner quilter you are building 2 skills here: 1 - Quilting smooth curves. The nice thing about this pattern is that a couple of wonky curves aren't going to stand out but by the time you get to the end of the quilt your curves will be pretty smooth. 2 - More importantly, you will be practicing stopping at specific points. Ideally you want your points on each row to touch so that anyone looking at the quilt can't be sure how you quilted it.You only learn to do that with practice and this is a perfect practice pattern. When you are done you are better at both of those skills AND you have a quilt quilted! 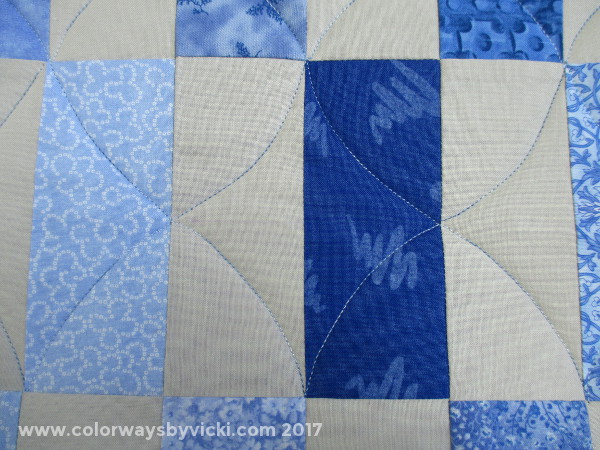 Oh, but what if you have rectangles instead of squares? No problem! In this case I used a purple air erasable pen to draw a line through the middle of the row. That gave me my stopping points. But I could have also simply made very long skinny diamonds and that would have looked good too. Once you have this mastered you can come back and add all kinds of elements to dress it up:
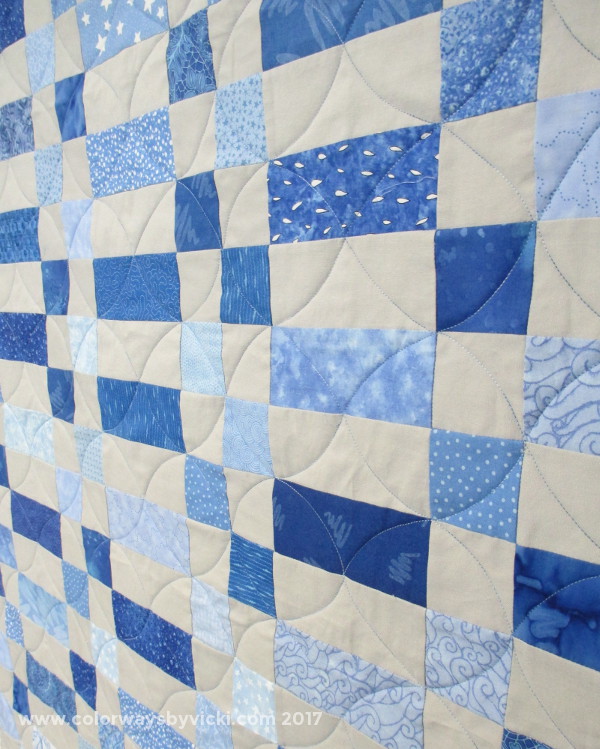 It really is the simplest of simple patterns but it has a lovely overall effect. 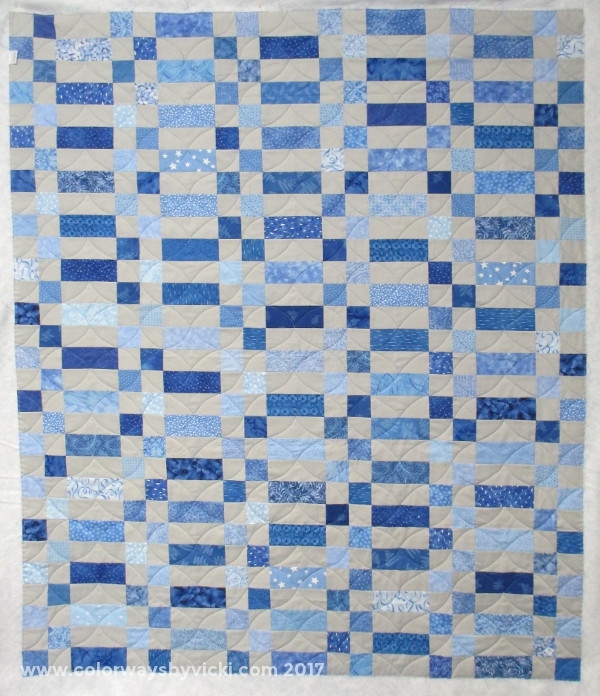 Betty B. from my quilt club made this pretty quilt. I think it's manly but still calming and soothing. 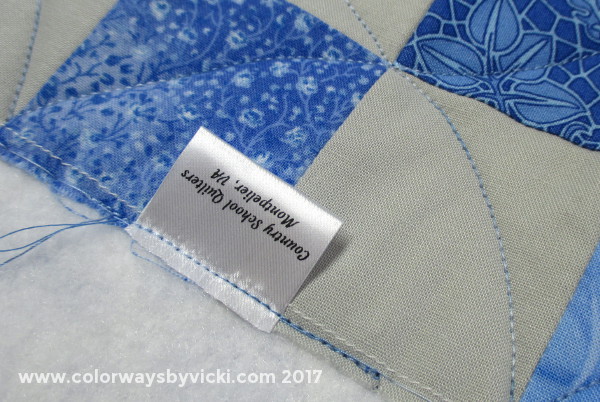 This is the first quilt that I got to add our new quilt labels to! One of our members has been printing labels for the back of the quilts. Of course no one really likes sewing on quilt labels and I found these at Ikaprint on France. They are small but you can't beat 200 labels for less than $30 (including shipping). It's a lot less expensive than what Becky was paying for printer-ready fabric. The labels arrived quickly and now Terry and I can sew on the labels as we quilt the quilts. it's one less step for the binders to do! 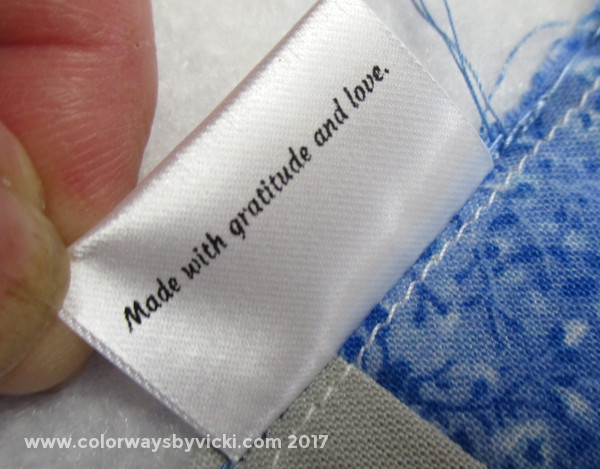 If anyone looks on the back they will see this message.
I quilted this quilt on the 4th of July. It seemed only appropriate to quilt a quilt on our birthday. 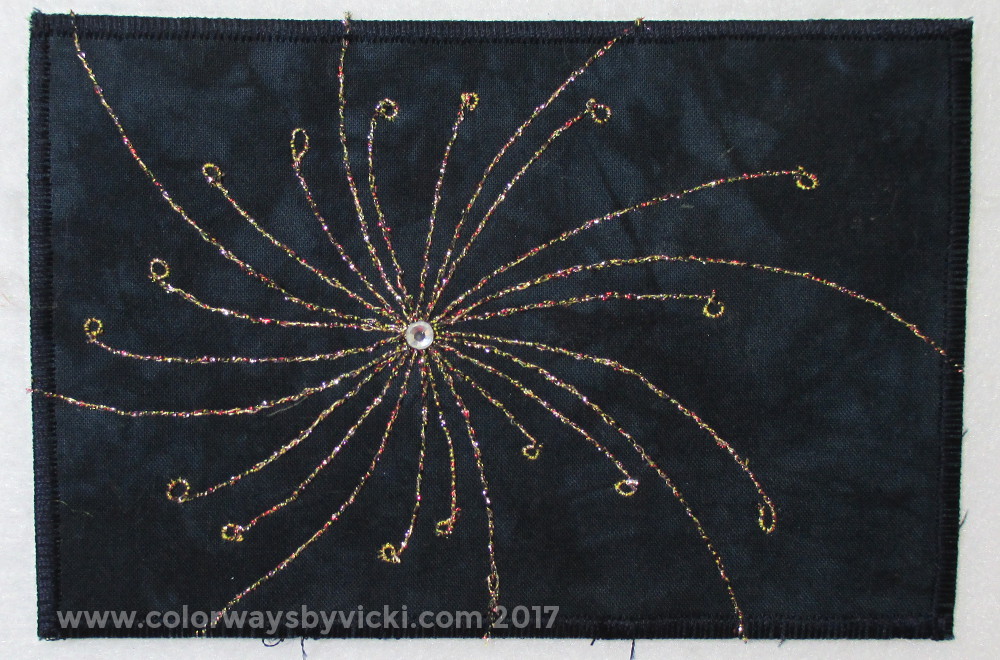 I had a lot of birthdays in May and our Airbnb traffic has picked up. Since both audiences get fabric postcards I wen't through my last stockpile pretty quickly. I only had 2 left and lots of Airbnb guests coming up. I had to get buys and make some new cards. I've been thinking about a fireworks theme for a long time but couldn't figure out how I wanted to execute it. Working on my little mandala quilt last month gave me the idea to get these done. I've written up a tutorial if you want to make some for yourself. You can find it under the Tutorials tab above or just click here. 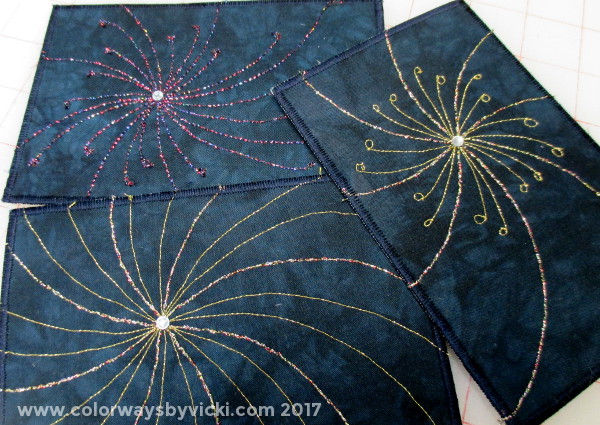 I worked through a few prototypes testing threads and technique. I decided that even the rejects looked good enough to keep.
I feel like I was very busy yesterday but it included a meeting in the morning and a concert last night so I don't have a whole lot to show for my efforts yesterday. 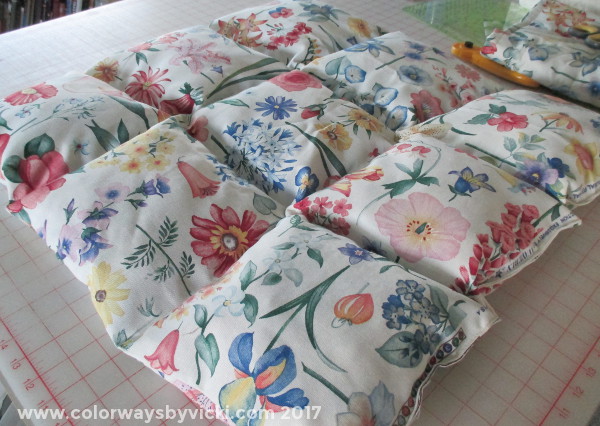 Except for this one lonely pet bed. Quilting the veterans quilts creates a lot of fabric and batting bits that are too small to save and use. I collect them in a separate trash can. Sometimes I can donate them to a group that makes pet beds but occasionally I find from free decorator weight fabric and I make my own. The friend that went with me to the concert last night also volunteers at Richmond Animal League so I stitched up a quick one to take to her. This one isn't stuffed quite enough but for a shelter dog it will be better than a flimsy towel for a bed. I have a tutorial if you want to make some for yourself.  My big project today is to gather up my piles of donation items and deliver it all to the local thrift store and then wait for the UPS driver to bring the king sized batting that I ordered for the Rainbow Quilt. I have the back loaded and ready to go and want to get started on it this weekend.
I also want to do some glass, make a special postcard for a friend and maybe start a new symmetry project. What are your plans? Did anyone wonder where I was yesterday? I did mention a couple of days ago that my posting might not be regular while my friends were here but I didn't miss yesterday because we were having fun. The evening before just as I was getting ready to leave to teach a class I decided to unload the dishwasher. On one of the bends my back decided to spasm. Don't you hat it when that happens? I'm fine and mostly just sore today but I was really uncomfortable driving and teaching Tuesday night and spent yesterday just resting. 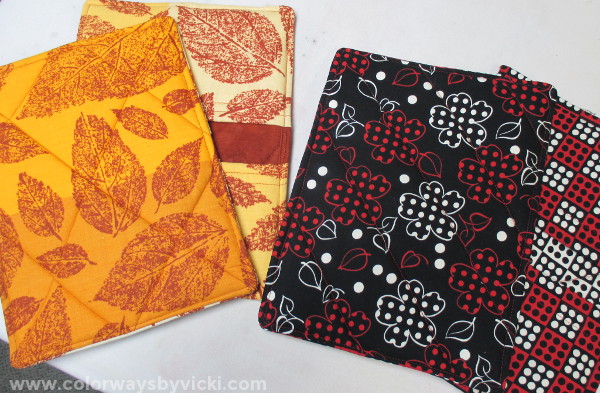 But Laura wasn't bothered by my lack of activity. She set herself up a little potholder factory in my sewing room. A few years ago I made potholders for everyone for Christmas. I think I made over 20 sets of potholders. People loved them and I wrote a tutorial so I'd remember how I made them. Laura got some of them and wanted to make some to take home for Christmas presents. She had free and unlimited access to my stash and I had a couple of yards of Insul-Brite so she got to work. Here are 2 of her first 3 sets. 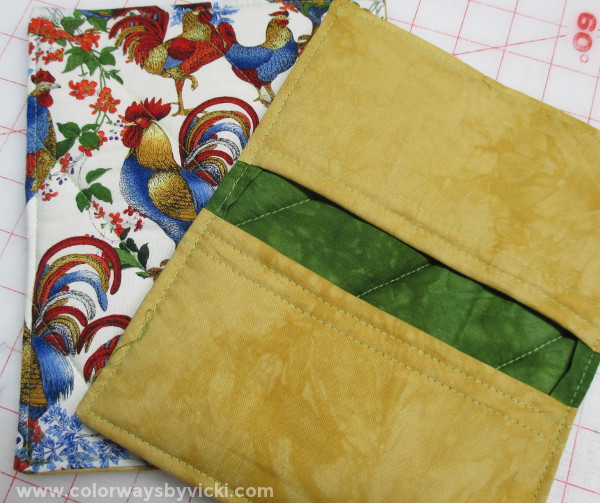 She even made a set for me. The ones that I made a few years ago are getting pretty ratty. I probably need to set up my own factory and make new ones for my family and friends. While she was sewing and I was resting, the landscape guys are working as hard as they can between rainstorms. We have had so much rain lately that they are far behind. I'm not bothered by it. They are doing great work and are the nicest group of guys you could have working on your property. 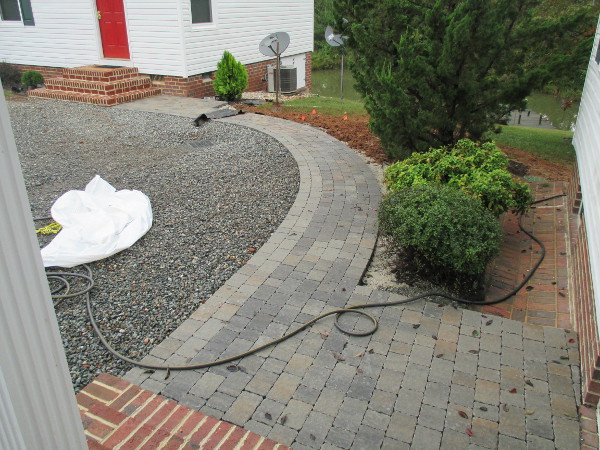 One sidewalk is finished except for sanding. They have to wait for the weather to be dry to do that. We've had some serious rain since they put in the drains and it's really exciting to see them work. But I love the new sidewalk. It's a huge improvement. Don't ask me why this house has brick gutters in front. The guy who built this house was a history professor and, we think, he was trying to build himself a plantation. It all fell short of the mark because plantations cost a lot of money! Anyway, we have brick gutters so we had drains put at the end of them and now they are actually working like they are supposed to. 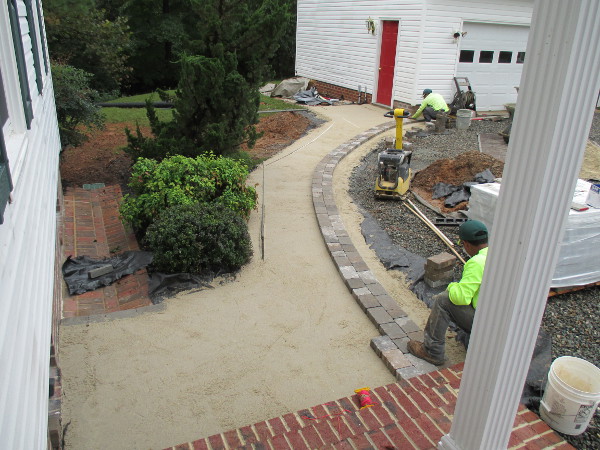 They should get this one laid out today before the rain starts again. The guy by the far door is the lead guy and his level of meticulousness makes me look like a slacker. We are lucky to have him and his crew. I can't wait to see it all finished.
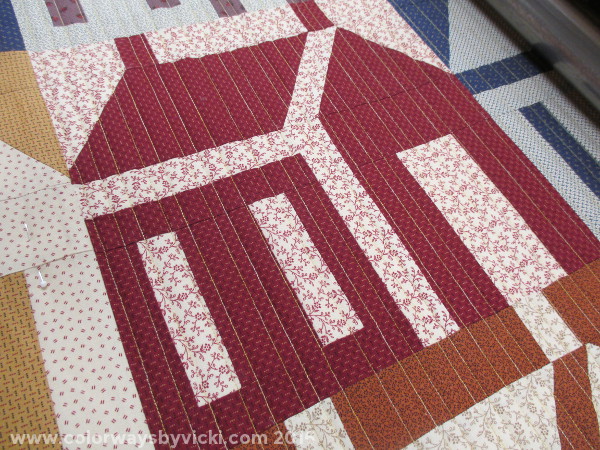 It was great to be home and start to get back into my routine this weekend. FloMo and I spent some time together yesterday. I'm going to quilt a few veterans quilts before I load a quilt of my own. This quilt is made of these large house blocks with no borders. I really like the look of it and felt that wavy or curvy lines wouldn't really look great on it. I decided on straight lines.
Since I'm teaching the Innova New Owners class at The Longarm Network again this weekend it was timely to write up a tutorial on using channel locks. If you have a longarm and haven't used channel locks (installed or DIY) you might find the Channel Locks Tutorial helpful. |
FeedsTo subscribe click the RSS Feed button and copy the URL of that page into your blog reader.
In Bloglovin you need to search "Colorways By Vicki Welsh" to find the blog. About Vicki
I'm Vicki Welsh and I've been making things as long as I can remember. I used to be a garment maker but transitioned to quilts about 20 years ago. Currently I'm into fabric dyeing, quilting, Zentangle, fabric postcards, fused glass and mosaic. I document my adventures here. Categories
All
Archives
April 2024
|

 RSS Feed