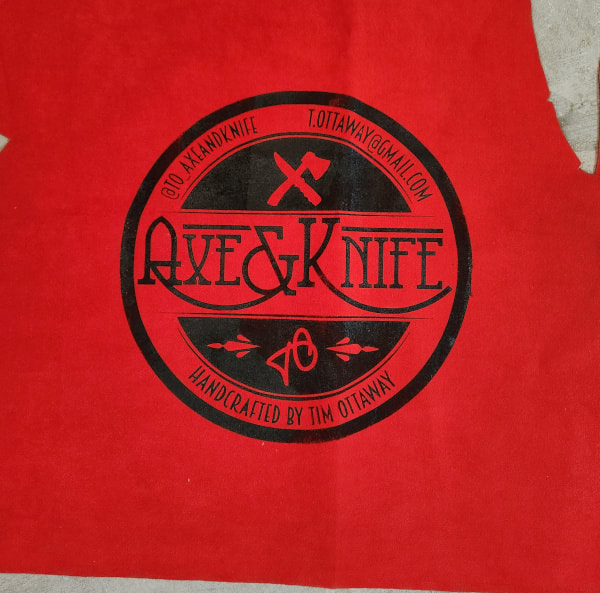
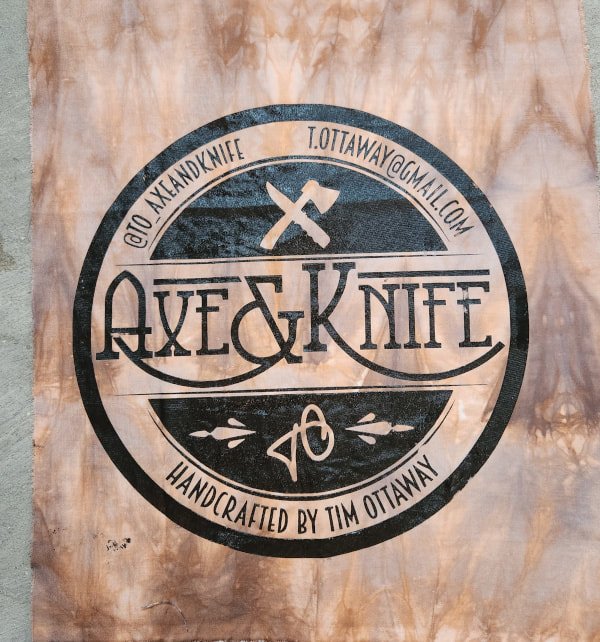
 Well, this week I am. This is my brother's logo. In case you are confused about his business, he makes axes and knives. He said a few months ago that he looked into getting some shirts printed with the logo but he was a little shocked by the price. He has a BIG birthday coming up Saturday and I thought it would be a good idea to try to screen print some shirts for him. Little did I know what a huge project it was going to be! MY SIL and niece have a Cricut machine so if I could get the logo file they agreed to cut it in vinyl for me. When I emailed him to get the logo I figured out that he would know why. Fortunately, he had food poisoning that week and wasn't alert enough to figure it out.  For screen printing, the image has to be cut in reverse and this particular one is a total pain to weed and transfer. The tiny triangles in the "A"s and the holes of the "B" helped me practice my profanity vocabulary. I'm trying to learn Spanish and I should have looked up some Spanish profanity for this project to learn new words. I actually weeded 2 of these because I used the first one to practice.  Transferring to the screen is no picnic either. After it's on the screen, you cover the rest of the screen in painter's tape.
My first practice pieces were in black ink on different fabrics. I wanted to see how many prints I can do with one screen and the answer is lots. Here's where I also learned that my ink is old and needed to be thinned out pretty substantially. A close inspection of my practice pieces show that there are some coverage inconsistencies and smudges. It was clear that practicing was needed. Then I decided to start on the shirts. I frequently dye shirts for him. Nothing fancy, he just likes some hand dyed texture in dullish colors. I got a pack of tshirts and dyed all 6 of them. I printed 3 of them and hated how they were looking so I washed out all of the ink, re-washed the shirts and started again.  My problem with the first printing was my print surface. I was using this little ironing board and the cover was too loose and gave me an uneven surface. I got my staple gun out and stapled the cover tight and that solved my problem. I never use this as an ironing board so now I have a new print board!  Because his business is a steel-based business, I wanted the color to be gray. Here are the finished shirts with the logo on the back. The funny thing is that he pulled the shirts out and looked at the front of them and was commenting on the colors. Chris finally told him to check out the back. I think he loved them.  While I was weeding the design, I took the waste piece with his initials and put that on another screen and printed this for his birthday postcard. I was so stressed getting the shirts done last weekend that I forgot to write a birthday note or sign the card! He can hang it in his shop somewhere to remind him how cool I am.
One thing that came out of this project is the recognition that I need a Cricut machine too. I might be getting into that later this summer.
8 Comments
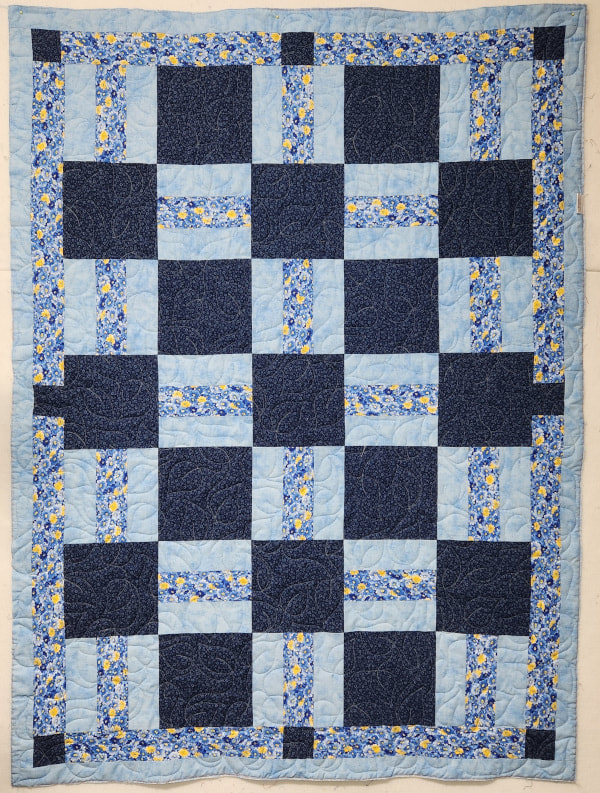
 I've been working on several of my own veterans quilts lately but wanted to wait to post about them until all 3 were done. This first one isn't totally mine. The blocks came from several people and Carolyn sewed together the center of the quilt. It wasn't quite big enough so I brought it home, added the borders, quilted it and put he binding on it. So I'm counting it as "mine". I think the lime green narrow border and binding made this quilt.  I quilted it in a free motion all-over design that I've seen called fern or banana peel. It's fun and fast.  This was one of my veterans quilt kits that I started sewing together last fall. The stars are made from hand dyed scraps. I had planned a different border but it looked horrible so I had to dig in the stash and came up with this medium blue. 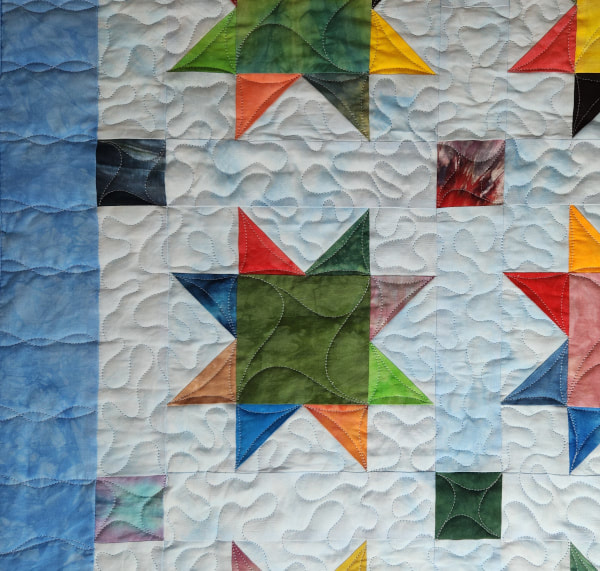 I wanted some light custom quilting and came up with this. It went fast and looks OK but I don't love it so when it came time to quilt the next one I did something different.  The quilt kit for the blue quilt actually had the making of 2 quilts in it and this was the second one. I love this pattern and will make more kits with this one. It makes great use of small scraps.  I decided to go with a small wavy crosshatch on this one and I like it much better.  We had sewing days this weekend and I started a new kit that also had 2 quilts in it. It's a super easy pattern and all I have left to do is add the borders. I might get that done this week although we will be getting ready for vacation this week. Who knows what will or not get done.  Yesterday we picked up Mom and went to my brother's to deliver Eli's tie dyed tshirts. After we dropped Mom back at home we saw the Weinermobile! Honestly, I've never seen the Weinermobile before. It turns out that you can find out if it's going to be near you on this website. It's a quite shocking thing to see unexpectedly driving down the street.
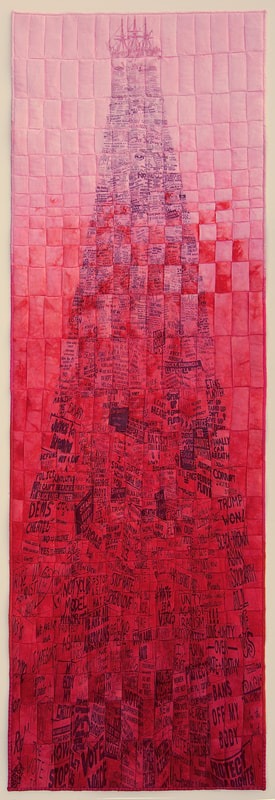 Seeing Red by Susan Bianchi, 15" x 45" Today's inspiration comes to us from Susan Bianchi. She made this with a custom red gradient. She has written a wonderfully detail post about the meaning behind this art quilt and you can read it here.  Seeing Red by Susan Bianchi, detail One of the trademarks of her art is the printing that she does on fabric.
For sharing, Susan received a 20% coupon for the shop that's good for 3 months! If you have made anything with my hand dyed fabric I hope you will consider sharing it in the Customer Gallery. The only rule is that projects have to be complete. It doesn't have to be made totally from hand dyed fabric, just include a recognizable amount.  I haven't posted anything about crochet in a while and that's simply because I haven't done much crochet lately since football season ended. I think I've also been staying away from it because I was a little stuck on my 2 projects. One of them is this donation baby blanket. It's supposed to have a border on it but I kind of messed up the first row so I couldn't figure out how to do the border to get the top and bottom even. I finally decided that I could skip the border and call it done.  The blanket finished about 34" square, a nice size for a baby quilt. The pattern is from Yarnspirations and is called Bundle in Blue. I can't find it on Yarnspirations anymore, but I did find it here. The yarn is Sundance Scramble from Herrschner's. I love how this yarn looks but I don't really love the yarn. I have a feeling it's going to pill based on one small washing sample. I used a 5.5mm hook.  I do like how the yarn stripes and it worked well with this pattern. I would make this pattern again. The other project I have going on is a summer vest. I'm not in love with it so I'll eventually decide if I'm going to finish it or not.  Meanwhile, I've decided to start 2 more blankets.The purple/green print yarn is a 3 weight and I'll make this blanket again. I remember it being easy and fast and being really pretty when it was done.
The blue, white and yellow yarns will be for a bigger donation blanket and I'll probably make it like this one. I've done that pattern twice and it's another fast and fun one.  I can't share my two biggest projects right now but I did get caught up on veterans quilts and finished quilting this one by Karen and also finished one of mine. I thought the meeting was last night but one of my friends corrected me. The meeting is next week! So I'm ahead.  I quilted this one in all-over leaves. That seemed to go well with the fabrics.  These are the t-shirts that I dyed for Eli and Ella. I hope to deliver them this weekend. I'm really pleased with how these turned out.
Today is dyeing day so I don't know if I'll have anything to share tomorrow, unless the weather is good enough to get photos of the big blue quilt. I know I've had a lot Gradient news lately but that's because they are the fabrics you want. My stocks had gotten low so I've been working for weeks to get things restocked. This week I have 5 more for you back in stock. 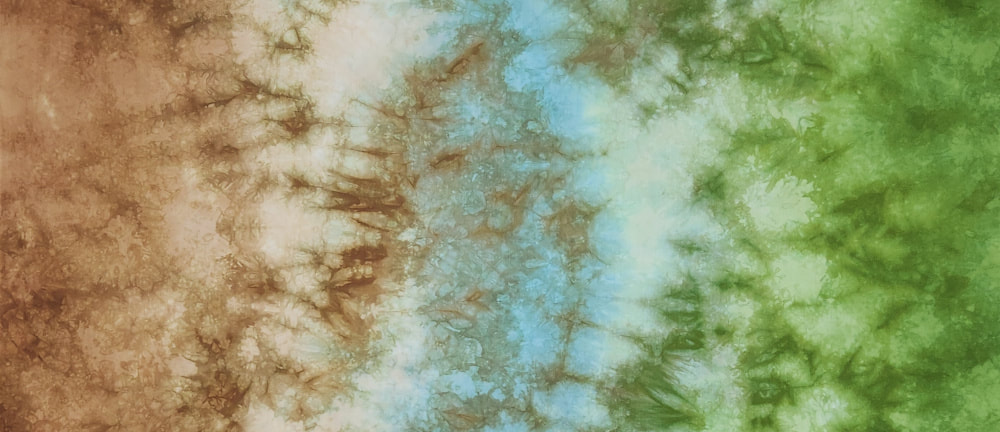 Salt Marsh Salt Marsh is a gradient that has been on hiatus for a couple of years but I've brought it back because I'm considering a new project with this palette. 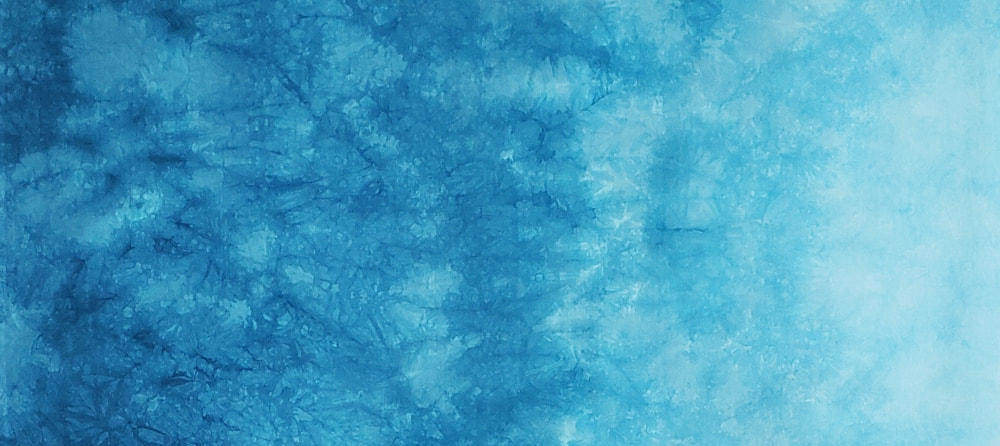 Monterey Bay 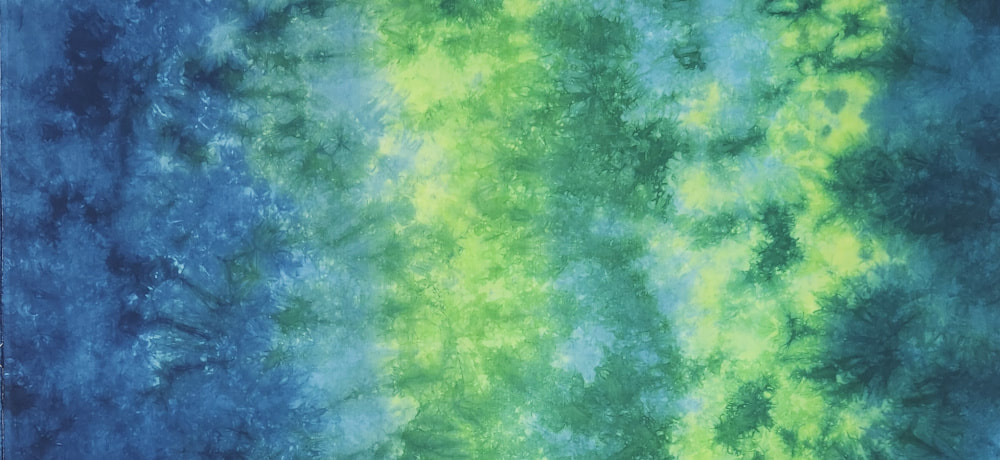 Aurora 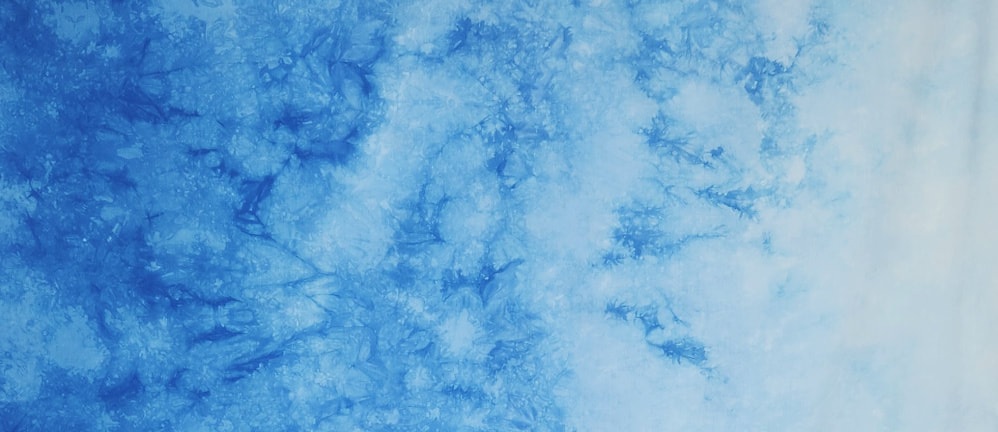 Blue Sky 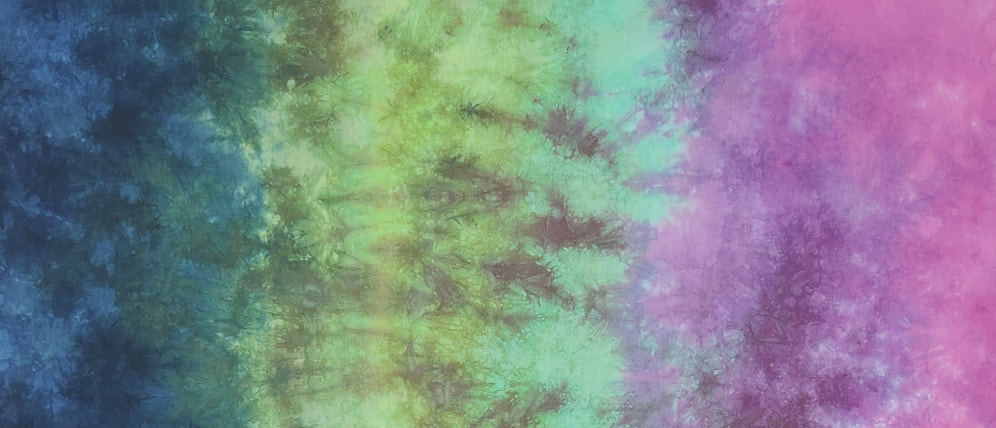 Peacock There are a few more Gradients to come next week and that should have the shop full for a while.
 The benefit of a cold and rainy weekend is that it makes for a great quilting weekend. I got busy on some veterans quilts. I had 6 that I wanted to get done by Tuesday. I got 4 finished. Two that I'll share today and two that I am binding so I'll share them when they are completely done. This one was made by Clara. She loves the 3 yard quilt patterns and then she adds borders to bring them up to the size we need for the VA hospital. I quilted it with overall leaves.  This one was pieced by Peg. She added the borders and sashing to some blocks from a scrappy block drive that the club did. She greatly improved this random set of blocks. There are two more that were quilted and I'll share them as soon as I get the bindings done. I also got the binding done on the big blue quilt but, with the rain, I couldn't photograph it this weekend. That will come later this week too!  I've got the last 2 quilts loaded. This is another that I made and will need to bind. I can start quilting these today after we drop off my car to get that dent fixed.  My batting scrap bin got full enough to make a giant dog bed. I'll pass this on to my friend for Richmond Animal League.  I've also figured out something to do with some of the scraps from the house quilt! I can't wait to share when I get it done.
This week is all about more quilting, finishing up some tie dye shirts and making a label for the big blue quilt.  Sun and Sand by Patricia Caldwell, 28" x 32" This week's inspiration comes from Patricia Caldwell. This is an original art work using Sahara Gradient, Cocoa Gradient, Maize Shades, Terrain Stash Pack.  Sun and Sand by Patricia Caldwell, detail She was kind enough to share two detail photos with us so that we could see her lovely quilting and embellishment.  Sun and Sand by Patricia Caldwell, detail For sharing, Patricia received a 20% coupon for the shop that's good for 3 months! If you have made anything with my hand dyed fabric I hope you will consider sharing it in the Customer Gallery. The only rule is that projects have to be complete. It doesn't have to be made totally from hand dyed fabric, just include a recognizable amount.
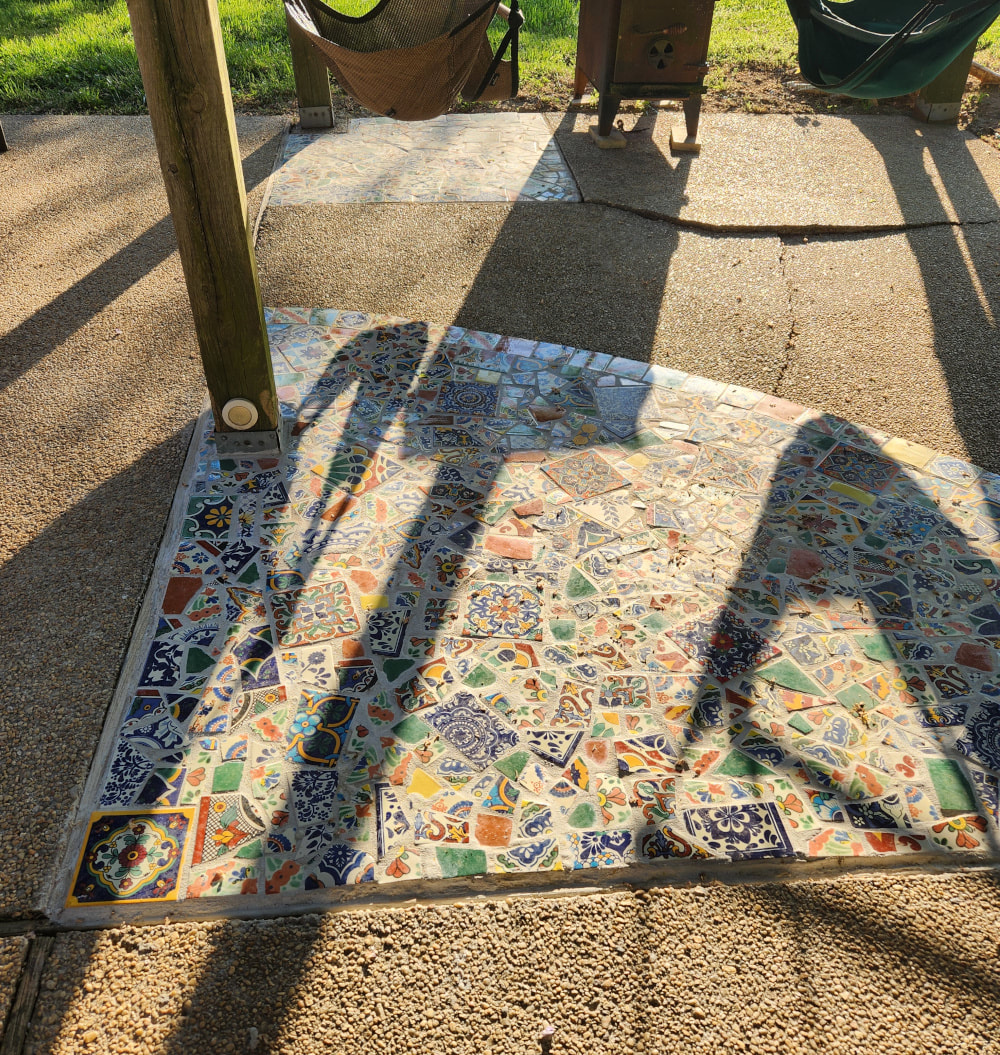 Last night we were invited back to Nadine and Jim's to see the finished mosaic. Her son did the grouting and the finished mosaic looks fantastic! This mosaic was a great solution for a difficult problem. Their patio is under a very old Wisteria plant that has become so heavy on the pergola that it's cracked the patio. they can't replace the patio without risking killing the Wisteria. The patio had become a bad trip hazard, especially in this corner. This corner was 3" lower than the point where the other 3 slabs meet. Her 99 year-old mother tripped on it last year. We had talked a couple of years ago about the idea of doing a mosaic to address this issue and the time came 2 weeks ago to get it done. She had a big collection of Mexican-style tiles. Her son poured concrete to bring the level up for us to lay the mosaic on. He also cut out the corner in the back of the photo and poured new concrete.  It was fun to smash up the tiles and I was thrilled to not have to do the grouting. But grouting makes suchs a difference in the look of the whole thing.  I thought about doing some quilting but after I was finished dyeing, Chris and I went to visit Mom and take her some strawberries. After dinner I just didn't have any mojo for much of anything. But I do have some photos from around the homestead.  Chris chopped wood 2 days ago and this afternoon he saw a wren building a nest in the pants he left outside.  She made a lot of progress in 2 days! We hated to destroy it but at least there weren't eggs yet. They used to build in the propane tank but they see to have abandoned that. One year they tried several times to build in the bumper of my car.  The black irises are blooming like crazy this year.  We saw the snapping turtle that moves between our pond and a neighbor's pond. It eats some of Chris' fish. He says there's a pair in the neighborhood lake that are 3 times bigger than this one.  The baby bluebirds will leave the nest soon!
Today I'll get the veterans quilts loaded and dye some shirts that I tied Tuesday. This evening we are going to go see the finished mosaic. Yay! |
FeedsTo subscribe click the RSS Feed button and copy the URL of that page into your blog reader.
In Bloglovin you need to search "Colorways By Vicki Welsh" to find the blog. About Vicki
I'm Vicki Welsh and I've been making things as long as I can remember. I used to be a garment maker but transitioned to quilts about 20 years ago. Currently I'm into fabric dyeing, quilting, Zentangle, fabric postcards, fused glass and mosaic. I document my adventures here. Categories
All
Archives
May 2024
|


 RSS Feed