Dyed and Painted Shower Curtain
In 2013 I executed a budget remodel on our guest bathroom. I couldn't replace big items but we did paint the cabinets, remove wall paper and paint the walls and install new vinyl flooring. It was kind of plain and I thought I might be able to make the room more special with a shower curtain project.
I was going for a forest look and got the dye pattern idea from work I had seen by Dijanne Cevaal. I've used that technique a lot but wanted it more controlled for this project. This is really a lesson in giving yourself permission to play. I was willing to start over if things went bad so I felt free to experiment.
I started with the shower curtain. I used my existing shower curtain for size and made the new one from quilt backing fabric. I used cotton thread so that everything would dye.
I soaked the shower curtain in soda solution and then let it dry for a day. It was still damp when I started working with it but it wasn't sopping wet.
|
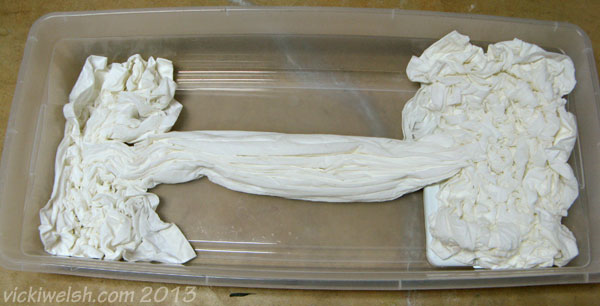
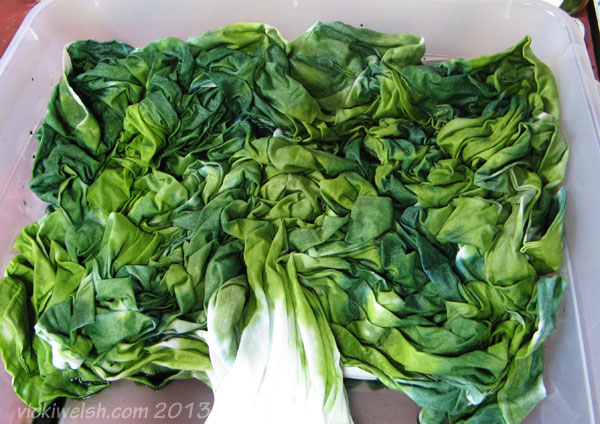
This is the shower curtain arranged in the dye bin. The center (tree trunks) is pleated. The tree tops is scrunched on the right and the grass is scrunched on the left. I didn't want the brown dye to migrate into the tree tops so that section is elevated on a lit from a plastic shoe bin.
|
|
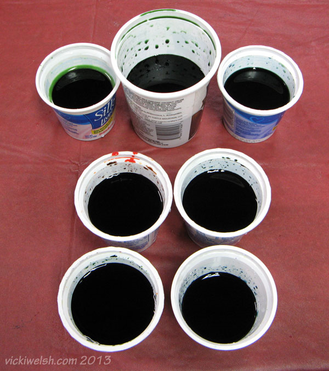
Mixing the dye is always the fun part for me. Starting with the tree tops I mixed about 16 oz of dye to match the wall color of the room. I poured some of the dye into two other cups. In one I added yellow to make a brighter green. In the other I added some blue to make a darker green.
I mixed 2 browns for the trunks. One was a chocolate brown and the other is a more orange brown. For the grass I dyed the darkest shade of the green I used for the tree tops and a second dark green that was more blue. |
|
I started with the tree tops pouring on the main color first.
|
|
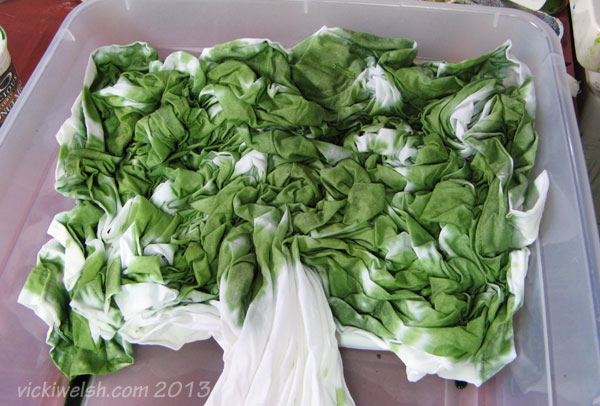
I added the 2 highlight colors. For this technique I do not do any squishing to mix the colors. I want a lot of texture and depth.
|

|
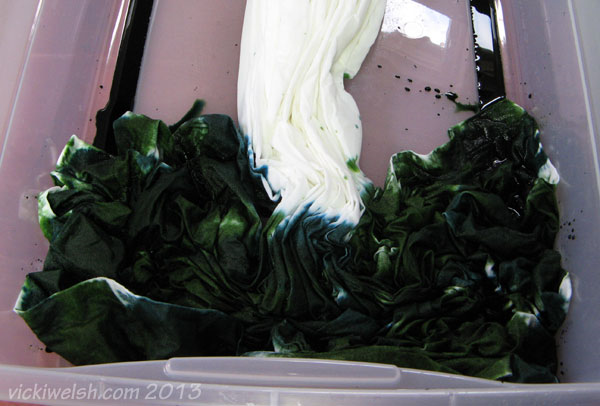
You can see here how some of the top dye has migrated to the "grass". That's OK but it shows why I wanted to keep the top section raised.
|
|
Here's the bottom part dyed in the 2 shades of dark green.
|
|
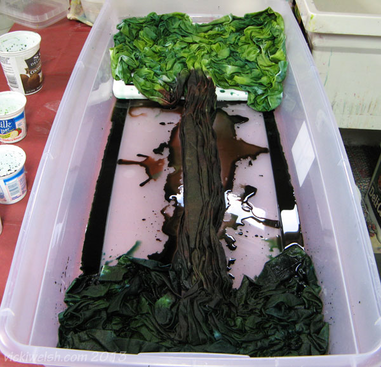
I applied the brown dyes last. I leave my fabrics to batch for 24 hours.
|
|
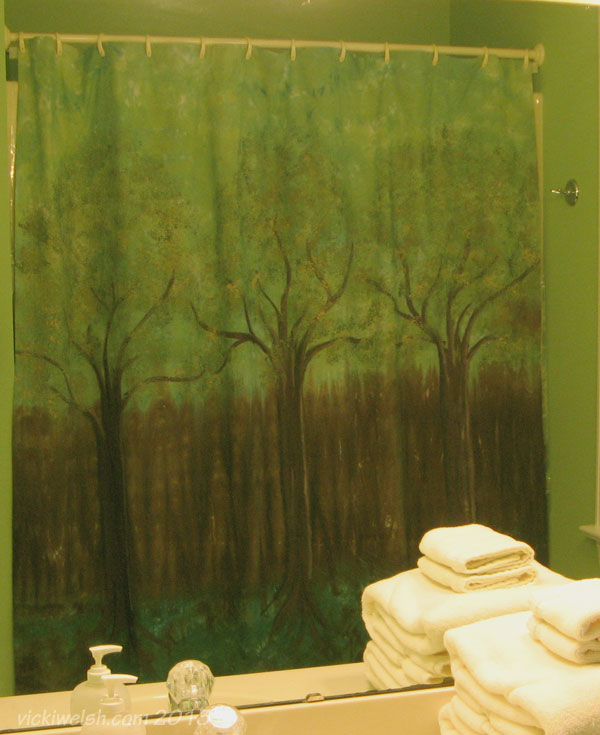
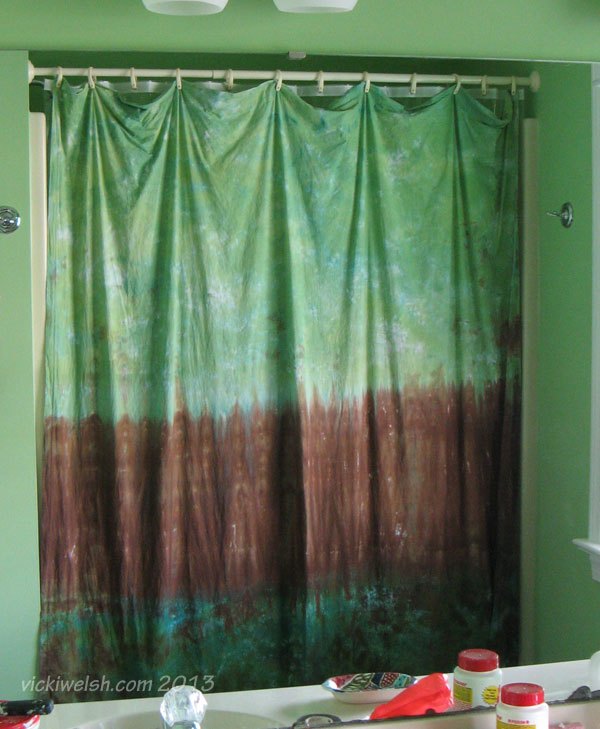
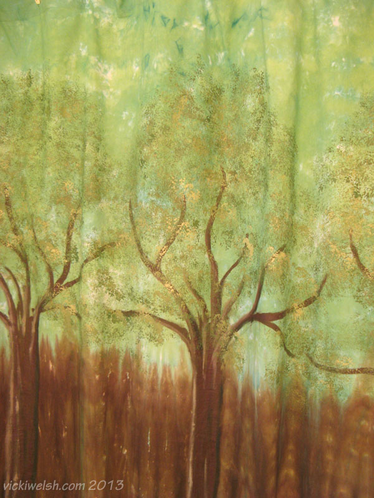
Here's the finished shower curtain dyed. You can see how well the top dye matches the wall color. It would have certainly been fine to leave it like this but I wanted trees and I felt this looked flat.
I had worked too hard to prevent color migration so it looks more like a fence than a stand of trees. This is where I usually give up and move on. This is the point where we all need to step back and say "it's only fabric". Try something new and see where it goes. The worst case scenario is that you buy another piece of fabric a try again. I got up my nerve and got out the fabric paints. |
|
I got out the fabric paints and painted 3 trees. I don't have in process photos but I can describe what I did. I started by mixing a brown paint that closely matched the dyed fabric. I painted three free-form tree trunks and some branches. Then I mixed part of the left over brown paint with some purple and part with some red and used those 2 on the tree to give some highlights.
Next I mixed a bit of the brown with some white and painted highlights on the left side of the tree and branches (because the window is on the left side of the room) and then mixed some of the brown with black to paint some shadows on the right side of the trunk and branches. For the leaves I mixed 4 shades of green and did a simple sponge painting technique layering the colors. I used pretty much any paint that I had and included some metallics in the tree and leaves. I've never painted anything like this before and only had the guts to do it because I was willing to throw it out and start over. Give yourself permission to play and you may be surprised by what you can accomplish! |