|
Because of my Save My Bleeding Quilt article, this topic comes up a lot for me. It's also a bit of a pet peeve. There's SO MUCH BAD INFORMATION out there about dealing with bleeding fabrics and about how to process hand dyed fabrics so that they don't bleed. It annoys me no end so I will continue to talk about it any time I get a chance. When I was vending at Birds of a Feather I had a free handout in my booth to help continue spreading the word. It was there that I met Rhonda M from Houston. Her home was flooded during Hurricane Harvey and one of her quilts bled when she washed it. I gave her the handout and talked her through the soaking process to try to get the dye out of her quilt. It doesn't work all the time but it works best when the bleeding is spotty like this. Another reader recently had a quilt that turned an even pink all over so that meant that the other fabrics in the quilt really wanted that dye and absorbed it. She was able to get about half of the pink out but not all of it. But Rhonda has much better luck! All of the dye came out of her quilt and she's happy again. These stories make me very happy too. I get at least one query or story every week about dealing with bleeding quilts. It's really sad because this can all be avoided by soaking fabric, using my process, as soon as it comes into your house.
I've decided that today I want to try to address some of the specific comments that I've seen lately on Facebook and some information that I heard in an online dyeing class. About commercial fabric and quilts: Just giving a quilt with some color catchers is not a very nice way to gift a quilt but it seems the favorite Facebook way to gift a quilt. If you are worried about a quilt bleeding please take the time to either soak the fabrics before you make the quilt or soak the quilt before you give it. Color catchers aren't going to prevent or fix a bleeding problem. They look really cool but it's the soap that does the work. Let's say you gift a quilt and it bleeds the first time the recipient washes it do you think they are going to tell you that they ruined "your" quilt? No! They are going to stuff it in a closet and hope you never ask about it again. It will eventually be used for moving pads or pet bedding. They will never know that it could probably be fixed. Soap and water are the key and you need plenty of both. A soap molecule is hydrophilic on one end and hydrophobic on the other. The hydrophilic end really wants to attach to a water molecule. The hydrophobic end hates water and looks for something else to attach to. That something else might be dirt, oil or loose dye particles. That means that you need lots of water molecules and lots of soap molecules to pick up all of the loose dye molecules. If that dye doesn't get attached to a water molecule it's going to attach back to the fabric. You can't fix a bleeding fabric or quilt in a HE washing machine. There simply isn't enough water. Time is also important. Some dyes take a while to let go. Blues are especially notorious. Soak a minimum of 8 hours to make sure that the fabric isn't going to bleed. This is why simply pre-washing fabric will not work. I recently bought a commercial purple fabric. I washed it once just to test my theory. I put in a color catcher to see if it bled in the wash. It didn't. Then I soaked it overnight and by morning the water was DARK purple! It was eventually going to bleed during one of the washings had I not soaked that fabric because exposure to water is cumulative. Any Dawn detergent will do. There's nothing magical about Blue Dawn! I compared the ingredients on all of the Dawn products and they should all work equally fine. I only tested the Dawn Pure Essentials but would use whichever is closest. Dawn does work better than Synthrapol and is a lot less expensive. Don't use Retayne to fix a bleeding quilt! Retayne "retains" dyes. That means that if there's loose dye in the water the Retayne will do a great job of attracting that loose dye back to your quilt and not necessarily where it came from. Retayne was developed for fabric dyers and I learned the hard way that you can only use Retayne on single color fabric. Regarding hand dyed fabrics: If you dye or purchase hand dyed fabric the same rules about water, soap and time apply. Here's the process I use to make sure that my fabrics are colorfast. With this process I can wash all of my fabrics together with no back staining. I wash yellows and dark blues together with no problem. 1. Rinse the fabric in cold water first to remove any soda ash. Put the fabric in a bucket or sink of cold water while you rinse out all of your fabrics. 2. If the fabric is very dark I might run through a couple of quick cold soaks to get some of the quick releasing dye out. Once the water is dark I drain. 3. Fill a large tub or sink with HOT water and enough soap to get a good suds. Add the fabric and agitate the fabric wearing heavy gloves. Cover the fabric with plastic bin lid and weight them with bins of water. You want all of the fabric under water. 4. Check the water in an hour. If the water is dark drain it and fill the tub again with HOT water. Check in a few hours and repeat if necessary. 5. Leave the fabric to soak 12 hours. Change the water and soak 12 more hours. Do this every 12 hours until the water is clear. Yellows and oranges will be done within 12 hours, reds generally take 24 - 36 and turquoise and cerulean blues can take 48 hours. If you follow this you will have colorfast hand dyed fabric that you can safely use in any project. OK, I feel better now that I've got all of that off my chest and it's time for me to rinse out yesterday's dyed fabric. 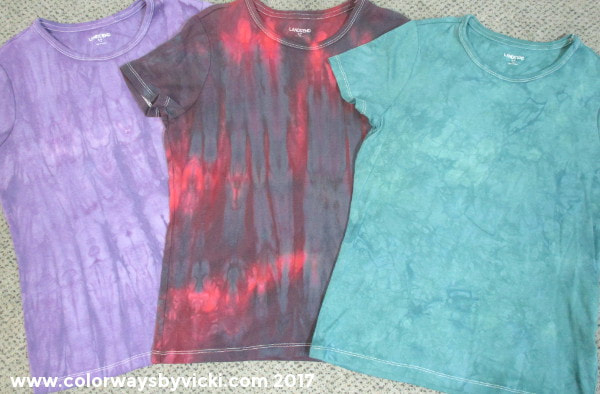 Every couple of years I buy some plain white knit shirts and dye them. I've dome tie dye and ice dyed but the ones that I wear most often are the ones that are simply textured dyed so that's what I did with these shirts. These 3 are all short sleeved for summer. 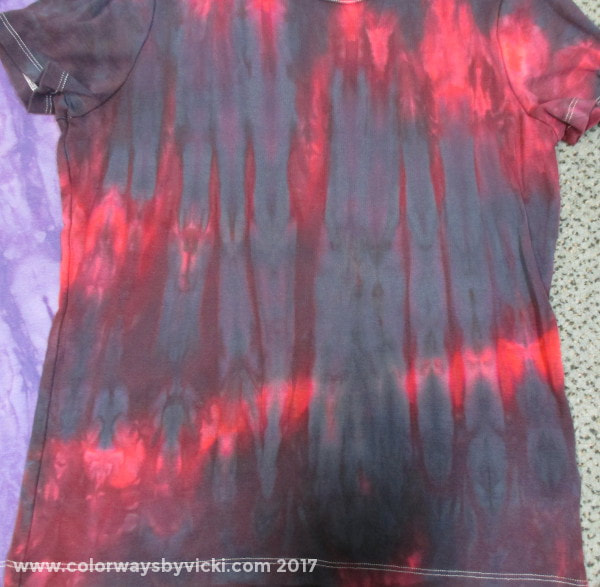 Of course this is my favorite. I'll wear this one out next summer. 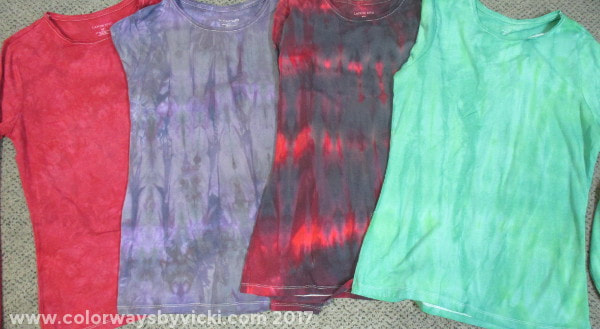 I did a red and black version in long sleeved too! I really love the purple/gray one but I don't love the green one. But the good thing about dyeing is that I can just dye it again today. I think it will get some blue added to it.
These shirts came from Land's End. They had a sale around Thanksgiving and I think I got them for between $10 and $15. They dyed great. I've dyed shirts from J Jill, Eddie Bauer and Land's End and they all dye great. Since I can't share what I'm sewing I thought that today I'd share what I do when someone contacts me for a custom palette. This one was pretty straight forward. 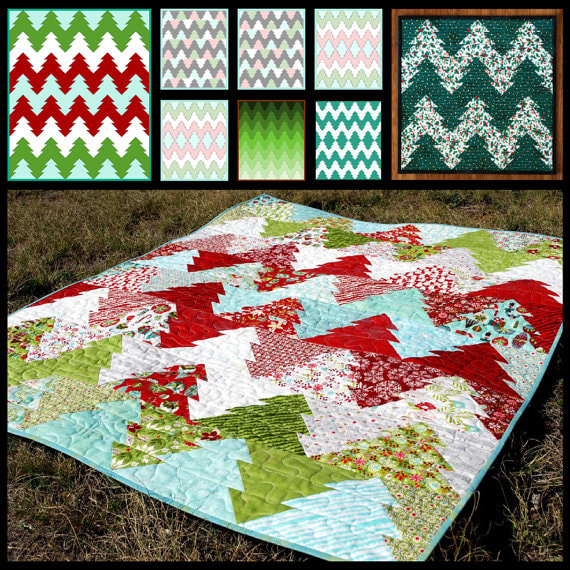 A customer contacted me about making this quilt. She wants to make the green gradient version. But I didn't know that. 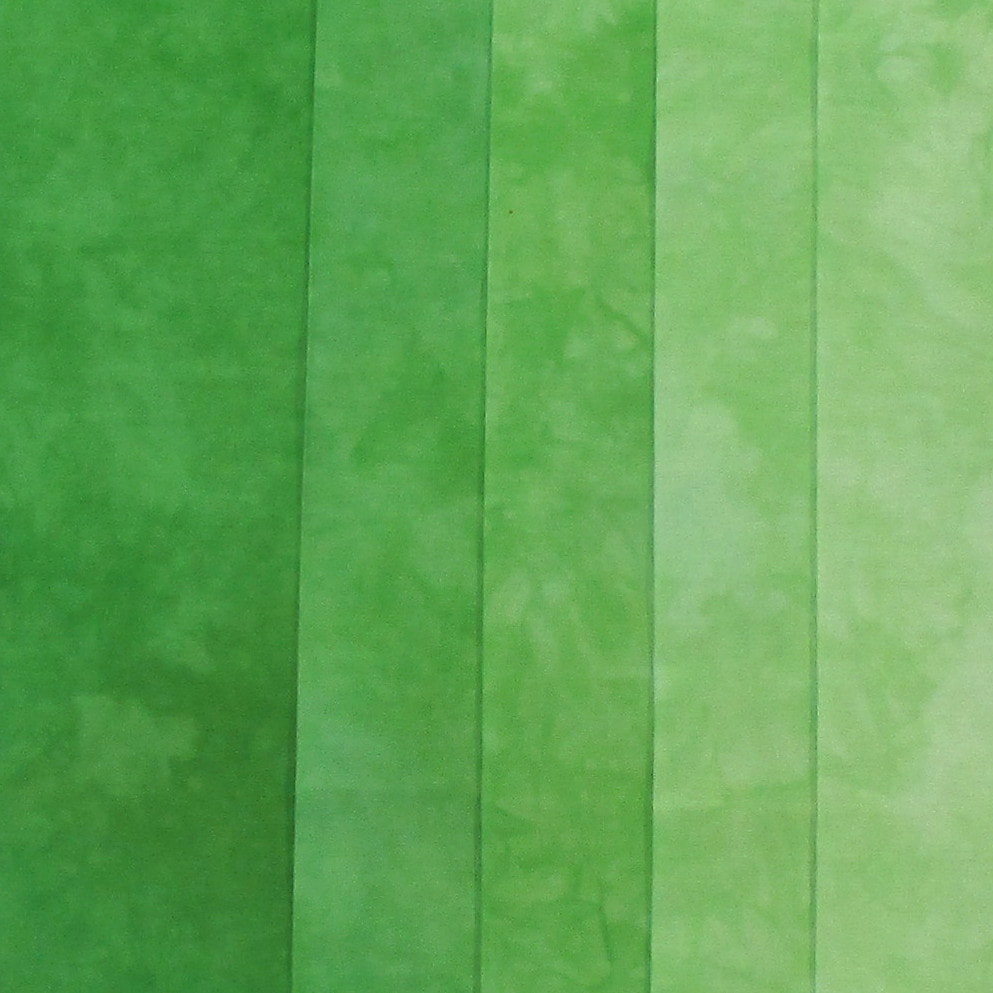 The request came through that she wanted this fabric in 9 steps. The problem with that is that the dark green in the image is the darkest possible shade so the other 4 steps would be lighter. I know from experience that those last 3 steps would be so light that you would hardly be able to tell them apart. So before I do a custom dye order I'll ask what the fabric is going to be used for. In this case she sent me a link to the pattern above and once I saw the gradient version I knew that what she asked for wasn't really what she wanted. My job was to put together some options for her. 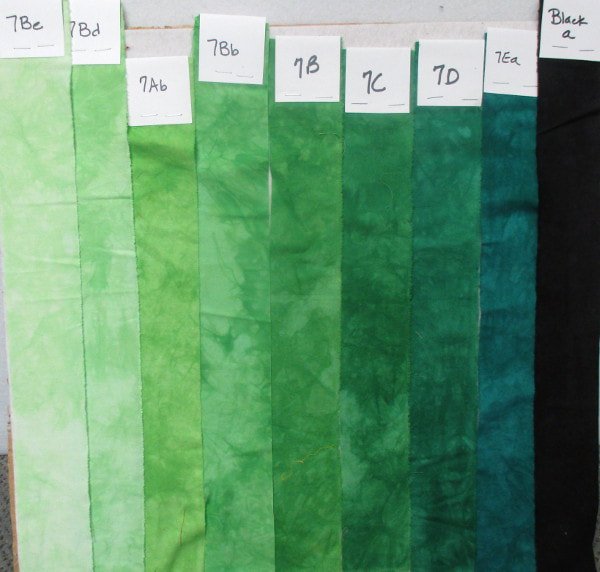 This is where my color swatches come in handy! First I pulled out the swatches for the color she selected. Those are the 7B samples (7Ab is in there because I'm missing 7Bc). Then I added darker shades from the same green family. By that I mean that all of these greens are made with the same yellow and blue just in different ratios. I also added black because she was considering black as the darkest color. I'm not really fond of that idea. I think it's way to stark. I prefer the darker colors to be more blue. 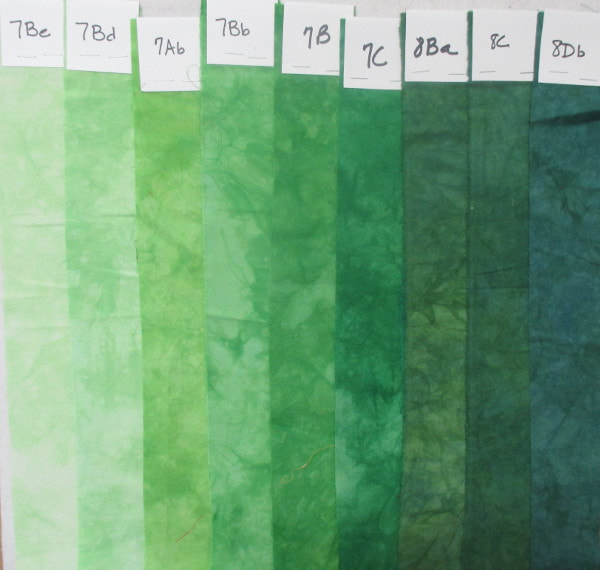 For this sample I started with the same base green (7B) but as I went darker I switched to another green for the darker shades so that there would be less blue. 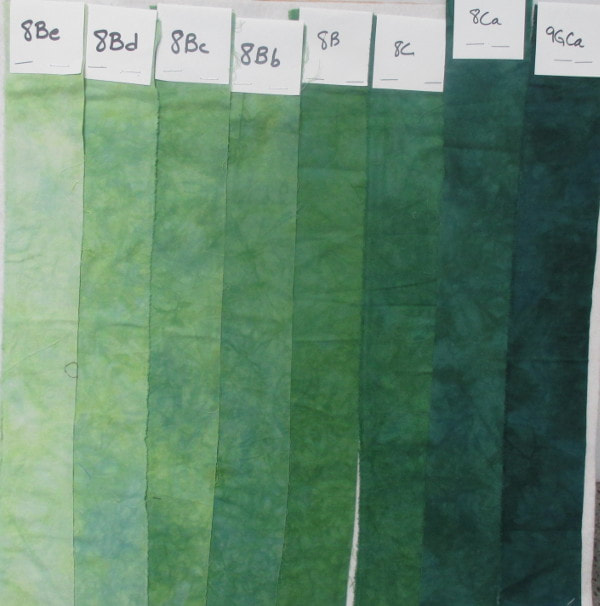 For the last sample I picked a different green just to give her another option. This is a darker base green (8B) so I could go even one step lighter on the light side if she wanted. 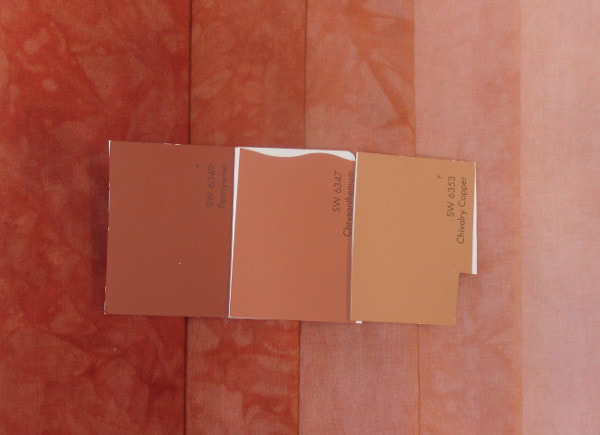 Here's another custom order that I've done recently. This customer needed a color matched. I focused on the dark and medium paint chips. Her lightest shade is actually a different color and I could pull that color from my Copper Mine gradient. The darker paint chip was the challenge. I had colors that were close but not close enough. This is a more complex color because it involves mixing 3 colors: a red, a yellow and a blue. Too much blue and it goes purple, too much yellow and it goes brown. There are also 2 yellows and 4 blues to choose from. It took a few weeks but I eventually got this and she's happy!
These are the things I love doing. I love it when people ask me to create new colors or palettes. Occasionally I can't do what they want but I'm always willing to give it a try. The next one I'm working on is seriously complex and involves about 40 different fabrics. We'll see if I'm able to get that one. 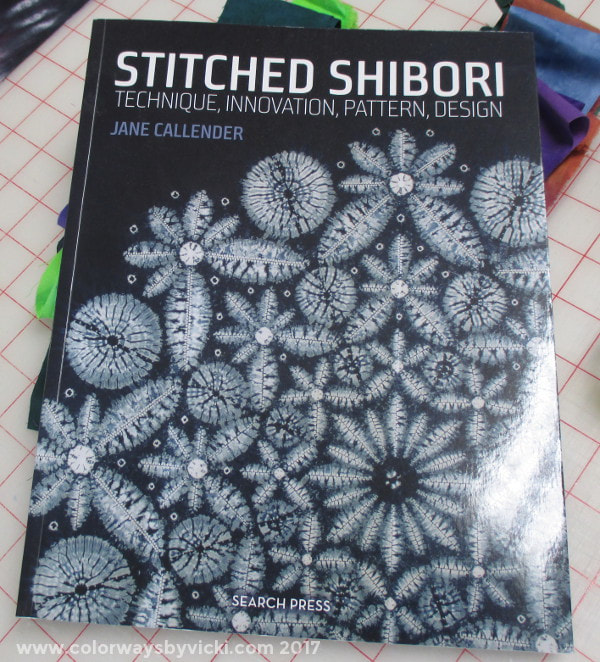 A couple of years ago I had another shibori book that I used to make a lot of samples of shibori fabric. You can see them all in my shibori gallery. It was a very good exercise and I've never pressured myself to do anything with those pieces. It was all about the learning. Earlier this year this book came out. I believe that most books that are published in the craft arena are pretty much crap but this one is outstanding. So I'm going to start a new personal sibori series and this one will focus on all stitched motifs. I think I'll take a chapter a month and do as many pieces as I can. You are welcome to stitch and dye along with me. If you think you want to do this but don't want to dye them contact me and we can work out something where I can dye your pieces for you. Let me give you a peek into the book so you can see if you want to buy it to work through it yourself. 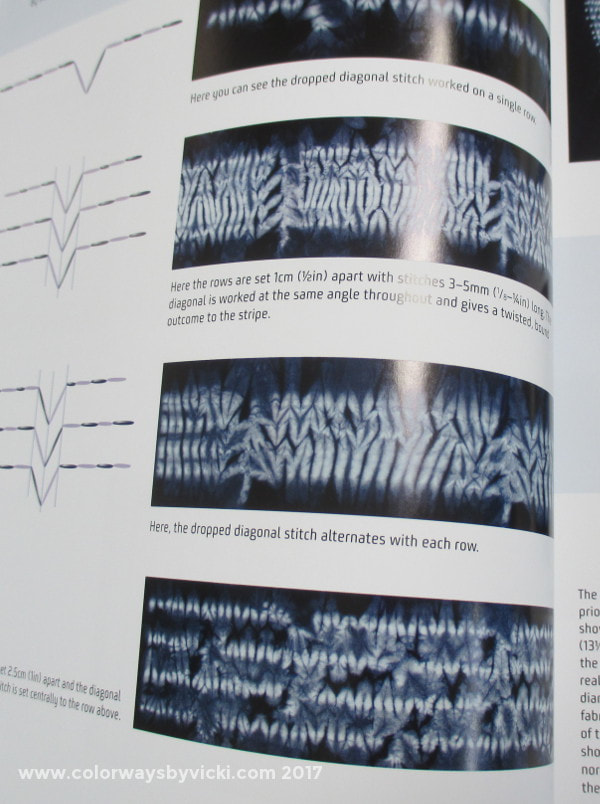 There's single layer stitching. 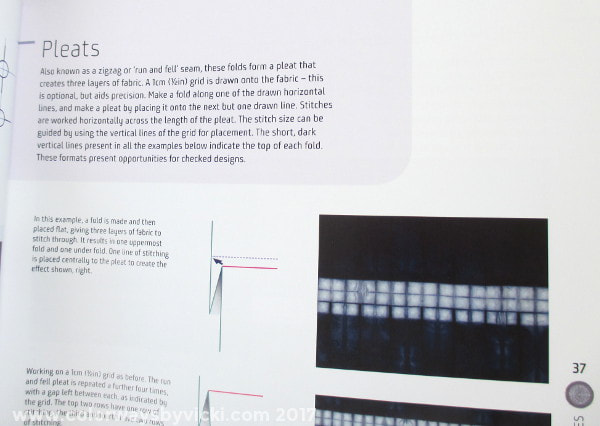 Pleating techniques 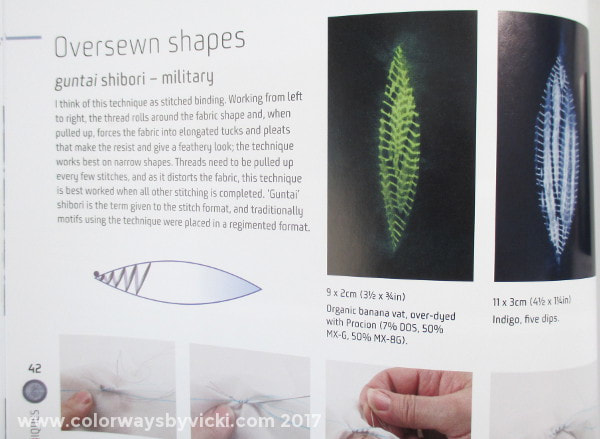 Shapes 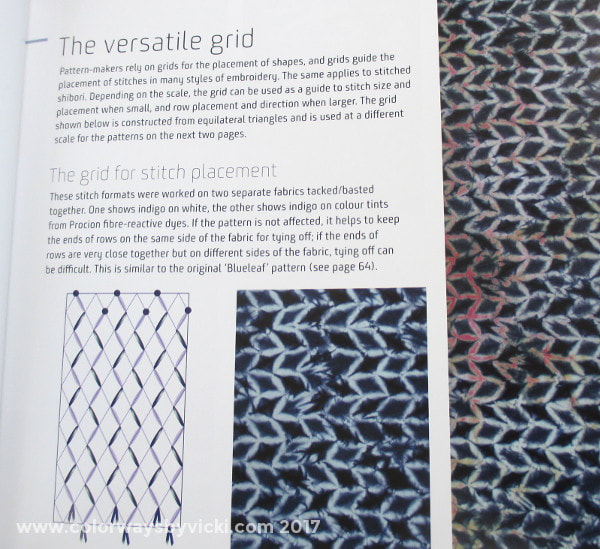 Grid patterns 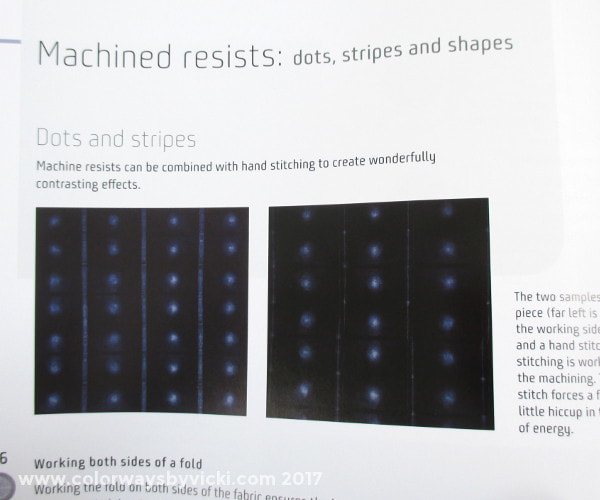 Machine stitched resists and tons more. In the book that I used before the designs were mostly historical and traditional designs and most were out of my skill set. This book is different. Jane Callender gives very detailed instructions and I've already learned some great techniques that I didn't grasp before.  I took the book and some fabrics on vacation the past 2 weeks and got started on some stitching. It was great work for the 14 hour card drive in each direction. Now I have to figure out if I want to dye them traditional blue (like the last set I made) or go in a different direction. Meanwhile I'll keep stitching and will try to show progress at least once a month.
I mix my dyes using only the 10 pure colors from Dharma Trading and I mix all of my colors from those. That means that as soon as a dye started to loose strength that I can't use it in my recipes anymore. How do I know when they start to weaken? I tested it of course! I have a chart right here. 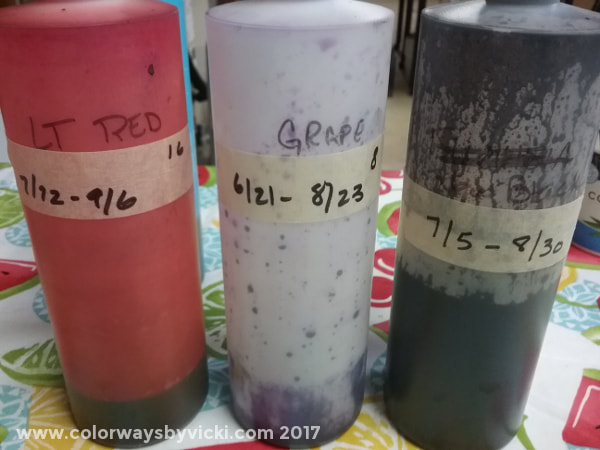 When I mix my dye concentrates I label the bottles with the date made and the "expiration" date. I've been doing to long enough that I'm pretty good at estimating the amount of dye I use each month but I still have some dyes that occasionally expire. Expiring just means that it loses a little strength. The dye is actually good for several more weeks. It's just weaker. I can't throw dye out so I had to come up with a way to use it. 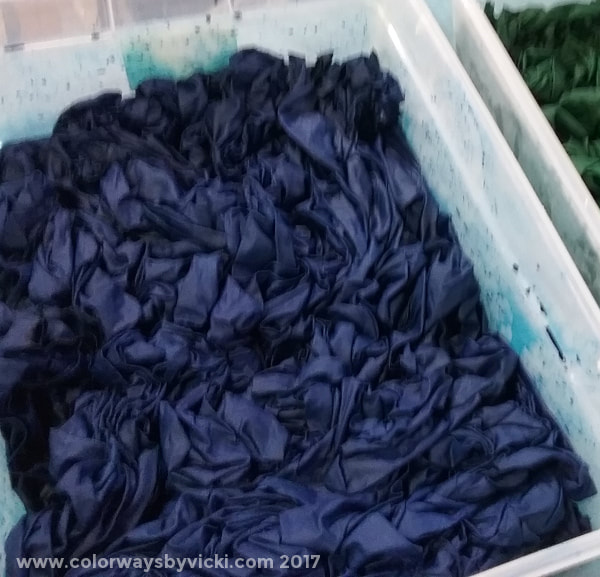 Sorry for the bad photo. I only snapped one and it's too late to get another. Veteran's quilt backs is the answer! Country School buys the backing and batting for the veterans quilts that Terry and I quilt. I buy the backing from Marshall Dry Goods by the bolt and used to buy printed fabrics. I'd get a blue and a gold or tan and force match the quilts to the 2 backs. A couple of years ago I decided to start buying one bold of white to dye in other colors and that's what I use the expired dyes for. Now I just buy 1 printed bold of backing and 2 of white so most of our quilt backs are dyed. We still mostly need blue backs but several shades of blue. Conveniently, most of the expired dye is one of the blues or black. I will add "good" yellows or red for green and purple backs. 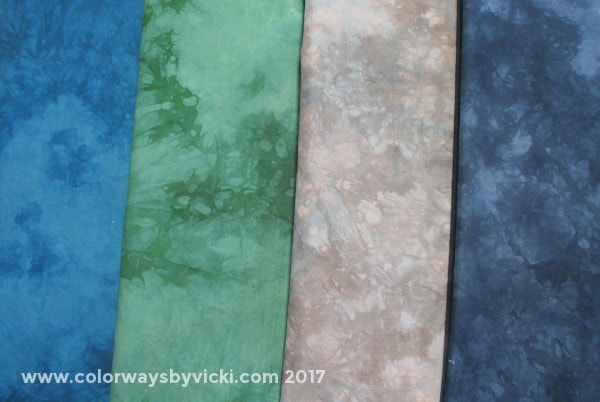 Here are a few that I have ready and waiting for quilts. Here are just a few of ones that I've done over the past year. I think these are much better than the cheap printed backing fabric that we buy. I'm glad the CSQ members let me make the dyed backing for our quilts. I think we get prettier colors and I don't dump good dye down the drain.
The most visited place on this whole website is the page of instructions for dealing with bleeding quilts. I get lots of emails from people telling me that these instructions saved their quilts. I know of three grandchildren who received pristine quilts for Christmas after their Grandmothers dealt with bleeding that seemed to ruin their special Christmas gifts. That makes me feel good but we can avoid all of that drama if we will treat our fabric before we ever sew with it. The key lesson that I learned through testing is that the fabric needs a long time exposed to water for it to let go of all of the excess dye and water exposure is cumulative. Three 15 minute washes is equivalent to a 45 minute soak. When we pre-wash fabric we are only giving the fabric about 15 minutes of exposure. I learned that reds generally need 8 - 12 hours soaking to release all of the excess dye and blues take even longer. A batik turquoise will still bleed dye even after 48 hours. That would be a lot of wasted water and electricity for repeated washing when a couple of soaking will do. Some commercial fabrics don't bleed at all but you never know which ones do until you soak them. It has nothing to do with Wal-Mart vs Quilt Shop fabric. As an example, I've bought Benartex fabric one year that bled and a related line the next year that didn't. Given that all of this fabric is printed overseas I just don't believe that anyone has any real control over those processes anymore. I soak EVERY commercial fabric that I buy and I soak all of my hand dyed fabrics before you ever purchase them. 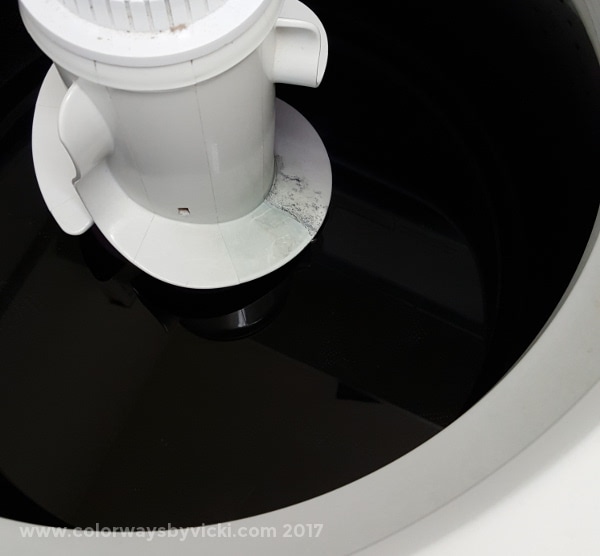 Yesterday I soaked 10 yards of some new fabric that I bought. After an hour of soaking the water was still quite clear but I left it overnight. This is what I found this morning. Imagine if I had sewn the fabric into a quilt with light colors. It might not have bled in the first couple of washings but eventually all of this dye would have released and ruined my quilt. I emptied the washer, filled it again and let it soak a few more hours to make sure it was done. Now I can use it confidently in any quilt. Soaking process for new fabric: Be sure to use a tub that can hold a lot of water. HE washers will not do the job. You need a large volume of water and soap. Hot water will make the process happen faster and Dawn dish soap (any of them) is the best soap to use. Use enough soap to get a good suds. That amount depends on the hardness of your water. When the water turns dark, drain the tub and start the process again. You are done when the water remains clear. 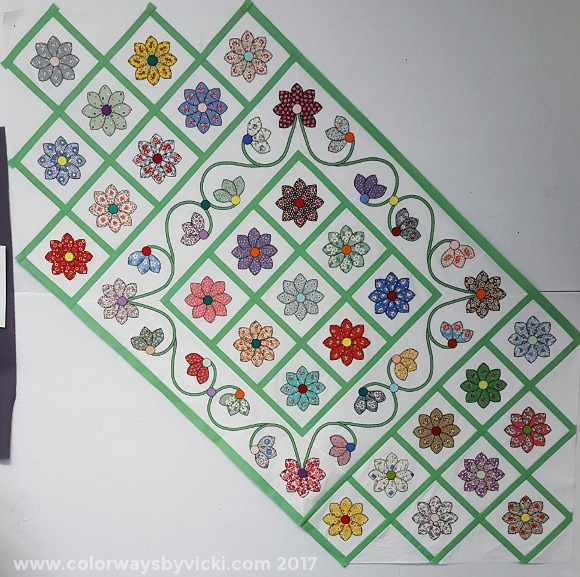 Let's not leave this post with just an ugly washing machine photo. Here's my applique quilt coming together. I've got 2 more corners to add and then a green outer boarder. Then I'll finally be able to draft up the outer border.
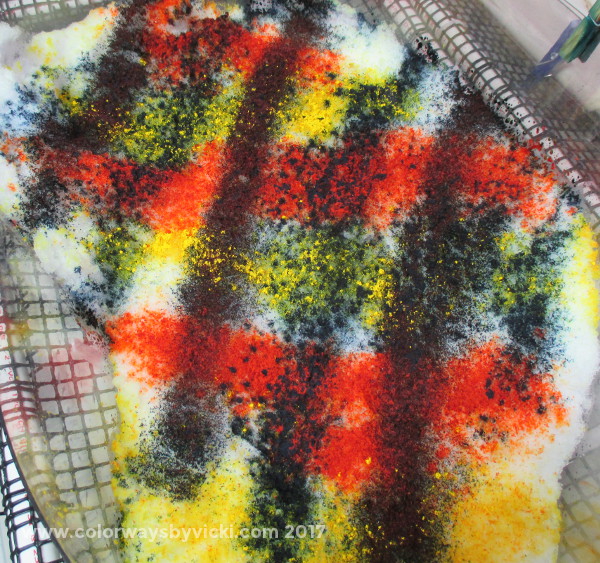
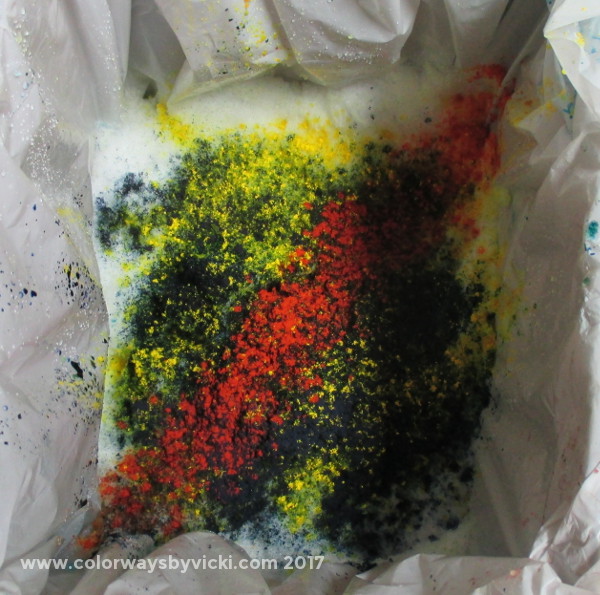
The snow melted on my dyed fabrics. We still have plenty outside. Here's how the bins look before I washed everything out this morning. Everything is soaking now. I love most of the pieces. A couple didn't turn out so great but that's how it goes. 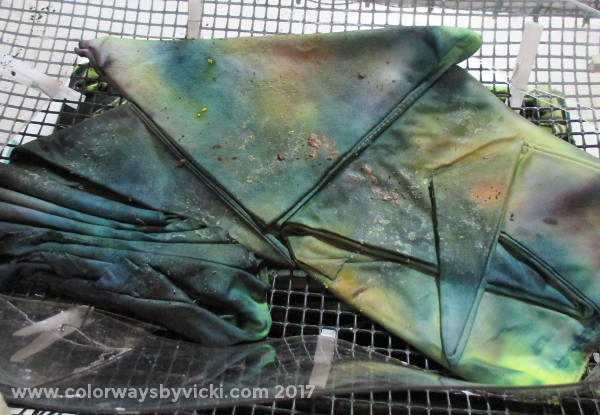 I wanted ruddy greens and I think I succeeded. 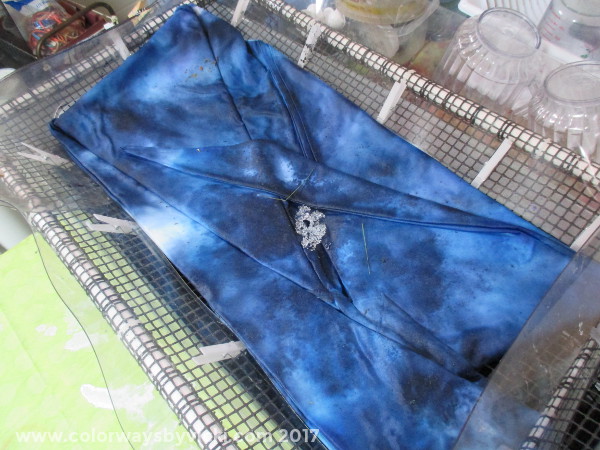 One of these is a 108" square quilt back...or front. 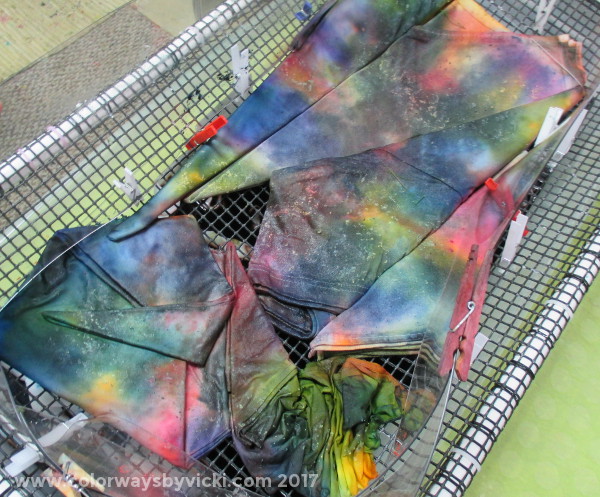 This didn't produce the browns that I wanted but I love all the colors and there's a Tshirt in there that's awesome. 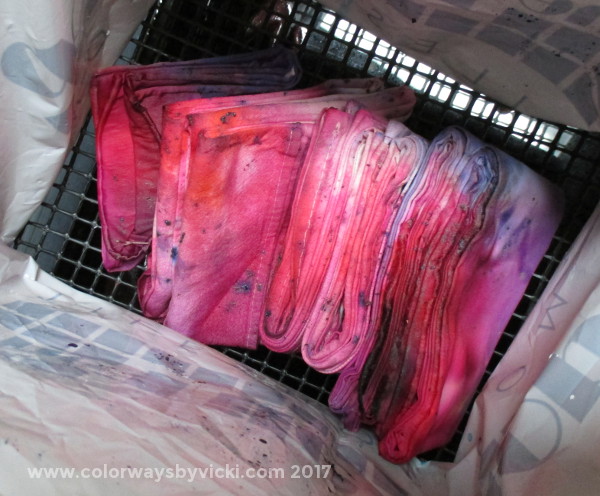 This one and the next one are pieces done in boxes so that I can sit the pieces on edge. It gives a totally different look. I wanted greens (check) and red(not so check). I got more pint than red but they still turned out really nice. 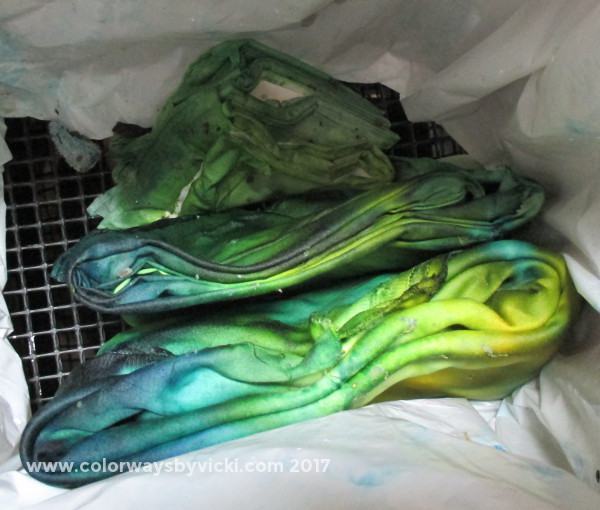 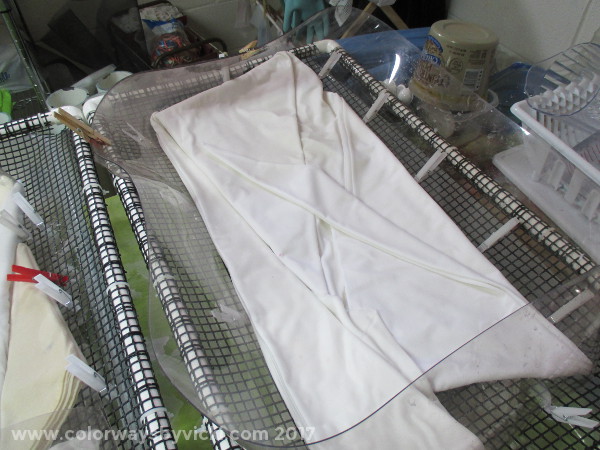 I peeled myself out of the recliner long enough Sunday to prep fabric, shirts and other things for snow dyeing. The most time consuming part of snow or ice dyeing is preparing the fabric. Most of the fabric isn't on grain so I have to do some tugging and stretching to get the fabrics square so I can get a perfectly centered mandala. The 108" square pieces are the hardest and I try to do one in each session. I got fabric ready for 4 trays. After I get all of the fabric folded I soak it all in soda ash solution for about a half hour and then arrange them on the 4 screens to get the ready for the snow and dye. This bin had one large quilt back and one 58" cotton sateen mandala. 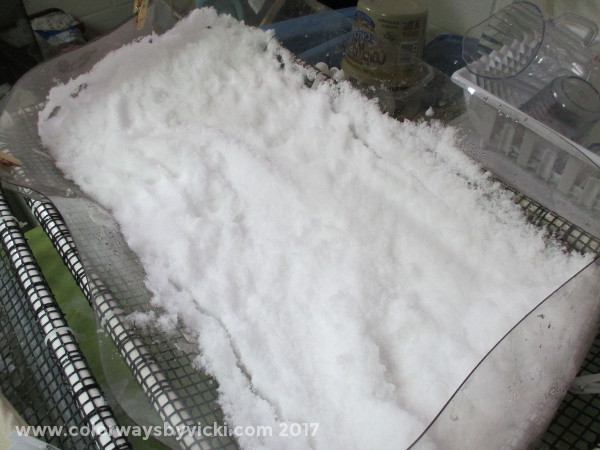 I have these wide plastic strips that I clip around the fabric to hold the snow/ice on the fabric. I start with a layer of snow. It's just enough to cover all of the fabric. I do this because I try to avoid getting dye dots on the fabric. 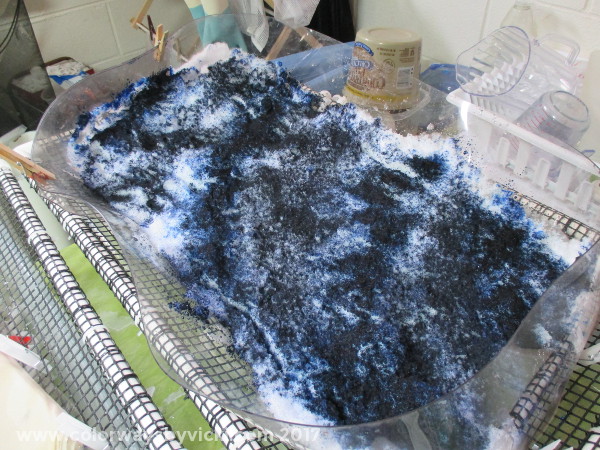 This one will be all blues. I don't bother with turquoise anymore because it's a colossal waste of dye. Turquoise just will not set in cold temperatures so 90% of it goes down the drain. This one will have sky, cerulean and cobalt. I cover this with several more inches of snow. This snow is so dry that I actually added about 3 more inches of snow after it melted some. 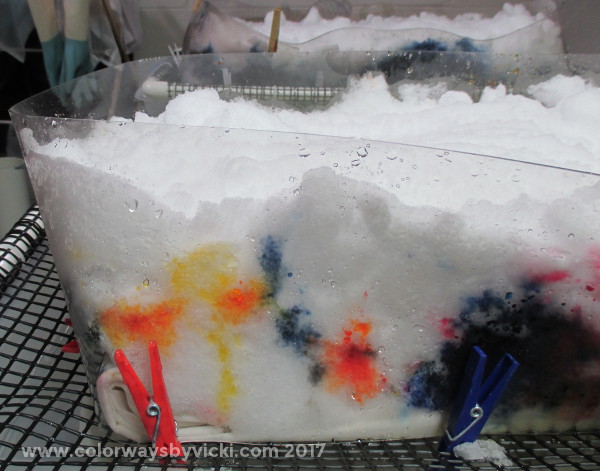 Here's what it looks like from the side where you can see the layering. Here are 3 more bins. On the left I'm going for golds, orange and browns. The middle is yellow, gold and black and the right one should come out in shades of green. 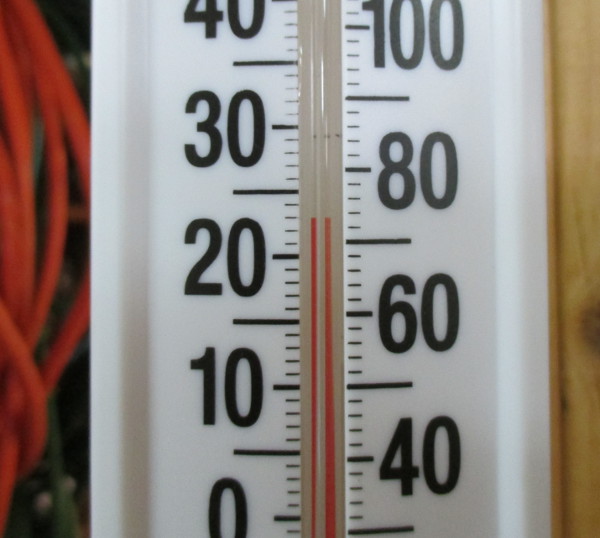 Chris has the wood stove going and 72 is about as low as it will get down there today so the dyeing should happen pretty quickly.
One of the things that I loved to do for my customers is color matching and the best way to do it is with paint chips. Two weeks ago a customer sent me paint chips for a whole cloth that she is going to quilt for her son's newly painted room. 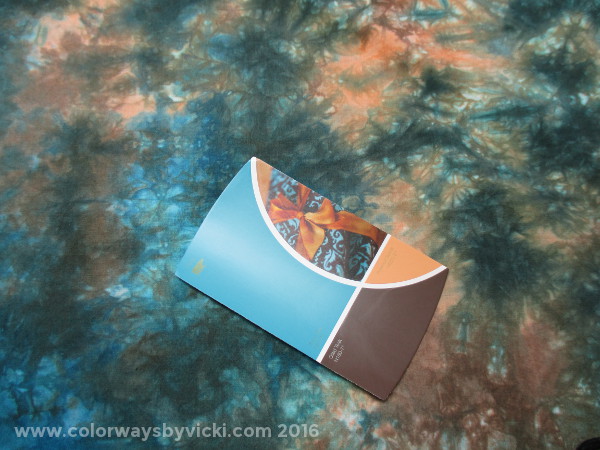 It's always risky to mix very light colors like the orange with very dark colors like the brown. In this case it worked just fine. 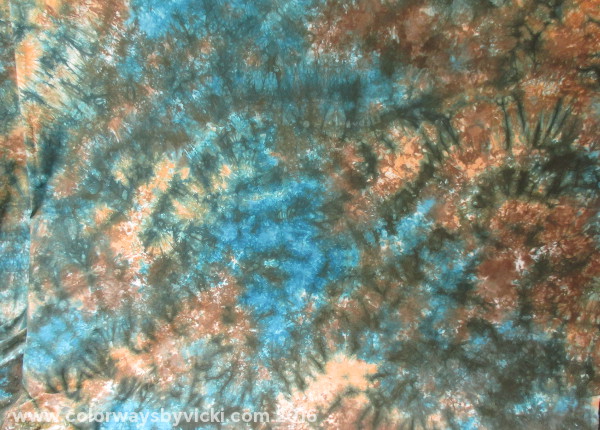 I couldn't get a photo of the whole thing before I shipped it because it was too windy outside. This is about a 3rd of a 108" square piece of fabric. I'm really thrilled with the way it turned out.
I was kind of hoping she would hate it because it would have been a perfect backing for one of my quilt tops. I suppose I could dye another.... 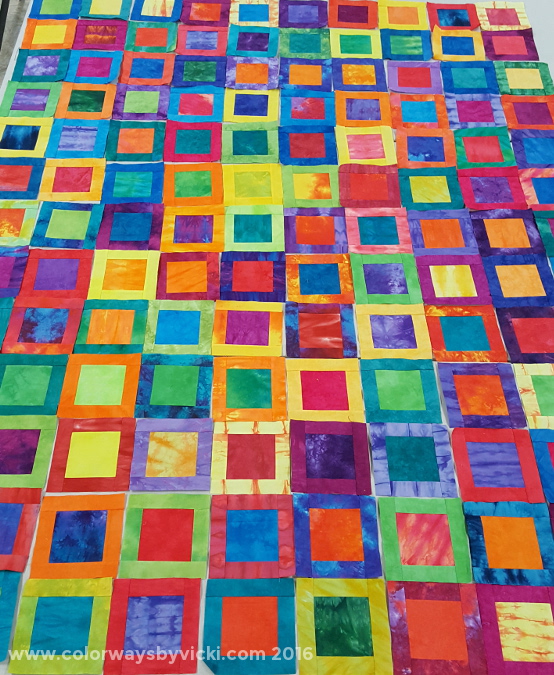 This past Friday and Saturday were sewing days with Country School quilters. I have this project packed up and only work on it there. It makes packing for the day very quick and easy. I have a dedicated sewing machine and set of notions for "travel quilting" so I can get ready in about 5 minutes.  This is a perfect project to work on because the blocks are simple so I can talk and sew at the same time. I just love these bright colors too so I really look forward to working on it.  I had a a stack of bright fabrics and cut as many blocks as I could. I should have enough for a king and lap quilt. This pretty stack represents 180 out of 318 blocks. That doesn't include the border blocks!
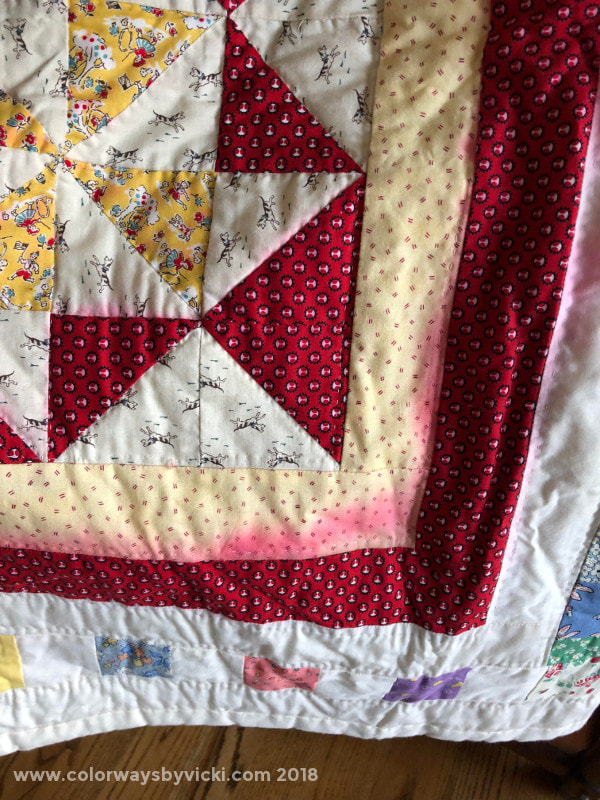
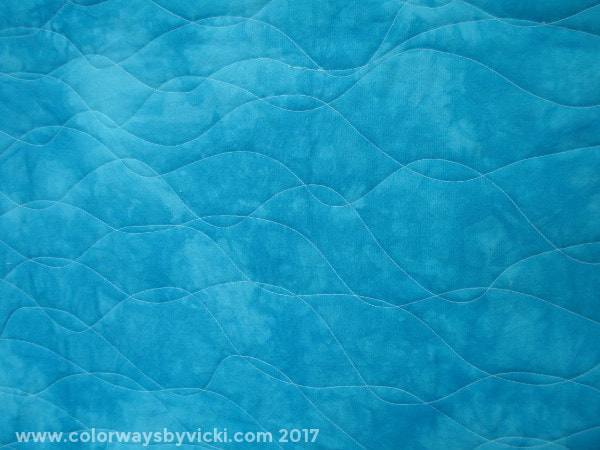
I have a tutorial for this quilt here. |
FeedsTo subscribe click the RSS Feed button and copy the URL of that page into your blog reader.
In Bloglovin you need to search "Colorways By Vicki Welsh" to find the blog. About Vicki
I'm Vicki Welsh and I've been making things as long as I can remember. I used to be a garment maker but transitioned to quilts about 20 years ago. Currently I'm into fabric dyeing, quilting, Zentangle, fabric postcards, fused glass and mosaic. I document my adventures here. Categories
All
Archives
May 2024
|


 RSS Feed