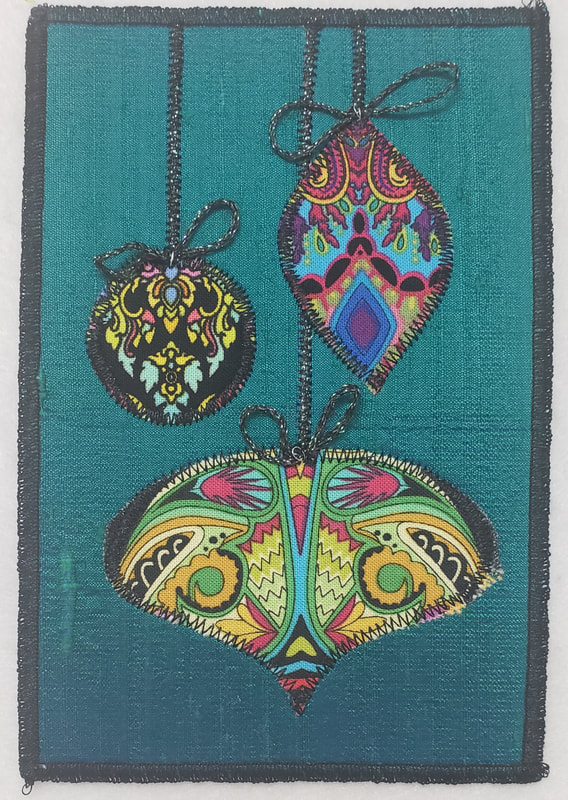
 All of the 2021 Christmas cards are done! With all 3 designs this year I started with a specific fabric and built the design from there. That's also true with this ornament arrangement. I think that Paula Nadelstern's fabrics really lend themselves to Christmas designs so I use these fabrics almost every year. I made 30 of these cards so I started by cutting out 90 individual ornaments from pre-fused fabric and I found a beautiful teal silk for the background. This photo doesn't really do the silk justice. 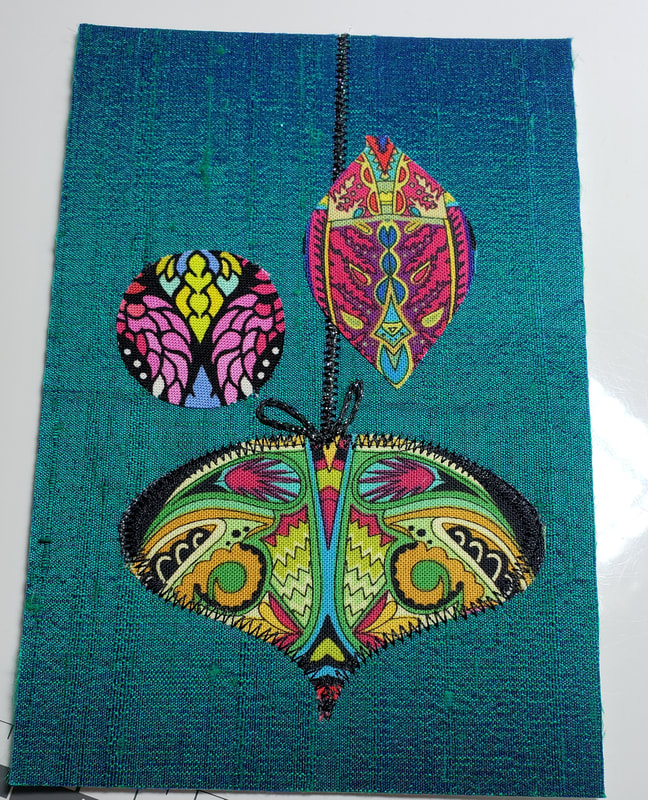 These were complex enough that I had to do some planning for the construction phase. I had to start with the big ornament. I fused and stitched that ornament and it's hanger before fusing on the 2 smaller ornaments because the oblong ornament overlapped the hanger of the big one. 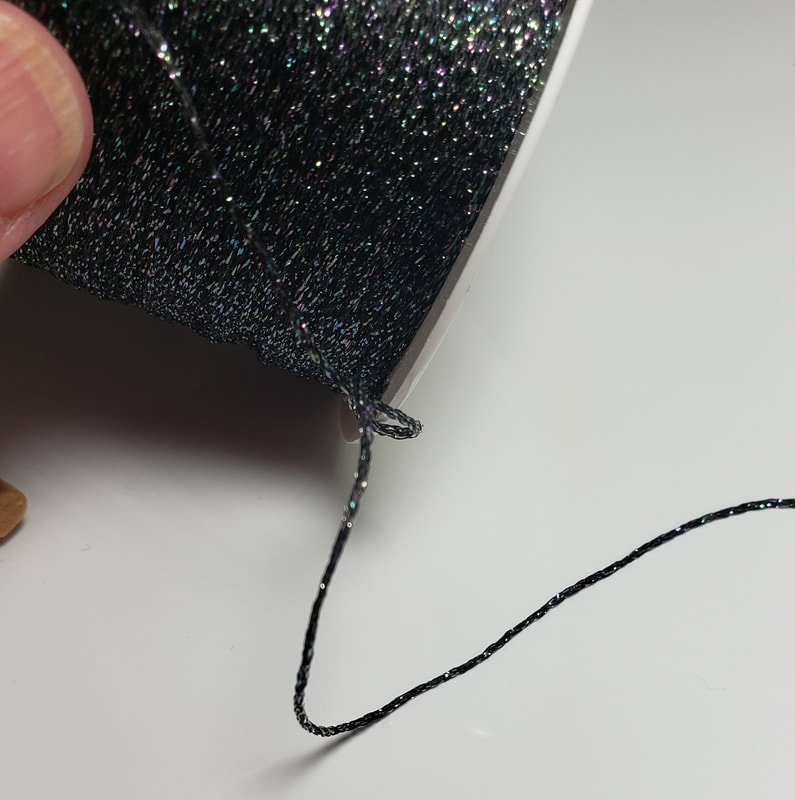 On my sample card I first stitched the hanger with just a zig-zag stitch but it really wasn't heavy enough. I found this thread/yarn/whatever in the Cabinet of Possibilities. This is from Madeira and is over 20 years old. It was called Lame' and I have it in 6 colors. I rarely use it but sometimes, like now, I'm really glad I have it! 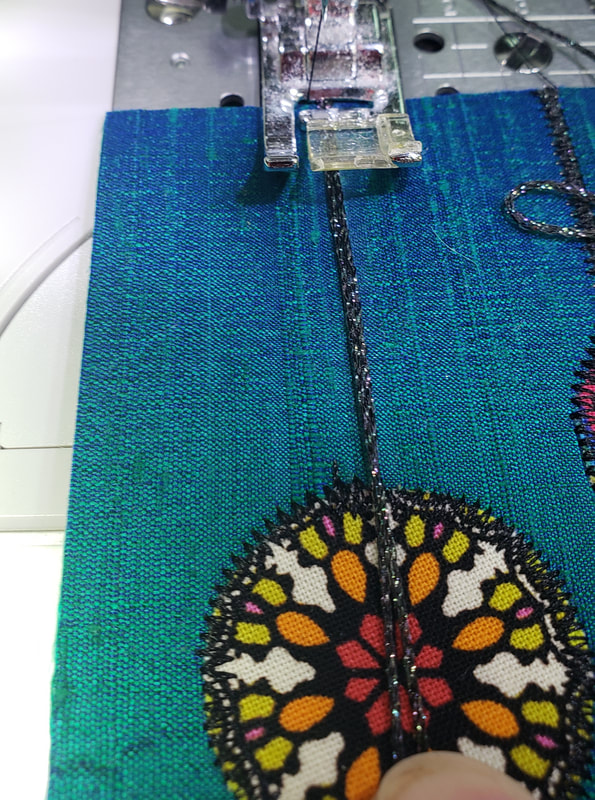 To make the hanger I doubled the Lame' and stitched with a zig zag from the edge of the card to the top of the ornament. 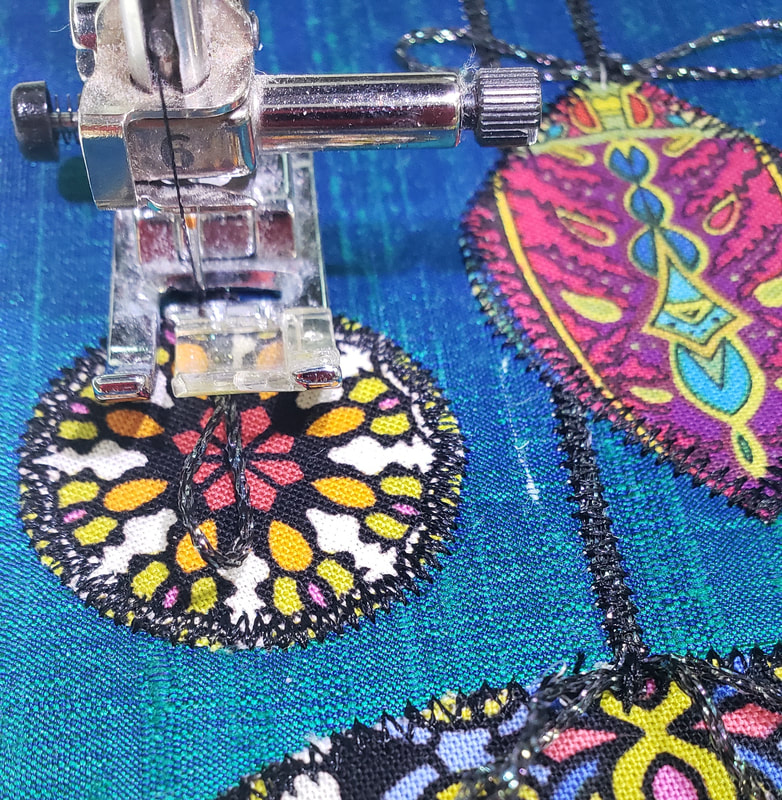 I made sure that I had a 1"ish loop of excess at the ornament. 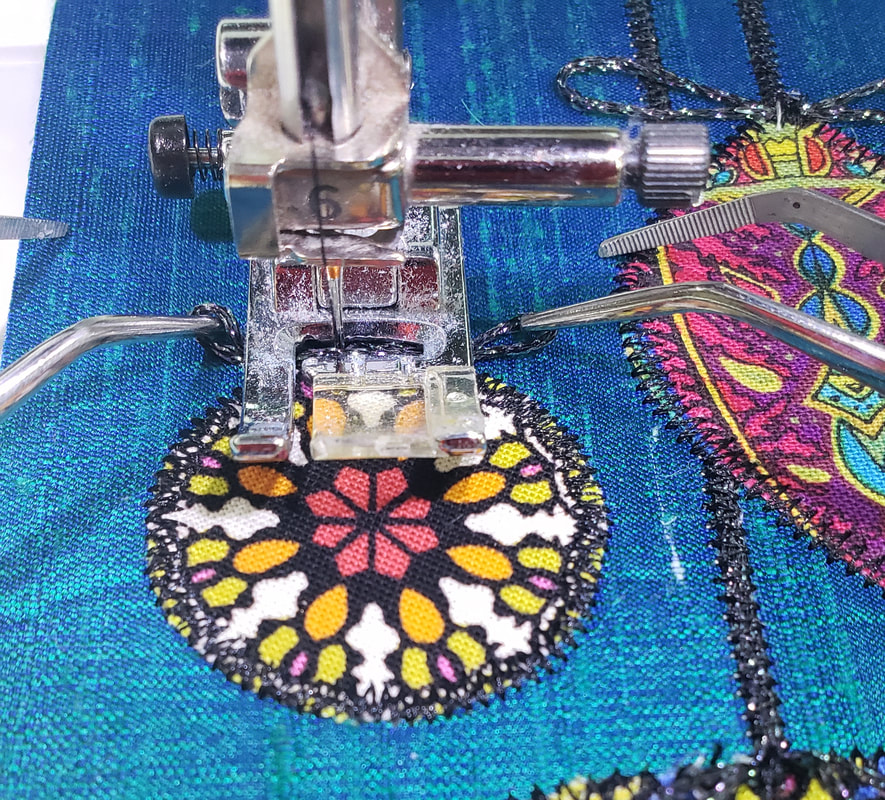 Then I lifted the presser foot and used 2 tweezers to pull the loop up to the needle to create the bow. 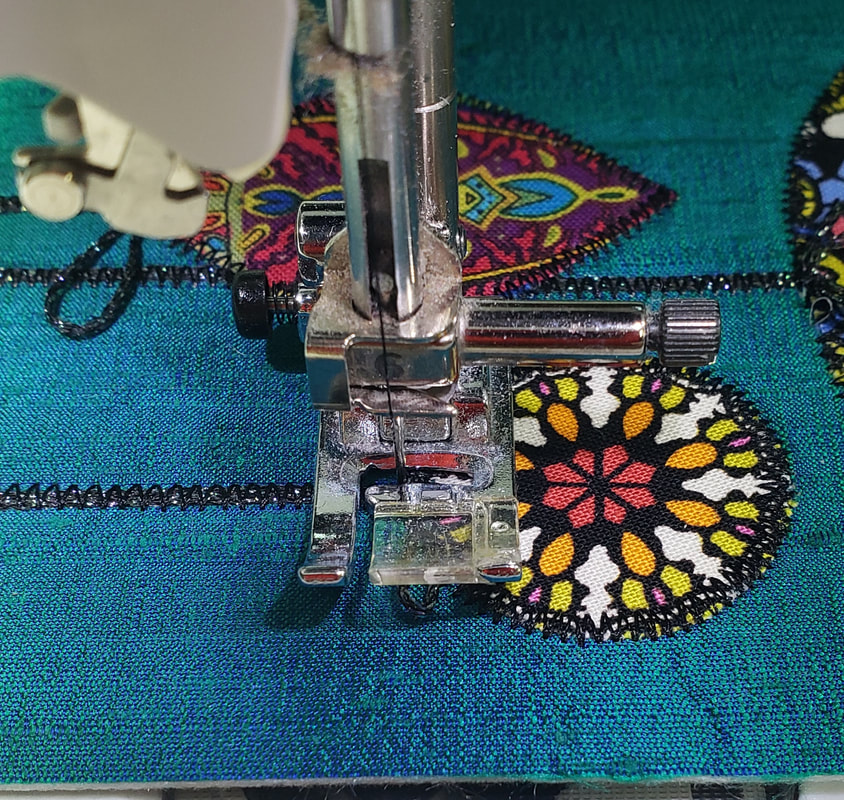 Then I turned the card sideways to zig zag a couple of stitches over the bow. 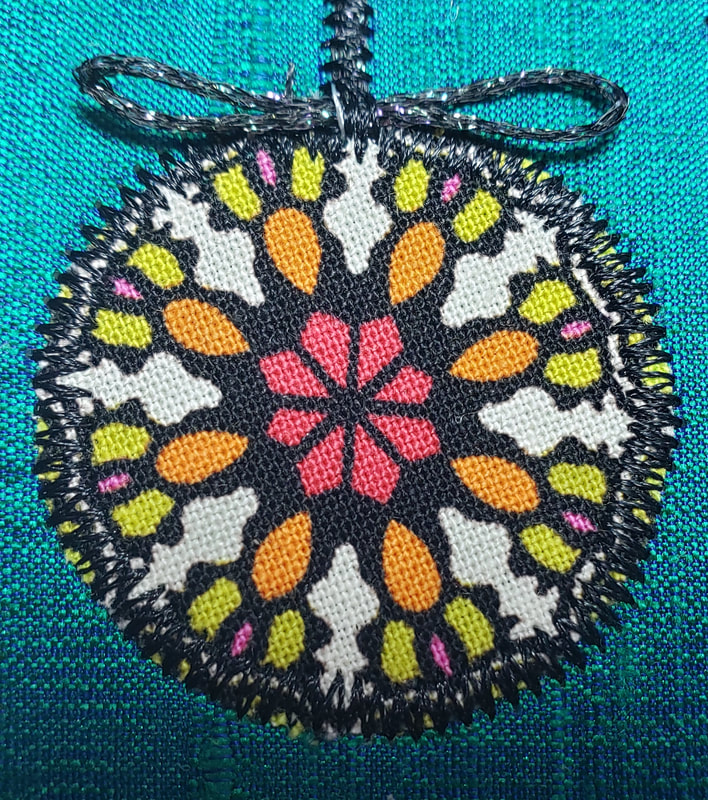 Success! A bow! 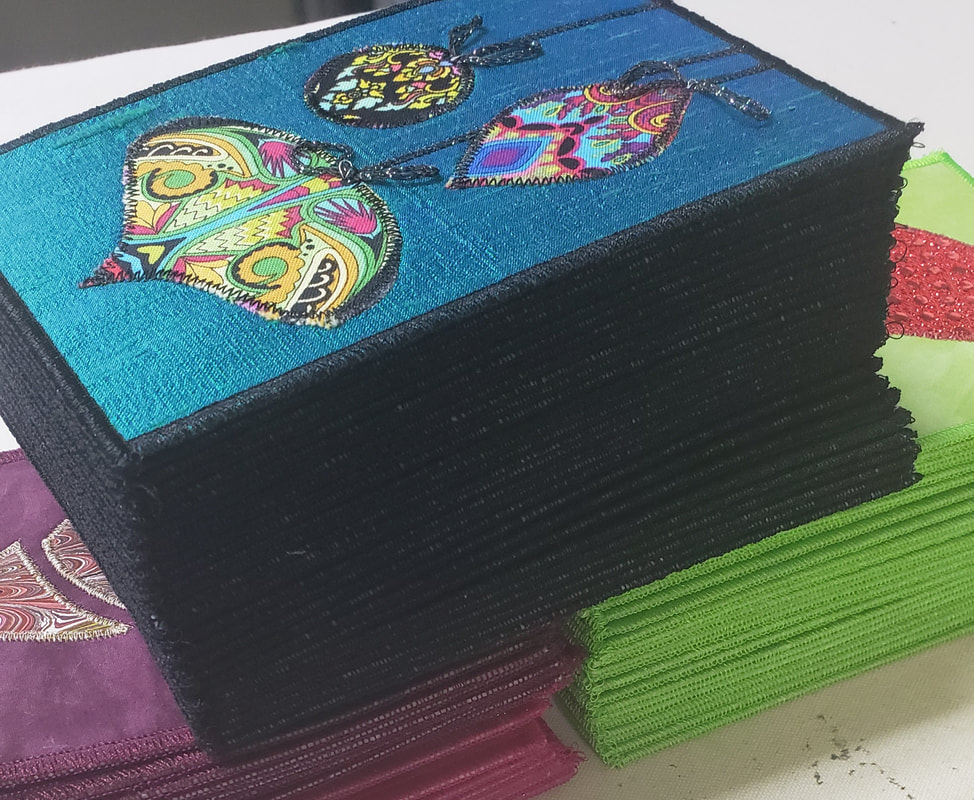 Now I have 78 cards that need to get addressed. My goal is to have them all in the mail by Monday.
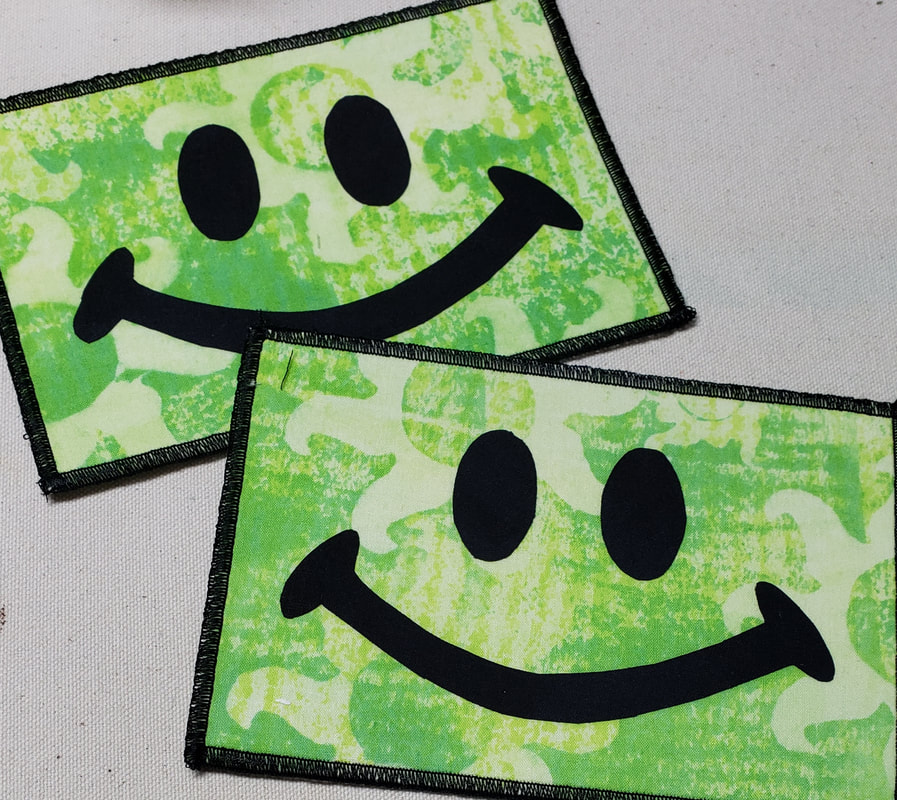 How cute are these? These are the December birthday cards for my friend and SIL. My SIL's birthday is December 23 so the 1 rule is that birthday gifts/cards cannot even have a scent of Christmas. I looked through some of my "special" dyed fabrics and found this bright, Springy one. I found a smile emoji silhouette online, cut it out and fused it on. I didn't even topstitch it. It didn't need it. 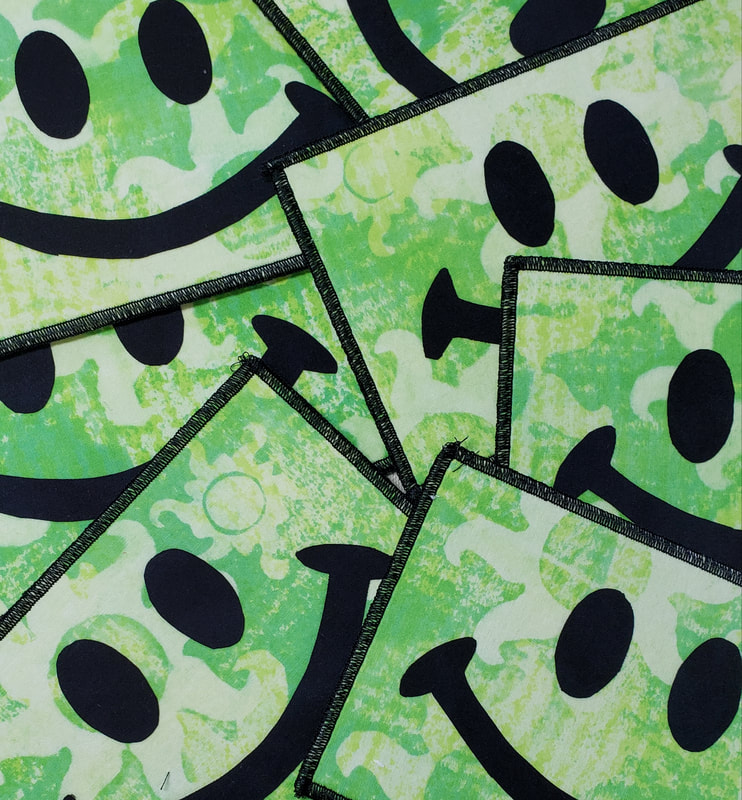 A couple of hours later I had 8 happy faces!
Meanwhile, I'm making good progress on the last set of Christmas cards. I'll be addressing all of the cards by Friday! 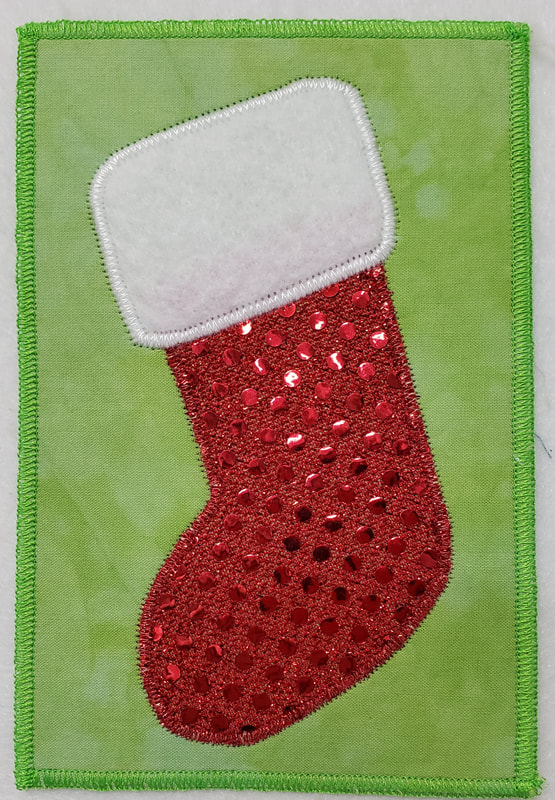 There's nothing going on around here except for postcard making. I had 2 more sets of Christmas postcards to make and 1 set of birthday cards. This is my second Christmas card design. I've been wanting to make a stocking design for a while and I found the perfect fabric in my stash. 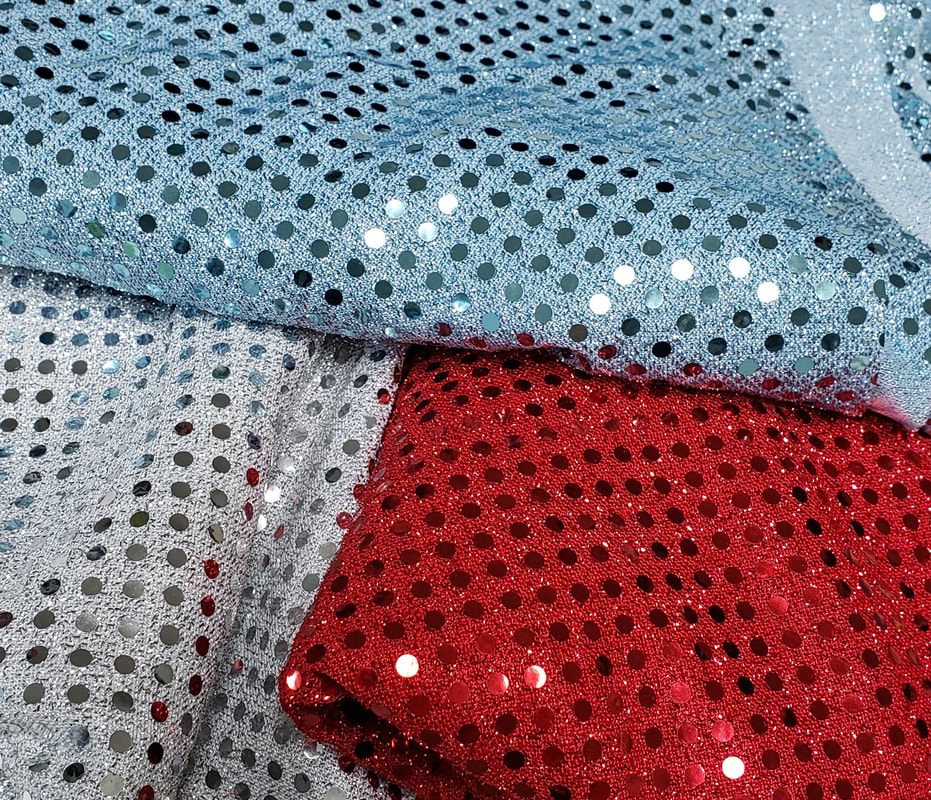 This year I've taken the approach to start all of my design by finding something in my stash and building the design from the fabric. My friend gave me these 3 fabrics last year to make American Girl dresses for Ella. Honestly, I had forgotten about the but unearthed the bag while looking for something else. I don't have any in-process photos. I started these over Thanksgiving break and was heads down focused. I can share that this is some really sturdy fabric and it easily took the hottest iron setting with steam! 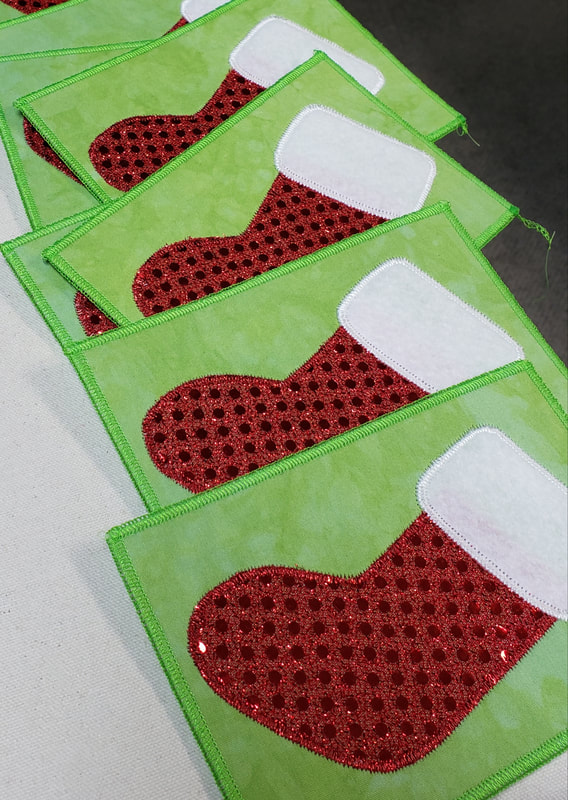 I made 24 of them and they actually came together pretty quickly in production mode. 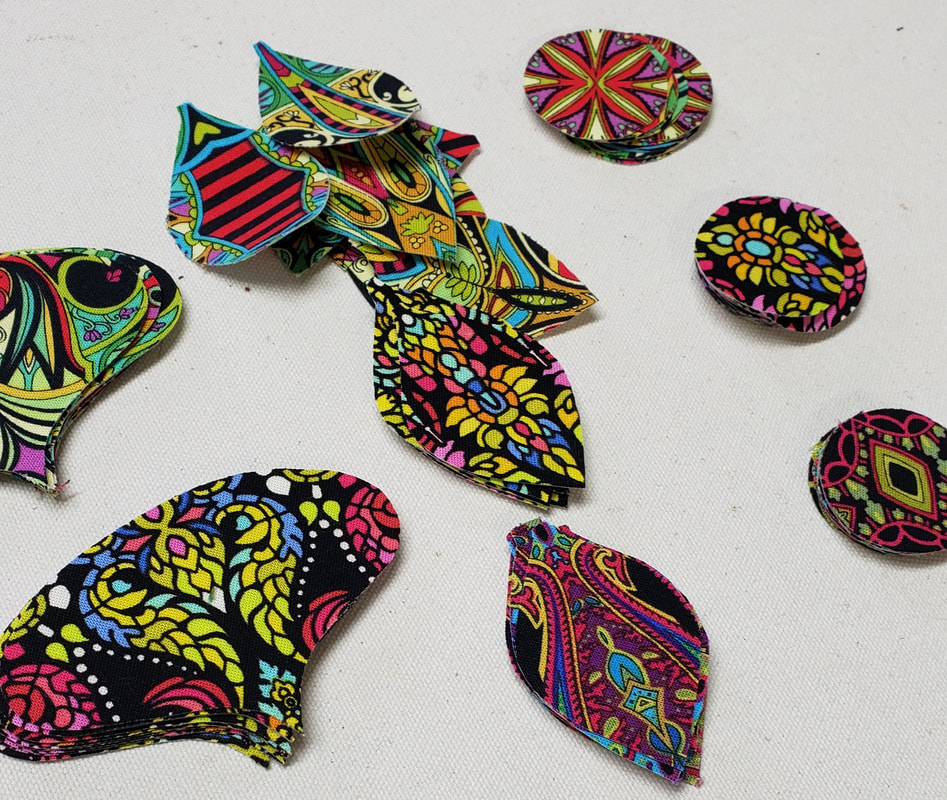 Since finishing those I also made a set of birthday cards and I'll share those once I know that the first one was received. This weekend I started on the last set of Christmas cards. These are the most involved of the bunch.....of course.
Well, Christmas is officially underway here. I've gotten the first set of cards done! 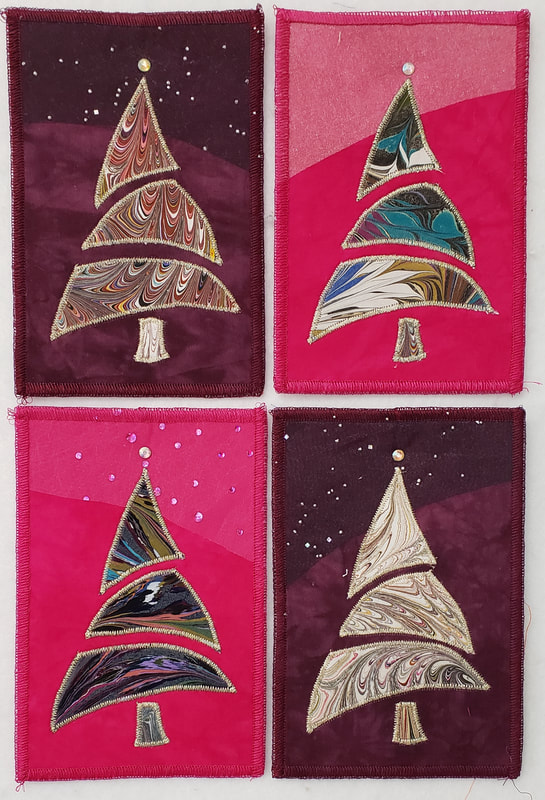 I don't know how the color is showing up on your screen but half of the 24 cards are on a bright pink background. It's very "not me" but I thought it really set off the dark fabric trees well. I have a few friends who will appreciate the pink cards. 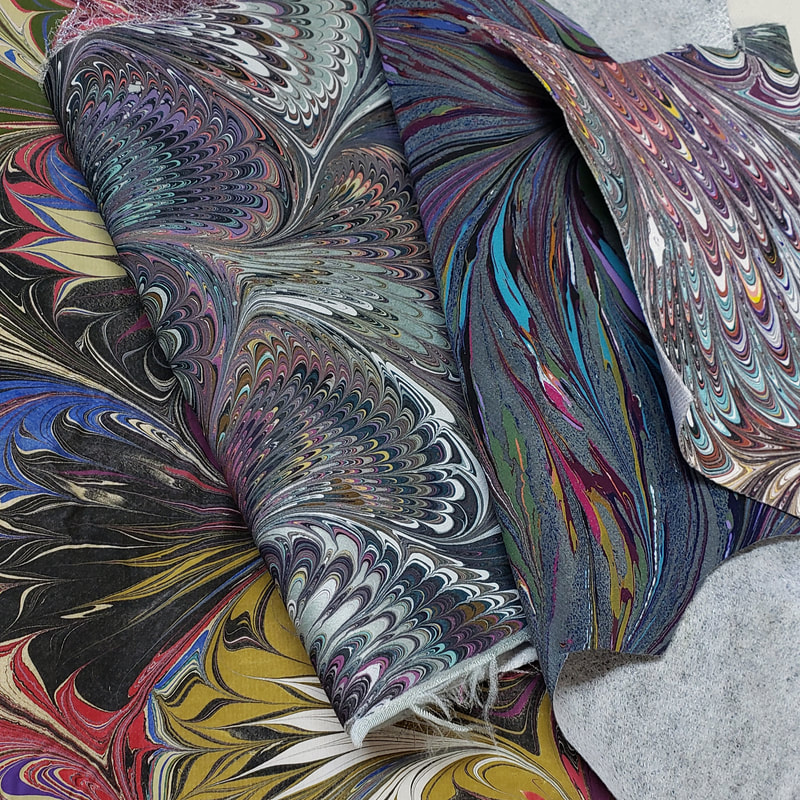 Often my card designs start with a fabric that I want to use instead of starting with a design and that was the case with these cards. Years ago I bought these painted silk fabrics. I bought them in Houston so it had to be 10 years or more and I think I bought them with the idea of using them in my symmetry quilts. They never worked for that so they wound up in the cabinet of bits and pieces. I found them last week and thought they might be good for tree images on cards. I started by fusing interfacing on the back and then adding a layer of fusible web. The fabric is really thin like scarf fabric so it had to be stabilized to be cut out. I knew I'd put them on a hand dyed fabric background but that wasn't going to be quite enough to complete the design.  Off I went to another bin to find something sparkly to add behind the tree. These fabrics helped narrow down the background choices.
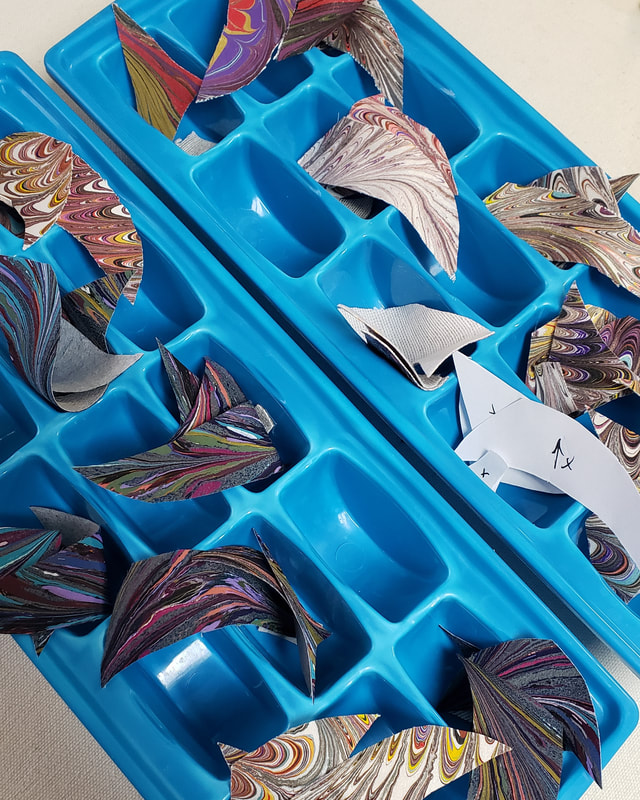
Now, I don't draw. When I need a template I head on over to Google and search for silhouettes and that's where I found this tree. I downloaded it, put it in my photo editor and resized it to fit the 4 x 6 postcard size. Then I was off for an evening of cutting out trees. Ice cube tray were really helpful to keep the pieces together. 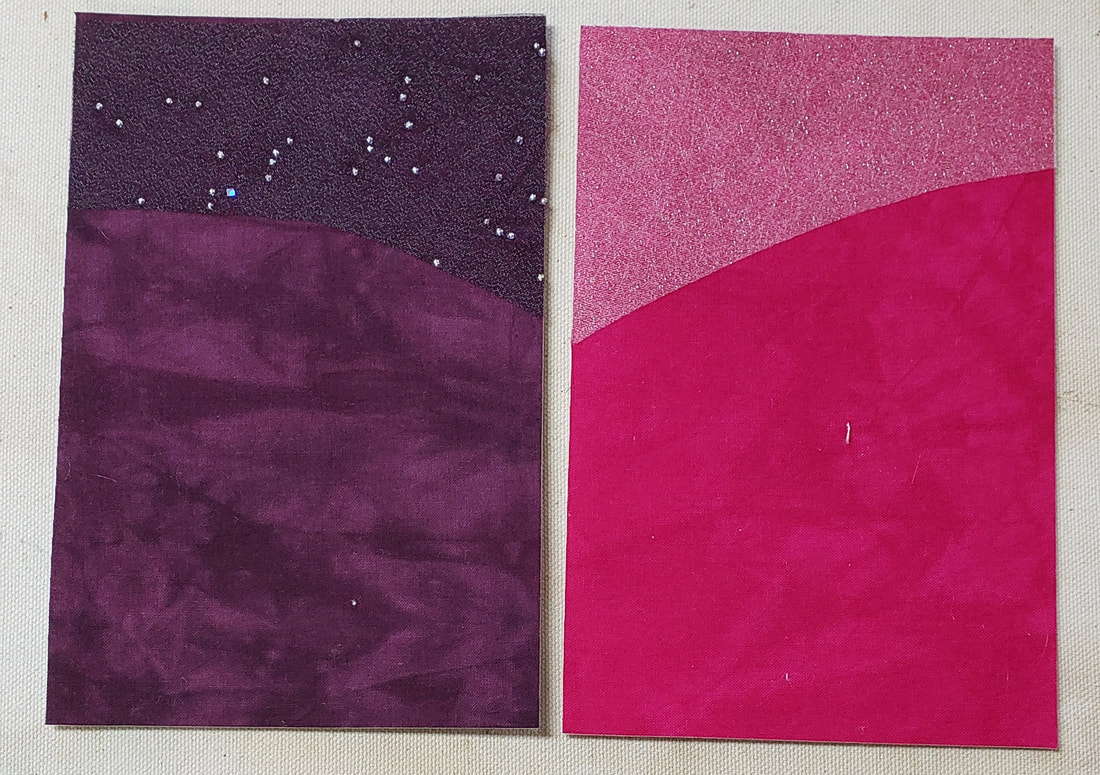 The backgrounds were fused, 12 in each color.  Then the fun part of fusing and stitching the trees. I used Superior in Light Gold to edge the trees. I finished them off on the serger. You can see from the first photo that I also added a crystal tree topper.
Now on to the second design which I think is going to be a stocking. 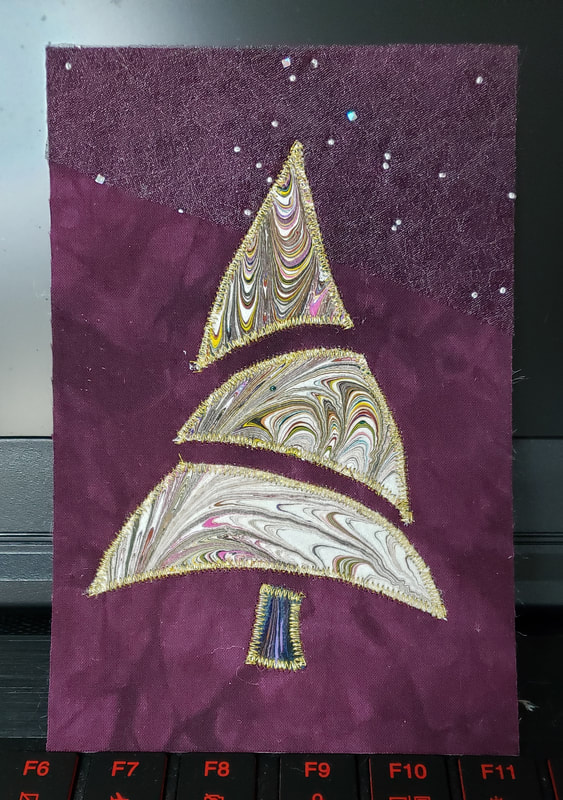 With Finally! done I've moved on to postcard planning. After doing a couple of sessions of leaf blowing I dug into my supplies and this is my first prototype. Hopefully I'll have set done my Monday.
Have a great weekend! 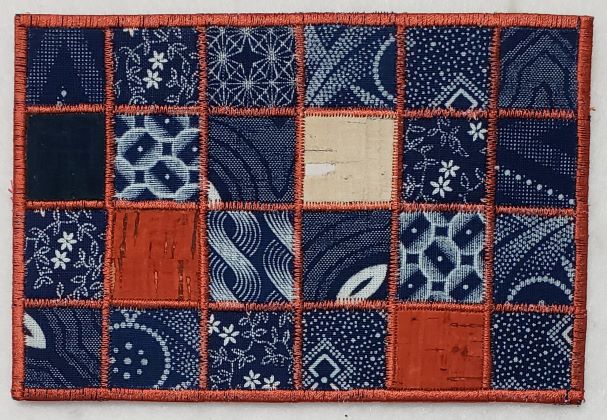 When Mom was over visiting a couple of weeks ago I was in the middle of "bag mania" and I told her not to be surprised if her birthday card contained the scraps from those efforts. I just have the worst angst about tossing out scraps when they still have potential to be something. I really had a hard time with the blue scraps from the zipper bags. I tried a few postcard design ideas that fell really flat and I almost gave up. When I get to that stage it means that I'm trying too hard and I need to simplify. 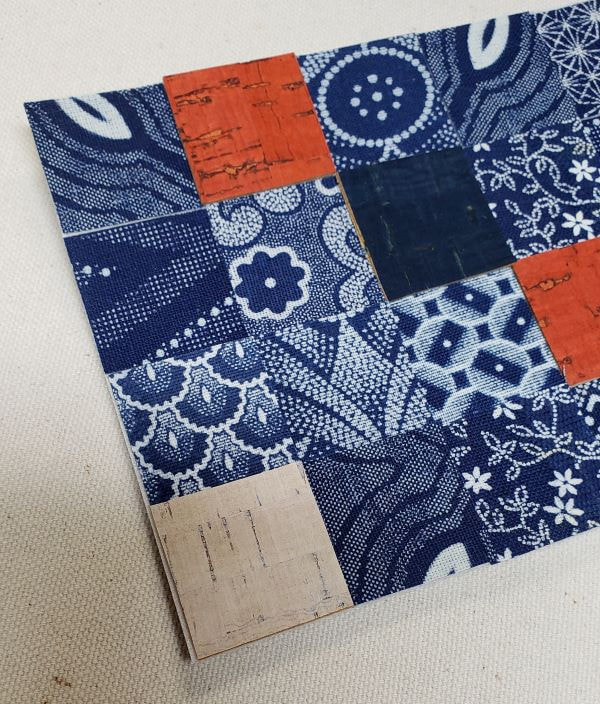 On the sewing table I spied the cork leftovers from making the bag handles and the idea of simple squares was born. I cut all of the blue into as many 1" squares as I could and then added some blue, white and orange cork squares. I fused them to a postcard base. I was careful with the cork pieces to use a pressing cloth but I was mostly just trying to adhere the blue fabric bits. The cork I could hold in place until I stitched over the edges. I used a zig zag stitch with a 3.0 width and .4 length to stitch over all of the joins and then finished off the edge with a wider zig zag. Once I had my design worked out these went together really fast. 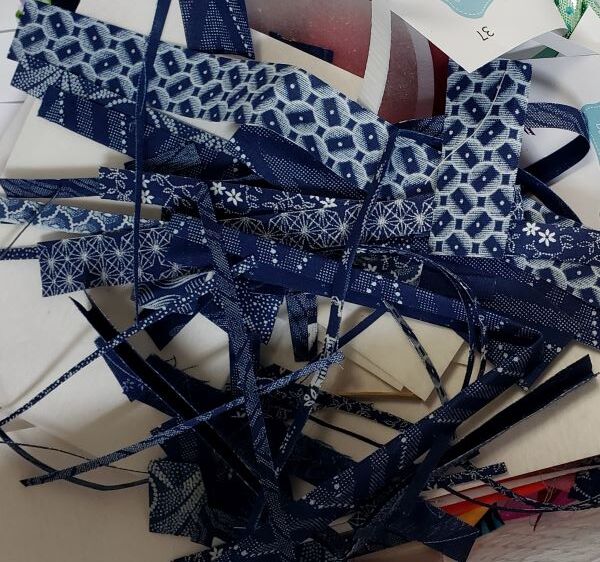 This is all that's left of the blue South African fabrics! 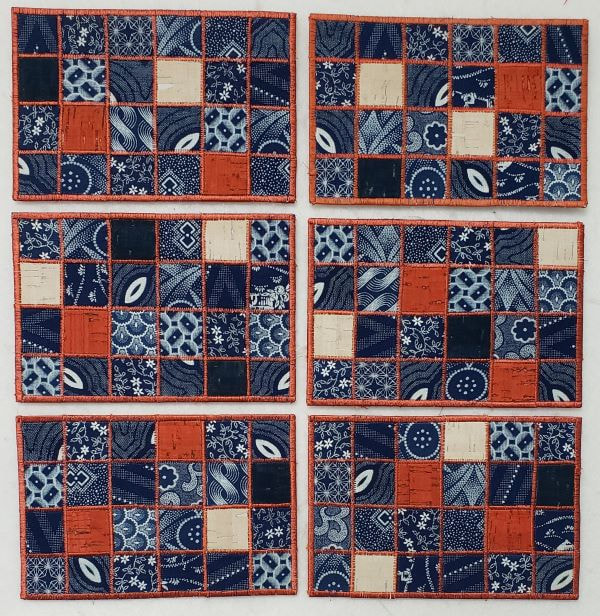 I made 7 of these cards. Mom's was already in the mail when I took this photo.
I hope you all have a great weekend. I'll be finishing the quilting on the big green quilt and, hopefully, cutting out some 9-patch blocks for my long term family quilts project. 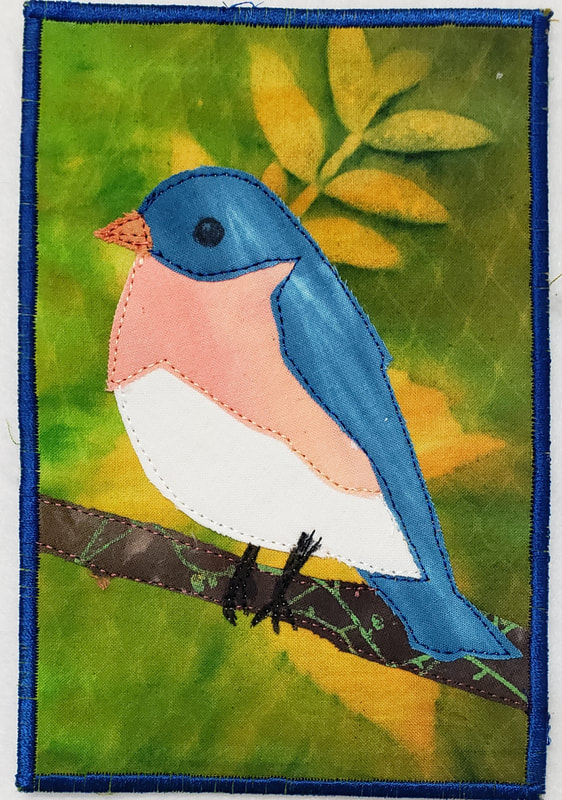 Since we stopped doing Airbnb (because the company went absolutely crazy), I don't need as many postcards as I used to so I don't make them as often. But there are lots of summer birthdays and, of course, I needed one for Mother's Day. I rarely make just one of a design. This one worked great for Mom and for some birthdays this month. 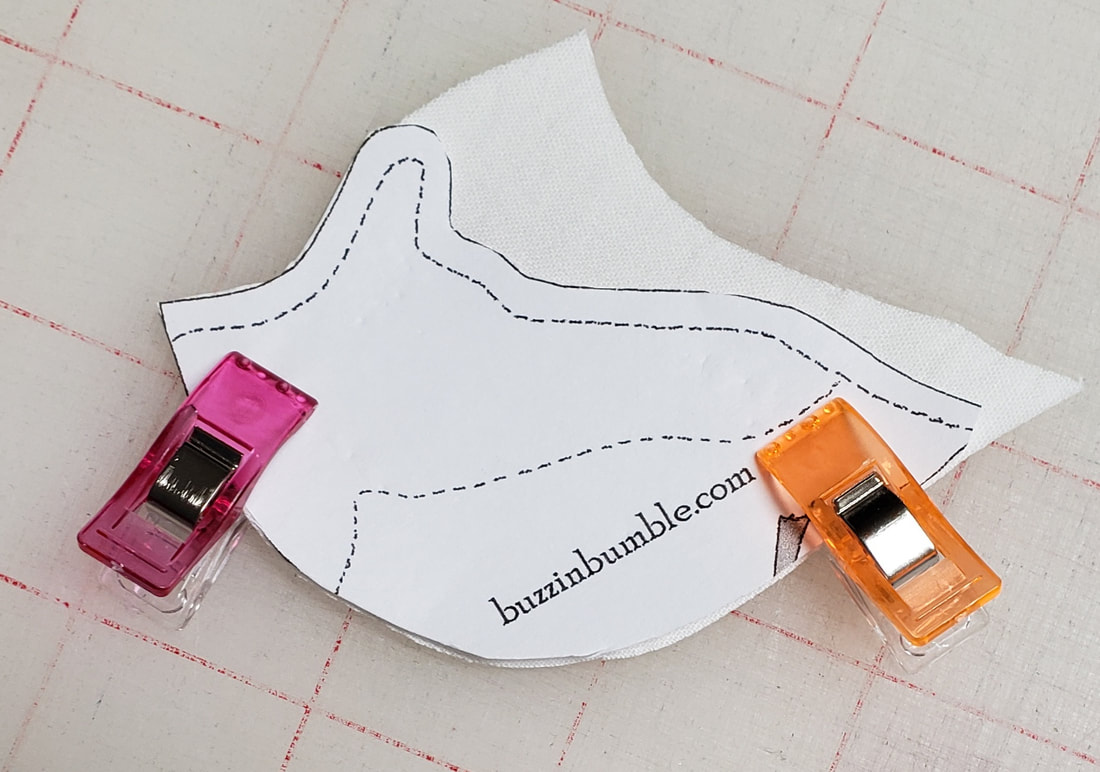 Lest you think I can draw a bluebird, the pattern for this came from here. I reduced it close to 50% to get the bird to fit perfectly on a postcard. The fabric were all from my pre-fused scrap bin and these clips were a lifesaver cutting out these small pieces. 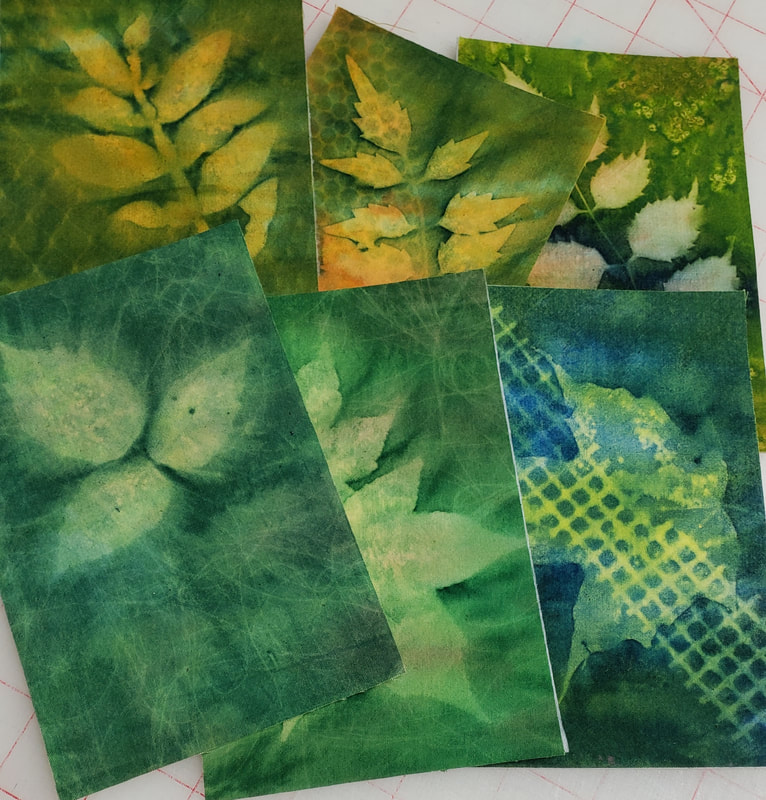 I even had the perfect backgrounds! These are some sunprints that I made at least 2 years ago and they were already fused onto the bases.  This is why I keep every little pre-fused scrap of fabric. This was perfect for a tree branch. 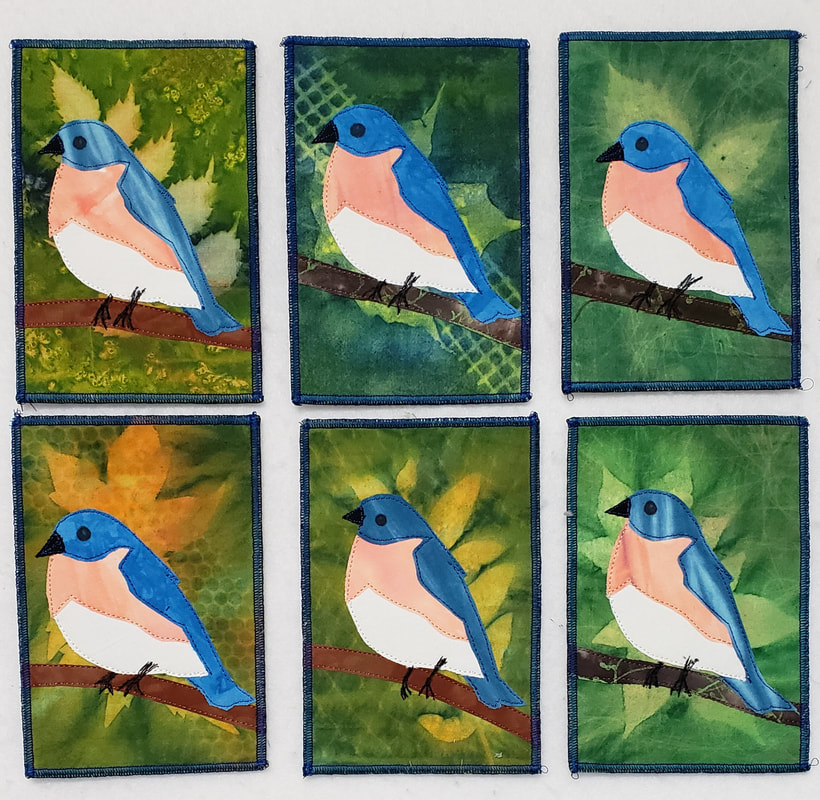 The one at the top of the post was for Mom. I made 6 more for birthday cards. It was great having the serger out so I could speed through the edges on these. 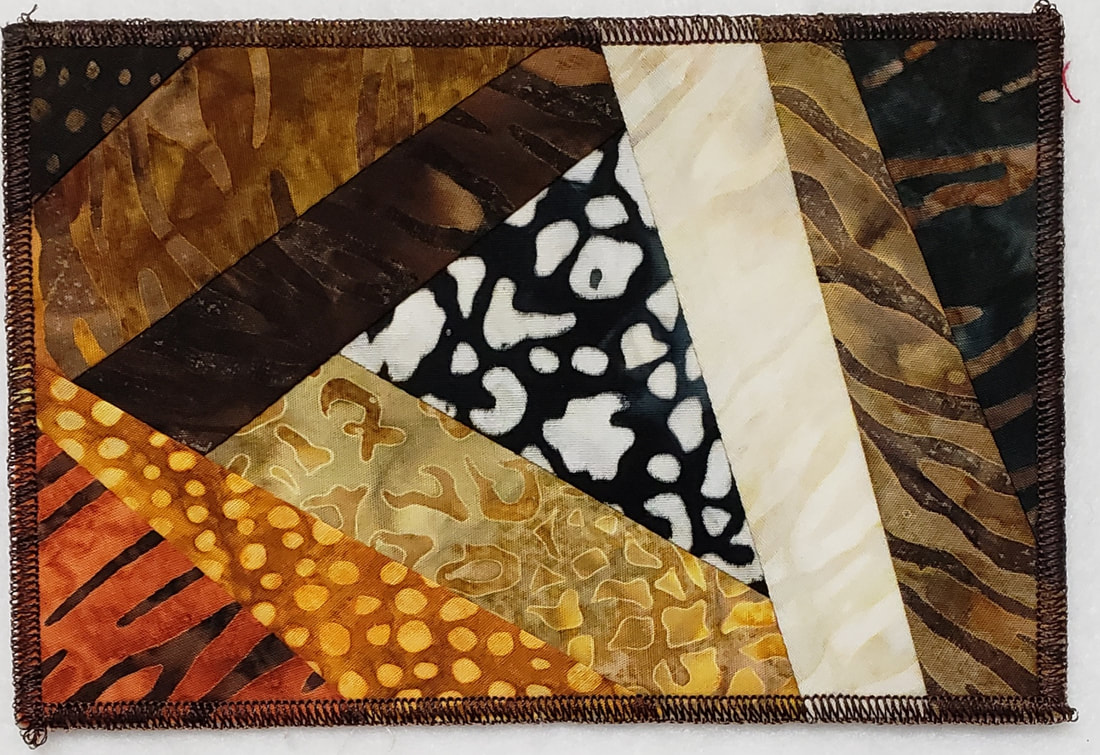 While I had the serger out I quickly finished the edges on these cards that I made from the scraps of my SIL's quilt. 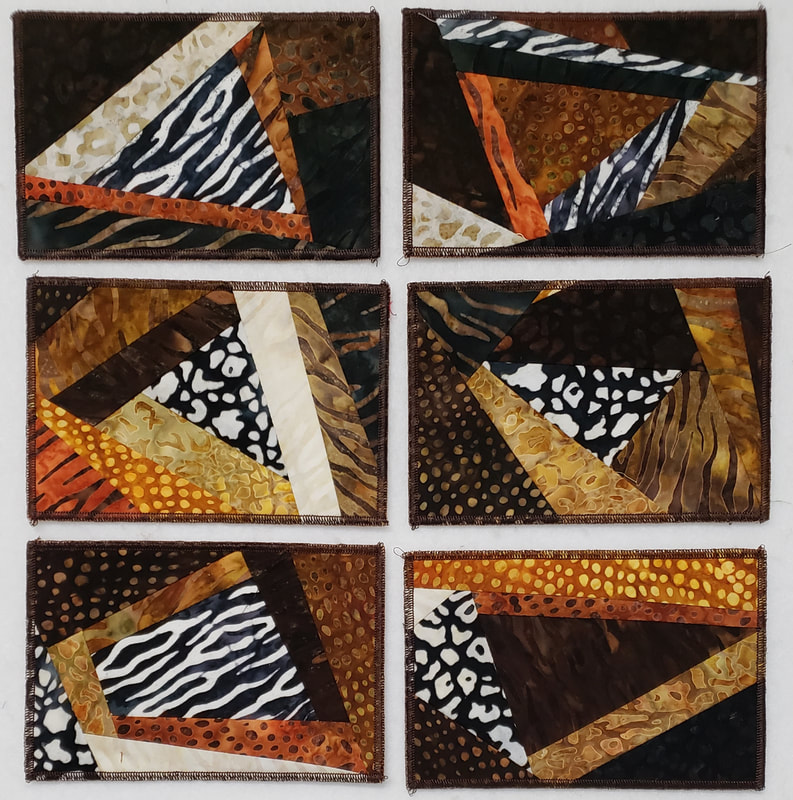 I have 6 of these and they will be great birthday cards for this summer too.
If all goes well today our generator and propane tank installation will be done AND the phone line they severed last week will be repaired. Fingers crossed! 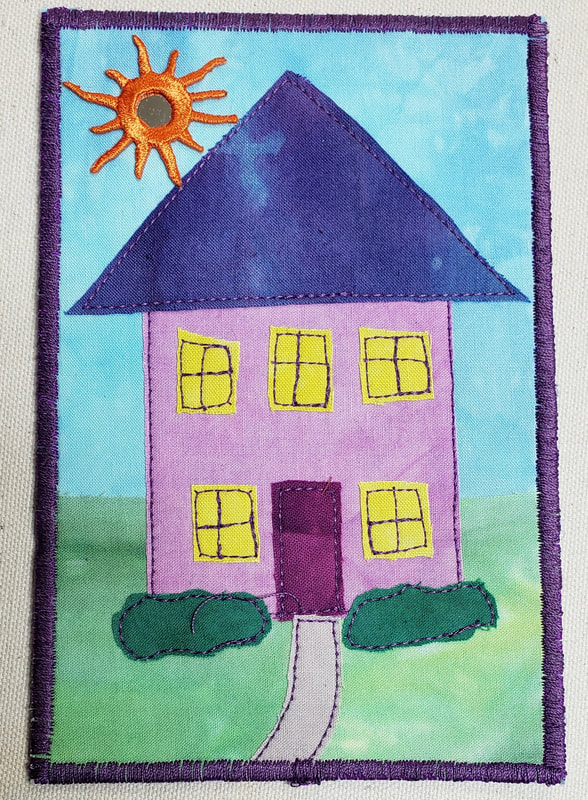 Yesterday I spent most of my time on the computer. I did some long needed file cleanup and I caught up on my feather quilting class. I'm not even halfway through the class and I've already gotten my money's worth. Bethanne Nemesch is an outstanding teacher.
The only sewing that happened is this one postcard. My nephew's birthday is this weekend. He and his wife just bought a house so I made him another house to hold him until move-in in May. The sun is an iron on thing. I bought a pack of them years ago and never used them. I think I'll try to do a set of pictorial cards to use them up. Today we are having more generator drama. Nothing big. I think I finally have all of the county regulations so we can possibly settle on placement of the propane and generator. It won't be where I wanted it but it will be easier for the installation and it will be well within code and not so far that propane can't be delivered. Yes, I even called the propane company to see how long the delivery truck hoses are. Maybe we can get this project started soon! I did it! I finished all the postcards! It's actually 79, not 80 but I'm not going to be short. There are a couple of people on last year's list that aren't on this year's. Not because I suddenly dislike them but because they moved, or, sadly, died. After all of the agony and angst, I'm actually happier with this batch of cards than any year before. I like all 3 designs equally. 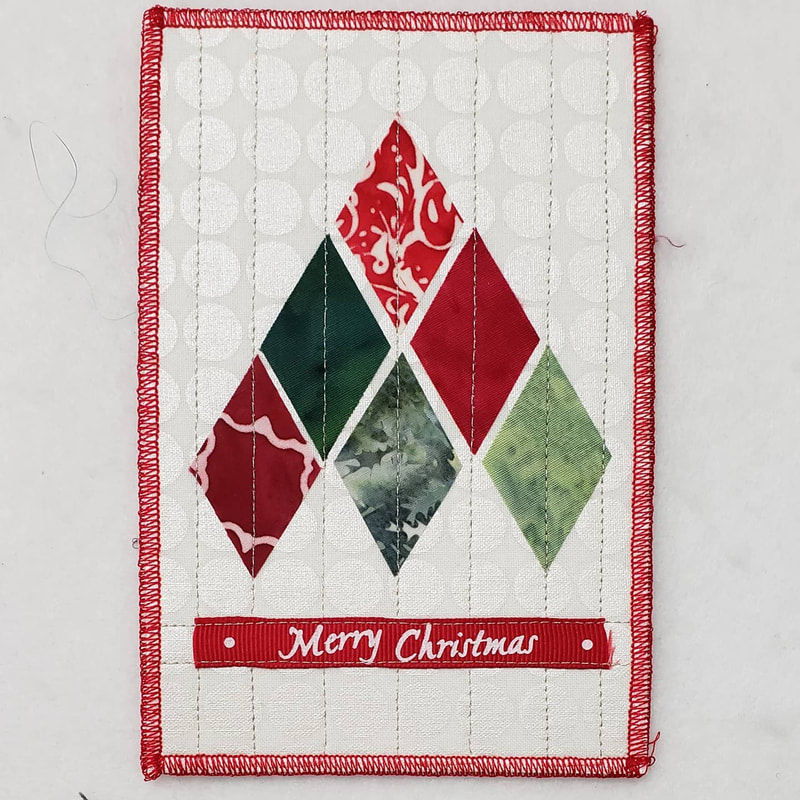 Here's the second design. I suppose it can be called an abstract tree. The background is a fabric that I think was called Mirror Ball and it's got just the right amount of sheen. I cut out diamond shapes from batik and fused them down. I picked up the Merry Christmas ribbon at one of the craft stores. The stitching is silver metallic thread. 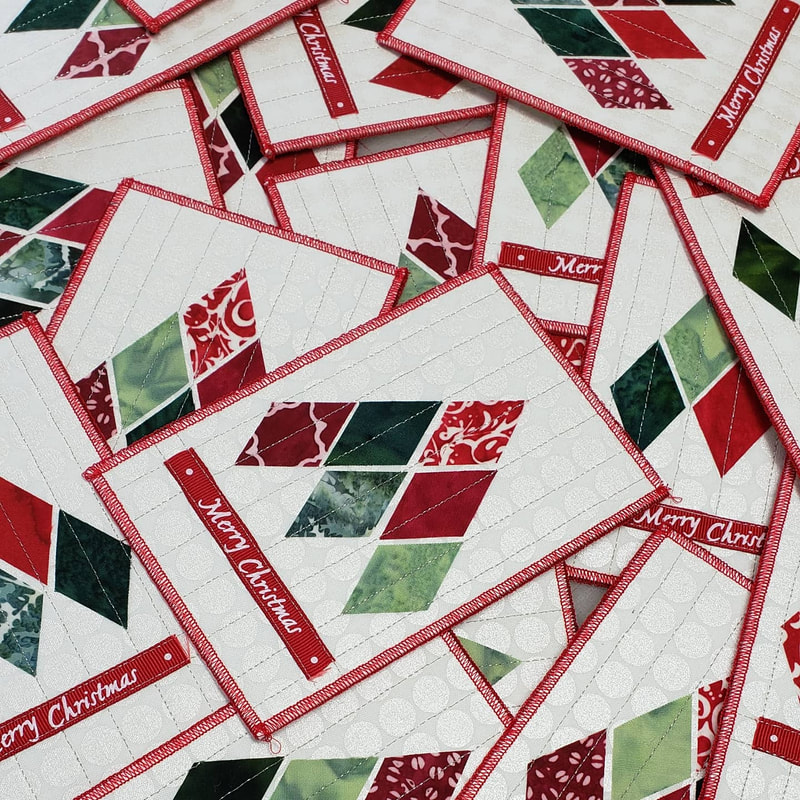 I think the final count on these was 22. I'm not about to get up out of this chair to go count. 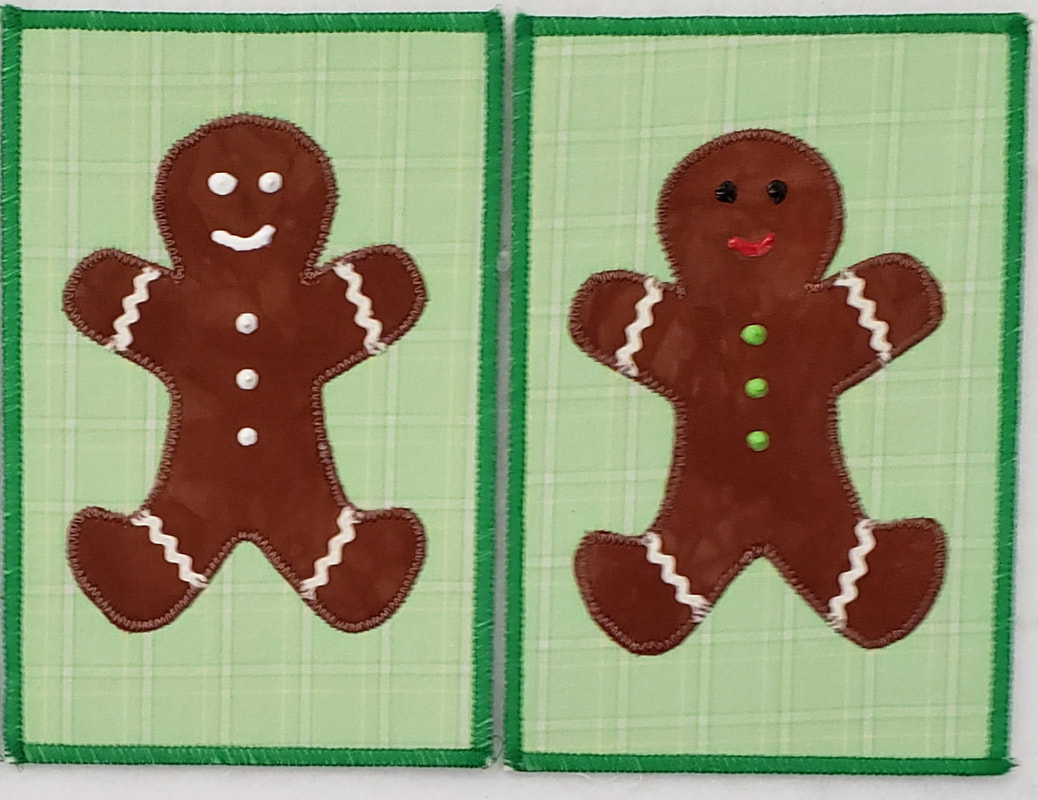 The third set are really cute Gingerbread Men. I picked a plaid background for the look of a kitchen towel or tablecloth. Mottled hand dyed fabric was perfect for the cookies (or biscuits for my UK friends). The shape came from Electric Quilt. I took their Gingerbread applique and sized it for a postcard. It distorted the head a little so I just had to fix that before making my cardboard template. The arm and leg icing is a very narrow ric rac. I have a shoebox of vintage ric rac that comes in handy from time to time. This was one of those times. The face and buttons are paint. I did some in white and some in colors and a few of the mouths are "o" shaped because they are afraid of being eaten. I wish I had "taken a bite" out of a couple of them. My brothers would get a kick out of that. 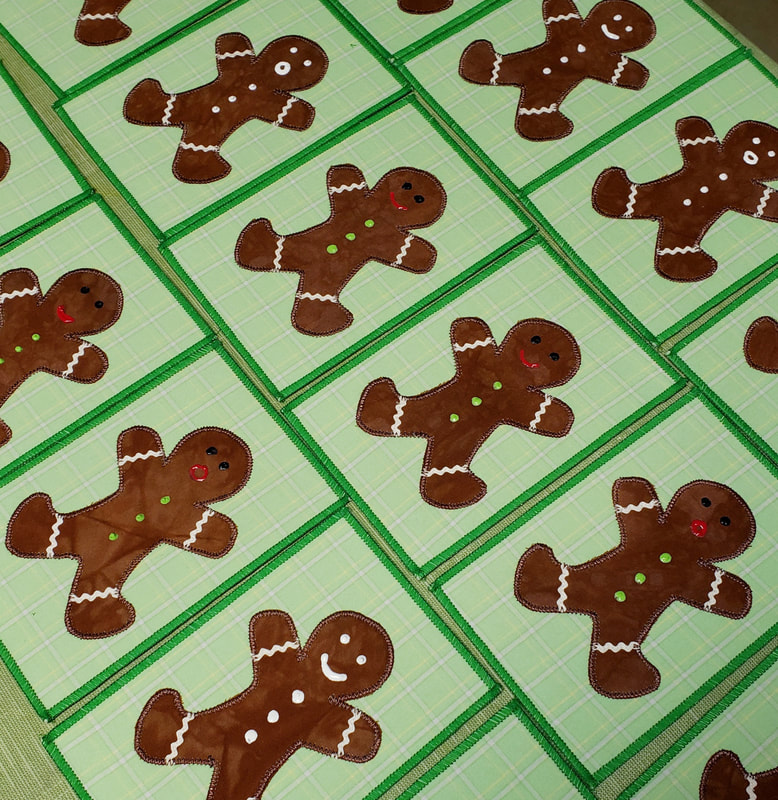 Here they are after painting. This picture reminds me of gingerbread on a cookie sheet. There are 20 of these cards. 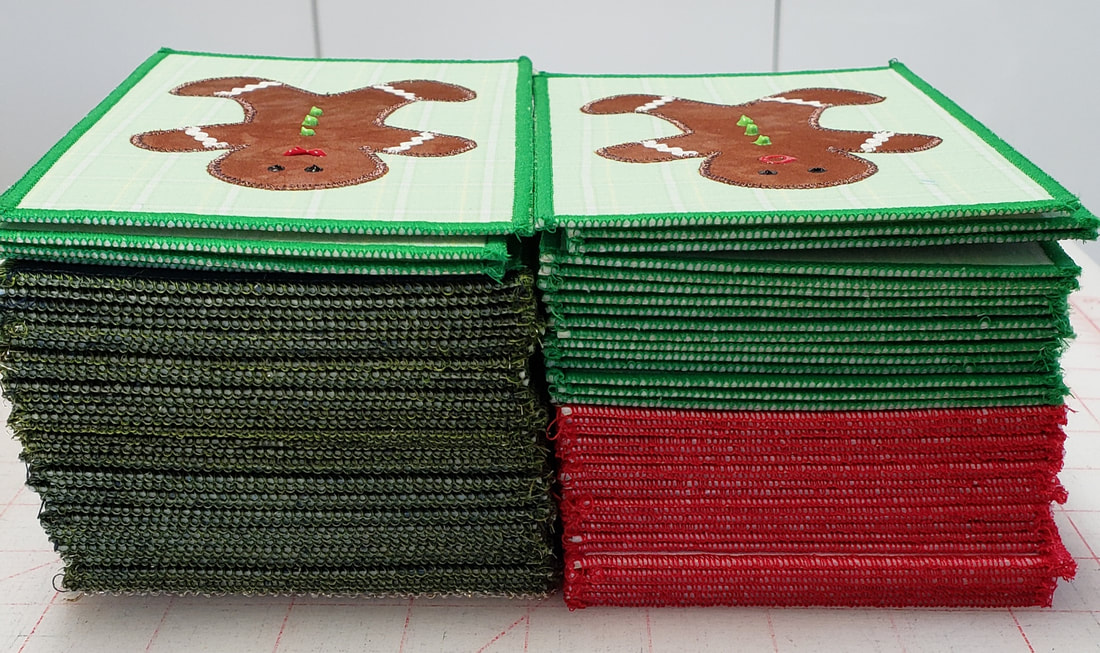 Here's the stack of 79 cards ready for a hand-cramping session of addressing. Before I get to these I have a few Christmas gifts that need to get made before Friday. I expect I'll address these this coming weekend and get them in the mail on the 14th. That's plenty of time! And now for my hack! After I finished these I shortened some sleeves on some new long sleeved tshirts that I bought and then I started cleaning up the serger to put away. It was a linty mess and I was trying to use cotton swabs and brushes. I used to have one of these mini-vacuum attachment kits but it never fit any vacuum that I owned so it was useless and was thrown out ages ago. I wondered if I couldn't hack one of my own. 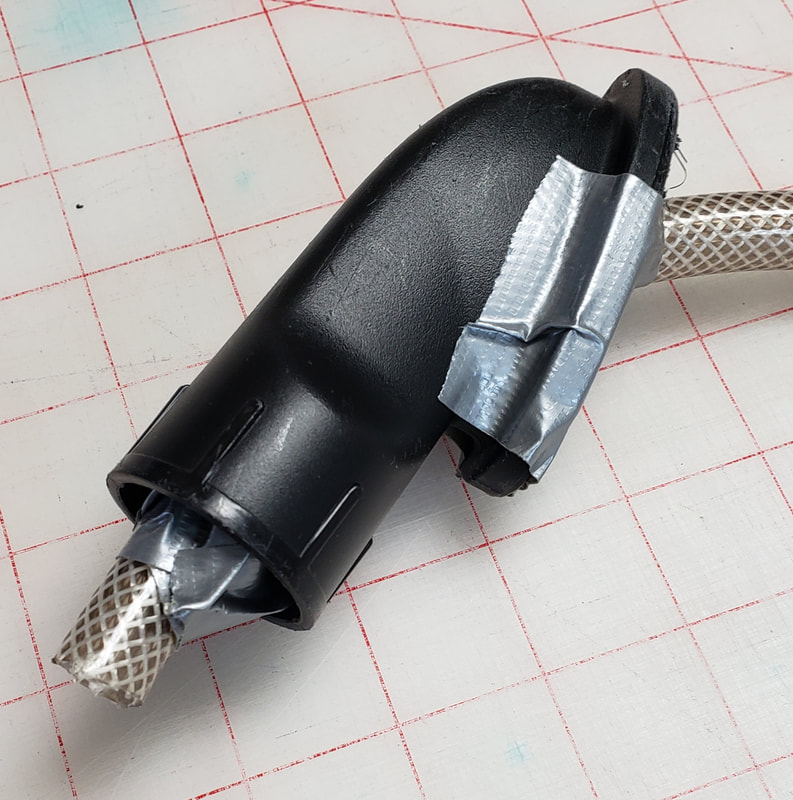 I had this attachment from an old vacuum that I use in the basement. I never use the attachment so I tested and it fits the upstairs vacuum. I cut off the brush stuff. Then I found this hose in the cabinet of leftover hardware and stuff. It turns out that cabinet has a TON of weather stripping for some reason. I can't even think where we have used any of it and have no idea why we have so much of it. Probably need to do a purge down there sometime. Anyway, this tubing was in there so I cut a length and it just fit inside the attachment. 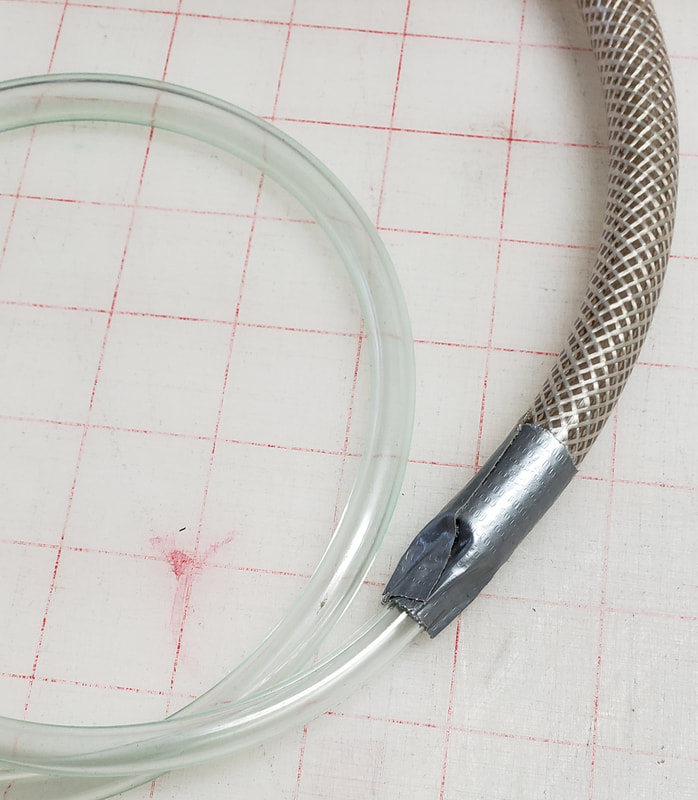 That tube wasn't going to be small enough to fit in the small areas of the sewing machines. I solved that with another length of a narrower tubing that fit perfectly inside the big one. Duct tape is so awesome. 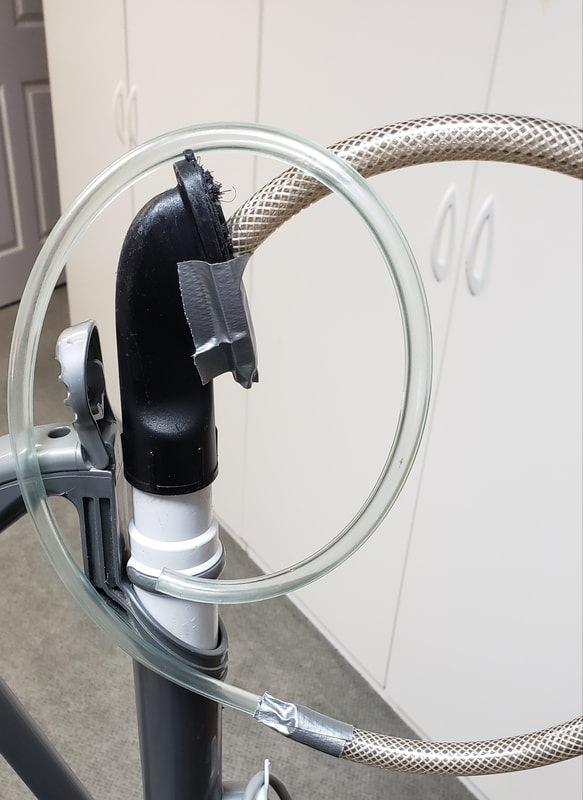 The old attachment fits right on the end of the vacuum extension thingy. It's not pretty but I've always been a function-over-form girl. 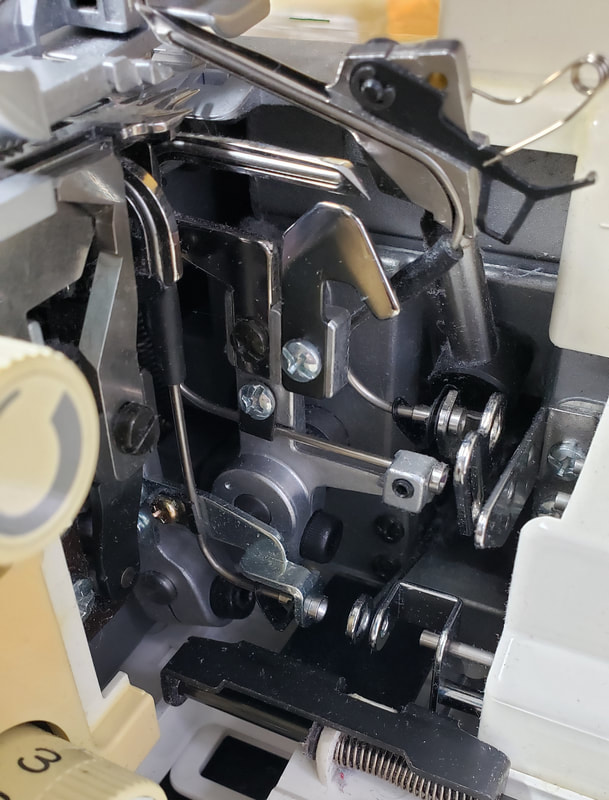 This hack functions perfectly! Look at that beautiful clean serger! I'll be using this on all my machines as soon as the Christmas sewing rush is over.
Now I'm working on coiled coaster sets, you know, the ones that are fabric wrapped around clothesline. My friend, Estelle, makes lots of these as a fundraiser for the Virginia Quilt Museum. She's right when sewing them is like eating potato chips. You just can't stop! It's such a zen activity. I made 2 sets earlier this year and another last night. I want to get 2 more made by Friday and that shouldn't be a problem at all. 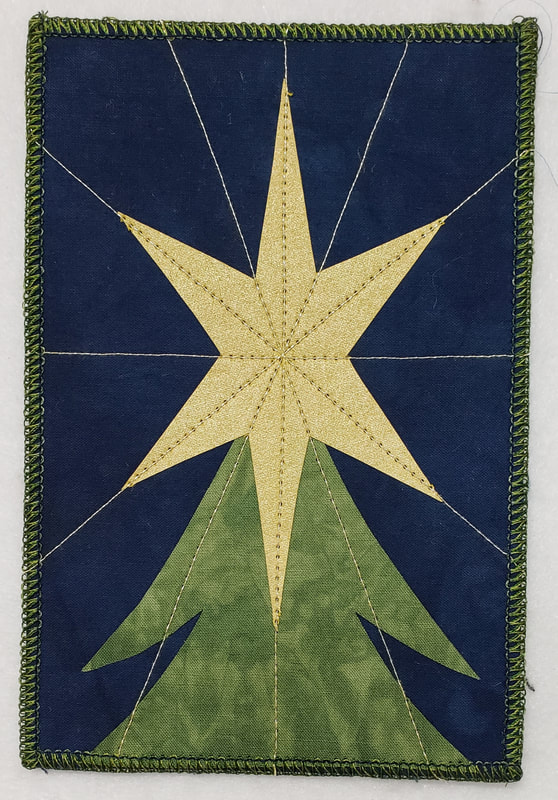 Yay! The first set of postcards are done! I finished the stitching on the gingerbread men last night so today I could prepare and fuse backs and start serging the edges. I think this is probably one of my favorite Christmas card designs in the 14 years that I've been making cards. It's simple but still nice and a little elegant. 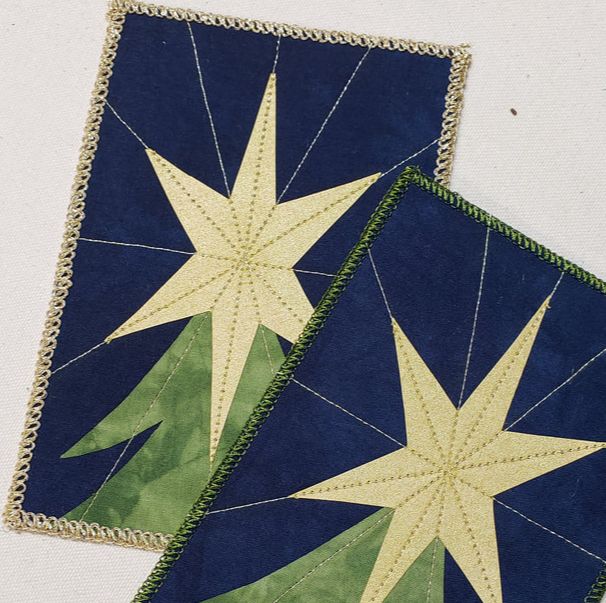 When I planned these cards I wanted gold for the edging but after I did one I decided that I didn't really like that so I switched to a green edging. I'll still mail the gold one, it's perfectly fine and the recipient will not know that they got the only gold one. Hmmm, maybe I should note it so they think they got a special one and not a pseudo-reject.  Getting the right green color was a bit of a challenge. I eventually settled on running these 2 green threads in the upper looper. The blend of the two matched the green in the tree really well. I used blue for the needle and a darker green for the lower looper. The upper looper threads are embroidery threads that have a nice sheen to them. 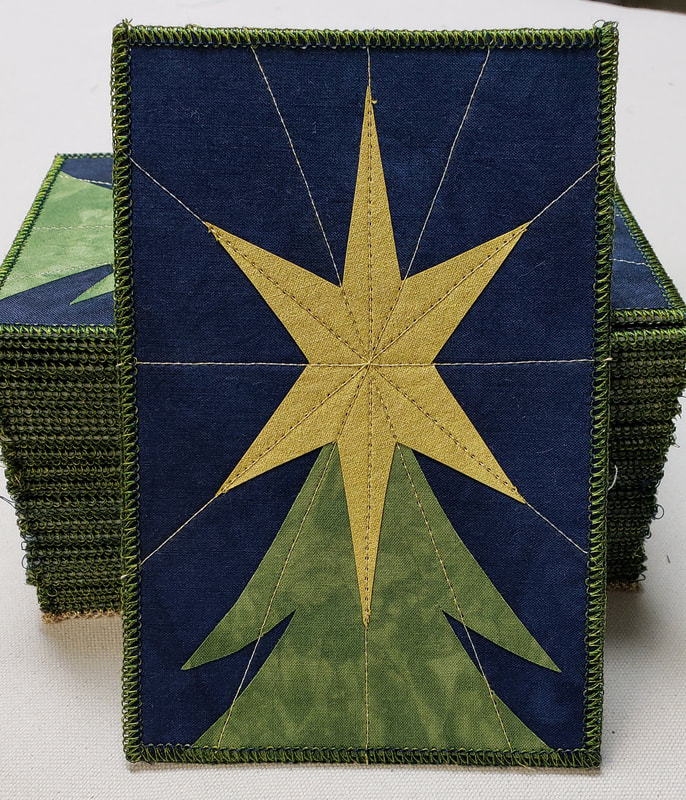 The first 37 cards are ready to address and mail.  The serger makes quick work of the postcard edges. If I were only making 10 or so cards, I'd use a satin stitch on the machine but when I need to crank out volume the serger can't be beat. I've had this serger over 20 years and it's not been serviced once! If the stitching is off it's ALWAYS a threading problem. I just rethread the machine and it's ready to go. 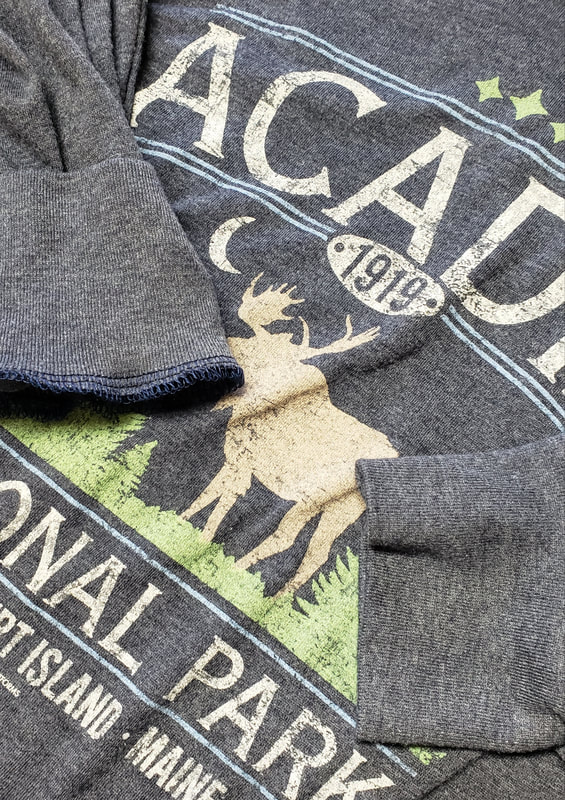 Actually the first thing I serged today were the cuffs on this shirt. I bought it in August and it's been hanging on the back of my sewing chair ever since waiting for me to shorten the sleeves. I didn't want to get the machine out for a 15 minute job so I took care of this first. I chop off the cuff, then cut some length off the sleeve and then sew the cuff back on. It's a little awkward at the machine but relatively easy. Now I can wear my super soft new shirt this winter.
I've got some errands to run today but this afternoon I'll be working on the rest of the cards. I should be able to get them all edged and then I need to add some paint highlights to the gingerbread men. |
FeedsTo subscribe click the RSS Feed button and copy the URL of that page into your blog reader.
In Bloglovin you need to search "Colorways By Vicki Welsh" to find the blog. About Vicki
I'm Vicki Welsh and I've been making things as long as I can remember. I used to be a garment maker but transitioned to quilts about 20 years ago. Currently I'm into fabric dyeing, quilting, Zentangle, fabric postcards, fused glass and mosaic. I document my adventures here. Categories
All
Archives
May 2024
|

 RSS Feed