Binding A Quilt Tutorial
|
You've made your quilt top and gotten it quilted and now there's only one step left to finish it up: binding. I've not met anyone who loves to do binding but a nicely executed binding makes all the different int he look of the quilt.
This tutorial covers the basic traditional binding where the binding is machine stitched to the front of the quilt and then hand stitched to the back like the bindings to the right. 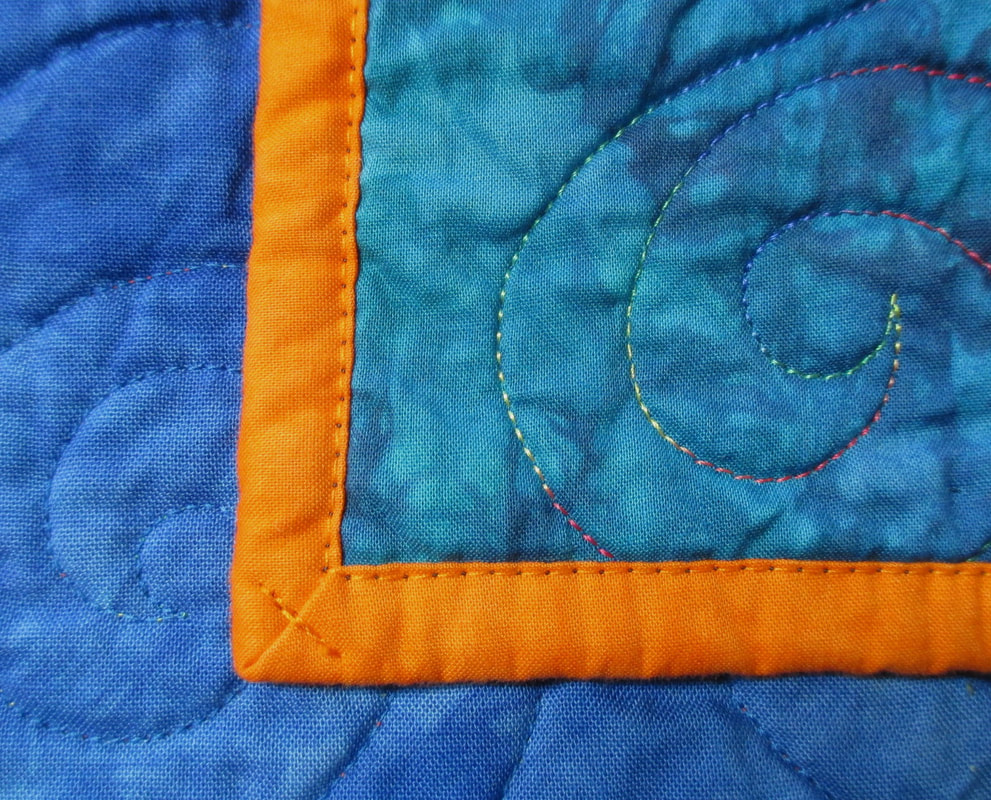
|
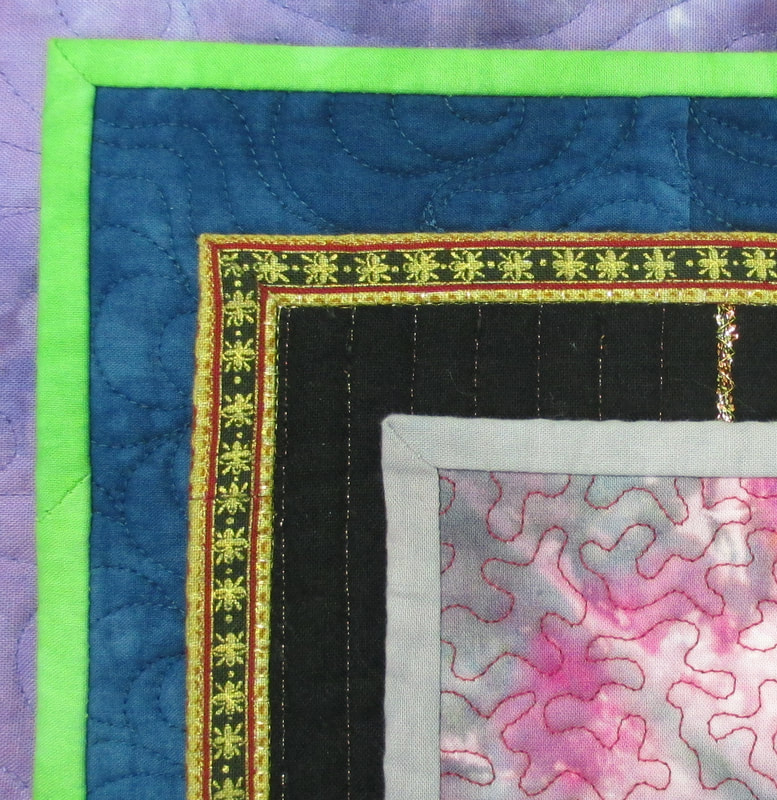
When I make quilts meant for kids or heavy use I will stitch the binding to the back and then topstitch it to the front, like the one on the left. There's absolutely nothing wrong with a completely machine stitched binding. It's very durable for quilts that are going to be used a lot.
|
Start by cutting and sewing the binding strips
The first step is to determine how much binding fabric and how many strips you need you need. The calculation that I use is:
(quilt length + quilt width)*2 + 15 inches
Divide that number by the width of fabric (less selveges) to get the number of strips.
Number of strips * width of strip = the yardage needed
How wide do you cut the strips? It depends on how narrow or wide you want the binding and how thick the batting is. Sometimes when I want a very particular effect I will cut some small fabric strips in varying widths to test them out until I get the perfect binding. For standard comfort quilts I tend to cut a width of 2 1/4". If the batting is thick or the quilt has a backing similar to Minky I'll cut a 2 1/2" strip.
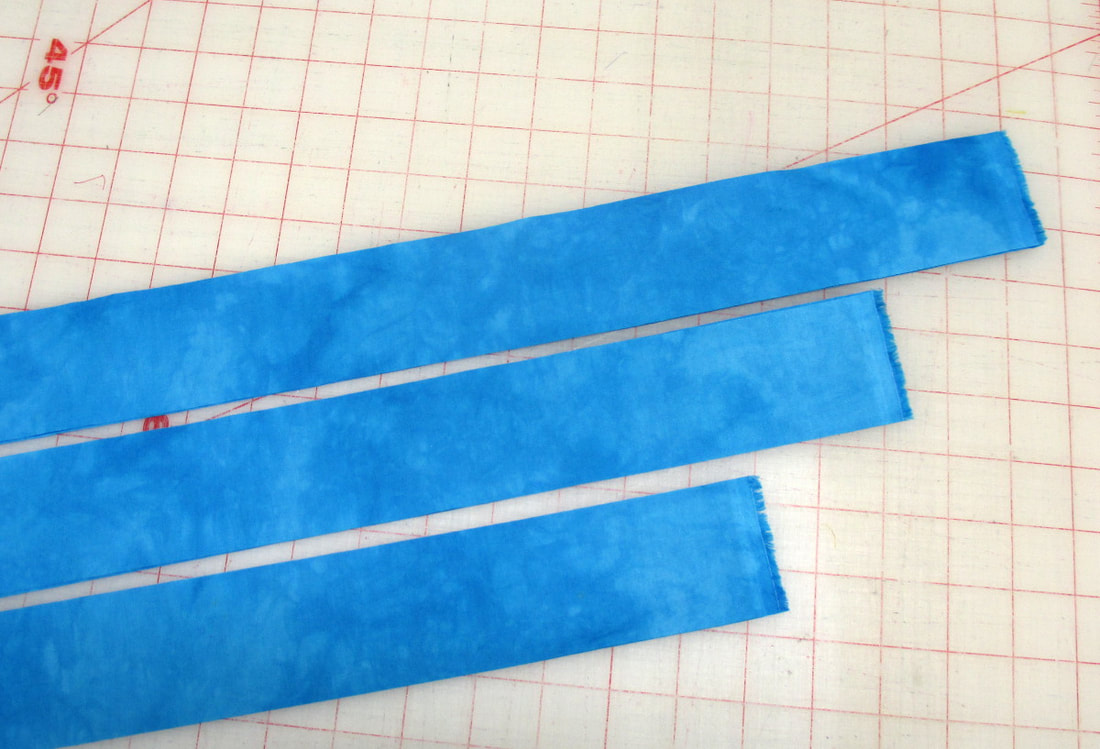
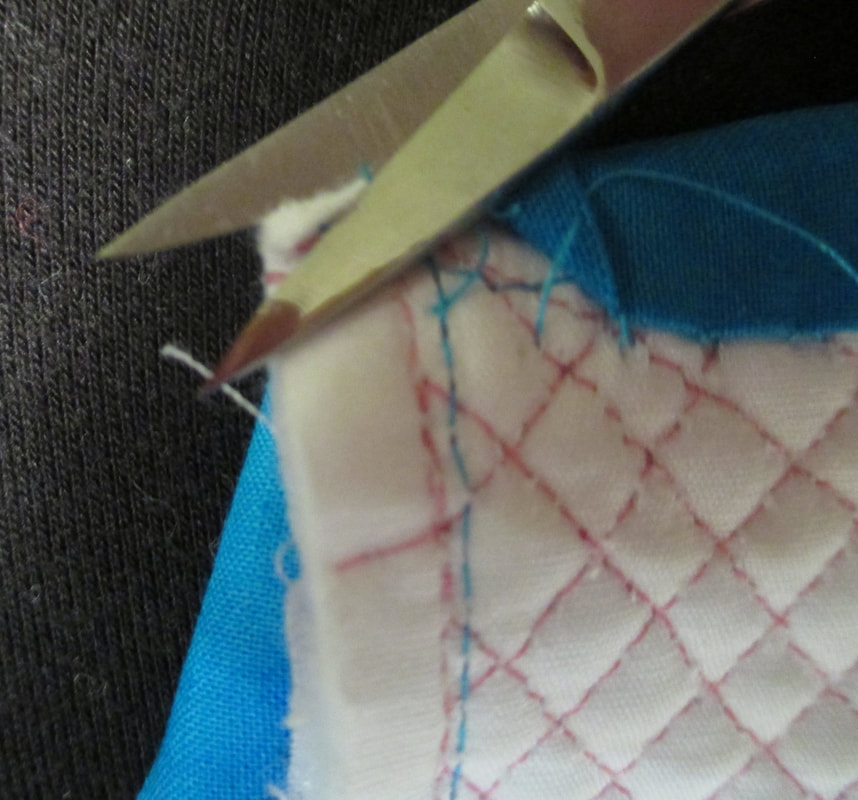
Cut all of the strips that you need and stitch them together into one long strip. To manage the bulk of the seam stitch the strips together on the bias.
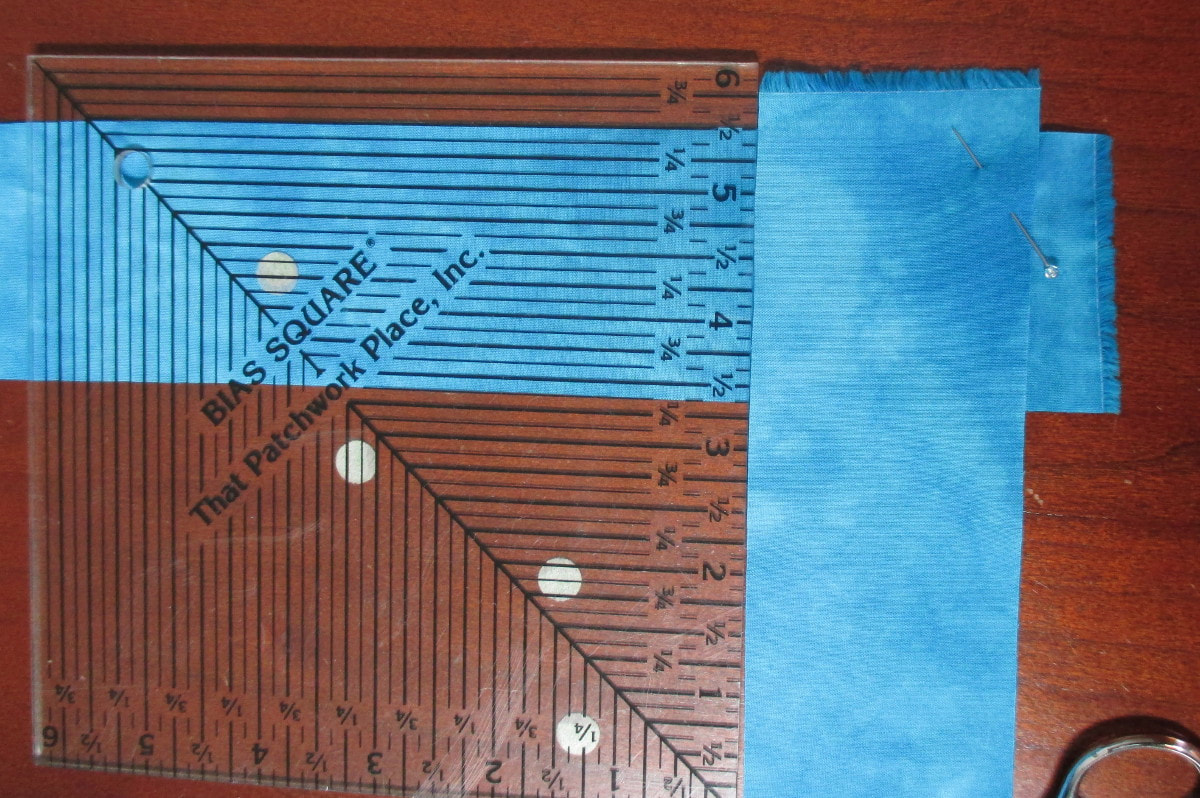
Lay out the first strip right side up horizontally on your work surface and align a ruler along the top edge. Then place the next strip perpendicular to the first one right sides together along the edge of the ruler.
Lay out the first strip right side up horizontally on your work surface and align a ruler along the top edge. Then place the next strip perpendicular to the first one right sides together along the edge of the ruler.
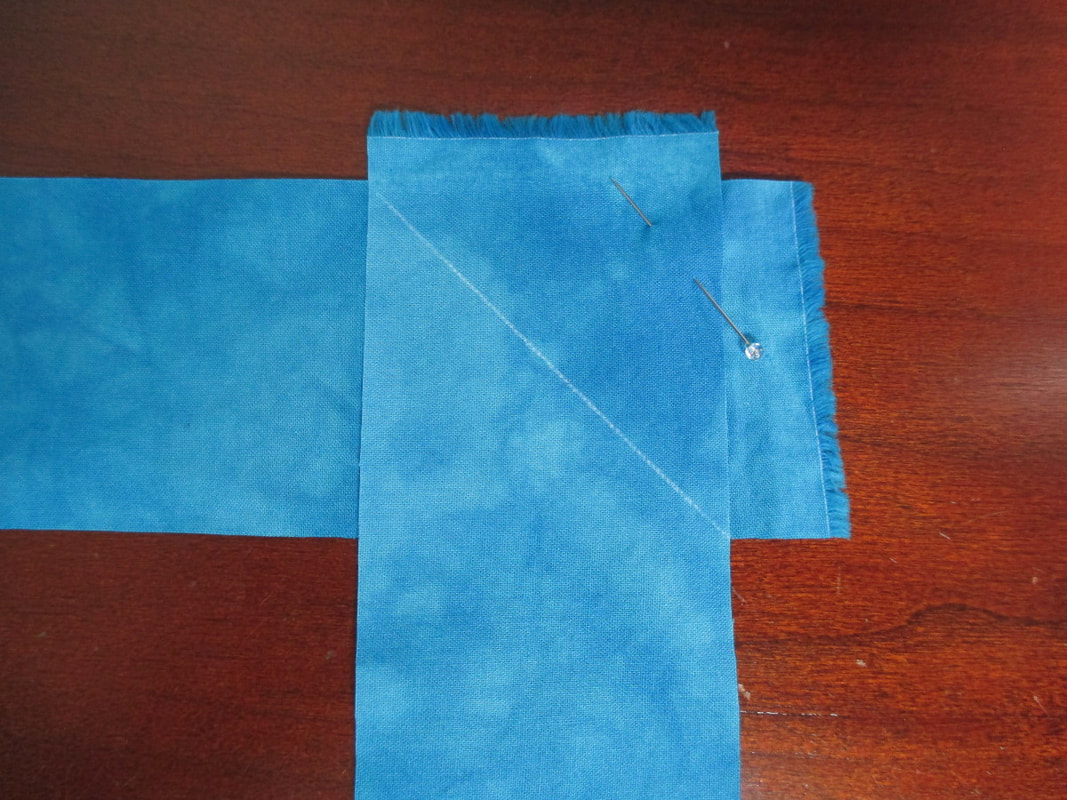
Pin the 2 strips together on the top right and chalk or pencil a line diagonally corner to corner across the strip.

Stitch on the drawn line. I like to use a stitch length of 1.5 - 2.0 for these seams.
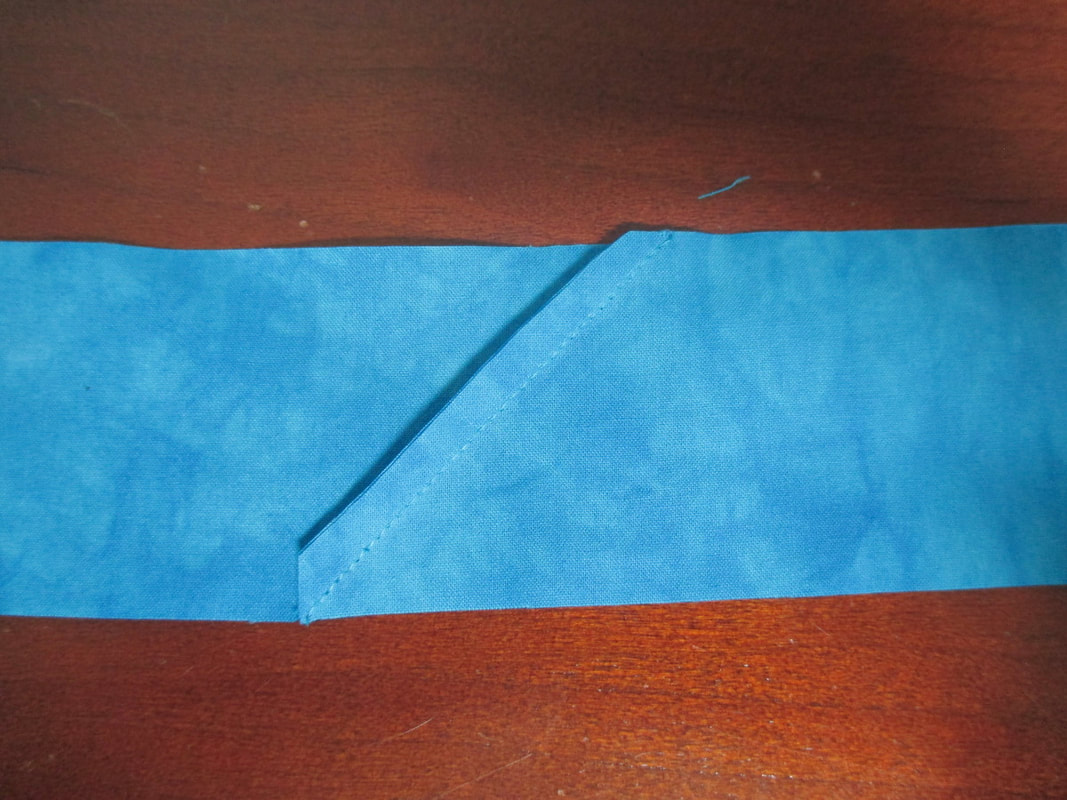
Trim the seam allowance and press the seam to one side. The binding gets a lot of wear and a seam pressed open will wear faster.
Stitch all of the binding pieces into one long strip.
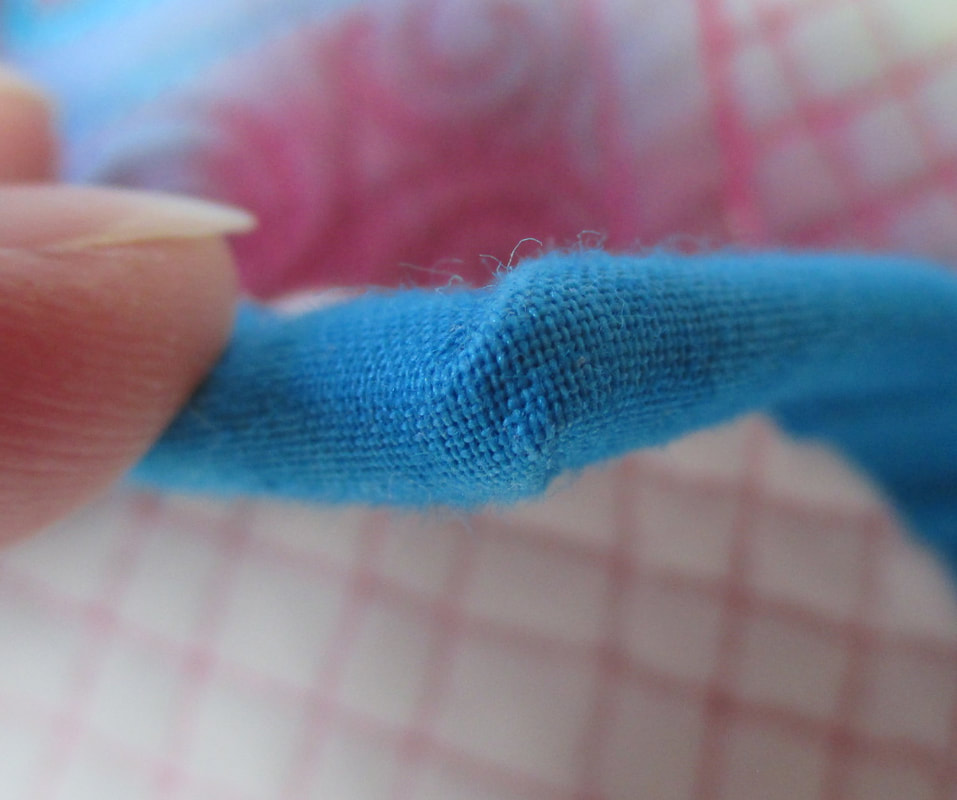
I do not take an extra step to press the binding in half. I just fold it as I attach it to the quilt.
Stitch all of the binding pieces into one long strip.
I do not take an extra step to press the binding in half. I just fold it as I attach it to the quilt.
Sew the binding to one side of the quilt
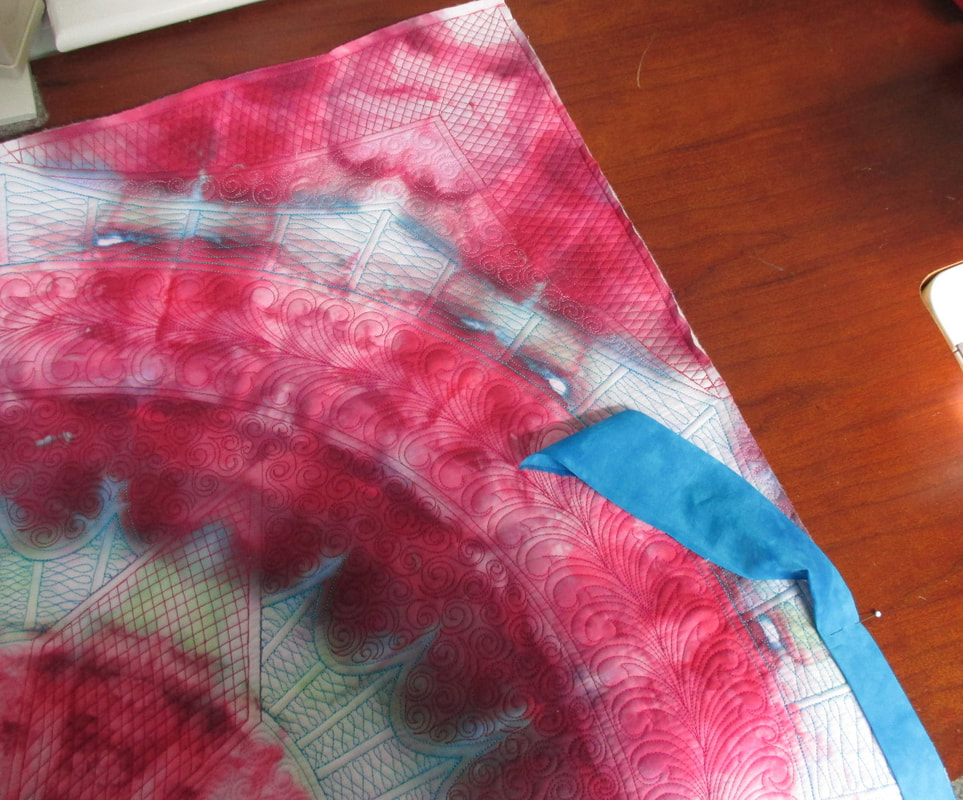
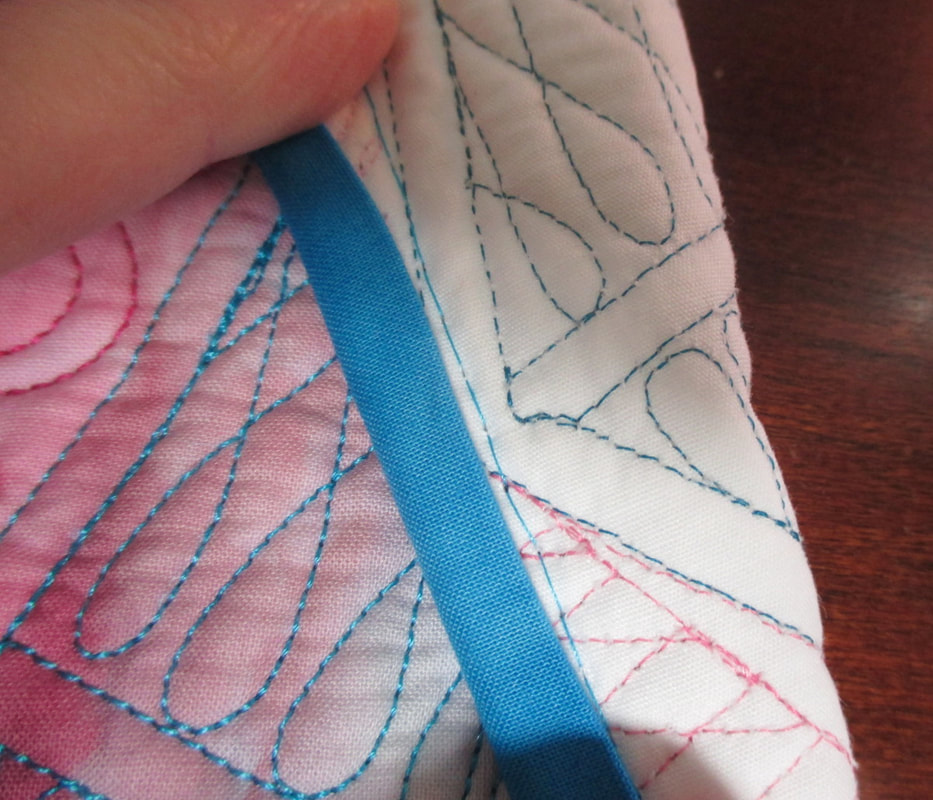
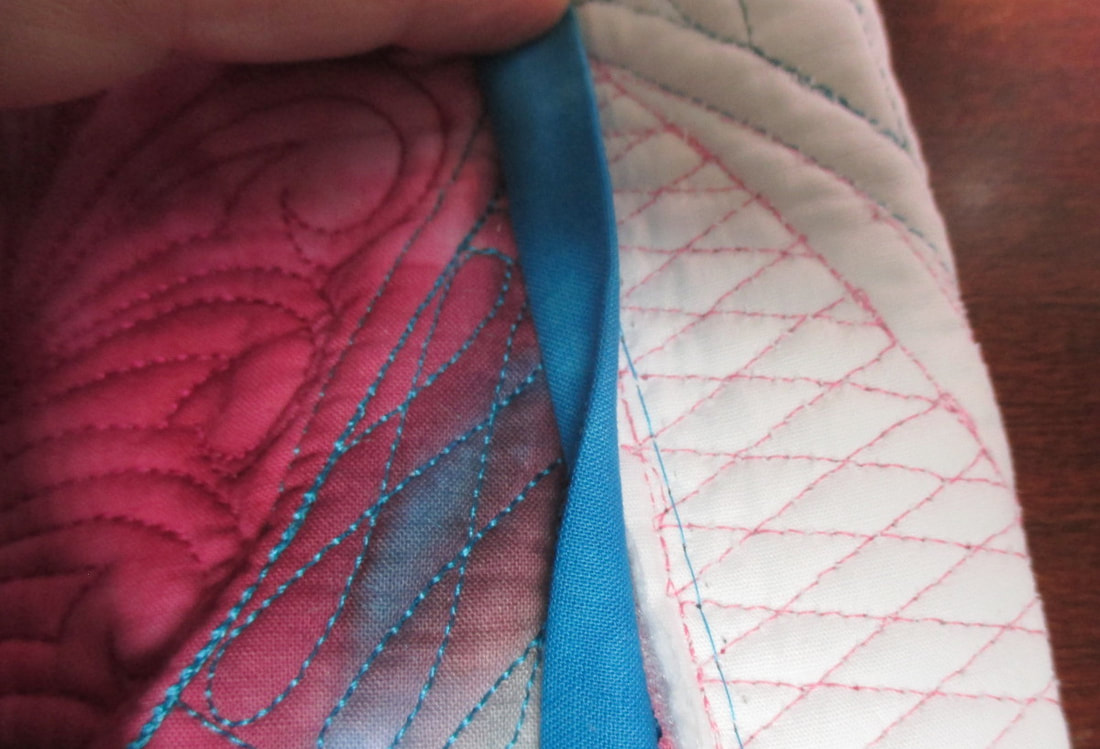
Start applying the binding near the middle of one edge. Fold the binding in half (wrong sides together) and align the wrong edges to the raw edge of the quilt. Leave about 10 - 12" of binding tail ahead of where you start stitching.
If you are doing a traditional binding then sew it to the from of the quilt.
If you are doing a totally machine stitched binding then stitch the binding to the back of the quilt.
If you are doing a traditional binding then sew it to the from of the quilt.
If you are doing a totally machine stitched binding then stitch the binding to the back of the quilt.
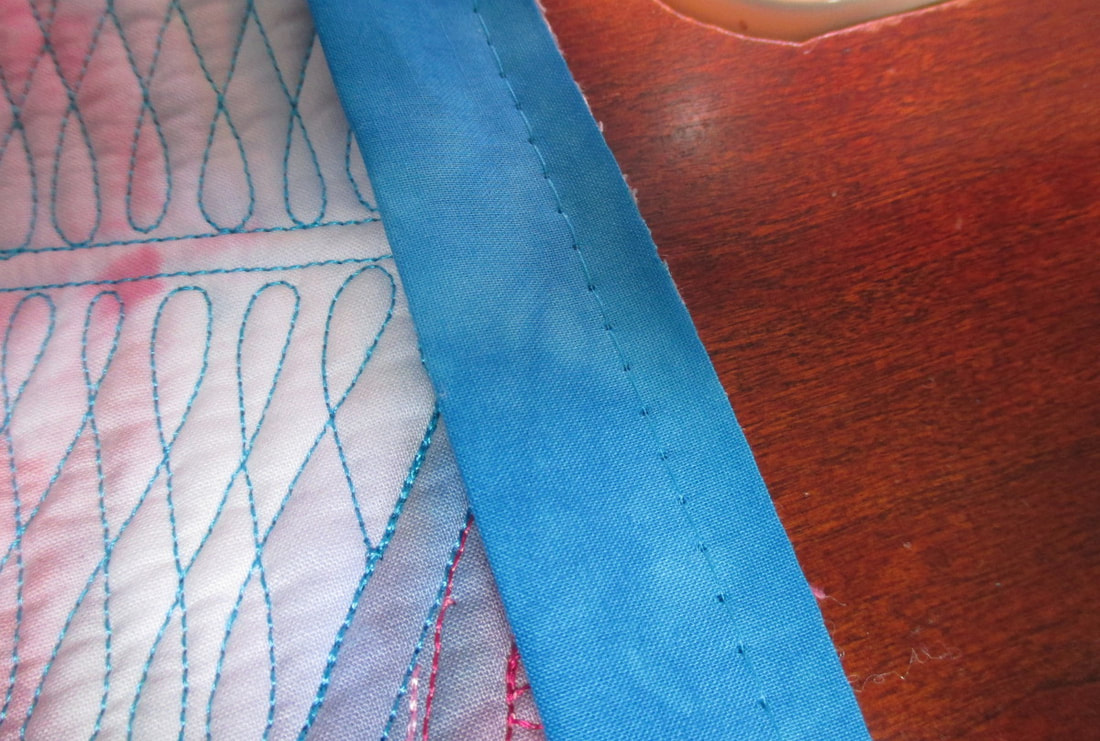
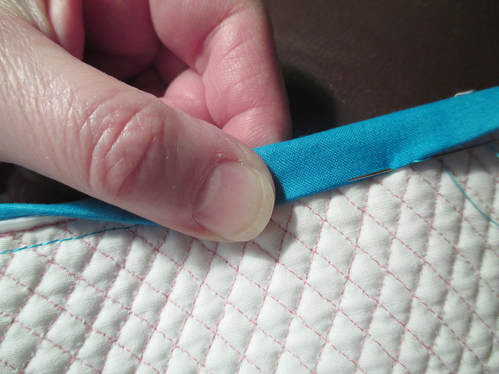
The first thing you want to figure out is the optimal seam allowance. I set my machine to a long basting stitch and stitch a few inches at about 1/4".
Fold the binding to the back to see if the edge of the binding will cover the basting stitch. In this example, it doesn't. So Ill rip out that stitching a try a narrower seam allowance.
This one is perfect!

Set your seam allowance on the machine. That might be with the width of your sewing machine foot, a line on the sewing plate or a seam allowance attachment.
On my very simple straight stitch machine I use a stack of sticky notes taped to the machine.
On my very simple straight stitch machine I use a stack of sticky notes taped to the machine.
Turning the corners

As you stitch the binding be careful not to stretch the binding, especially at the corners. If the binding is stretched while it's sewn the corners on the finished quilt will curl in.
As you get near the corner chalk or pencil a diagonal line from the corner of the edge of the quilt. Stitch to that mark, stop with the needle down, lift the presser foot and turn the quilt to align the needle to stitch on the chalked line. Lower the presser foot and stitch off the edge of the corner.
Clip the threads.
Here's what the corner looks like after it's stitched.
Fold the binding 45 degrees so that the cut edges are perfectly aligned with the next edge of the quilt you are going to sew.
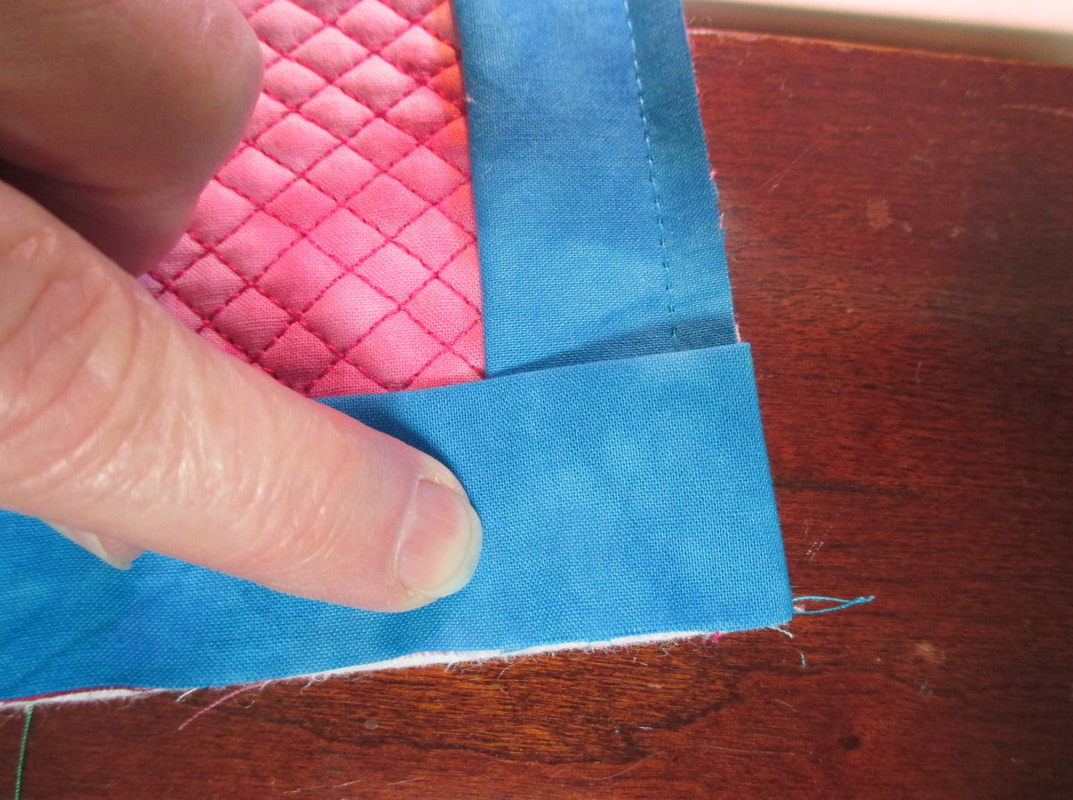
Fold the binding back over the previous fold so that the new folded edge is perfectly aligned with the sewn edge of the quilt and the loose binding is perfectly aligned with the next edge to stitch.
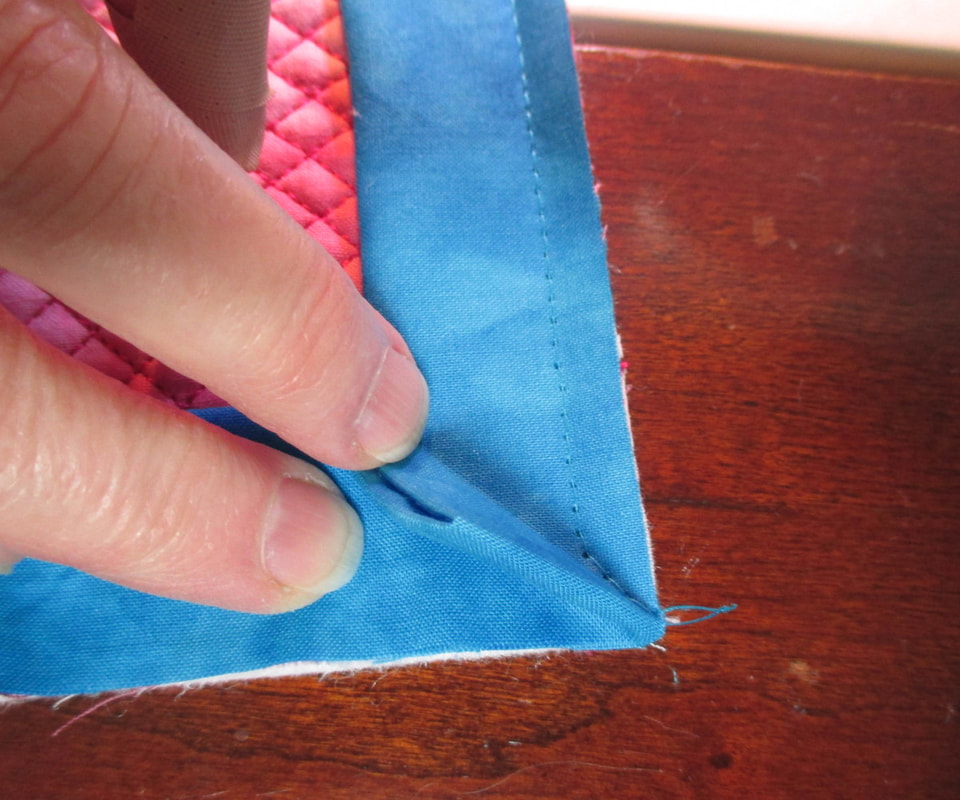
Here's what it looks like under that folded corner.
Start sewing the next side from the edge of the quilt down to the next corner. Continue like this until you are back around to ALMOST where you started. Leave about 10" unstitched to leave space for joining the tails.
****Note: As you stitch your binding you might have a situation where a binding seam ends up in one of your corners. You can prevent this all together by laying out the binding around the quilt before you start stitching and adjust your starting point so that those seams are always away from a corner. Or as you get about 10" from a corner and see that the seam is falling there, cut your threads and re-piece the ends so that the seam is moved away from the corner.
****Note: As you stitch your binding you might have a situation where a binding seam ends up in one of your corners. You can prevent this all together by laying out the binding around the quilt before you start stitching and adjust your starting point so that those seams are always away from a corner. Or as you get about 10" from a corner and see that the seam is falling there, cut your threads and re-piece the ends so that the seam is moved away from the corner.
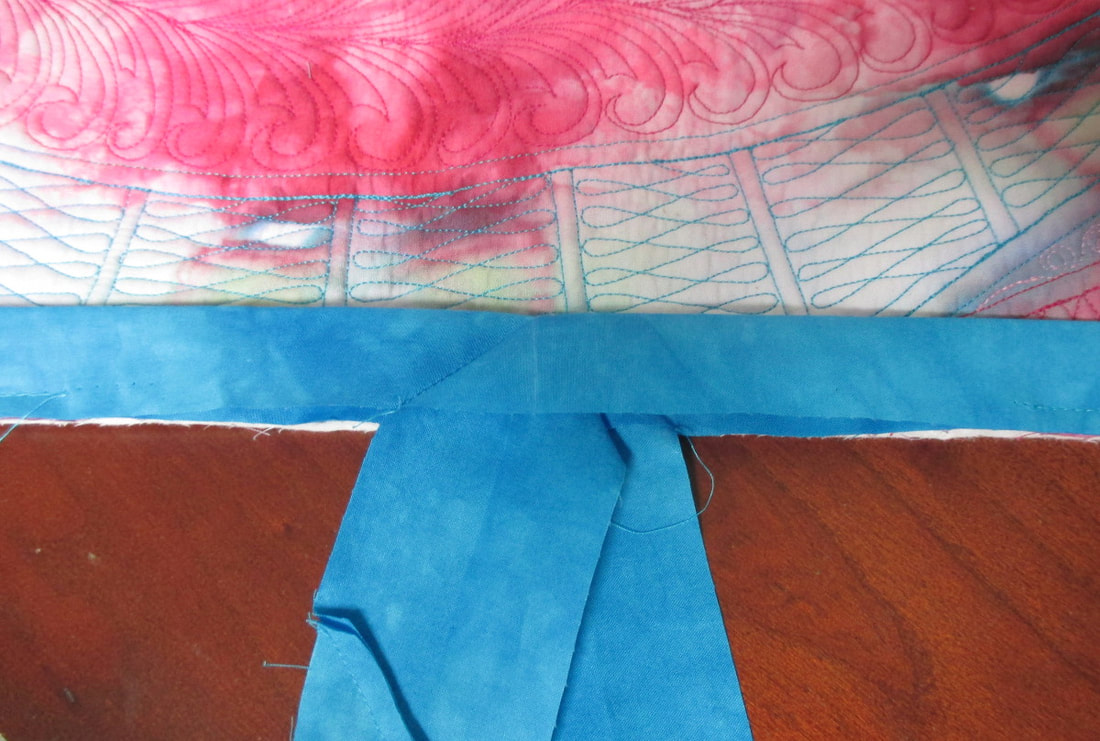
Joining the ends

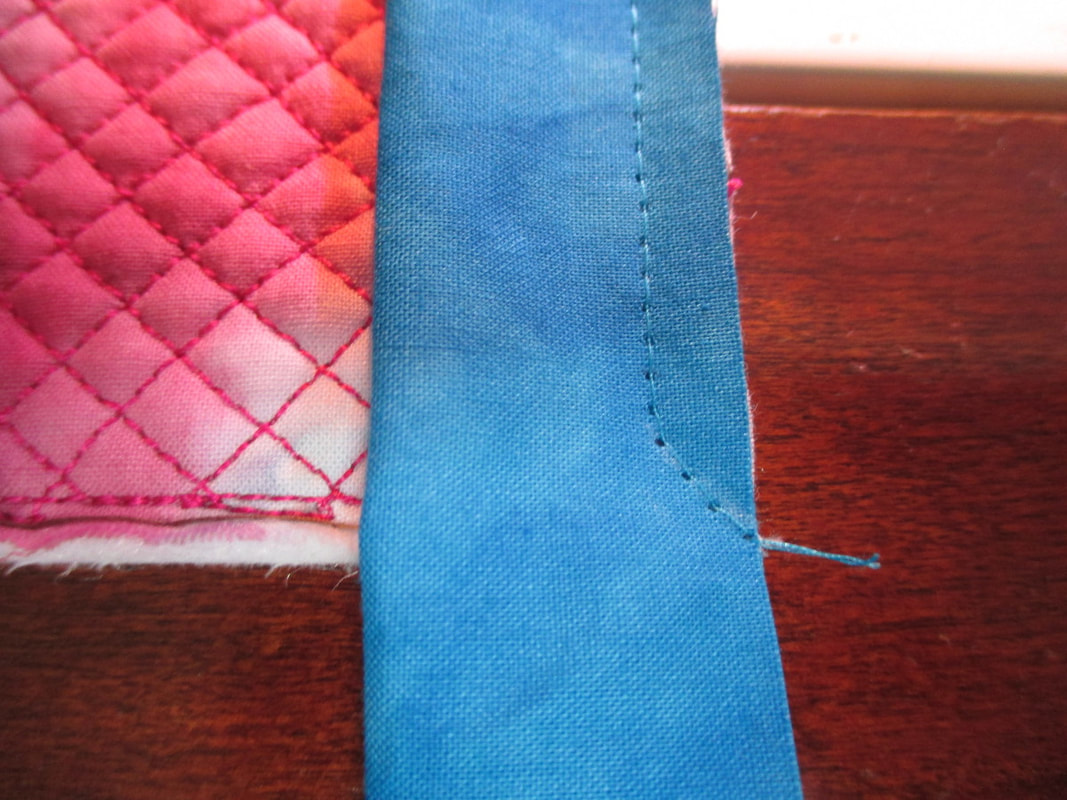
Leave about 10 - 15" area unstitched so that you have room to work with the binding tails and get them sewn together.
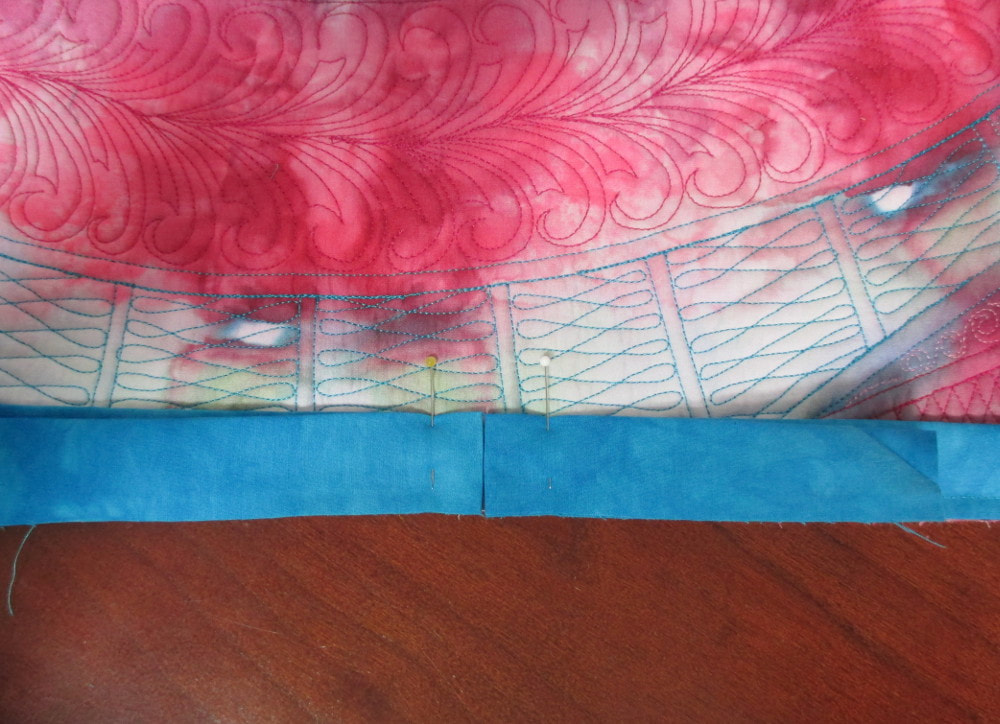
Fold the 2 binding tails back on so that they butt together in the middle of the space. Finger press creases in each binding end and pin the folds.
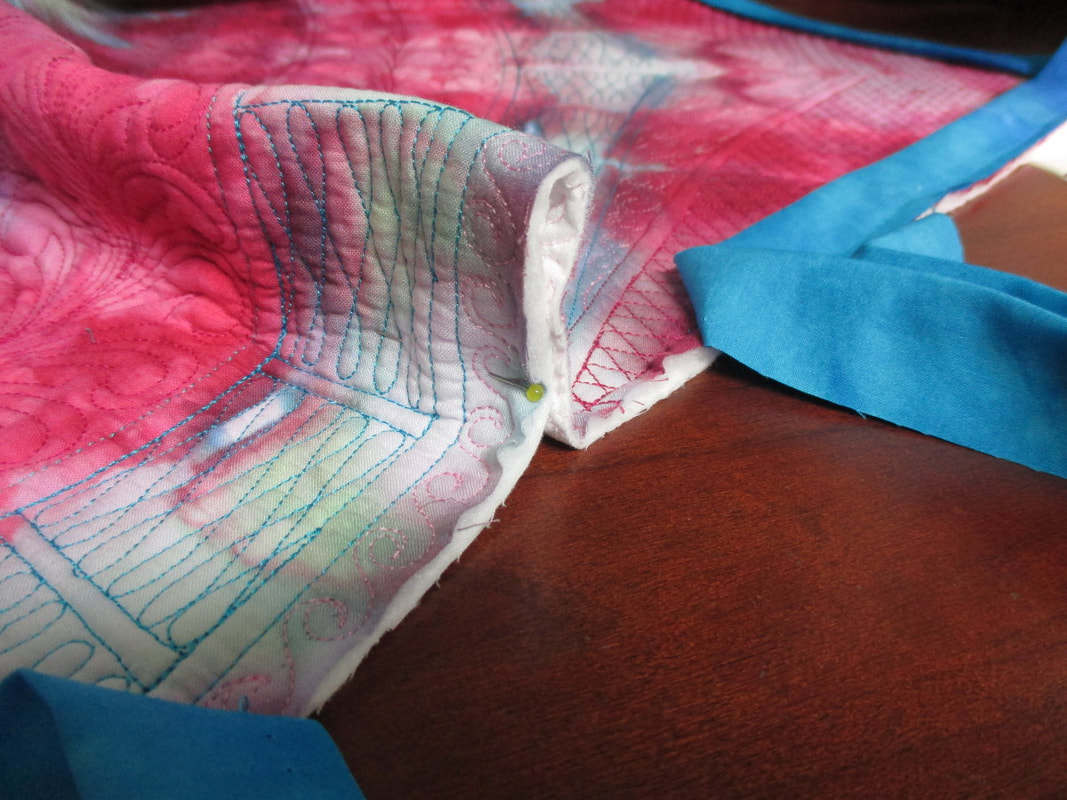
To give yourself some working space temporarily pin a big pleat in the quilt.
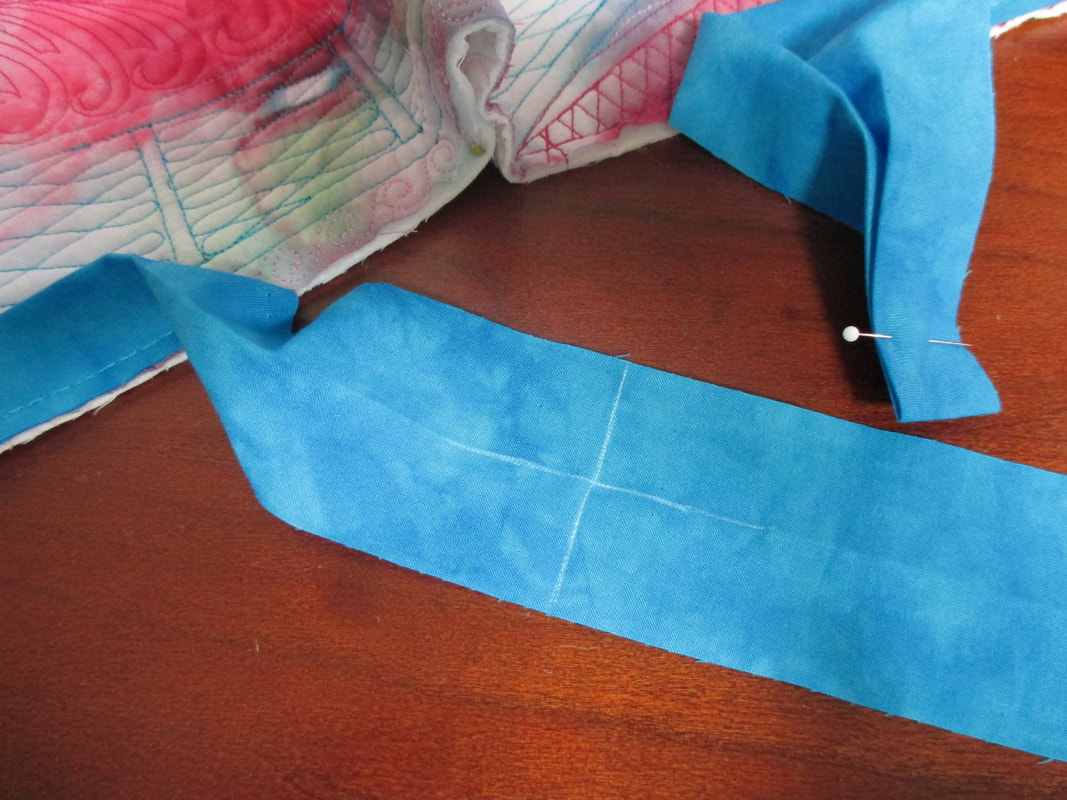
Open each binding tail and use chalk to mark the creases on the right side of the fabric. With some fabrics the crease will be visible enough without marking.
When joining the edges make sure that you always have right sides together.
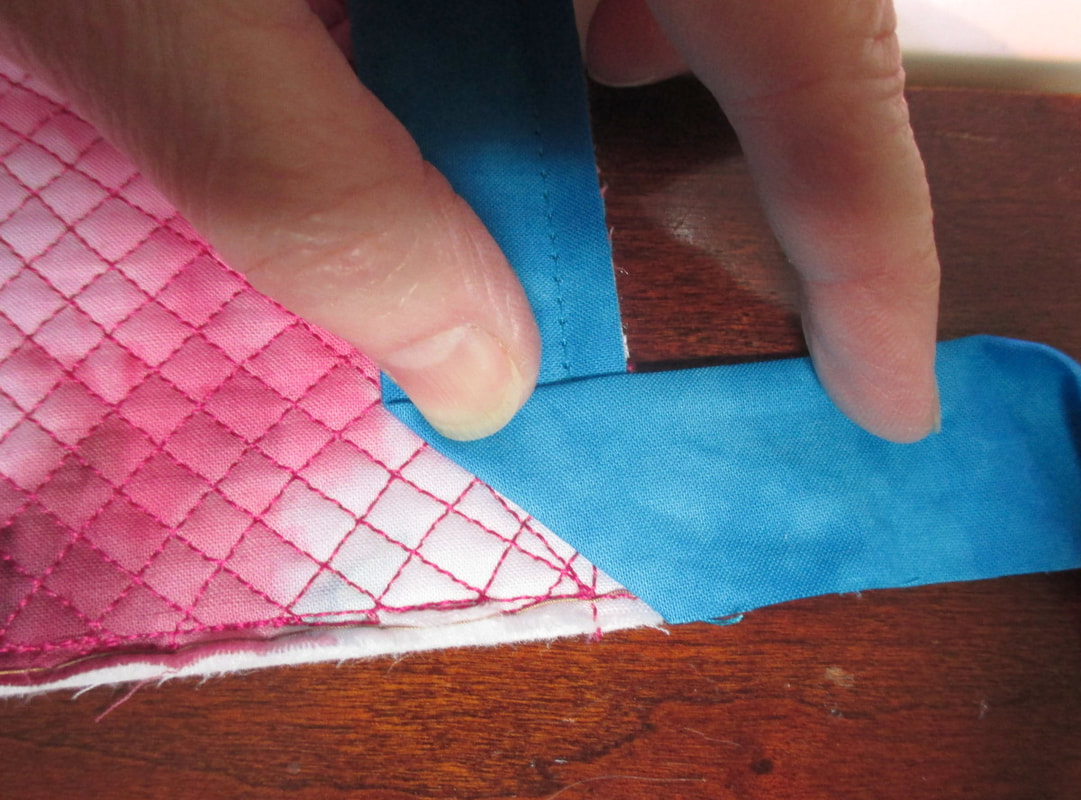
Open the left binding tail and then place the right binding tail on it PERPENDICULAR, aligning the chalked lines in both directions.
Open the left binding tail and then place the right binding tail on it PERPENDICULAR, aligning the chalked lines in both directions.
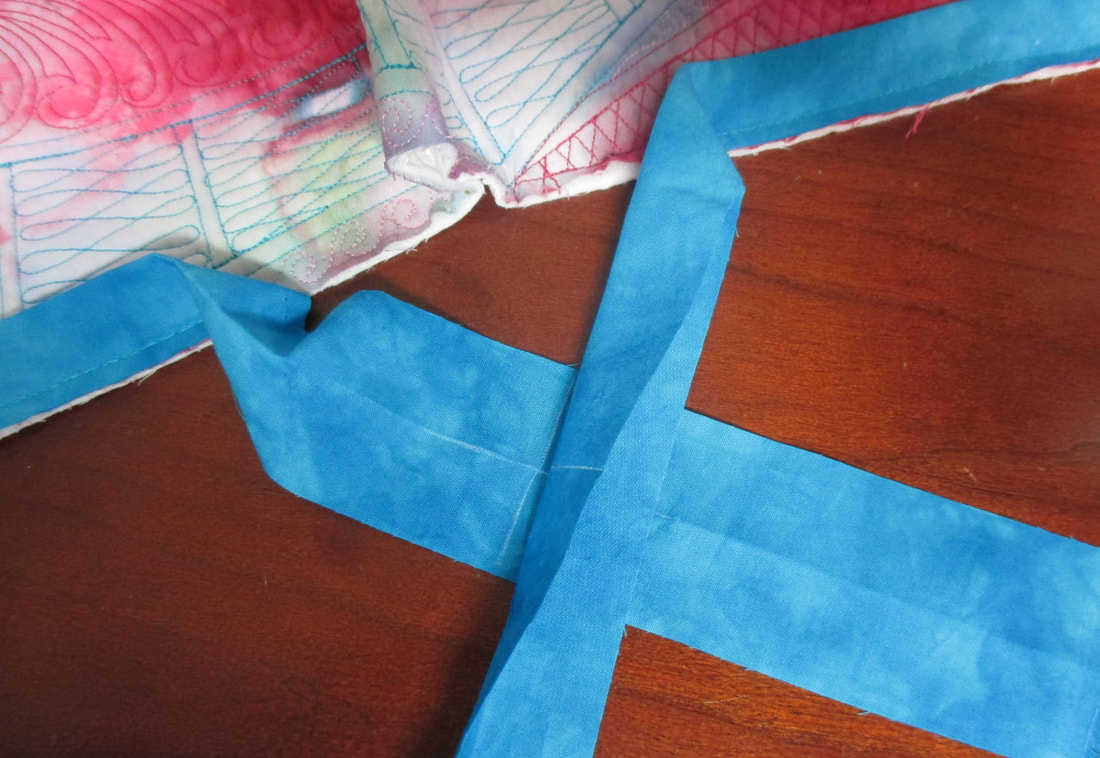
Here's a closeup of how they are aligned.

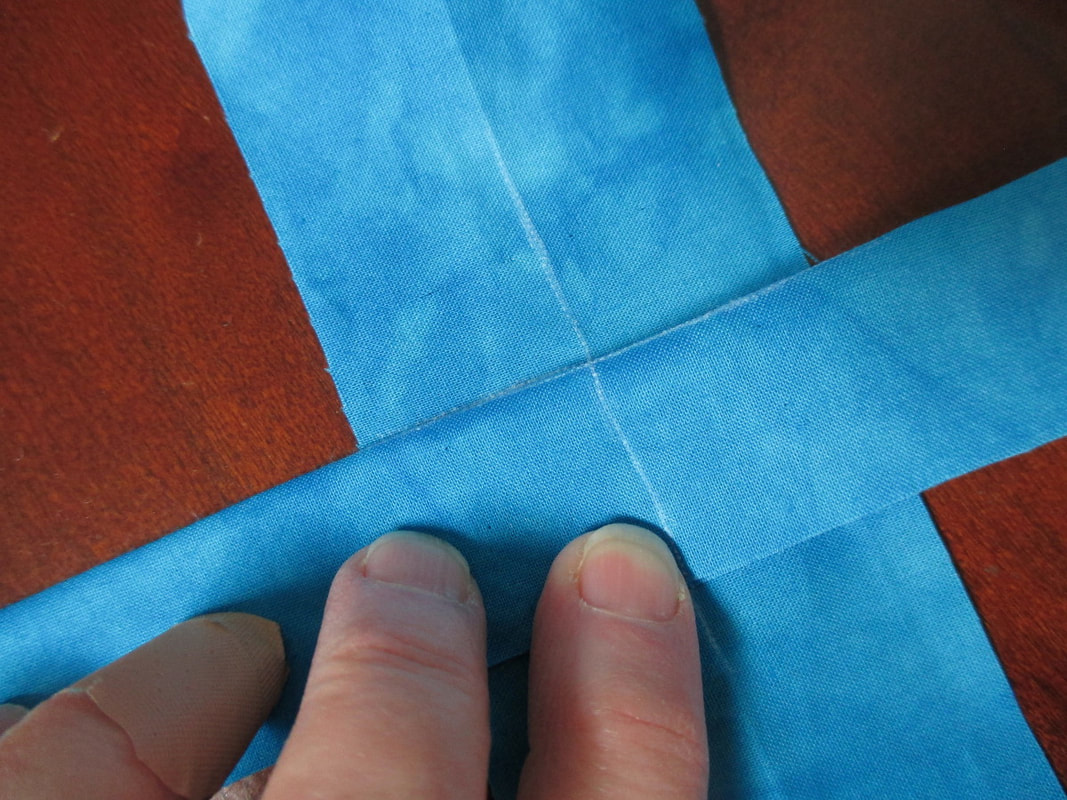
Chalk or pencil a line diagonally across that joint. You know you've done it right if that line is PARALLEL to the edge of the quilt.
Stitch that line but do not trim yet.
Stitch that line but do not trim yet.
Before you cut the excess fabric from the binding remove the pleat in the quilt, open the binding and make sure that it fits perfectly. Once you know it's right trim the excess fabric from the last binding seam, finger press the seam allowance to one side and finish stitching the binding to the quilt.
Sew the binding to the back
If you are doing the totally machine stitched binding all of these instructions apply to the front of the quilt and you will be topstitching instead of hand stitching. Use a bobbin thread that will match your backing fabric.
I do not pin or clip the binding as I hand sew it. I just work on the inch that I'm getting read to stitch and hold it with my hand. Pinning and clipping just takes a lot of extra time and doesn't really add any value. Every time you remove a pin or clip you are still adjusting the binding a bit with your hand.
Hand stitch the binding with a blind hem stitch or ladder stitch. I use a single thread and make my stitches about 1/4 inch apart. Hide knots under the binding.
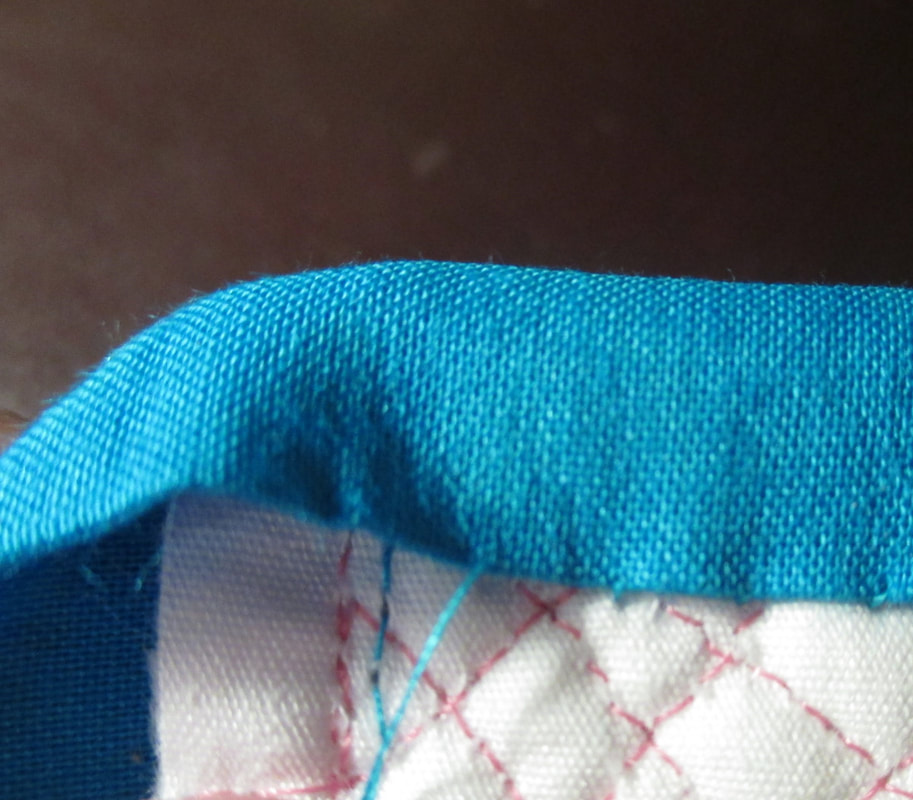
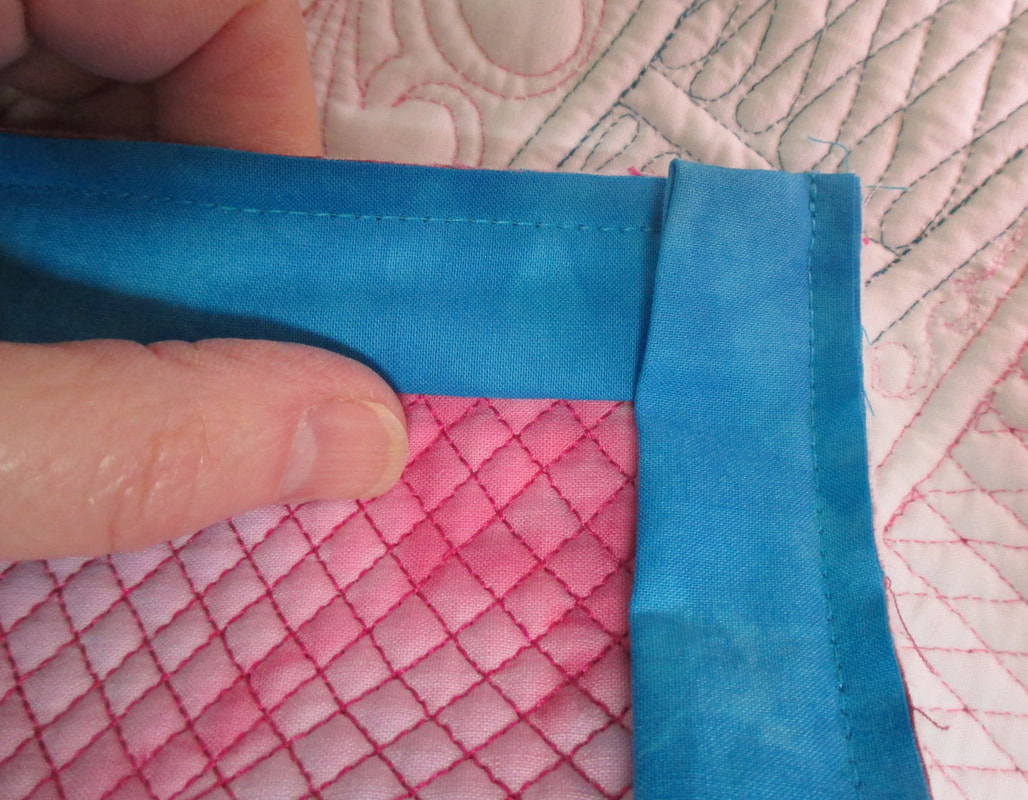
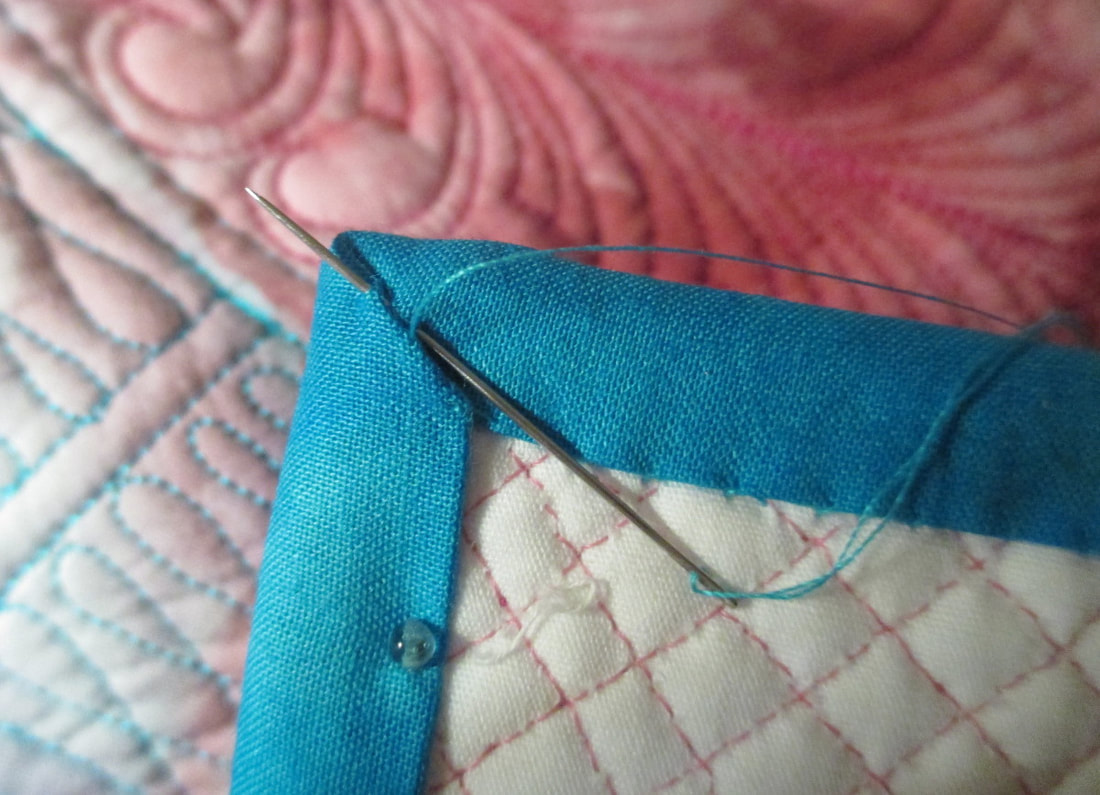
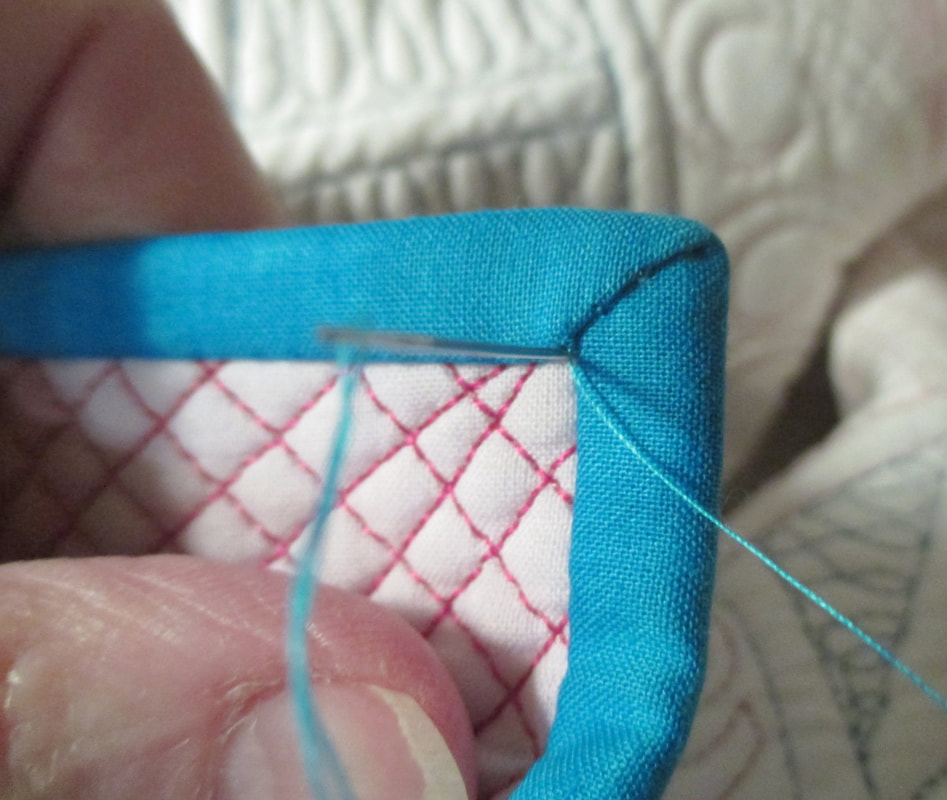
As you get to the corner stop just short of the binding bobbin stitching line. Fold the top edge down and the left edge over to the right.
If everything is right you will get a perfect miter meeting at the corner. This can take some fiddling but it's worth a little effort to get it perfect.
At this point I actually use a pin or two to keep this in place while I stitch the miter.
At this point I actually use a pin or two to keep this in place while I stitch the miter.
Occasionally there's just too much bulk in the corner to get a perfectly turned corner. I'll just snip out a little batting to reduce that bulk and then I can get the corner to turn perfectly.
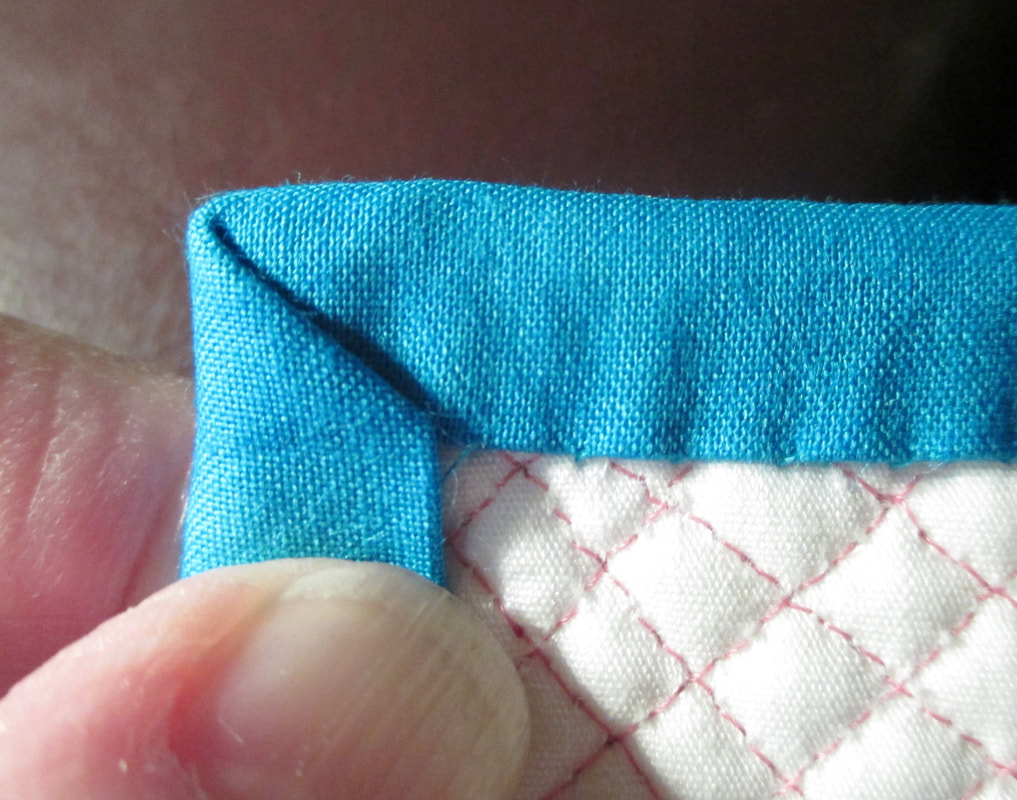
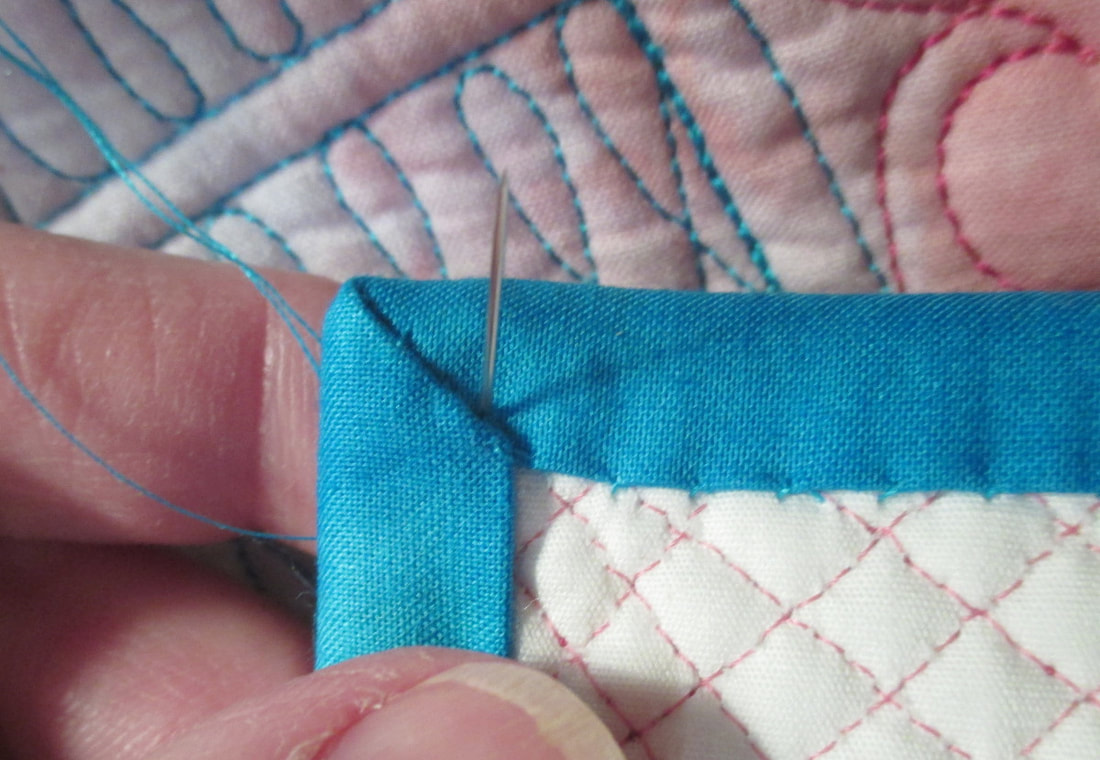
Take a moment to admire this perfectly turned corner. Looking at the corner from the side you can see that the bulk from the folds on each side are on opposite sides of the miter. In the photo the bulk on the top is to the right and the bulk on the bottom is to the left. That makes the corner balanced and you will get less wear.
Before I stitch the next edge of the quilt I always stitch down the miter fold. Start with the back side.
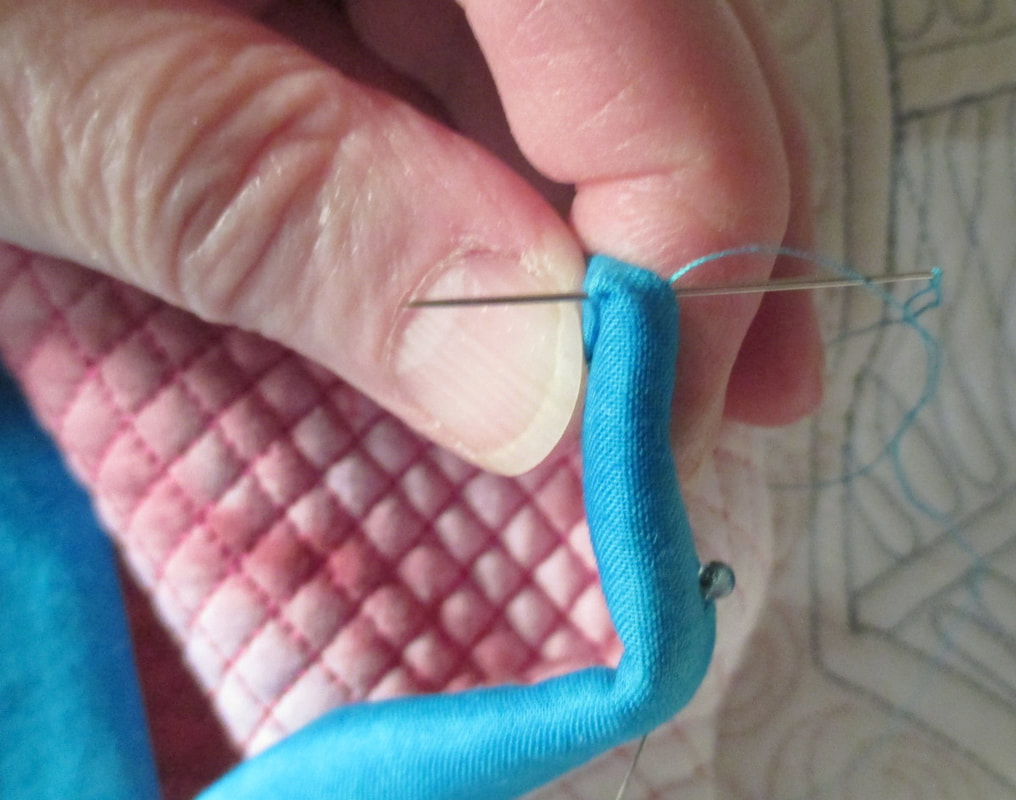
At the point stitch straight through to the front coming out in the fold.
Take a few stitches to secure the fold on the front of the binding and then poke the needle back to the back making sure you come out in a convenient spot.
That's a convenient spot. Now you can travel back to the corner and start stitching the binding down the next side.
One last tip
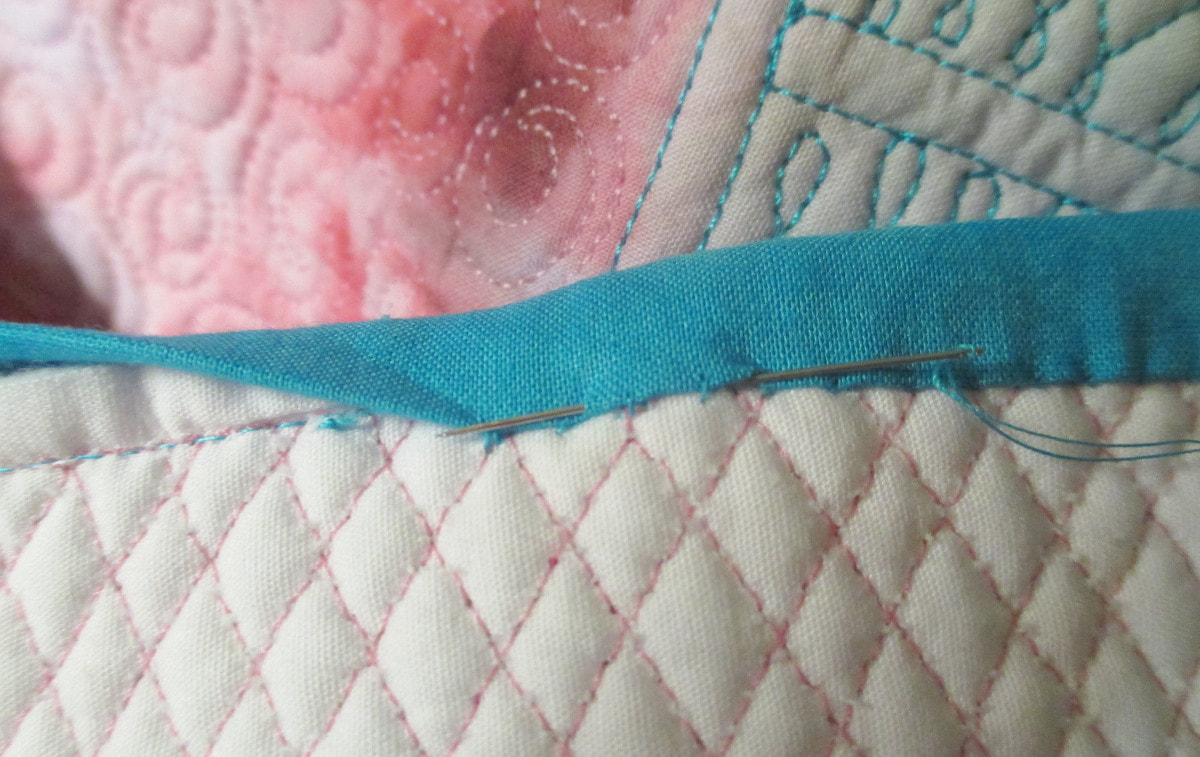
When I'm hand stitching the binding I end a thread with a knot under the binding. You can see my knot right under the folded edge of the binding. I always start the new thread so that I overlap a few stitches. That way of a know gets loose it's less likely to unravel because there are some double stitches in that area.