Leaf Printing
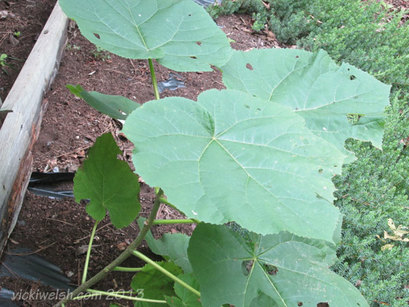
Letting the weeds get out of hand is something that I'm really good out and, on rare occasion, it can be a good art thing too. I had this giant plat growing behind our little deck for a couple of years. I have no idea what it is but it's leaves are awesome.
Estelle and I took the opportunity to cut and print a few and I thought I'd share how we did it.
The first step is selecting the leaves. The leaves on this weed were perfect. They were thin and pliable. They have very prominent veins on the back side and the leaf doesn't tear too easily. They did have a tendency to wilt quickly but that wasn't an issue once we got paint on them. Thick or papery leaves don't work quite as well. You want to be able to get the leaf flat without it splitting.
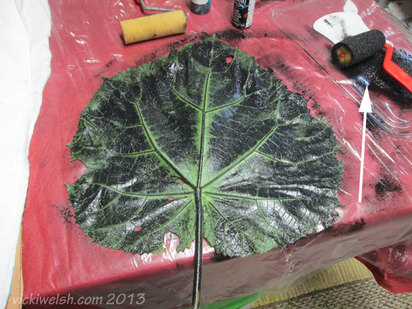
We spread some plastic on a smooth table and placed the leaf face down on the table. You can see out paint palette on the right. We spread paint on the tray and picked it up with a foam roller. The foam roller is perfect for applying the paint to the leaf. It doesn't cause any friction with the leaf so it's less likely to tear. Just be sure to get a layer of paint spread evenly over the entire leaf, especially out to the edges.
You can use any fabric paint or ink for this. We have used screen printing ink, cheap craft store paint and fabric paints. They all work well.
You can use any fabric paint or ink for this. We have used screen printing ink, cheap craft store paint and fabric paints. They all work well.
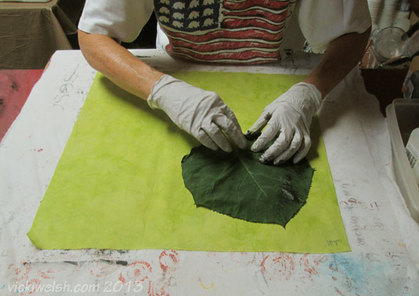
The tricky part with a big leaf is getting it positioned on the fabric. We held onto the stem and sort of waved it down onto the fabric. We let the air trapped under the leaf help to spread the edges of the leaf out as we dropped it gently onto the fabric. Once it's down carefully spread out any curled edges without applying any pressure on the leaf. You want to get it spread out before the paint transfers to the fabric.
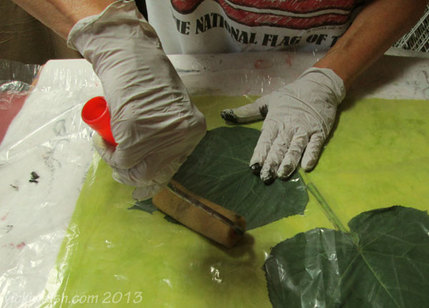
Cover the leaf with a clean piece of plastic. An opened grocery sack will work. This just helps to keep from accidentally transferring any paint other than what's on that leaf. Use a clean foam paint roller as a brayer to gently press the leaf to the fabric and transfer the paint. Be sure to cover the entire leaf and stem paying particular attention to the edges.
Carefully pick up the leaf and get ready to print it again.
Carefully pick up the leaf and get ready to print it again.
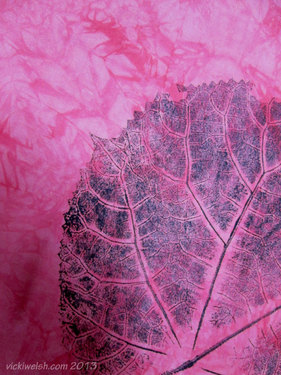
I printed my leaves on red fabric and here's a close up of one of the prints. Isn't that fabulous?
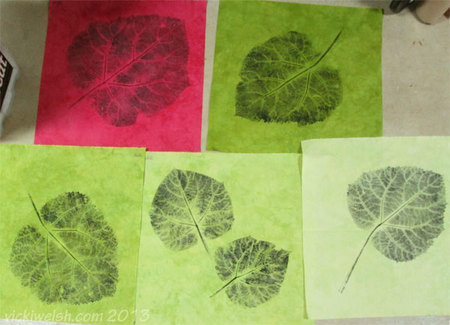
The red print in this photo is my first one and you can see that I didn't roll the leaf evenly and there are areas of uneven paint transfer. The green prints are the ones that Estelle did. To give you an idea of scale, these are all fat quarters of fabric.
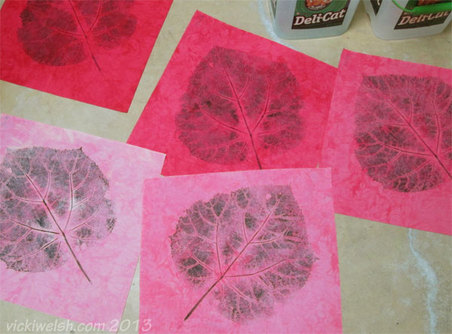
As I said, I did mine on a set of red and I used the same leaf 6 times and I could have gotten even more prints from it if needed.