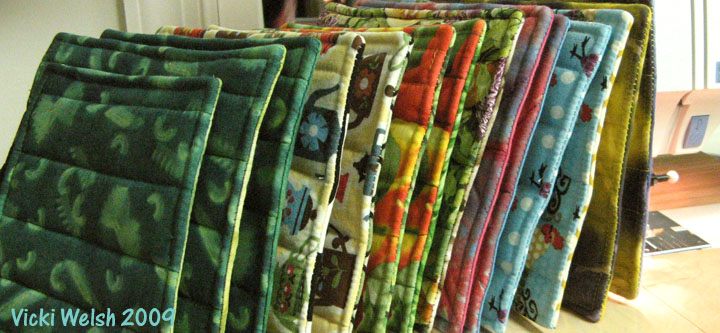
The Best Potholder Pattern
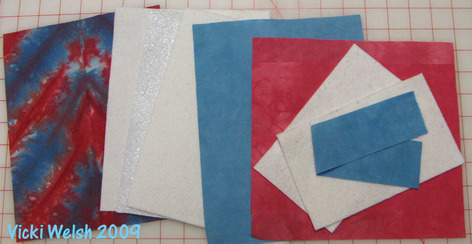
Cutting:
Front and back fabric, each 10" x 8" (the stripe and the small print)
Cotton Batting, 2 pieces each 9" x 7" (I used Warm and Natural scraps)
Insul-Bright, 1 pieces 9" x 7"
Pockets, 2 pieces each 9" x 8" (the floral print)
Cotton batting for pocket padding, 2 pieces each 7" x 4 1/4"
Front and back fabric, each 10" x 8" (the stripe and the small print)
Cotton Batting, 2 pieces each 9" x 7" (I used Warm and Natural scraps)
Insul-Bright, 1 pieces 9" x 7"
Pockets, 2 pieces each 9" x 8" (the floral print)
Cotton batting for pocket padding, 2 pieces each 7" x 4 1/4"
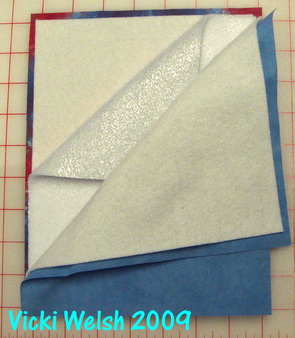
Layer the potholder parts: front fabric (right side down), 1 piece of cotton batting centered in the fabric, Insul-Bright, second piece of cotton batting and the back layer of the fabric (right side up). The batting layers are centered in the fabric so that there is about 1/2" of fabric extra around all sides of the batting. Pin through all layers. This will probably seem way to thick and it will be tough to pin through but, trust me, this is right!
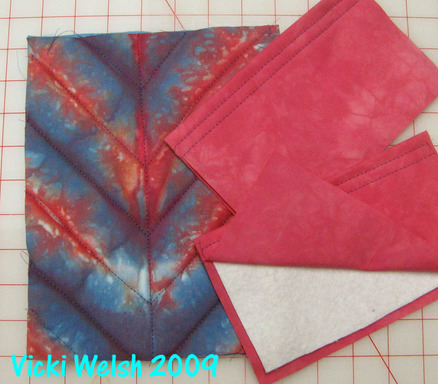
Quilt through all layers. I followed the "V" of the dye pattern but you can do simple straight lines. Stitch with a long stitch size. A long stitch length is necessary when stitching through so many layers. You do not need to quilt densely. Parallel lines an inch apart will be plenty but it's good to have some stitching going off the edges.
Prepare the pockets. Fold 2 pieces of the pocket fabric in half and place a piece of the batting inside against the fold. Stitch a couple of rows of stitches through all layers near the folded edge.
Prepare the pockets. Fold 2 pieces of the pocket fabric in half and place a piece of the batting inside against the fold. Stitch a couple of rows of stitches through all layers near the folded edge.

Here's a side view of the quilted potholder where you can see that the batting layers do not go all the way to the edge of the fabric. This makes the potholder easier to turn.
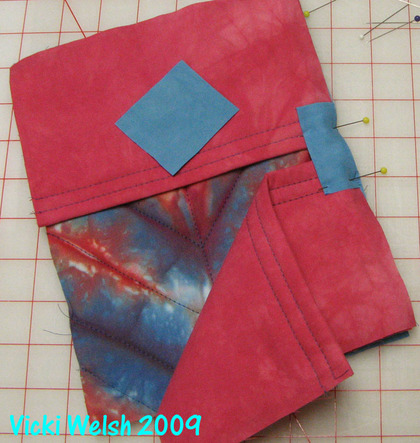
Lay the pockets on the FRONT of the potholder with the folded edges of the pockets toward the center of the potholder. The pockets will not touch at the center of the potholder. See that little piece blue of fabric on the right? It's about 1 1/5" x 2" and is cut from the backing fabric. I folded it in half lengthwise and pinned it over the space where the pockets almost meet. See it pinned on the right side? The folded edge is toward the INSIDE of the potholder. This will encase the raw edges on the sides of the potholder. Pin through all layers.
I do not hang my potholders but you could insert a loop between these layers to add a loop.
I do not hang my potholders but you could insert a loop between these layers to add a loop.
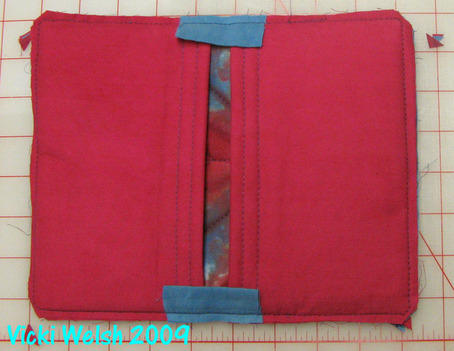
Stitch all around the potholder about 1/2" from the edge. If you do it right you will not sew through batting. Clip the corners and turn the potholder right side out. This will take some careful fiddling so that you do not poke the corners out.
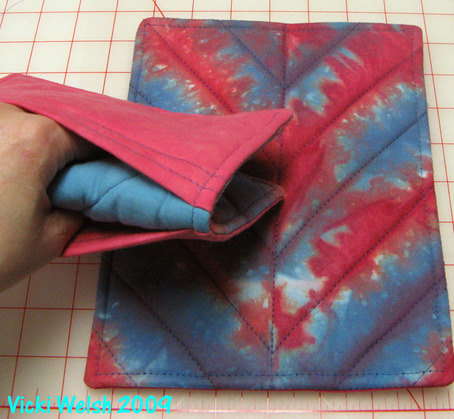
After the potholder is turned, top stitch about 1/4" from the edge all the way around.
At first it will seem really stiff but after a few uses it will become soft and pliable and you will appreciate the 3 layers of batting/insulation.
When I make these I tend to make a lot at one time and set them up on an assembly line. In that way you can get several done in an evening.
At first it will seem really stiff but after a few uses it will become soft and pliable and you will appreciate the 3 layers of batting/insulation.
When I make these I tend to make a lot at one time and set them up on an assembly line. In that way you can get several done in an evening.
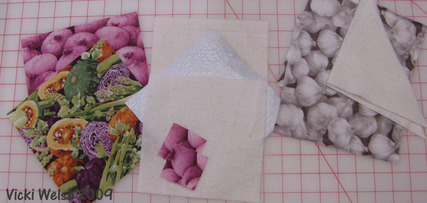
The square potholder is about 6 1/2" square.
Cutting:
Front and back fabric, each 7 1/2" square (the veggies and purple onions)
Cotton Batting, 2 pieces each 6 1/2" square (I used Warm and Natural scraps)
Insul-Bright, 1 pieces 6 1/2" square
Pockets, 2 pieces each 71/2" square (the white onion print)
Cotton batting for pocket padding, 1 6 1/2" square cut on the diagonal
Corners, 2 2" squares (purple onions)
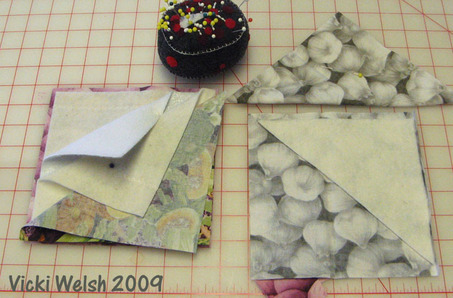
Layer the potholder parts: front fabric (right side down), 1 piece of cotton batting centered in the fabric, Insul-Bright, second piece of cotton batting and the back layer of the fabric (right side up). The batting layers are centered in the fabric so that there is about 1/2" of fabric extra around all sides of the batting. Pin through all layers.
Place the pocket batting on the diagonal of the pocket fabric and fold the pocket over. These pockets are on the diagonal of the potholder.
Place the pocket batting on the diagonal of the pocket fabric and fold the pocket over. These pockets are on the diagonal of the potholder.
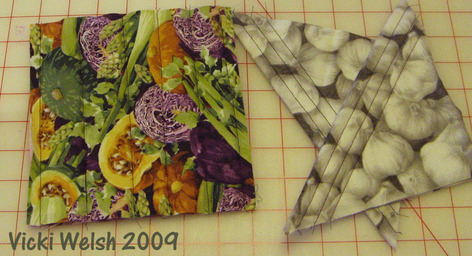
Quilt through all layers. I stitched simple straight lines with a long (3.5) stitch length. Stitch A long stitch length is necessary when stitching through so many layers. I stitched a few rows of stitching on the folded edge of the pockets.
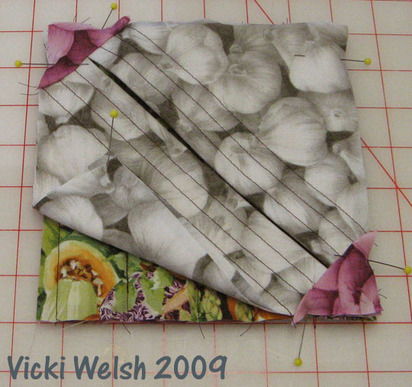
Lay the pockets on the FRONT of the potholder with the folded edges of the pockets along the diagonal center of the potholder. The pockets may or may not touch at the center of the potholder - it doesn't matter. Fold the 2" squares in half on the diagonal and pin in place at the corners where the edges of the pocket meet. This will encase the raw edges on the sides of the potholder. Pin through all layers.
I do not hang my potholders but you could insert a loop between these layers to add a loop.
I do not hang my potholders but you could insert a loop between these layers to add a loop.

Stitch all around the potholder about 1/2" from the edge. If you do it right you will not sew through batting. Clip the corners and turn the pockets to the back.

After the potholder is turned, top stitch about 1/4" from the edge all the way around.
Now you have 2 sizes of potholders!
Now you have 2 sizes of potholders!
