Fabric Postcard With A Door Hanger

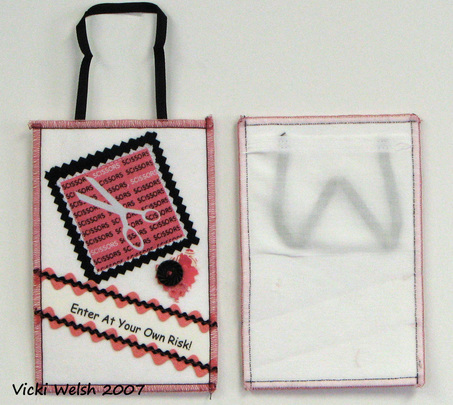
You'll see the black cord. That's the new twist on this card - I decided to make the card a door sign for the recipients sewing room (or studio or whatever it's called). The back photo shows how the card will arrive in the mail. I wanted to avoid having to use a clear envelope so I made a little pocket as part of the backing. That will keep the cord safe in the mail.
This tutorial isn't about the card, it's about the construction of the hanging loop and a way to store it for mailing.
This tutorial isn't about the card, it's about the construction of the hanging loop and a way to store it for mailing.

At this point the front of the card is done. The hanger is built into the postcard back.
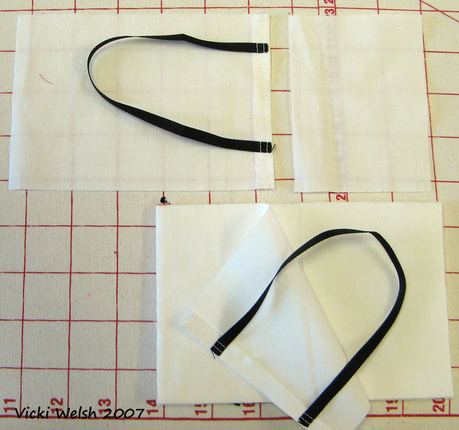
I cut one piece of the white backing 3" x 4" (top of photo right) and one at 4" x 6" (top of photo left). I folded down one 4" edge of the larger piece as a hem and stitched the hanger to the edge. The hanger is stitched to the BACK of the lining piece - the side that will be fused onto the back of the postcard. The hanger is about 9" cut and I used twill tape - because that's what I had on hand.
The postcard is placed face down on the pressing board with the TOP of the card to the RIGHT. In the lower half of the photo I have fused the 3 x 4 inch piece of backing to the right side of the back (top of the card). Then I placed the larger piece on the back with the hanger to the right (top of the card) and fused that to the lower half.

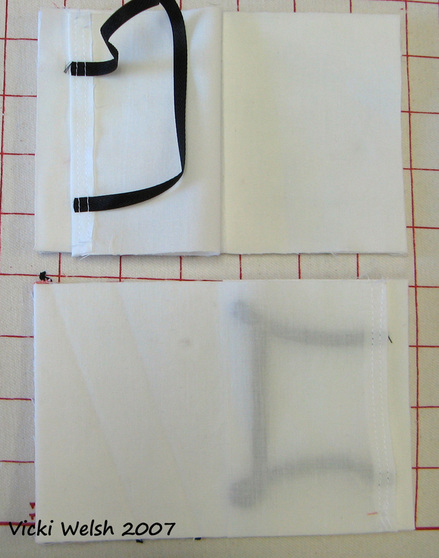
In the top of this photo the backing pieces are fused in place. Fold the hanger under the top flap of the backing piece. Once the edge finishing is done, the two sides of the pocket are sewn down. I did a serger finish on these cards in a solid pink for the upper looper and black in the needle. When you make a backing like this you have to be careful to make sure that the proper layers of the back are sewn into the edge finish. That was the trickiest part of the whole construction process.
Adding the hanging loop to your postcards would be a great way to make your holiday cards hangable on a tree or create a "Do Not Disturb" sign for someone.
Adding the hanging loop to your postcards would be a great way to make your holiday cards hangable on a tree or create a "Do Not Disturb" sign for someone.