Silver Christmas Tree Postcard
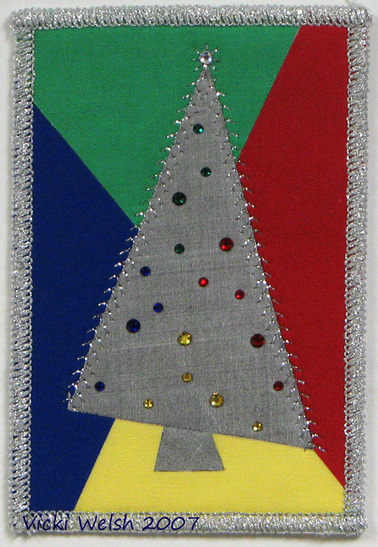
Are you old enough to remember the aluminum tree with the 4-color light wheel? Both of my Grandparents had them at one time or another. I still love them and I've been trying to come up with a way to represent the aluminum tree in a postcard. It all came to me when Kim gave me some scraps of silver silk from her holiday dress. I thought that others might want to create an aluminum tree memory so here's a little tutorial.
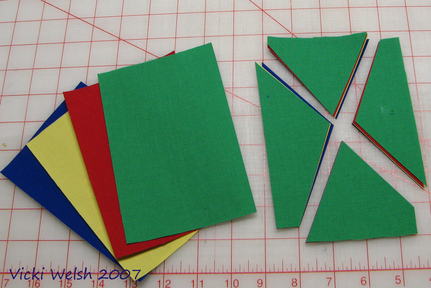
These cards are made in sets of 4. Cut 4 Timtex (or whatever you use for the insides of your postcards) bases 4" x 6".Fuse paper-backed fusible web to the back of 4 fabrics, one each of red, yellow, green and blue. Cut one piece of each 4"x6".
Stack the 4 fused fabrics and align them carefully. Cut a crooked "X" (not corner to corner) through all layers. It's important to keep the fabrics aligned for the cutting because you have to put these pieces back together.
Stack the 4 fused fabrics and align them carefully. Cut a crooked "X" (not corner to corner) through all layers. It's important to keep the fabrics aligned for the cutting because you have to put these pieces back together.
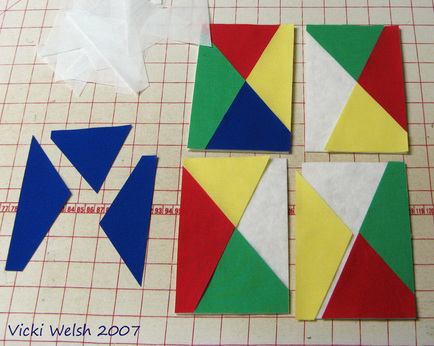
Sort out the cut pieces and arrange them on the 4 postcard bases so that you have a piece of all 4 colors on each postcard base. Make sure the cut edges align in the center of the card and then fuse everything in place.
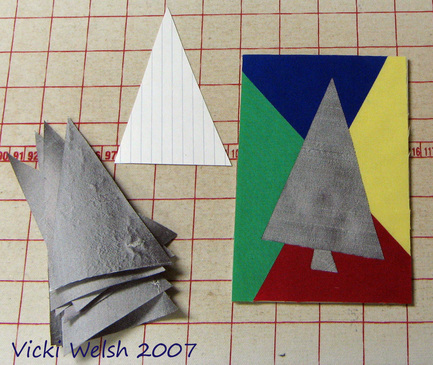
Apply some fusible web to the back of the silver fabric. Make a paper tree template. I made mine a little wonky so I would not have to be fussy about placing the tree in the card. Cut out 4 trees, one for each card and 4 small triangle shapes for the base of the tree. Peel off the paper backing from the fusible web and position the tree on the card. Make sure that there is a bit of tree over each of the 4 colors of the backing. Tuck the base triangle under the tree and fuse the tree in place.
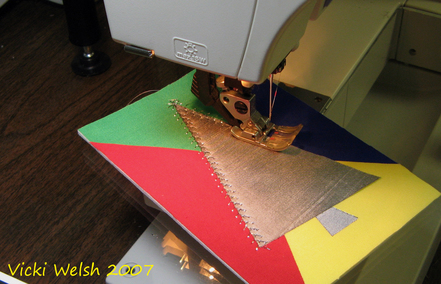
I put some Silver Superior Glitter thread in the needle and stitched a star at the top if the tree and the fagoting stitch down each side. Any decorative stitch that you want to use will work fine.
Fuse a solid piece of fabric on the address side of the postcard. Make sure it's light enough to write on.
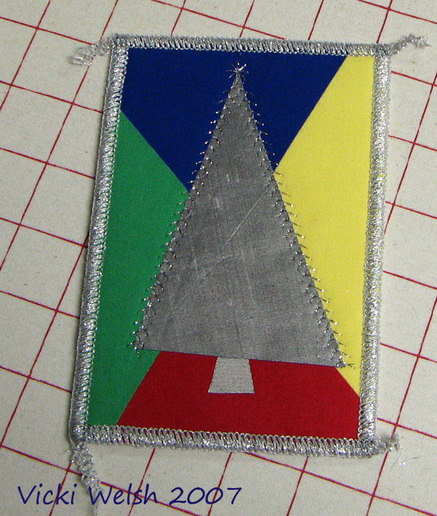
The next step is to finish the edges. I have a serger so chose to serge the edges so that I could use a heavy decorative thread for total coverage. I used Silver Superior Razzle Dazzle in the upper looper, white standard serger thread in the lower looper and Silver Superior Metallic in the needle. I serge straight off each edge, then use seam sealant on the 4 corners (front and back) and then trim off the tails.
You do not have to serge the edges. If you wanted to use Razzle Dazzle you could load it in the bobbin with white in the needle and zig-zag with the front of the card down.
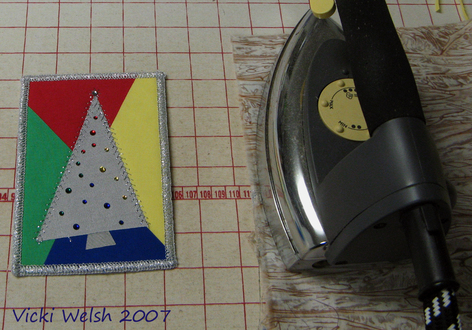
The last step is the most fun - add the crystals! I placed one large clear or silver crystal in the middle of the star and then added red, yellow, blue and green crystals (small and large) on the tree. Keep each color of crystal placed in the appropriate color quadrant. In the card in the photo look at the top red quadrant. All of the red crystals are on the tree only where there is red fabric underneath. I do not fuse my crystals one at a time. I carefully place a press cloth over the card and them place the iron on the press cloth and fuse all of the crystals at once. On the right side of the photo - there is a postcard under the iron. Now you are done! Address and mail them.
If you do not have crystals, you could paint ornaments on the tree with fabric paints or you could embroider French knots. If you do the ornaments with stitching do it before the back is fused to the card.
If you do not have crystals, you could paint ornaments on the tree with fabric paints or you could embroider French knots. If you do the ornaments with stitching do it before the back is fused to the card.