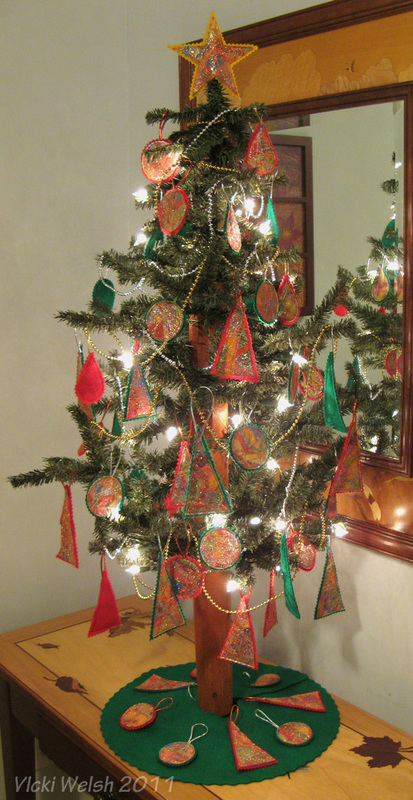
Trash To Treasure Holiday Ornaments
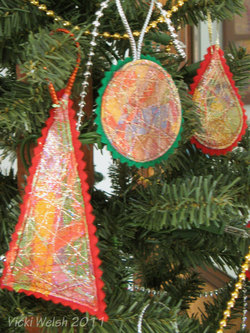
Are you like me and have trouble throwing fabric bots out? If so this is a perfect project for you! Grab all those bits, some Mistyfuse and felt and make a tree full of pretty ornaments.
What you will need:
Fusible Web - I use Mistyfuse because it fuses sheer and you can fuse several layers together and still see through to the bottom layer. You need enough for about 4 layers of fusing. Base fabric - I used a piece that was 18" square and that gave me about 50 ornaments and the star. I used an old fabric that I didn't like because it wasn't going to be visible in the final project. Depending on what you are layering you might want a base fabric that is in your color theme. Bits and pieces - I used tiny bits of hand dyed fabric as my first layer and added bits of yarn, metallic fibers and Angelina fibers Tulle - for the top layer Felt - For the backing Cording or ribbon - for the hanger Decorative thread - I used metallic thread |
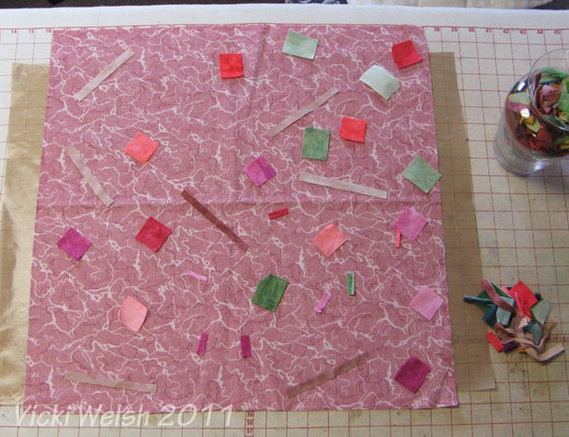
Start with your base fabric and fuse Mistyfuse to it. Start layering on your first layer of bits. Keep adding layers, alternating with Mistyfuse, until you are happy. The final layer will be Mistyfuse and then tulle to trap it all down. Here's how mine went together:
Base fabric
Mistyfuse
Fabric bits covering most of the base fabric
Mistyfuse
More fabric bits to completely cover the base fabric
Mistyfuse
Drizzled yarns and metallic threads
Mistyfuse
Angelina fibers and tulle
Base fabric
Mistyfuse
Fabric bits covering most of the base fabric
Mistyfuse
More fabric bits to completely cover the base fabric
Mistyfuse
Drizzled yarns and metallic threads
Mistyfuse
Angelina fibers and tulle
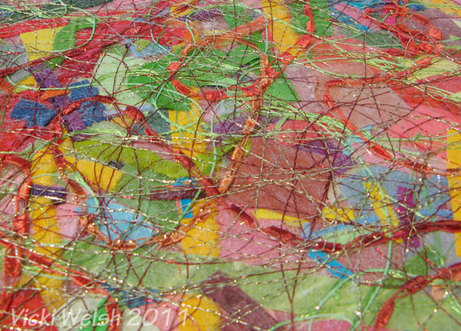
Here's what it looked like before the last layer of Mistyfuse, Angelina fibers and Tulle.
At this point it's still very pliable and can easily be stitched. If you use another type of fusible you may want to do fewer layers. But I still haven't done any stitching and that's what makes these so fast and easy to make.
Now the fun begins. Cut the embellished fabric into shapes. I used my 30 degree mark on my ruler to cut some diamonds that I then cut them into half to get tree shapes. I also used my Go! cutter to cut teardrops, circles and stars.
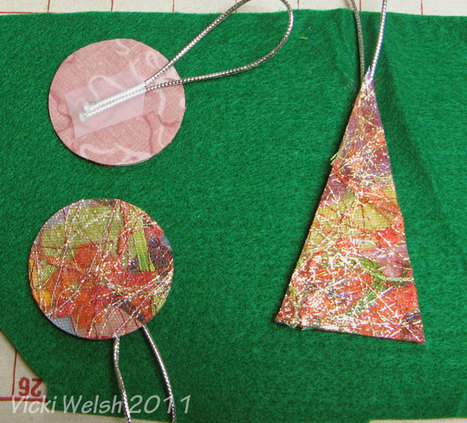
Cut a piece of ribbon or cording for the hanger and use a bit of tape to hold it in place on the back. Cut a chunk of felt larger than the ornament and place the ornament right side up on the felt. I cut several large pieces of felt so I could stitch a few at a time.
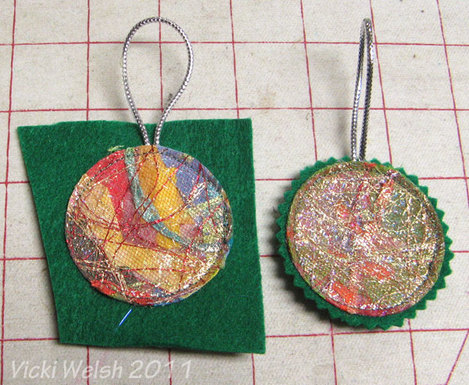
Sew the ornament to the felt around the edges. Hold your hanger in place as you sew around. I used metallic thread and a simple straight stitch but you could use a decorative stitch. Trim away the excess felt with pinking shears or other decorative scissors.
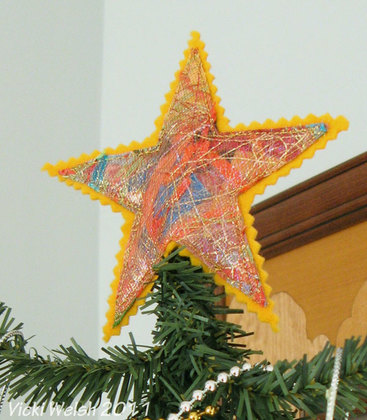
I even made a tree topper by stitching the fabric star to one piece of felt and then adding another piece of felt and stitching it all the way around leaving an opening for the tree top. I trimmed the felt after I finished all of the stitching.
That's all there is to it! I made about 50 of these ornaments in one evening and I wasted a lot of that time making Chris look at them as I completed them. You could do the same thing with card stock as a backing and use them as gift tags.
That's all there is to it! I made about 50 of these ornaments in one evening and I wasted a lot of that time making Chris look at them as I completed them. You could do the same thing with card stock as a backing and use them as gift tags.
