|
Yesterday was dyeing day and usually I'm too tired to do much else after that. But I was listening to a good book and that was enough to keep me company in the sewing room for a few hours. 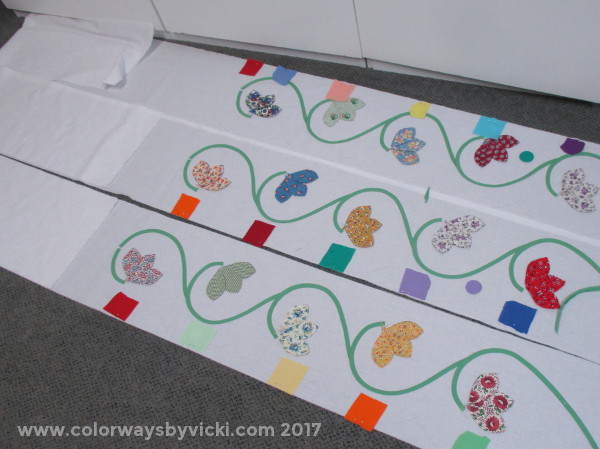 I got 3 half borders done! I know this looks silly. Why would you prepare half a border? Well,, my template is half a border and to do the other half I have to flip it over and realign everything. I decided it would be easier to do this half on all 3 border and then flip everything to do the other half. I was right, it is easier. 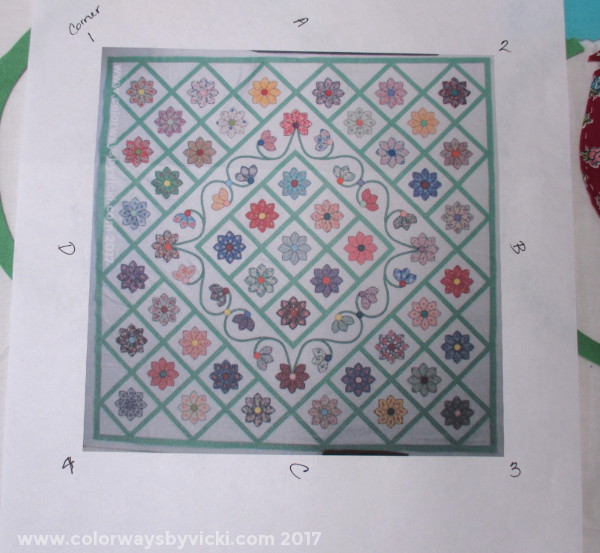 Just in case you think I'm being uncharacteristically carefree about the blossom colors, fear not. I printed out a photo of the quilt top and have the border sides labeled. I use this photo as a guide to pick the blossom and center colors. I mostly want to avoid reds and yellows next to each other since they stand out the most. 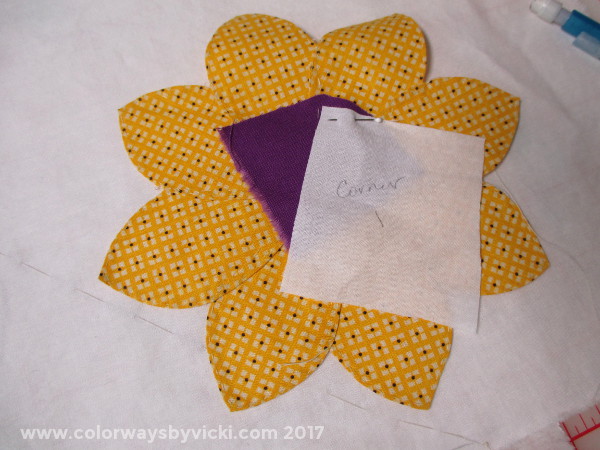 I'm even picking the corner blossoms as I go. Although I might move this one to corner 4. I'll see when I have all of the borders glue basted.
Today a friend is coming over to help me with some veterans quilts and while she is quilting I might get to work on my wall. I have my idea for the last block. Before I left for Birds of a Feather I got one if my borders prepped for applique. 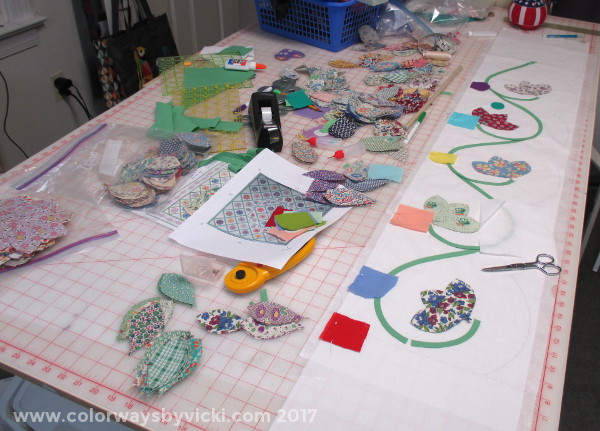 This is pretty much how I left my cutting table.  The ironing table is not much better. I need to get the other 3 borders prepped so I can get this project out of the way and start something else. I figure it's going to take a couple of years to do all of the hand stitching but I want it all ready to go so I don't have to think about this project again until it's read to sew on the borders and applique the corners. 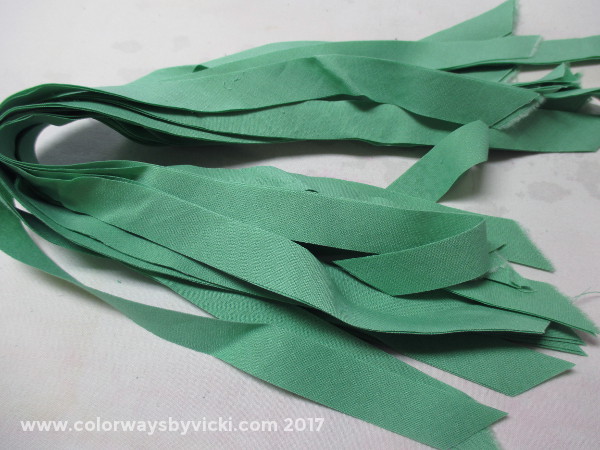 I started by getting the rest of the vines cut. 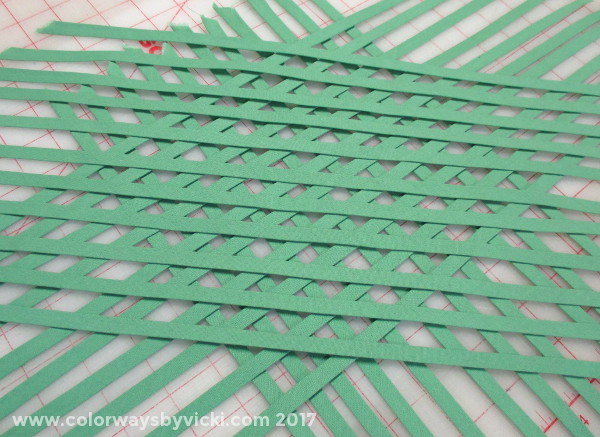 The Clover bias tape maker is a miraculous little tool and turned those strips into vines in no time. 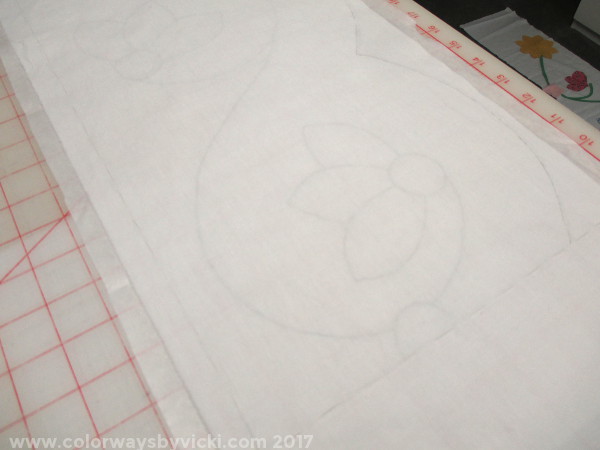 I have a paper mock up of the half a border on my cutting table and I start by marking the center and bottom with basting lines. I drew the curved border with a pencil since that's a cutting line. I use this to position my applique pieces. 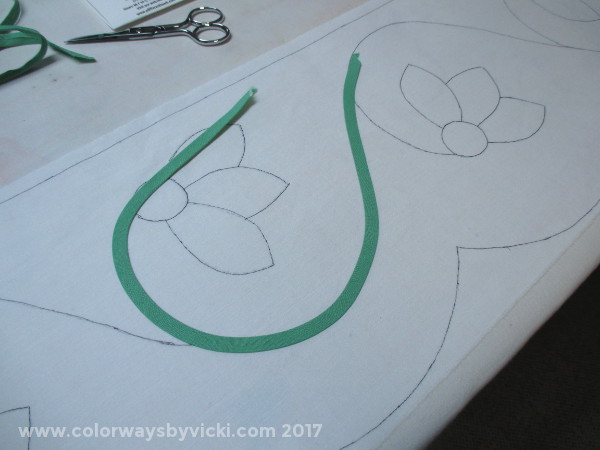 I have another mock up of the layout on fabric and I use that one to steam press my vines into shape. Once it's shaped I move it to the border and use the paper guide to position it. 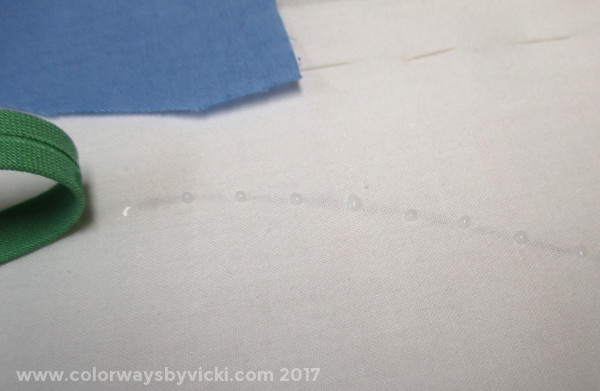 Next I glue baste the vines with tiny dots of glue. The glue is watered down Elmer's Washable School Glue. My friend, Becky, turned me on to it. She says it works just as well as Roxanne's. I have to dilute mine a bit because my glue dispenser is extra fine. As soon as this one is empty I'll switch to the new one I got at Bird. After I glue bast the vines I glue on the petals and pick fabrics for the centers. You can see the current border that I'm working on in the top photo. I'm also picking the corner blossoms and centers for those too. Each border has 10 long vines, 2 short vines, 10 blossoms and 11 centers. Then there are 4 corner blossoms with 4 centers. I have 1.5 borders glue basted. Once those are done I will clean up this mess and work on making the centers - 48 of them if I did the math right. I'd like to have all of this done by the end of the weekend but I'm not sure if that's going to happen. I'll try. 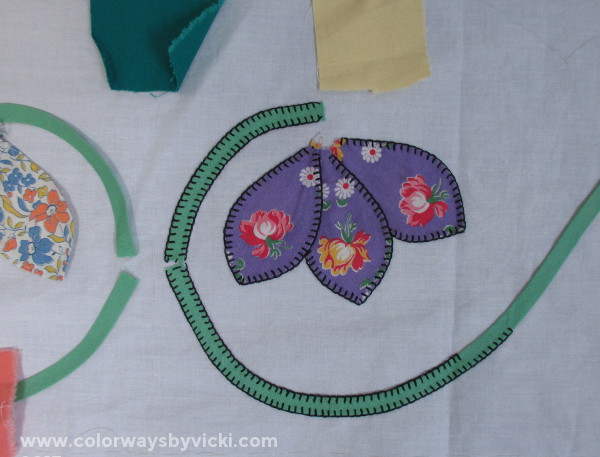 Meanwhile, this is all of the stitching that's done. That top curve smooth. It looks wonky because the way the fabric is laying. If I measure my completion by blossoms I'm 2% done with the borders.
Maybe I won't track progress that way. But today is dyeing day, not applique day so I'll be in the basement if anyone is looking for me. Almost 2 years ago I wrote an article on my old blog describing my experience shopping for a new longarm and showing why I selected Innova. But more than my opinion, the article has a list of things to test drive when you are shopping for a longarm.  I bought my Innova because of the stitch quality and control that I have to place every single stitch exactly where I want it. A Birds of a Feather this weekend I found out that people are still going to the old blog to read that article. So now I've moved it over and it's with the Longarm Tutorials. If you want to read it you can find it here.
Meanwhile back at home, I took yesterday seriously as a Sunday and basically only did laundry. I had my physical this morning and plan to work on my applique this afternoon. I got back from Birds of a Feather late yesterday afternoon and immediately collapsed in the recliner and didn't move much more after that. I had a fantastic time but, working from home, I'm not used to being around so many people so I always find crowds exhausting. But this was a really good crowd and it was great to reconnect with other teachers and some of my new owner students. I loved both of the classes that I taught and hope to get the opportunity to teach again next year. Before I left I worked so hard to get my applique ready to take with me and then barely took a stitch. I came home to my brother's every night and vegged out with a movie. The last night we even had a double header. But I did shop! 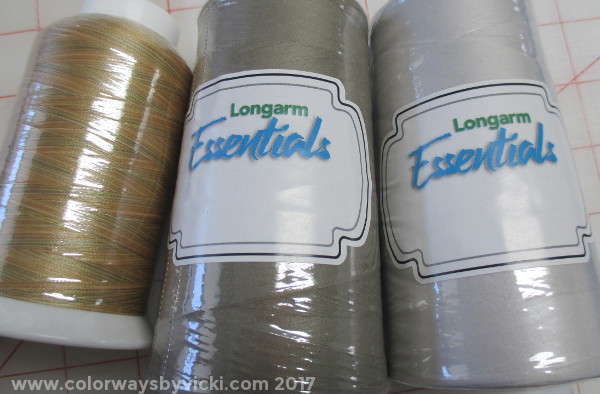 I talk a lot about Superior Threads but I also like YLI a lot and most of their threads are made in the USA. Their booth was right next to where I was selling my Crystals fabric so I spent a lot of time talking to them. The Longarm Essentials is a brand new thread that they developed for The Longarm Network. I bought these 2 colors to try out on some of my veterans quilts. The pale gray will be perfect for the next 4 quilts. The tan variegated is YLI Variations, a trilobal polyester. I have this in a darker brown called Teddy that is beautiful. This one is Fawn and I love that it has a tiny bit of a pale olive to blend with the golds. 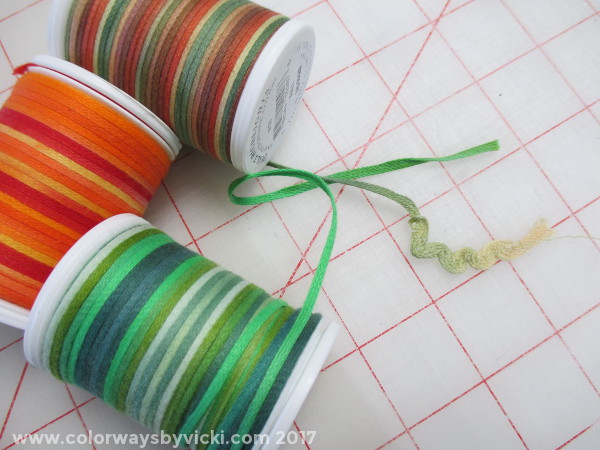 Then I spied these hand dyed cotton ribbon threads! These are YLI Quilt Highlights and I can't wait to try them on some postcards. You can see that you can even pull a thread for a ruched effect. I will be playing with these very soon. 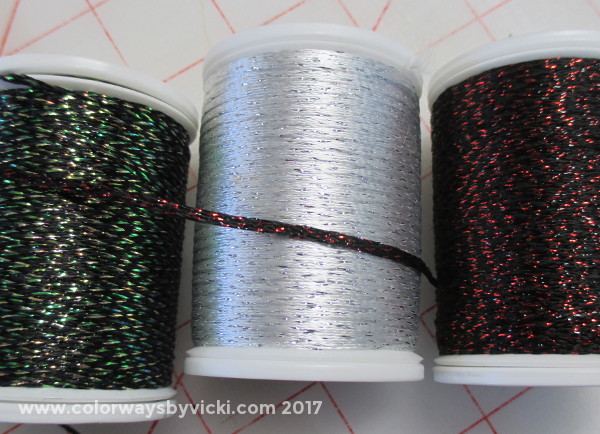 These are the rayon/metallic versions of the YLI Quilt Highlights. Of course I had to get these for my Christmas postcards for this year. The green one is called Night Sky and the red one is called Night Embers. Very fancy. 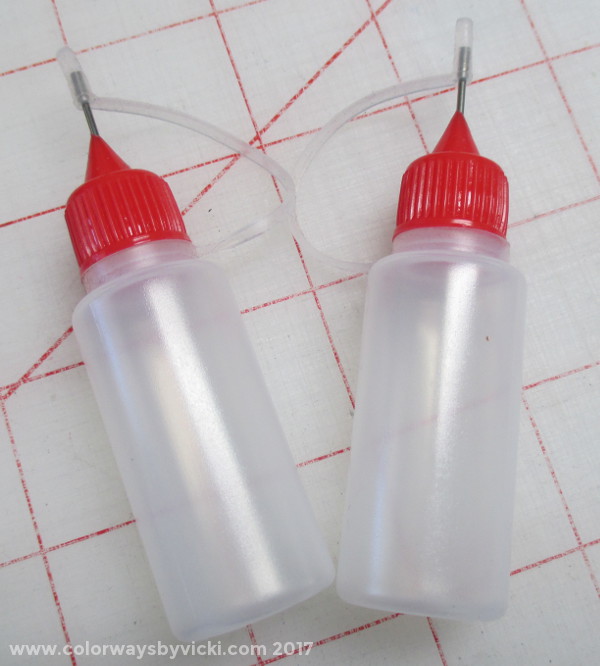 My friend, Terry, bought these for me and I was thrilled to find them. They are really for holding oil but I need it for glue basting. It's going to be much better that what I'm using now. 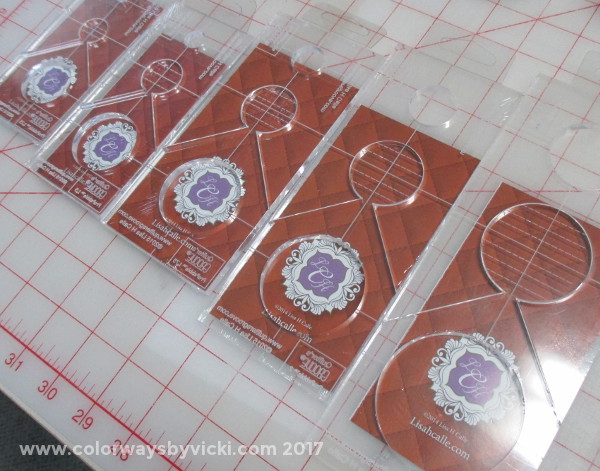 Jamie Wallen and Lisa Calle were both there selling their rulers. I have almost all of Jamie's rulers except for the small pebbles/circles. His have handles which are perfect for most people but not for me. I found my missing sizes in Lisa's booth. These are her ProPebbles rulers and she has great instructional videos on her site on how to use them. 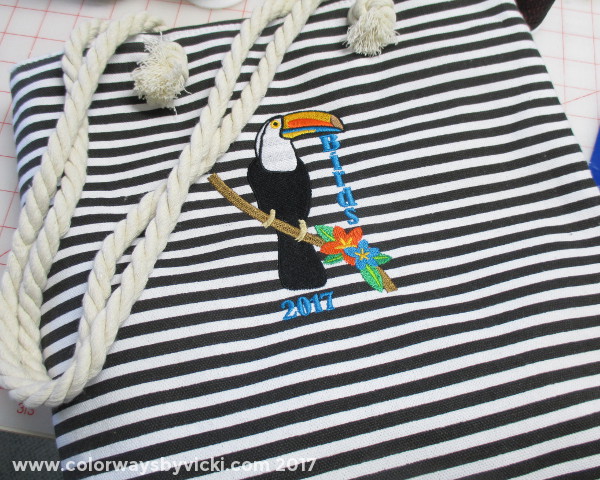 The bonus of the weekend was this cool beach tote that the conference attendees received. I'll be toting this to the beach in a few months.
Today I decided is going to be a Sunday. I'm not going to do much work. I'll catch up on laundry and work on my applique. I'll get back to work tomorrow. I'm off to Newport News this morning for Birds of a Feather so I won't be posting again until Monday. It also means that any orders placed will not be shipped until Monday. In the middle of frantically getting my class stuff together (at the last minute) I got 2 veterans quilts quilted! 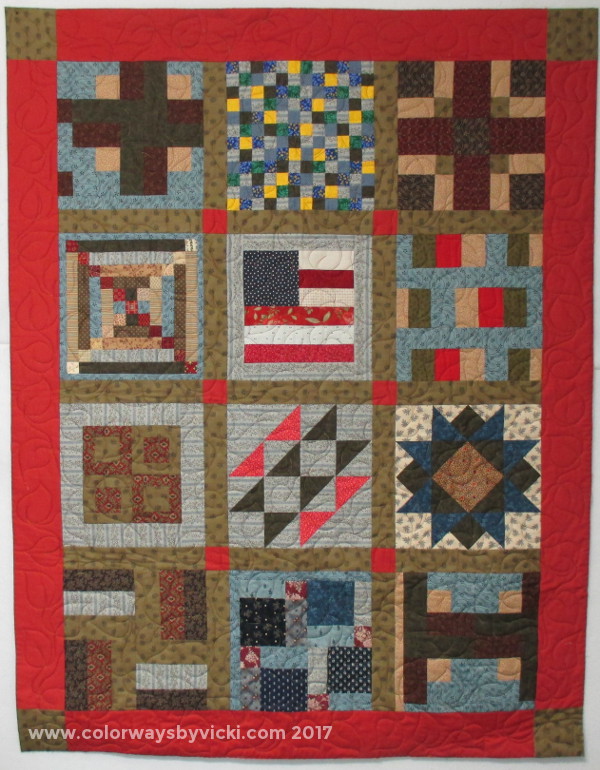 Several years ago we (Country School Quilters) were gifted with a LOT of fabric. It was all from a Barbara Brackman repro line. If you've been following me for a while you have seen a lot of colors in this palette, minus the red. I THINK that this is the last of that fabric. We are grateful to have been able to cover so many veterans with it.  I quilted this one with an all-over leaf motif. 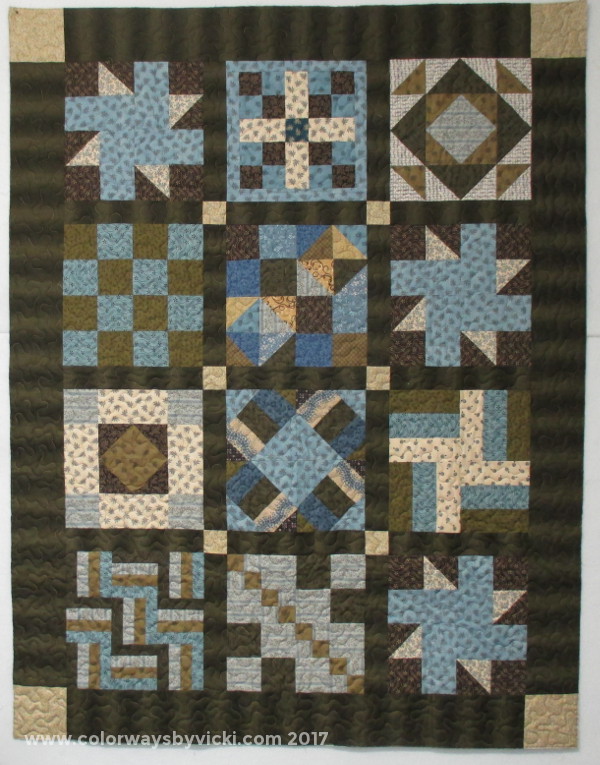 Here's the other one and it's all in the original fabric collection. Perfect for manly quilts. 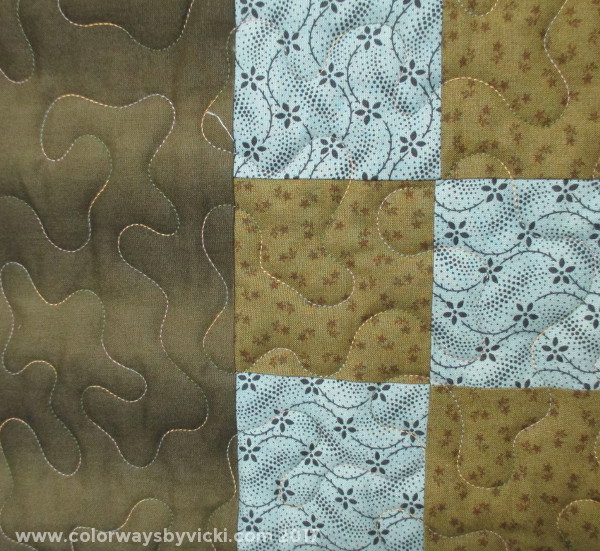 I had an hour so this one got a meander with the most perfect variegated thread ever. When this one is washed it's going to be nice a snuggly. Now they are back to CSQ for binding and eventual delivery at McGuire Veteran's Hospital.
The person who delivers the quilts for us is the mother of one of our members. She's 80+ and volunteers at the hospital frequently. She loves delivering the quilts because she remember when her husband received a quilt when he was in the hospital years ago. We weren't making them at that time but we are happy to help her pay it forward. It's another wonderful week here at the playhouse and it was made wonderful by seeing new customer pieces from TWO customers! If you have a piece that you have made with hand dyed fabric please consider sharing it in the Customer Gallery. In exchange you will receive a 20% discount on a future order. 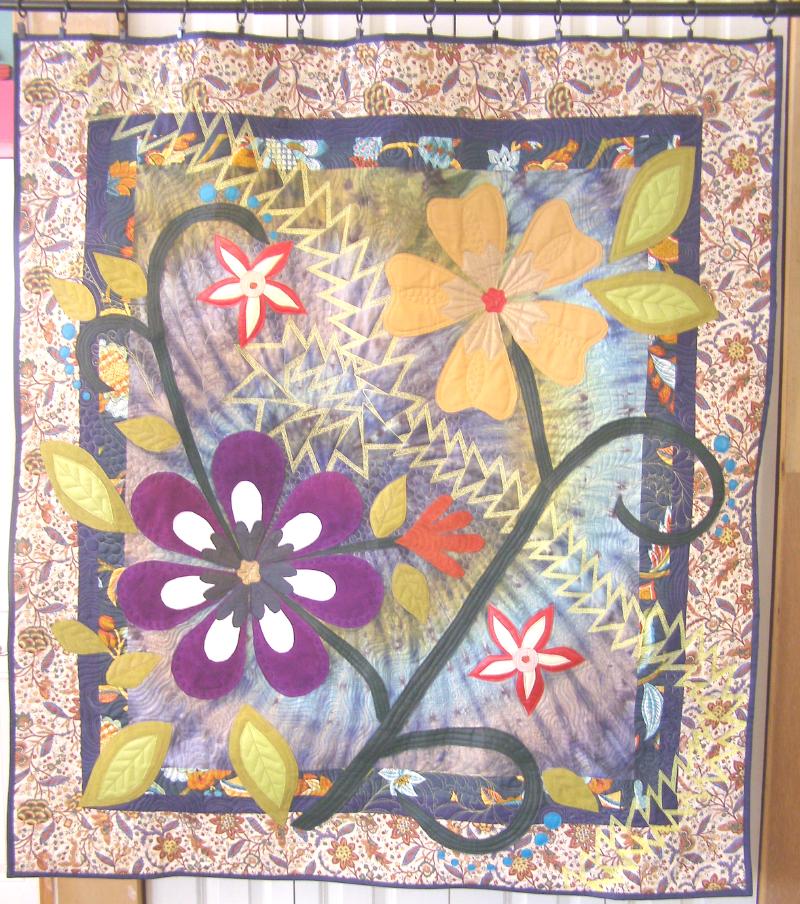 Carnival Bloom is one of Shirley Bruner's pieces. She is a very prolific quilter and was experimenting with a new design technique for this and it done on with a hand dyed background. Shirley likes this technique so much that she ordered a large custom dyed gradient for a bed size version. I can't wait to see it.  Gene Black incorporates this woven technique in many of his art quilts and he does it very well! This one is Garden Path and uses the Sugar Maple gradient.
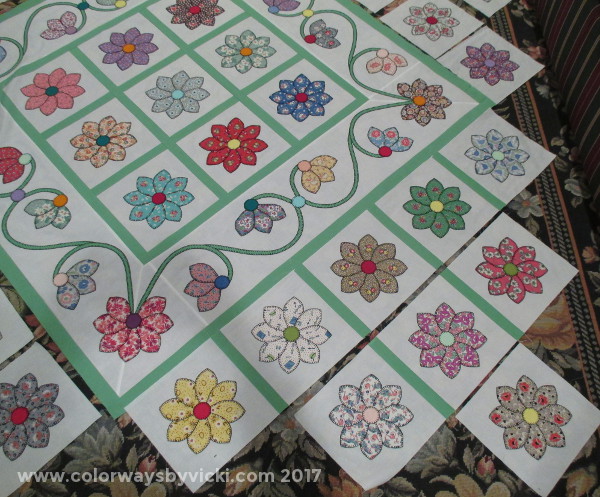
Thank you both for sharing your beautiful art! Galaxy fabrics are one of a kind fabrics that are larger than a yard. They have unique texture and color combinations. Check them all out in the shop. Here are some new ones.  Mayall - 1.5 yards  Ringtail 2 yards 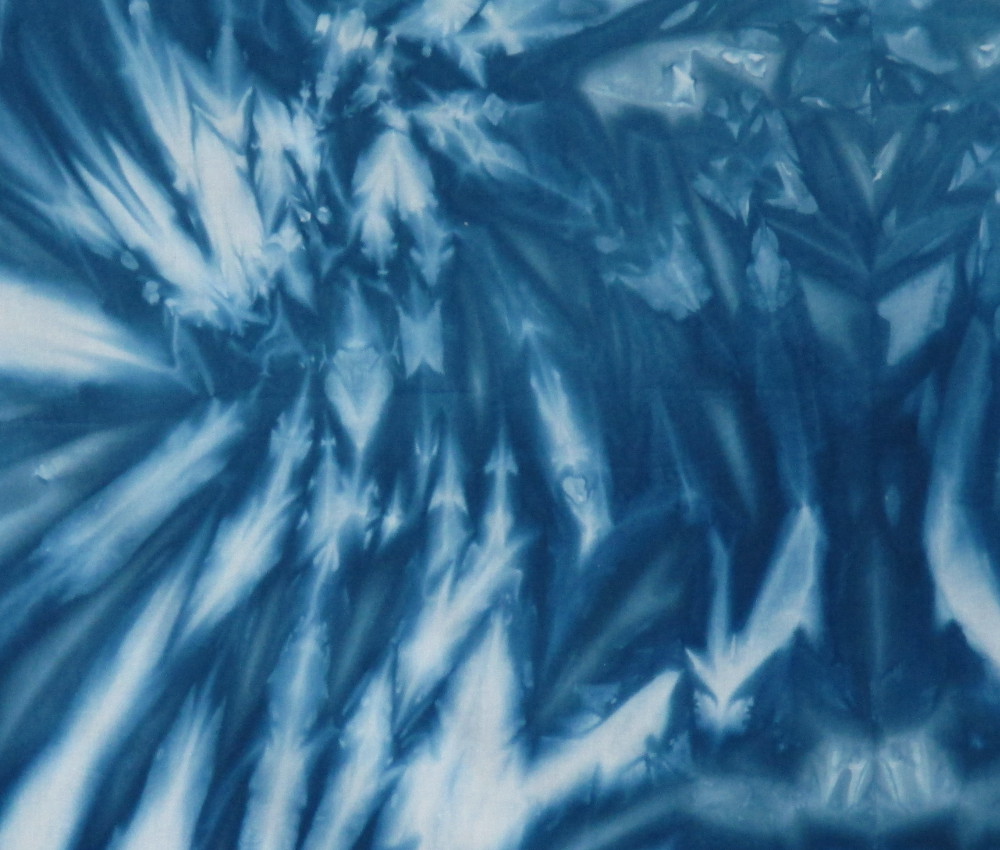 Whirlpool 3 yards 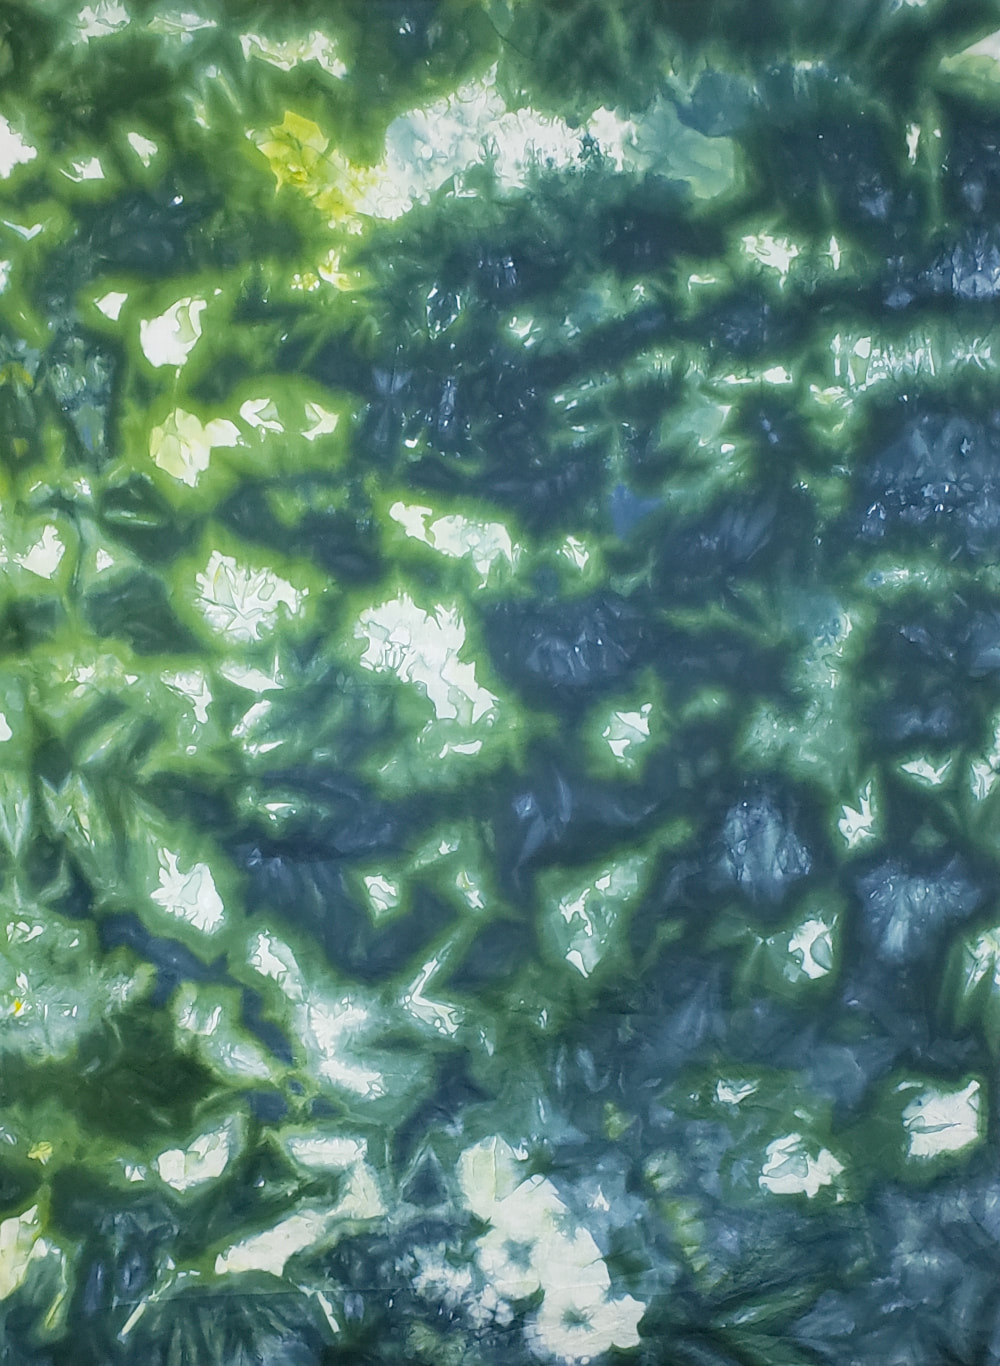 Andromeda 1.5 yards 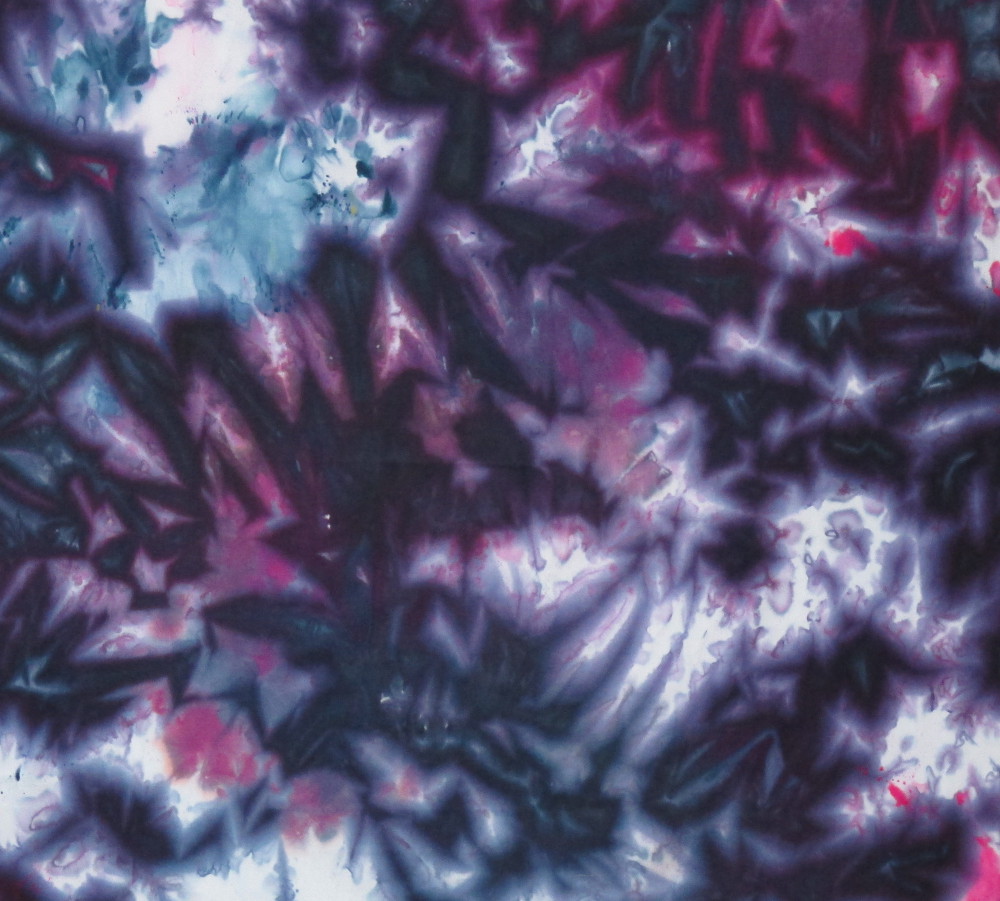 Markarian - 2 yards 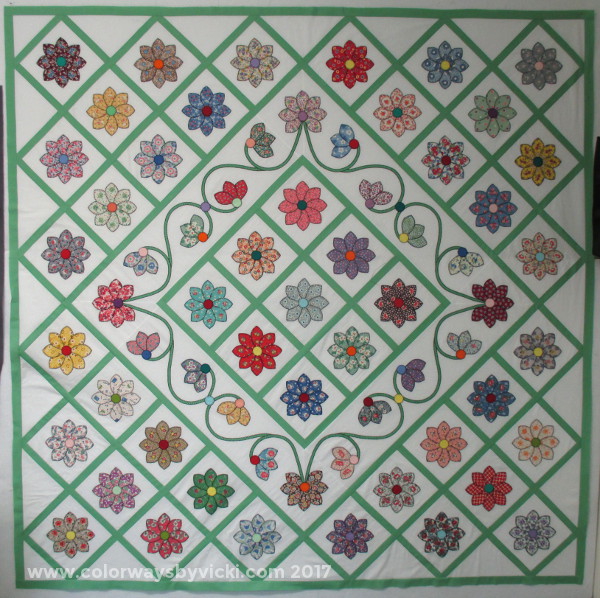 The blocks for this quilt have been spread out on the living room floor for over a month. Yesterday just before kickoff I got the last green border on it. I'm going to admire it in the wall for a few days and then I'll put it away until the last appliqued vine border is done....a long time from now. 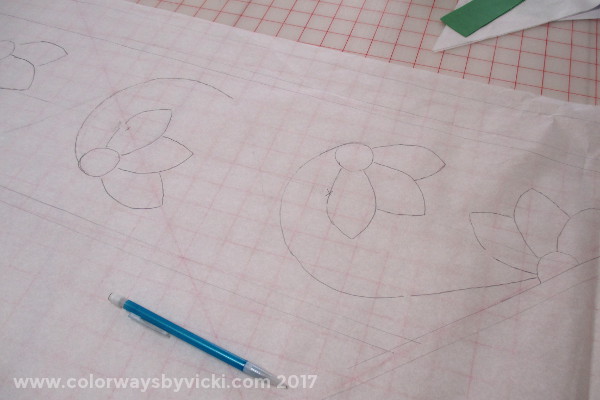 Now I'm working on drafting the applique for the last border. I'd like to get one prepared so I can take it with me to Birds of Feather to work on during the slow periods and at night when I'm hanging out with my brother and SIL. I was lucky, the blossoms space out almost exactly the same as the inner border. 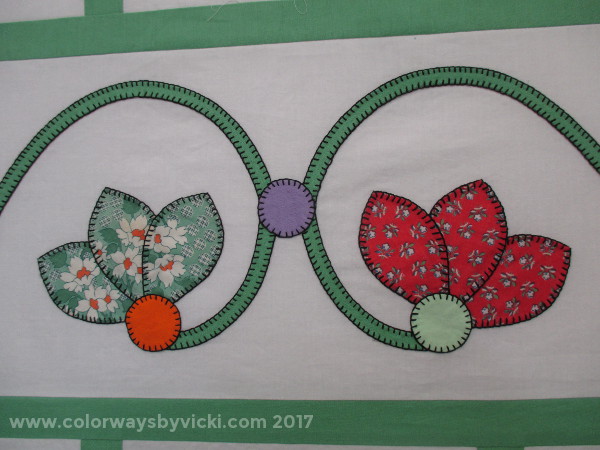 The only difference is that my center motif will face in a different direction than it does in the inner border. But there's no way to get around that without making the outer border look totally different. It's going to be fine and I'm excited to get started on it.
The most visited place on this whole website is the page of instructions for dealing with bleeding quilts. I get lots of emails from people telling me that these instructions saved their quilts. I know of three grandchildren who received pristine quilts for Christmas after their Grandmothers dealt with bleeding that seemed to ruin their special Christmas gifts. That makes me feel good but we can avoid all of that drama if we will treat our fabric before we ever sew with it. The key lesson that I learned through testing is that the fabric needs a long time exposed to water for it to let go of all of the excess dye and water exposure is cumulative. Three 15 minute washes is equivalent to a 45 minute soak. When we pre-wash fabric we are only giving the fabric about 15 minutes of exposure. I learned that reds generally need 8 - 12 hours soaking to release all of the excess dye and blues take even longer. A batik turquoise will still bleed dye even after 48 hours. That would be a lot of wasted water and electricity for repeated washing when a couple of soaking will do. Some commercial fabrics don't bleed at all but you never know which ones do until you soak them. It has nothing to do with Wal-Mart vs Quilt Shop fabric. As an example, I've bought Benartex fabric one year that bled and a related line the next year that didn't. Given that all of this fabric is printed overseas I just don't believe that anyone has any real control over those processes anymore. I soak EVERY commercial fabric that I buy and I soak all of my hand dyed fabrics before you ever purchase them. 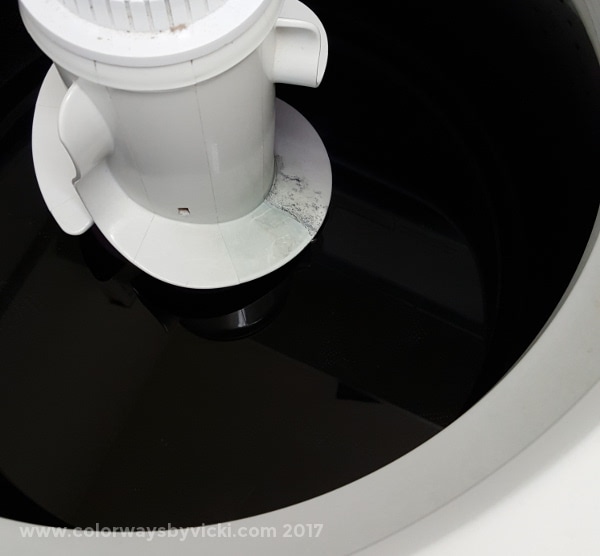 Yesterday I soaked 10 yards of some new fabric that I bought. After an hour of soaking the water was still quite clear but I left it overnight. This is what I found this morning. Imagine if I had sewn the fabric into a quilt with light colors. It might not have bled in the first couple of washings but eventually all of this dye would have released and ruined my quilt. I emptied the washer, filled it again and let it soak a few more hours to make sure it was done. Now I can use it confidently in any quilt. Soaking process for new fabric: Be sure to use a tub that can hold a lot of water. HE washers will not do the job. You need a large volume of water and soap. Hot water will make the process happen faster and Dawn dish soap (any of them) is the best soap to use. Use enough soap to get a good suds. That amount depends on the hardness of your water. When the water turns dark, drain the tub and start the process again. You are done when the water remains clear. 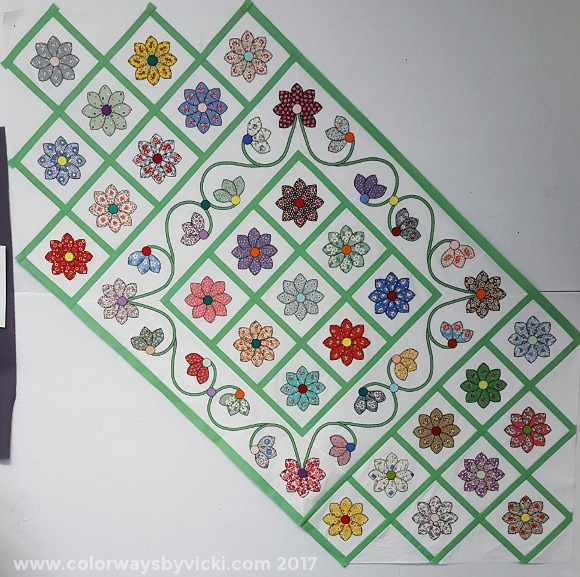 Let's not leave this post with just an ugly washing machine photo. Here's my applique quilt coming together. I've got 2 more corners to add and then a green outer boarder. Then I'll finally be able to draft up the outer border.
 Yesterday I got the dreaded task of doing my year-end business accounting tasks and setting up 2017 so I rewarded myself with some sewing time. I have to spend most of my weekend getting everything ready for my Bird classes but I'm hoping to get the center of this quilt put together so that I can work on the applique borders when I get back. Last night I got the green border added to the medallion and started putting one quadrant of rows together. I need to cut the setting triangles next and that didn't seem to be a smart thing to do at 11:00. So I went to bed.
Today is mammogram day. yippee. Then I can come back and work on this a bit or do some quilting on a veterans quilt. So many options of things to play with! |
FeedsTo subscribe click the RSS Feed button and copy the URL of that page into your blog reader.
In Bloglovin you need to search "Colorways By Vicki Welsh" to find the blog. About Vicki
I'm Vicki Welsh and I've been making things as long as I can remember. I used to be a garment maker but transitioned to quilts about 20 years ago. Currently I'm into fabric dyeing, quilting, Zentangle, fabric postcards, fused glass and mosaic. I document my adventures here. Categories
All
Archives
April 2024
|
 RSS Feed