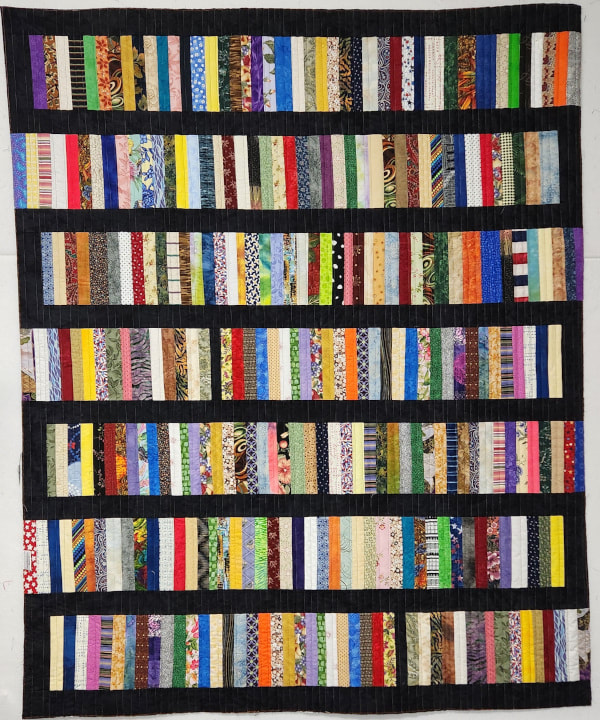
 Here are my last finishes for 2023 and it's appropriate that they are veterans quilts. These two quilts bring my number of veterans quilts quilted to 41. Add ot that the 15 that I made and it was a very good year. These were clearly my priority for the year and I expect that to continue in 2024. I love quilting and making these important quilts. This quilt was made by Glenda (Mom). She thinks that she going to use up all of the strings in her stash. I think it's a Sisyphean task but it's a very worthy goal. 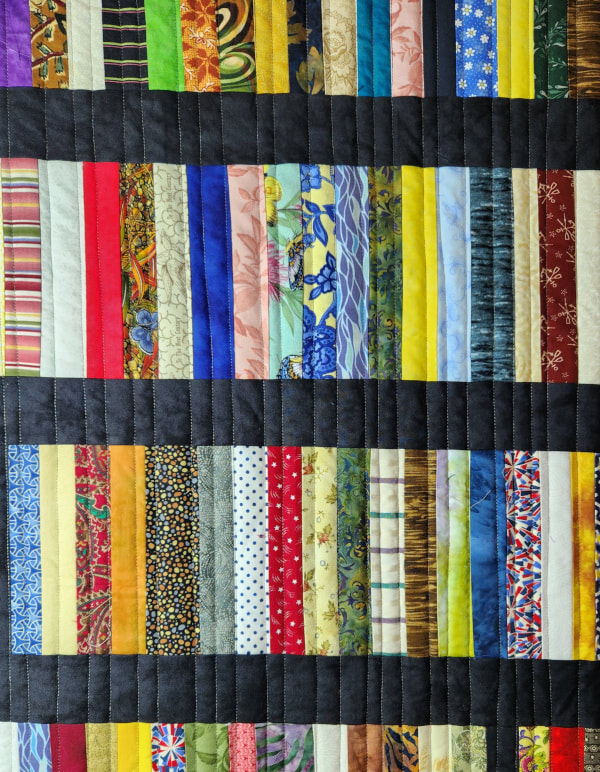 I quilted this one with free form "straight" lines going back and forth across the quilt. I quilted this one with Superior Rainbow's thread and I didn't have one thread break. Then I quilted the next one. 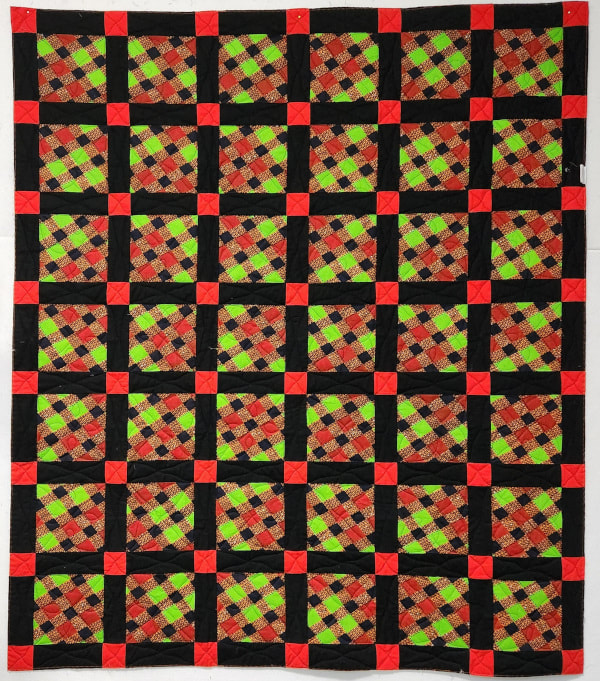 This one was made by Peg. I changed to SoFine thread and it gave me fits when moving right to left. I think it might have something to do with the thinness of the thread. But I solved the problem, for now, by only moving left to right. 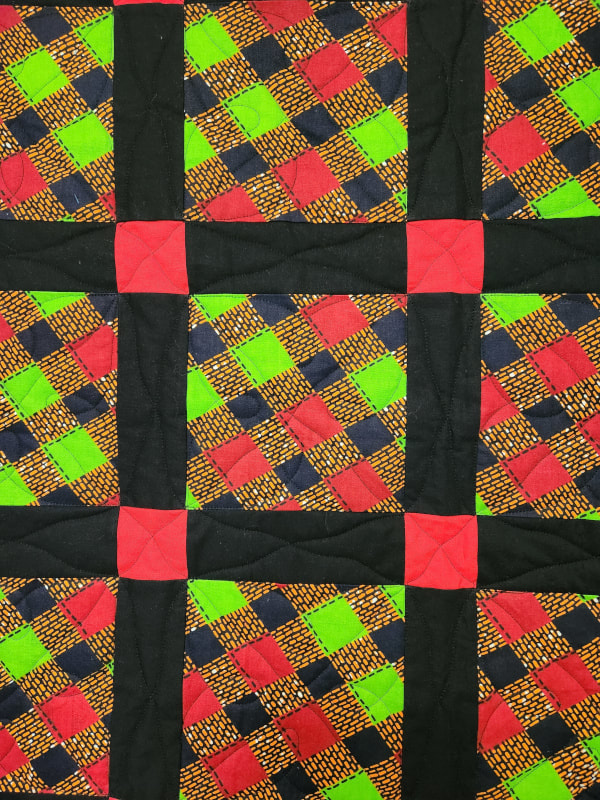 Someone gifted her this traditional African fabric and I think she said she has enough to make a second quilt. I also free-motion quilted on this quilt and, even with the problems, it went pretty quickly. 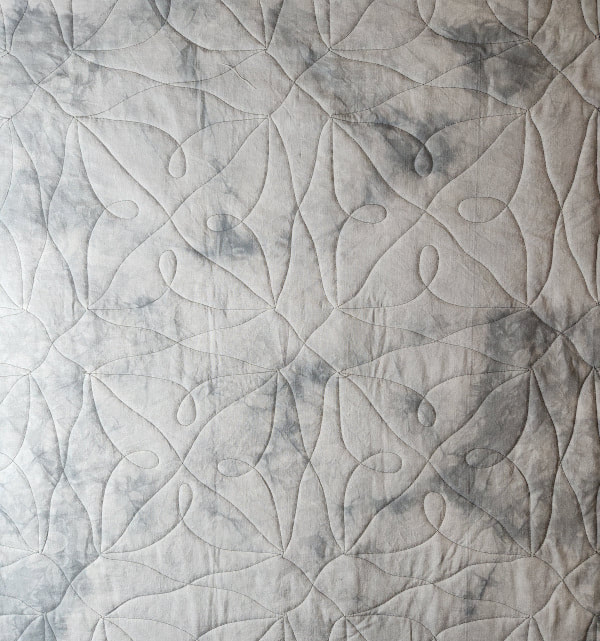 I love how the quilting pattern looks on the back! 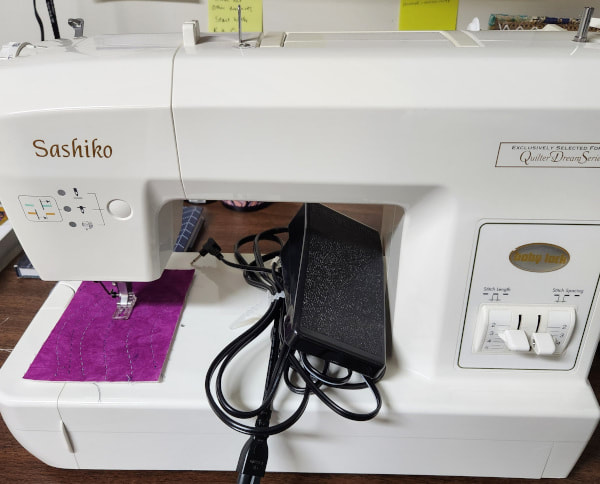 In other news I took the Sashiko machine to the repair store today. One of the ladies looked at it quickly while I was there and got it un-jammed. More importantly, she showed me how to do it. I wasn't sure if it still needed servicing so she set it up to do some test stitching. She eventually got the technician involved for about 10 minutes and I left with a working machine! The store was All-Brands in Richmond and both ladies were super nice. Unfortunately, they only work on Babylock so I wouldn't be able to take any of my other machines there. But I'm looking forward to playing with this some more.
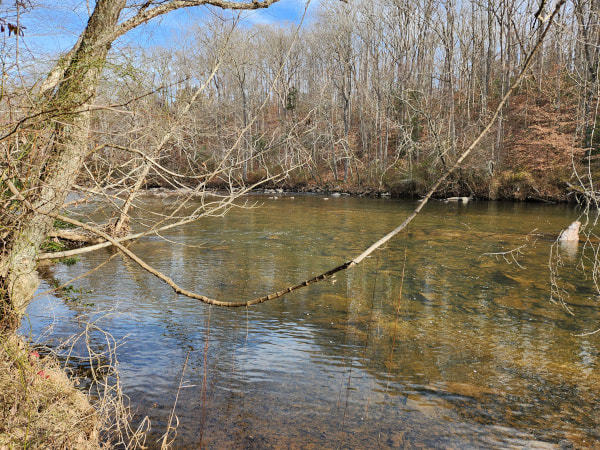 Not having children means that we don't' do a lot for Christmas but I do usually take the time to just take a few days "off". I don't blog and do want I want, not what's on my to do list. We did get invited to a friend's Christmas afternoon for a couple of fun hours and we spent Christmas morning on a lovely hike along the North Anna river. It was kind of a perfect day! 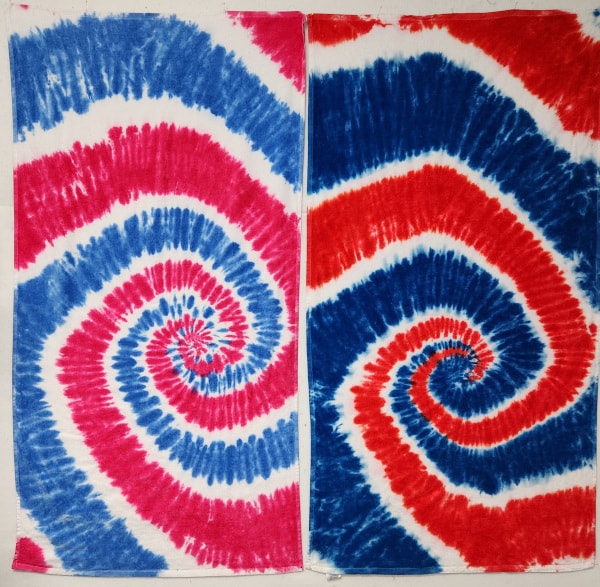 ON the craft front, I've mostly been watching football and crocheting. I think I'll have my purple sweater ready for an update photo tomorrow. Meanwhile, I have dyed the last of the beach towels. They will be gifted this Saturday. These two are for Ella and Eli. I got the color assignments from their Mom. 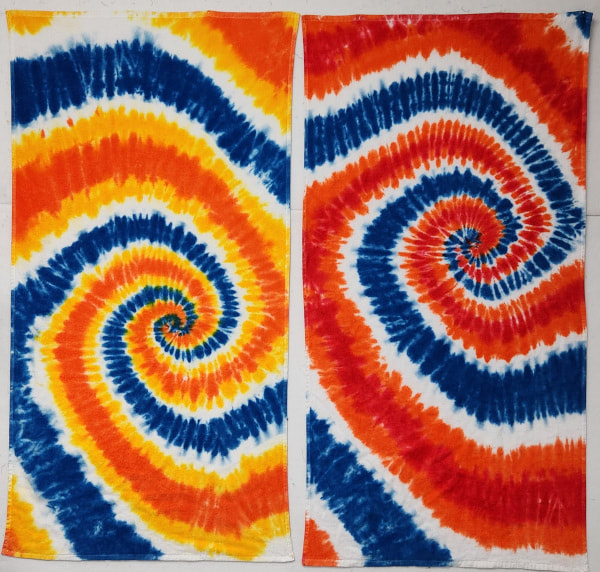 Sawyer and Lincoln wanted 3 color beach towels. I had to dye them in a way that the blue would not mix with the yellow and orange. My spirals do square off a bit and I think that's because of the way I tie them. I'll have to work on my tyeing technique for future dyes but I think the kids will be happy with these. 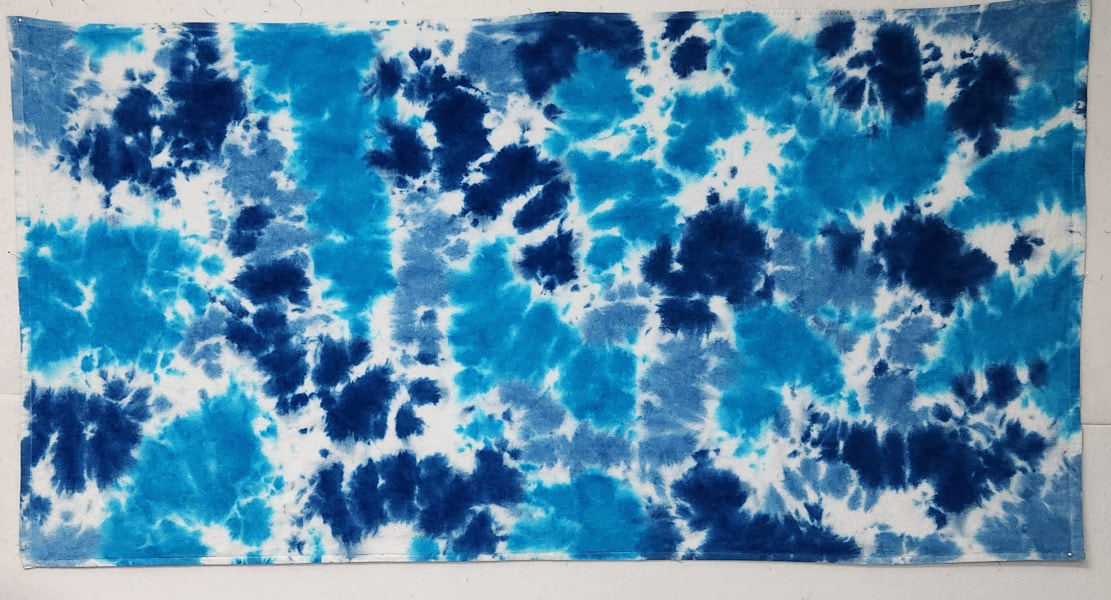 I had one extra towel so I dyed it with splotchy blues. I love this one and will either keep it for myself or set it aside for a future gift.  I still have the serger out from working on the postcards so I decided to start another donation project before I put it away. I'm going to make another big batch of surgery drain bags. With the serger and and production sewing methods, these can be done pretty quickly. I expect I'll have them done in early January. Then I'll make some pet beds before I get back to my normal sewing/quilting schedule.
I hope you had a great holiday weekend, even if you don't' celebrate Christmas. It's just a great time of year for rest and recharging. 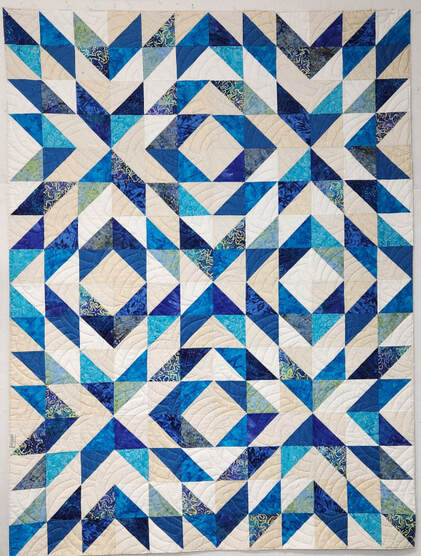 I got 2 more veterans quilts done this week. These may be the last that I get done this year but It's possible that I get 2 more done next week......we'll see. This one was made by Mary and I think it's very striking. 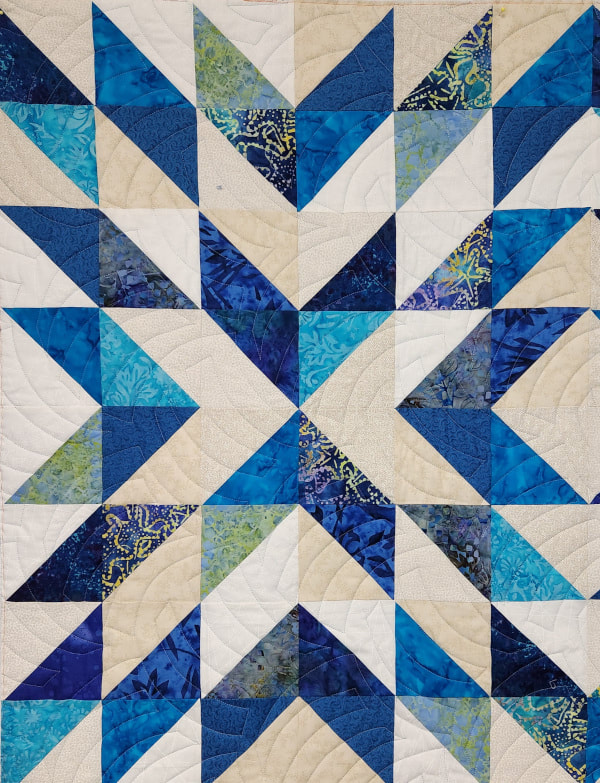 She said that she saw a quilt made with this pattern on the web and thought it would be cool if she made the blocks smaller and put 4 of them together. She was right. The secondary pattern where the blocks meet is very cool. 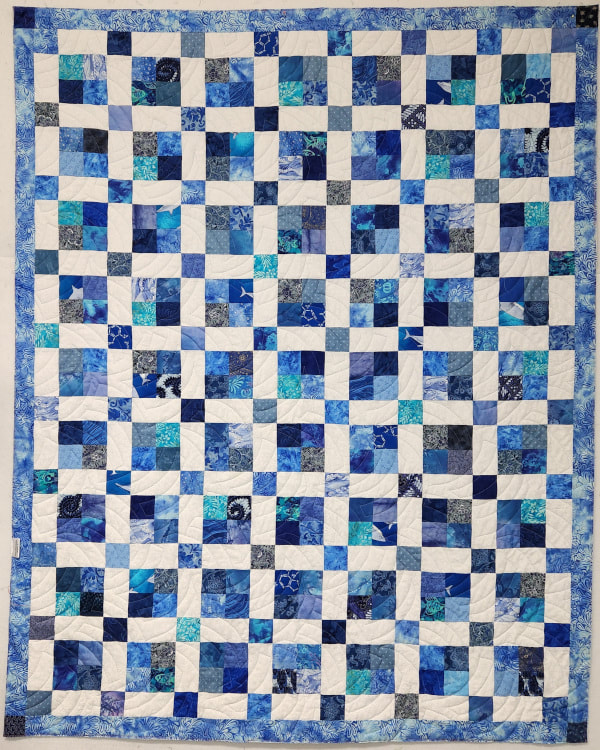 This is a really nice scrap quilt made by Peg. I love monochromatic scrap quilts. 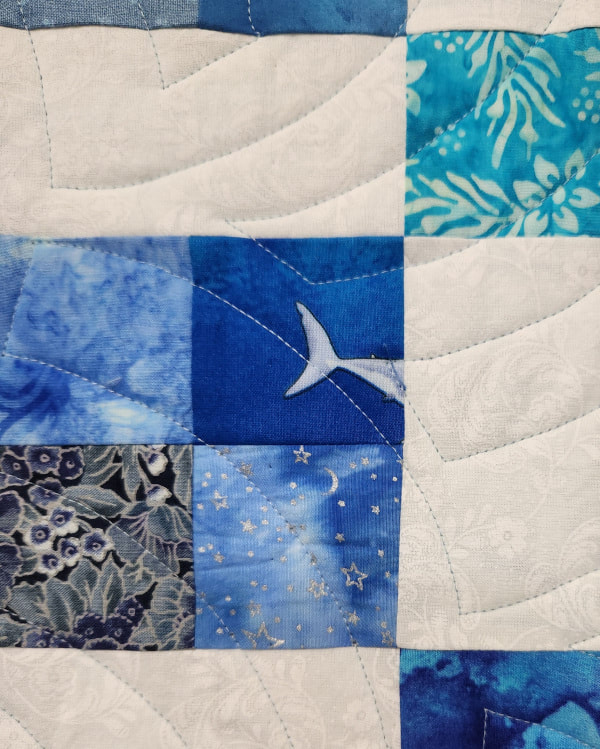 I wasn't quite sure who made the quilt until I saw this shark fabric. I remembered it from another quilt that Peg made several months ago.  Yesterday Mom sent me a photo of her Christmas tree. She has a little tree just outside the door of her apartment and this is her inside tree! Clever.
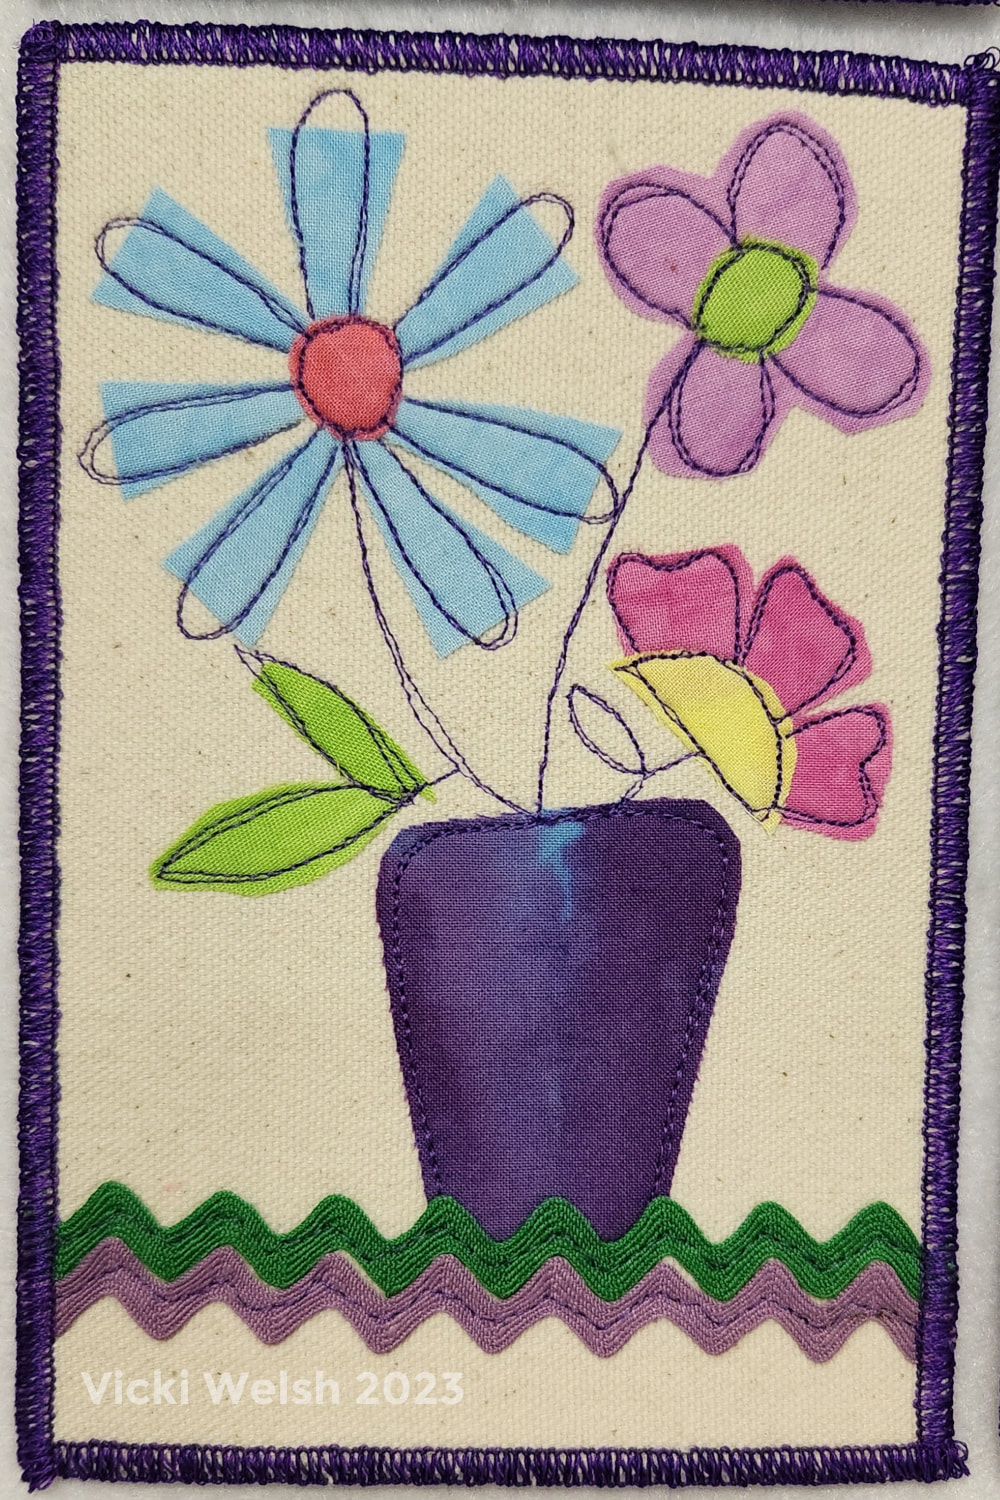 Every year, as soon as I finish the Christmas cards, I have to get busy making a birthday card for my SIL. Her birthday is the 23rd so it's important that her card not look anything like Christmas. I think I met the challenge with this one! This has turned out to be one of my all time favorite designs, especially since it came together with scraps and leftovers. I decided that, whatever design I chose, I'd make 4 cards. That will get me through birthdays until March. My design challenge was to use nothing but leftover stuff and it started with a box of fused card blanks. I pulled 4 cards that were already fused with a natural denim. 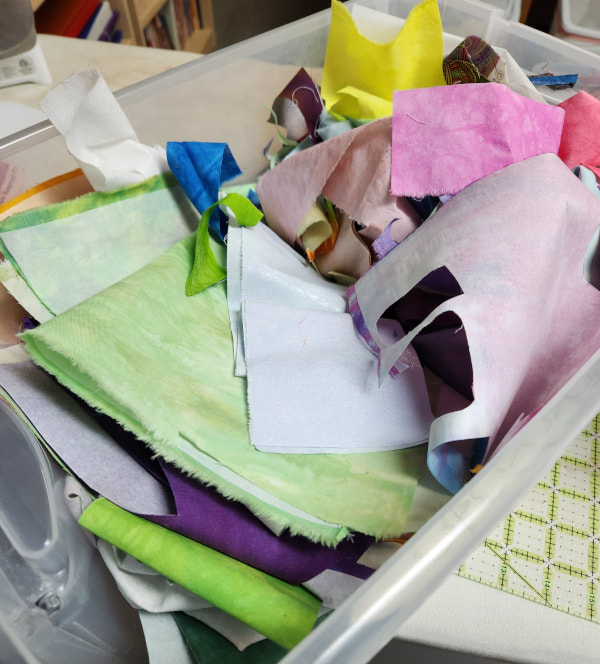 I decided that I'd try to use some elements from this bin of pre-fused fabric scraps. I keep all of my fused leftovers. They often come in handy! 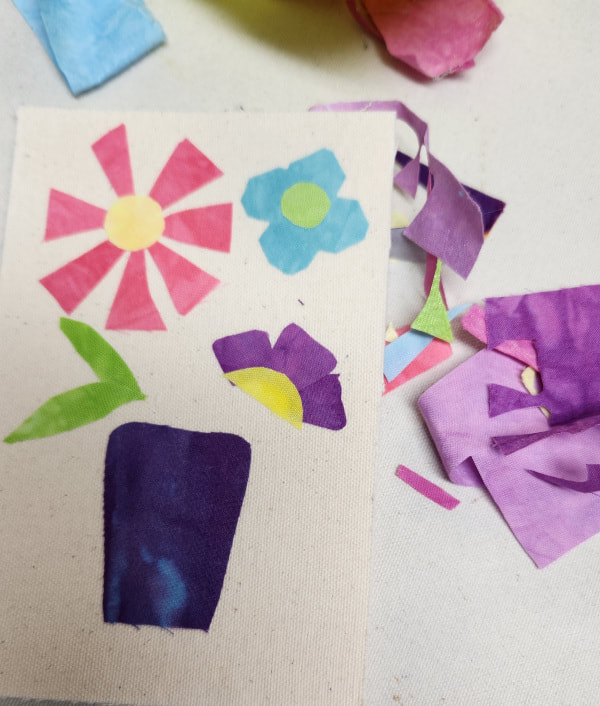 I didn't use much from that bin but I had enough to cut out some rough floral elements. 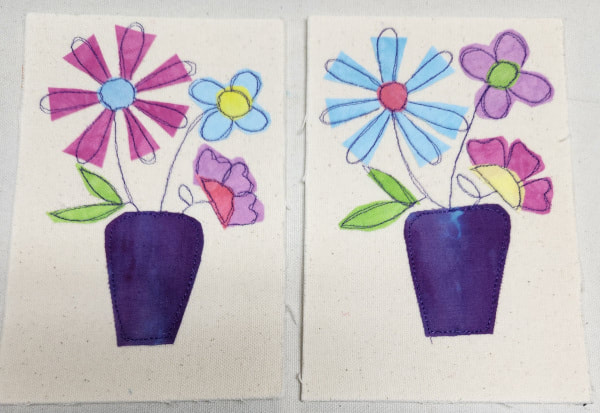 Next up I added some outline stitching. I thought about using black thread but I thought that might be too stark. Instead I took the lead from the vase and used dark purple thread. I really liked it and thought this might be the final product. But after some studying, I didn't think it was quite done. 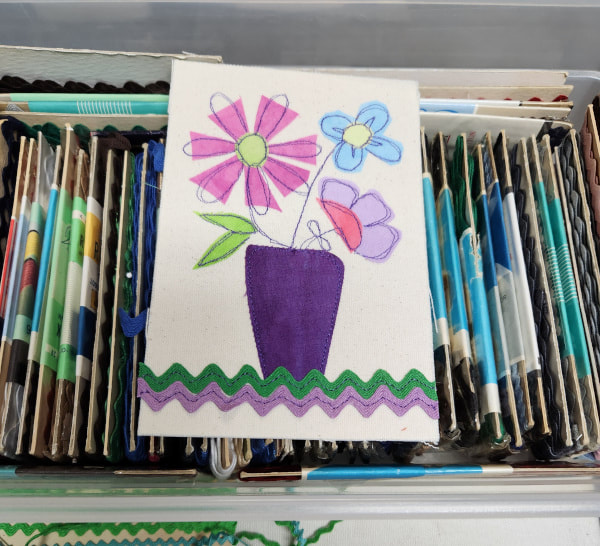 How about some purple and green ricrac? I have a lifetime supply of ricrac! 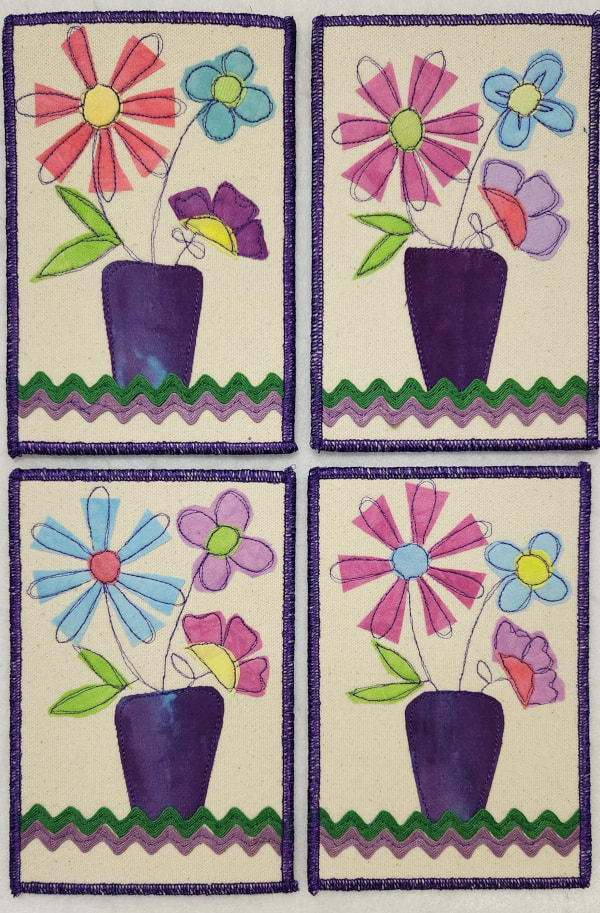 Some purple edging and they are all done. Carol's is already in the mail.
Yesterday I got started on 2 veterans quilts while the plumber was here installing a new filtration system. I'll get the quilts finished today. 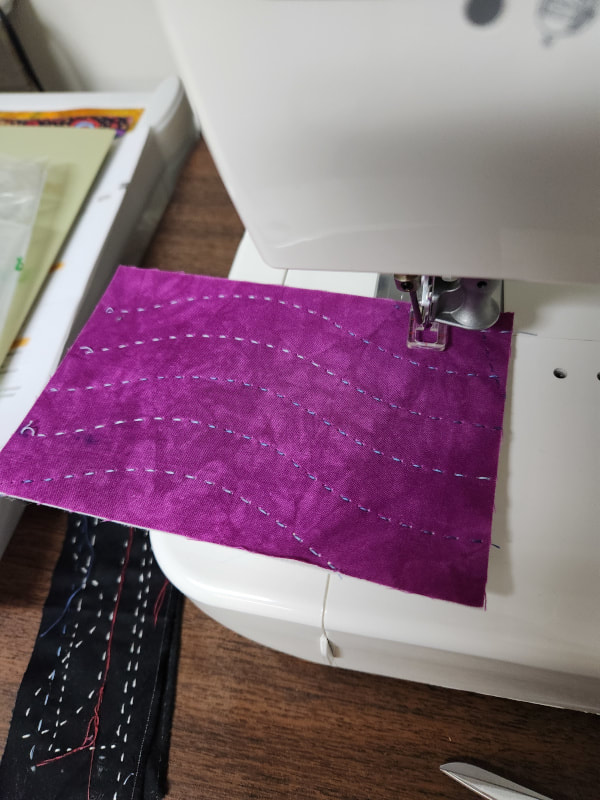 I had some plans but those plans had to be changed. I was going to quilt 2 more veterans quilts but I needed to exchange the 2 I was going to do with Brenda, the other quilter, so quilting didn't happen. Then I decided to sit down with the Sashiko machine. I got a bobbin wound and, after 4 tries, got it loaded properly. (There's a specific set of steps to get the machine set to sew). Then I decided that I'd do some stitching on postcards since I need to get a birthday card out this week. Look how cool those stitches were looking? Then there was a loud, unnatural noise and now the machine is stuck. I can't even turn the wheel to bring the hook up and release teh card. I'll be taking the machine to the shop this week for repair. Anne knows all about it and isn't worked up by it at all. She told me to leave it until she gets back but I had plans of things I wanted to make! 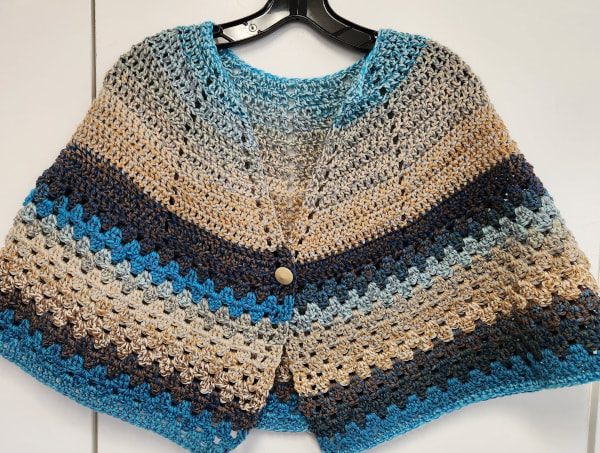 Instead of my original plans, I switched to crochet and finished this shawl. I was waiting for this finish before I take a bunch of items to From The Heart later this week. The yarn is Mandala Ombre that I got on a big sale. I have enough in other colorways to make about 3 more shawls. 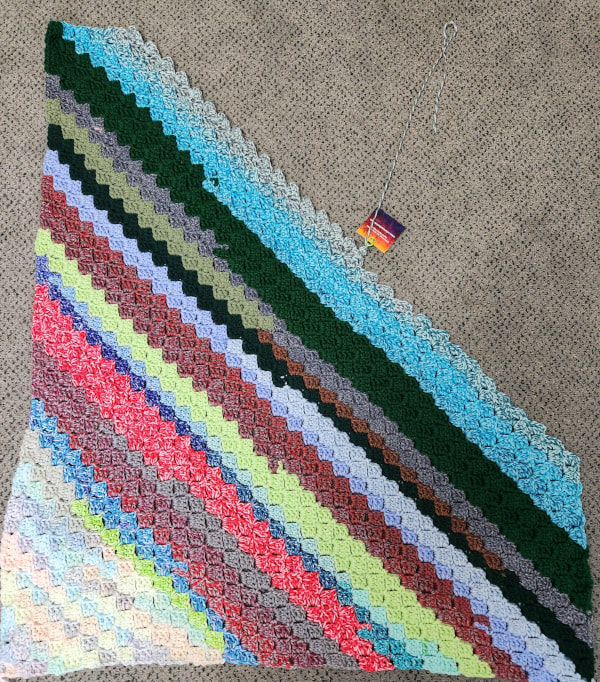 I even got the leftover yarn added to my scrappy blanket. I hate scrap yarn so I go ahead and add it to a scrappy blanket to use it all up. This will be either a wheelchair blanket or a pet blanket. I'll donate it and let the organization decide where it's needed....once I finish it. I have one of these for each yarn weight (4, 5 and 6) and add whatever I'm working on to the appropriate blanket after every project. 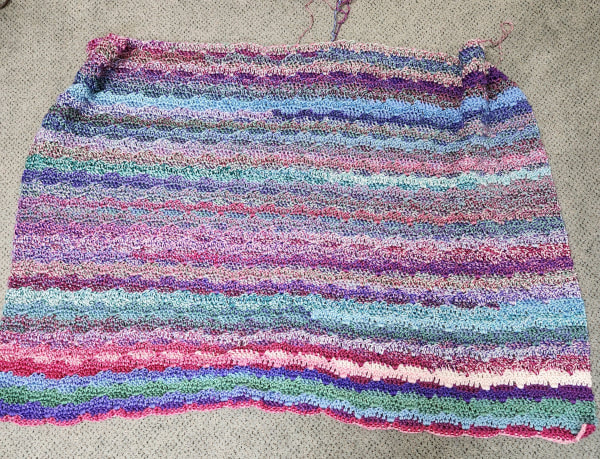 There was a lot of football this weekend so lots of good crocheting time and I also made some progress on the last of the big blankets. This one is for Chris' best friend and I'm about half done.
I also started some new birthday cards because my SIL has a birthday this Friday. I'll have those done to share tomorrow. 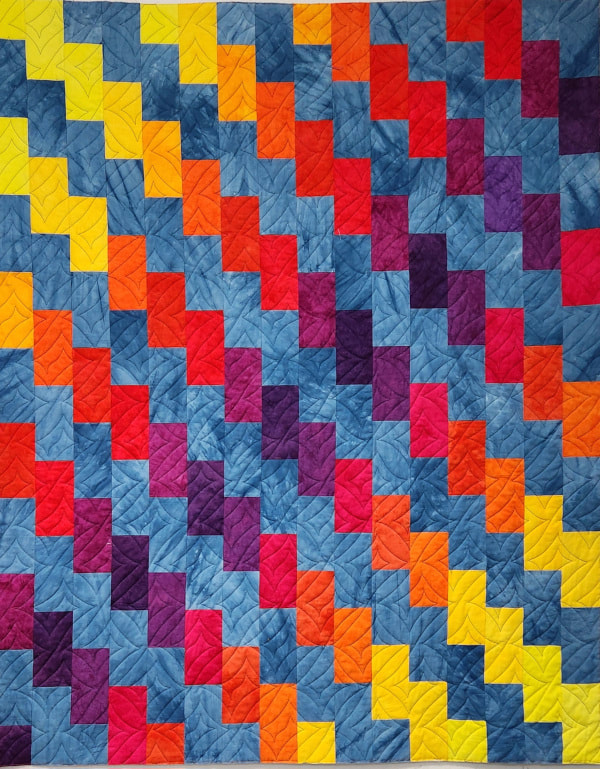 I'm on the home stretch with the last of my veterans quilts for 2023. I finished 2 more yesterday. This is one that I made and I absolutely love it. The blue fabrics are all from leftover veterans quilt backs and the color fabrics are hand dyed FQ sized scraps. 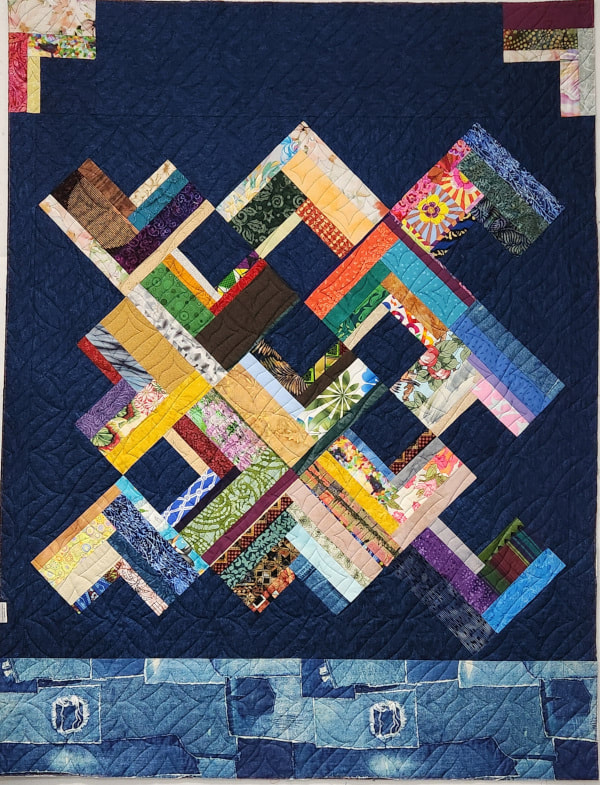 This fun quilt was made by Marcy. I always love seeing her quilts because she and I think so differently and I often try to channel a little more Marcy in my quilts. 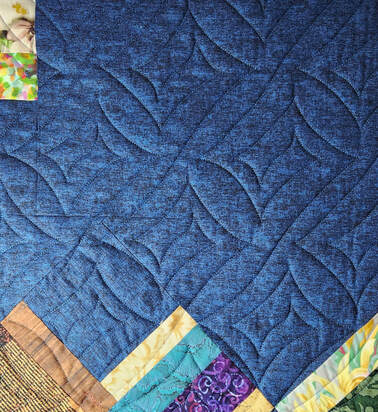 Both of these are quilted with the Square Spiral pantograph. I have 2 more quilts ready to load today and hope to have them done by tomorrow. Then I will dye a quilt back for one of my big quilts and try to work on that over the holiday. 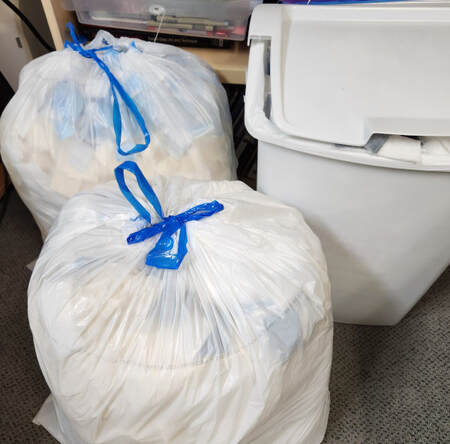 After I finish the last 2 veterans quilts I need to get busy making some pet beds. This is the current stash of chopped up batting scraps and it will make a lot of pet beds!
The other thing I want to do this weekend is to get the Sashiko machine out and start learning how to use it. Stay tuned! 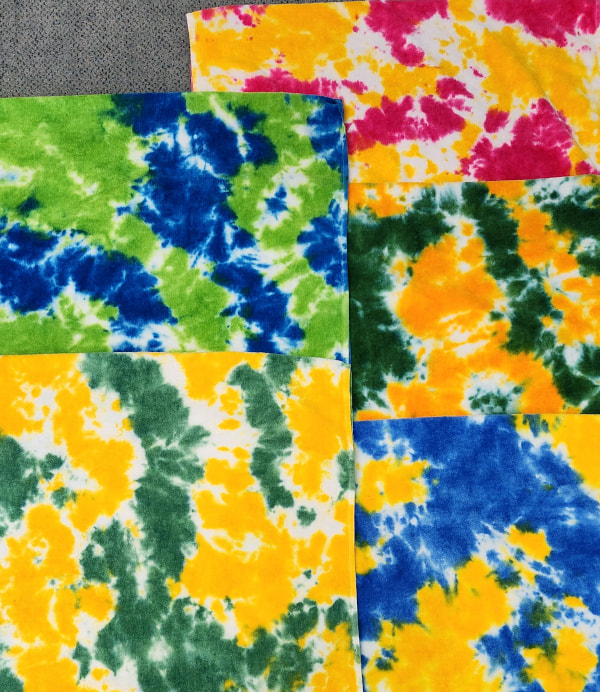 I have some work friends that I get together with each month and we've been getting together at least since I retired 13 years ago. Every Christmas I like to make gifts for them and this year I chose dyed beach towels. I get my beach towels from Dharma Trading. They dye beautifully and are very soft. I used to always dye beach towels in a spiral design but I'm kind of tired of that so this year I decided to do something more organic and, honestly, it took just as long! I love the effect and might order some more towels to do some for myself. I each of my friend to tell me their 2 favorite colors and that's the guidance I used for the colors. I delivered two of them last night and will deliver the others next week. 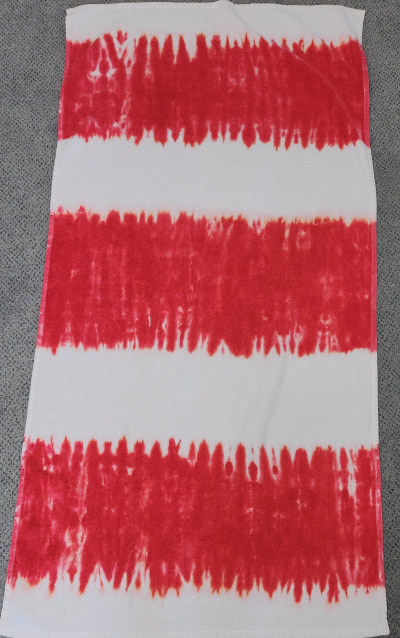 I also dyed one for June. June works for Hanover County and she is the person who "manages" our group and she is the NICEST person in the world. She loves the color red because it's the color of her college sorority so I made her a red stripe beach towel. I have 4 more beach towels to dye for my SIL's grandkids and then I'll be all done with Christmas making. Chris and I don't exchange gifts but conveniently we are getting a new printer and new water filtration system for our "gifts" this year. 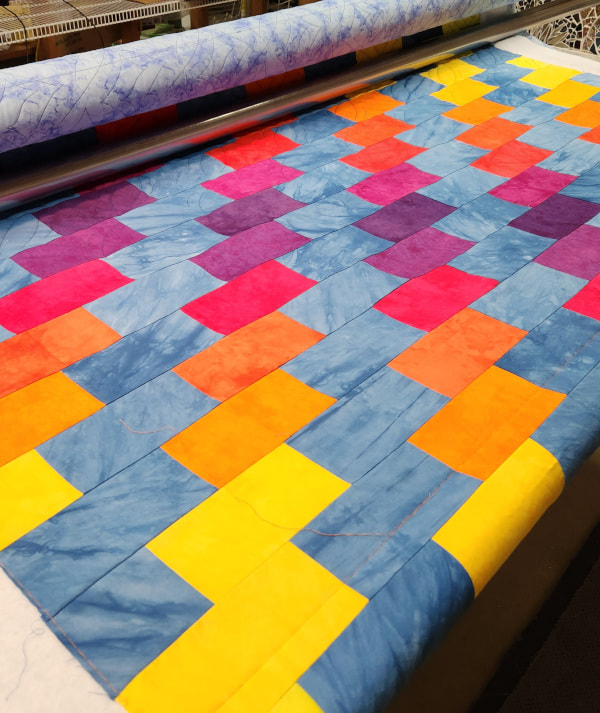 Yesterday I also got 2 more veterans quilts loaded and one of them done. I hope to finish off this one this afternoon. After that I have one more pair and I'll be done for the rest of the year! I might get one of my big quilts loaded and started.
Today I'm going to do something that I've never done before, participate in a medical trial. It's for a blood test for cancer screening. It's already commercially available but they will have to have a pretty extensive trial to prove it works for insurance to cover the cost. All I have to do is give blood and I get the test for free and they follow me for 3 years. That's it. If you are interested you could probably find a trial near you. It's being done nationwide in the US and they are enrolling thousands of people over the age of 50. It's a very expensive test and this is an opportunity to get it free. It's also being run in the UK by the NHS. 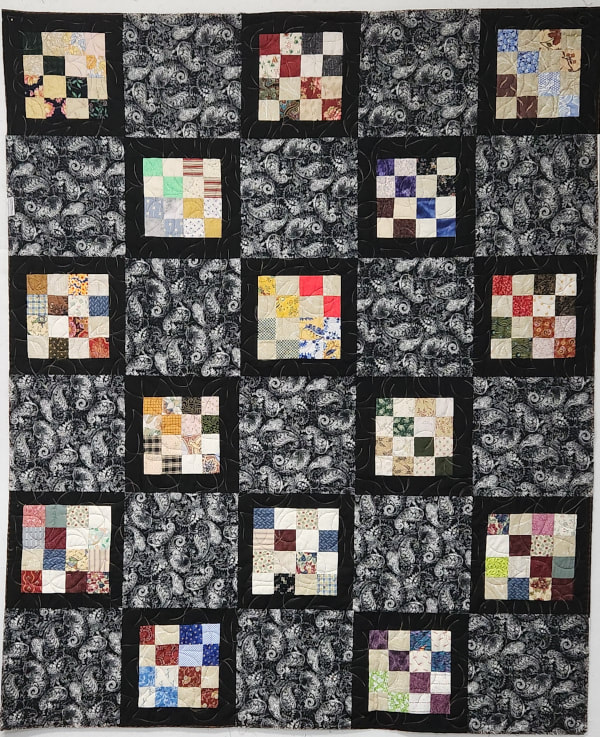 This weekend was all about catching up on quilting and addressing postcards. I started with quilting 2 veterans quilts. One is this quilt made by Brenda. 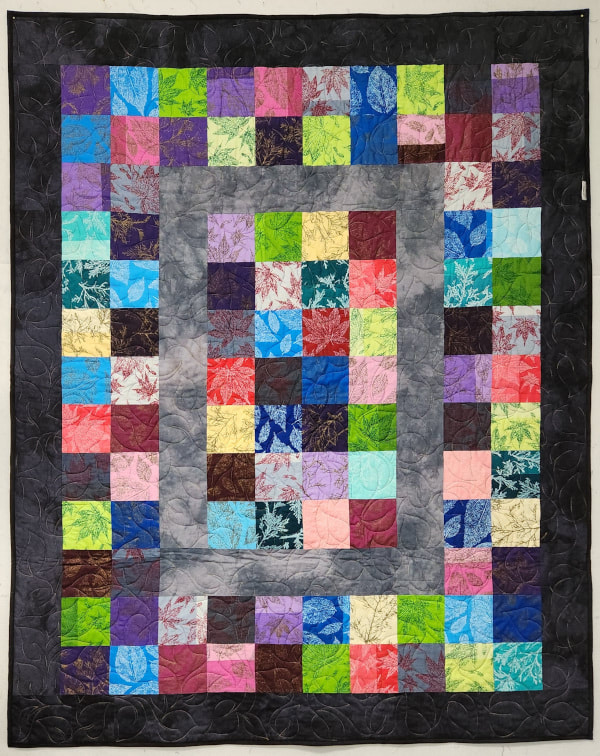 The second one is this quilt that is one of mine but it was pieced my my friend, Laura, on vacation this summer. I got it quilted and bound. 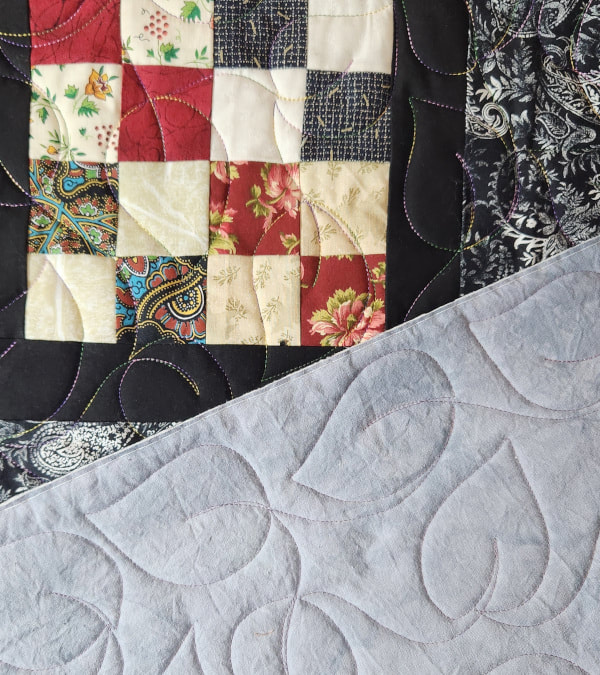 Both of these are quilted with this all-over leaf motif. It's freehand so it was very fast to quilt. 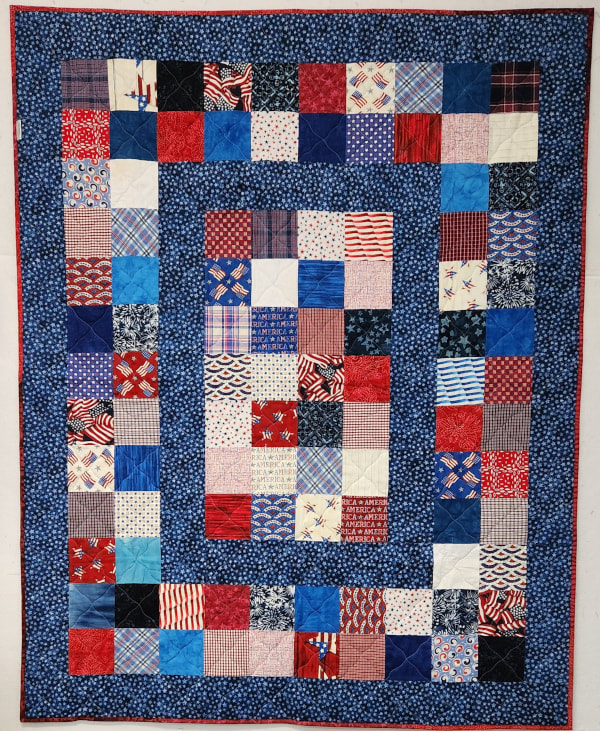 I also put a red scrappy binding on this veterans quilt. It's another that Laura pieced on vacation and I quilted it several days ago. I now have 2 more quilts ready to deliver to our veterans. 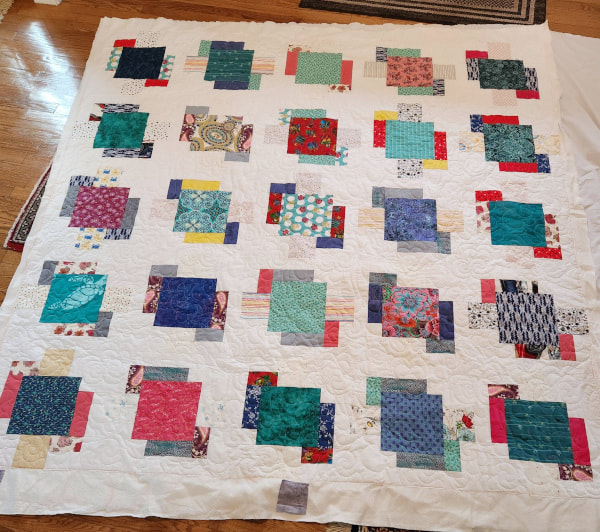 Finally, I quilted this quilt for my friend, Kim. It's 80" square. She is going home to Alabama at the end of this week and wanted to take it home with her. I think the pattern is called Scrapbook but I can't find it anywhere on the web. 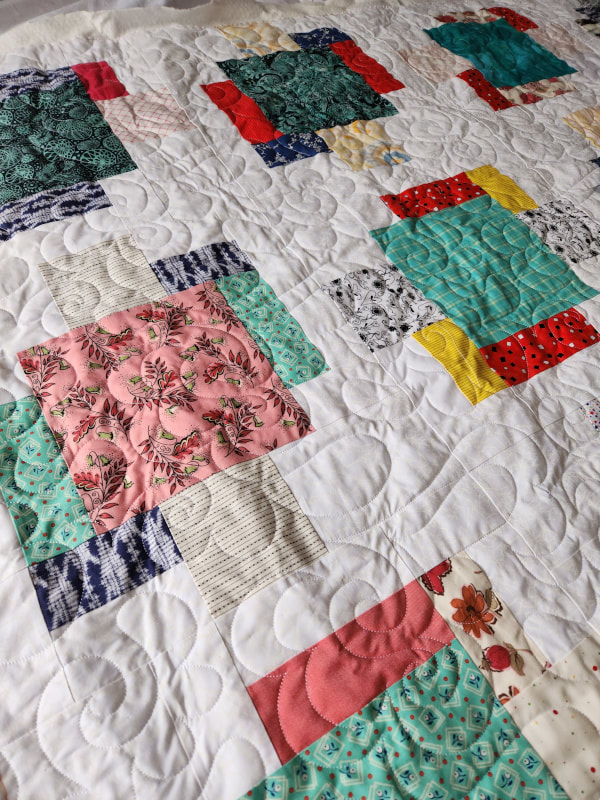 I quilted it with white thread (as requested) and the Fluffy Clouds pantograph. It's a very quick and easy pantograph and it makes some lovely texture.
All in all, that was a pretty good weekend. The cards also got addressed and will be in the mail today. That means I can get the Sashiko machine out this week! My Christmas chores are almost all done. 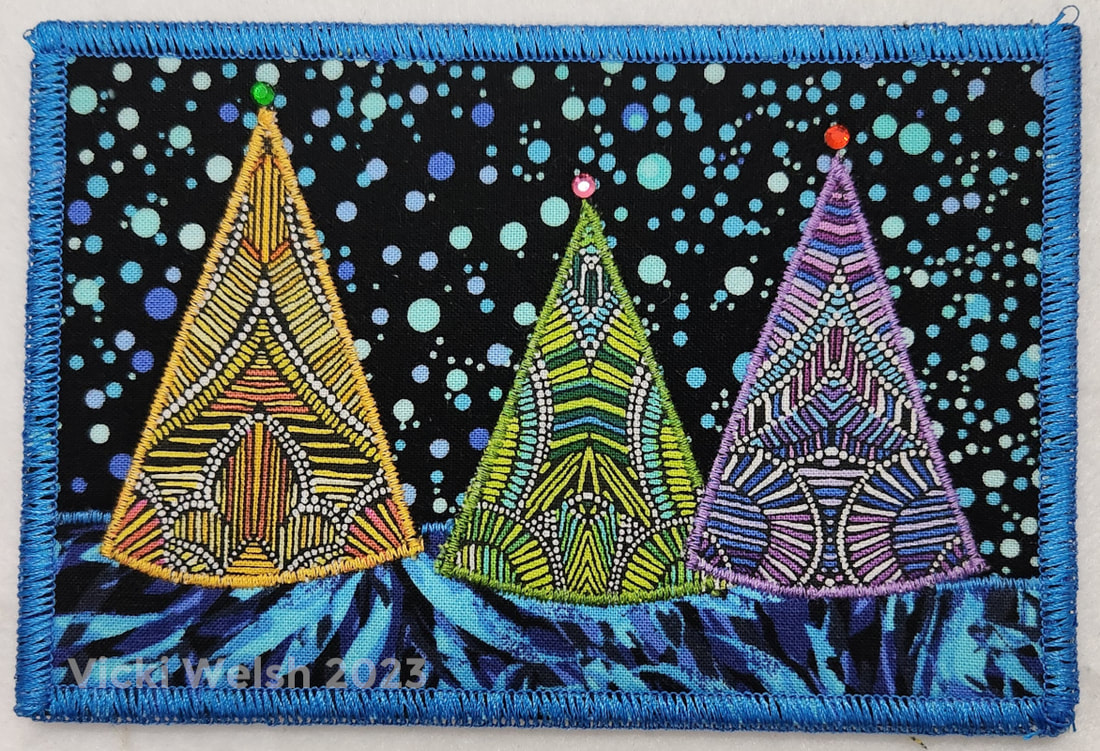 The one thing that's consistent from year to year is that there is always a tree design. Recently, there's also always been a design using Paula Nadelstern fabrics. This year I combined the two. The dot fabrics are from her 2023 line that was released earlier this year. The others are from the 2024 line that will be available in February. 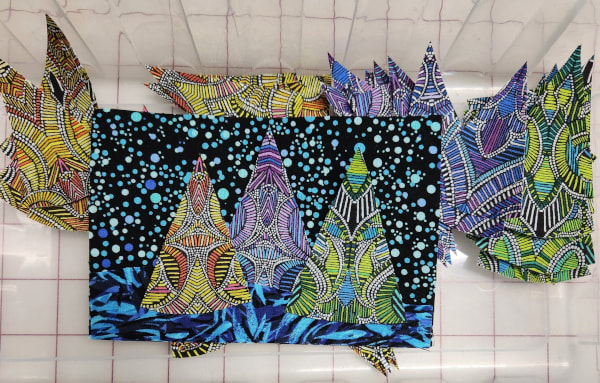 I made this set last because I knew that they would be the easiest to cut out and stitch.The tree fabrics are from the same print that will be available in 3 colorways. I decided to go bright with these are use all 3 colors that aren't really Christmassy. 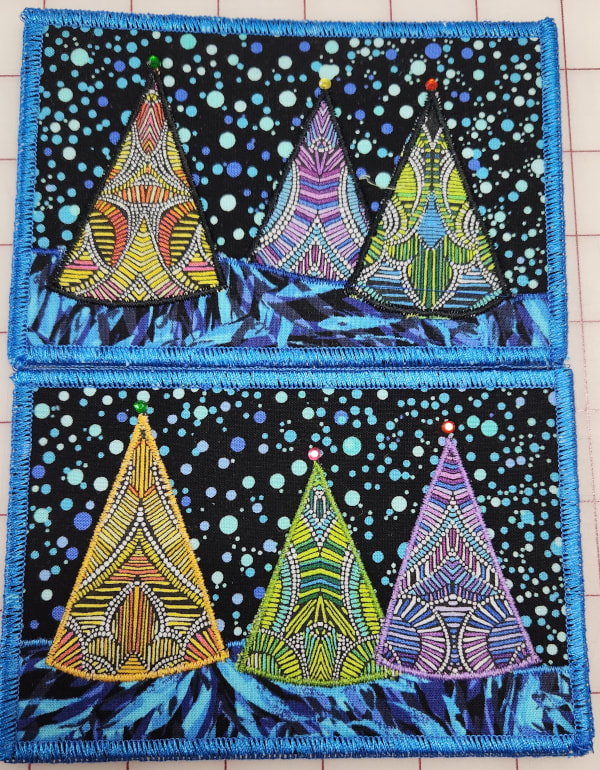 When I planned these cards I was certain that I wanted to outline the trees with black thread. Boy was that a bad idea! I quickly changed my plans to outline the trees in colors to match each tree. I added crystals to the top of each tree for just a touch of bling. 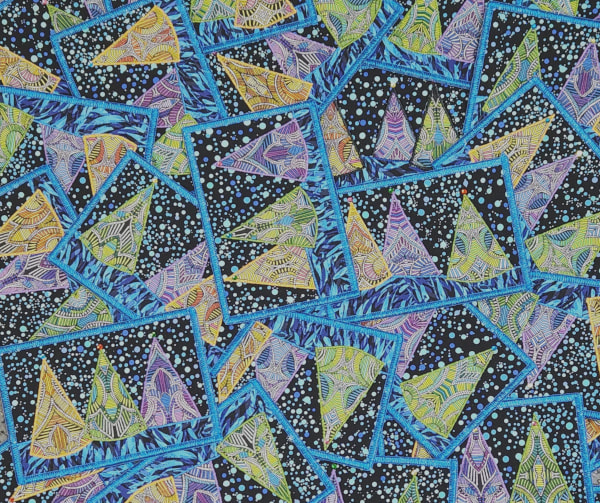 I made 25 of these cards! 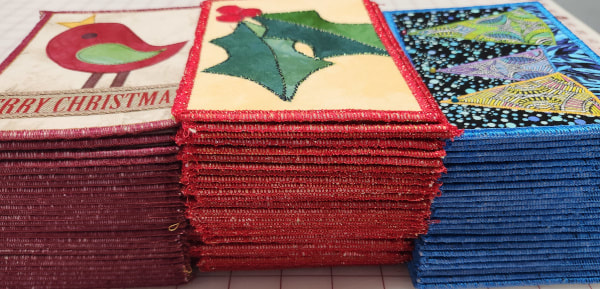 Here are 81 cards ready to address this weekend! I also have to quilt a quilt for my friend, Kim and dyed some gifts for friends. Today is a sewing day with my quilt club so I'm going to try to get 2 veterans quilts bound. I have 2 more veterans quilts to quilt but I don't know if I can get those done by Tuesday for the club meeting. It's going to be a busy weekend!
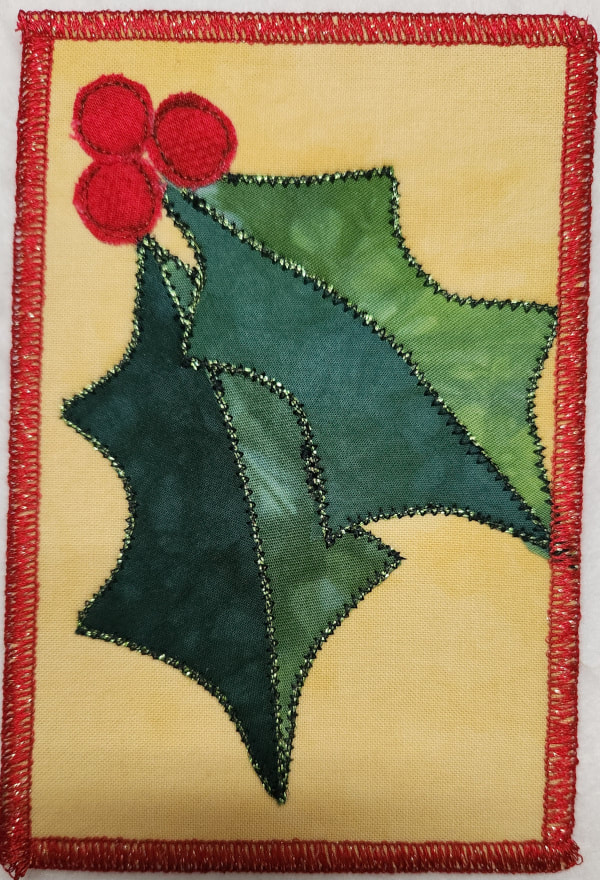 I have been wanting to make a holly-themed postcard for a while. I did one the one below in 2013 and it was based on a stitching technique used by Cane Glendening. I've been wanting to do another and this is finally the year, 10 years later.  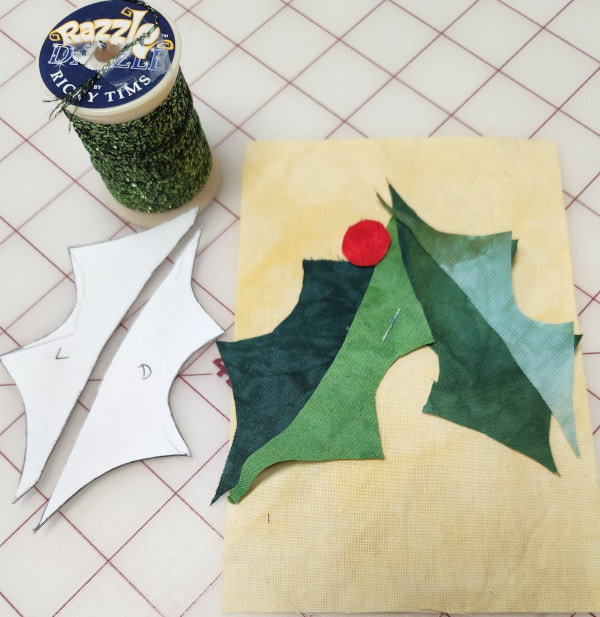 I wanted this version to be an applique version. This photo shows how I start my cards. I always start by cutting some sample fabrics to size and arranging then on a " x 6" piece of backing fabric until I get something that I like. 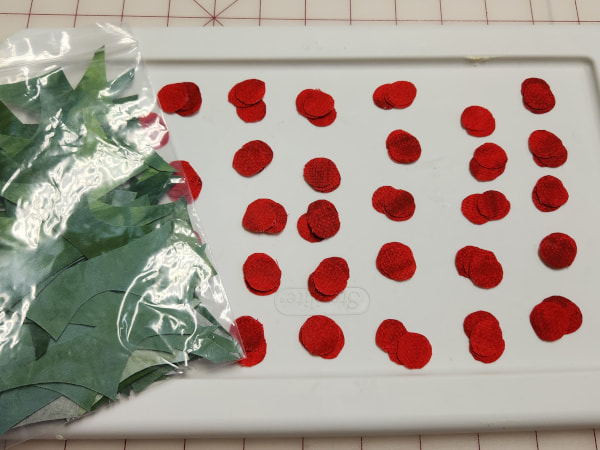 I think it took 3 evenings to cut all of the leaves and berries. I cut them from pre-fused fabric. I made cardstock templates for the leaves and traced them on the paper backing of the fused fabric and then cut them out. There were 120 leave parts and 90 free-form cut berries. Before I cut the berries I removed the fusible backing paper because removing paper from the tiny berries would have been a pain. 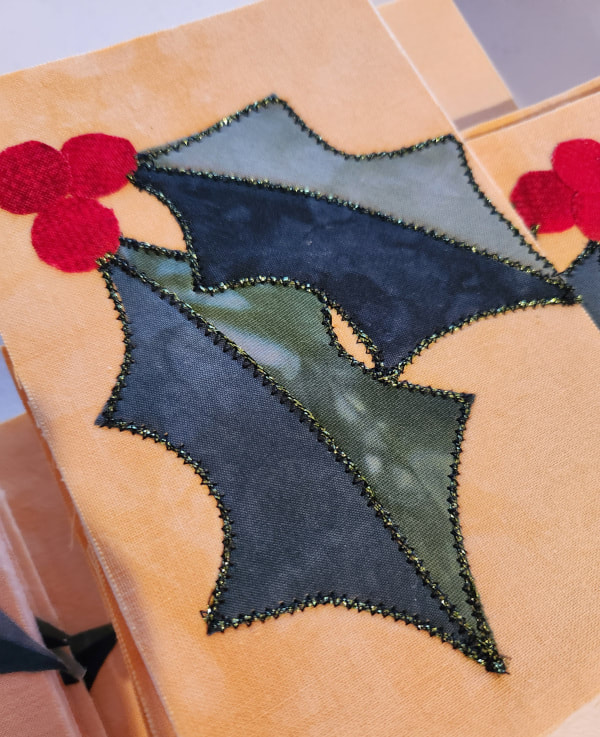 I had not intended to make them sparkly but when I started stitching the leaves I realized that they need more than simple straight stitching, like yesterday's birds. Couching Razzle thread seemed to be the right idea. For the berries I just free-motion stitched around them with a dark red thread. 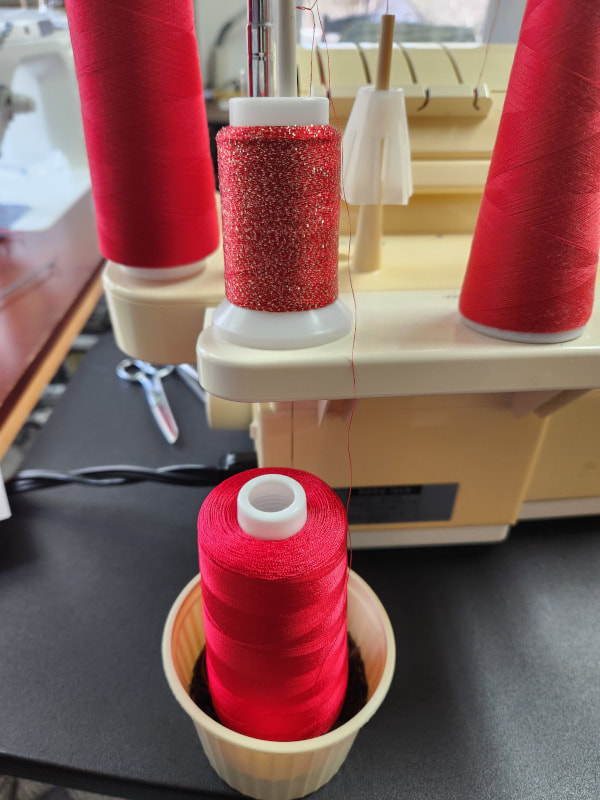 I serge the edge of my postcards and I felt that I needed some sparkle to the edges of these cards. On the serger I can run two (or more) threads through the loopers. I picked a red metallic and a red shiny acrylic for the upper looper. When I need to run a slippery thread I often set the cone in a cup of rice and that keeps the thread from sliding down and getting caught under the wound thread at the bottom of the cone. I've had this same cup of black rice sitting in my sewing room at least 10 years. 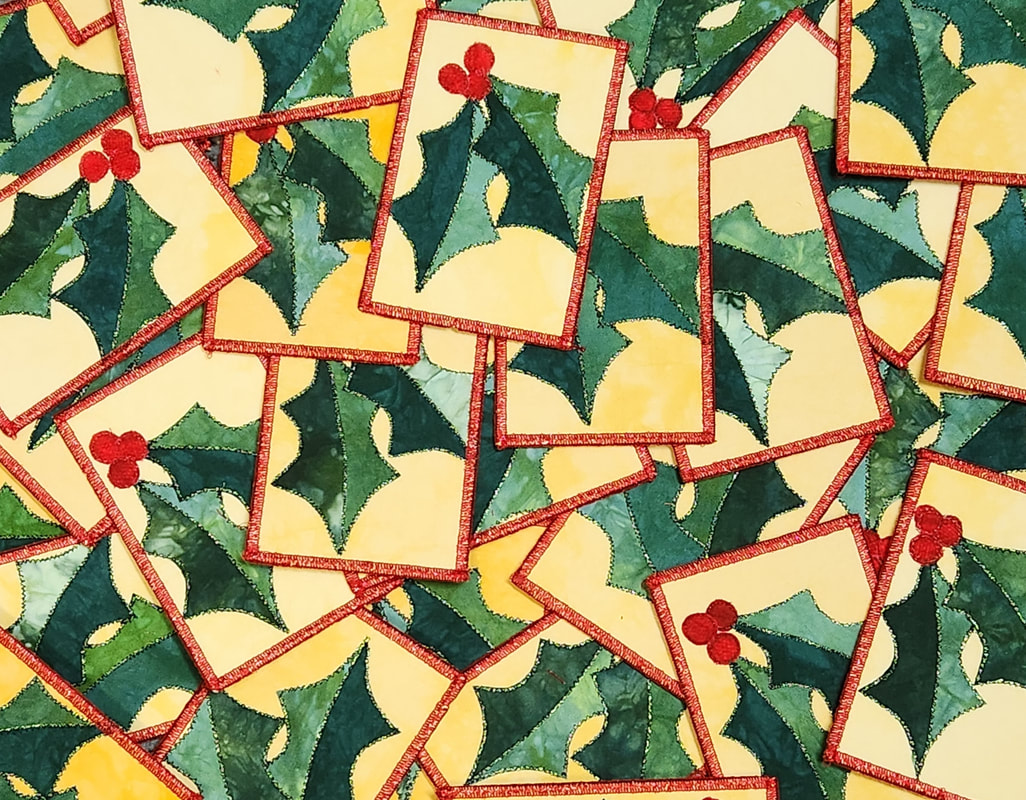 I made 30 of these so now I have a total of 56. One more set to finish up today!
|
FeedsTo subscribe click the RSS Feed button and copy the URL of that page into your blog reader.
In Bloglovin you need to search "Colorways By Vicki Welsh" to find the blog. About Vicki
I'm Vicki Welsh and I've been making things as long as I can remember. I used to be a garment maker but transitioned to quilts about 20 years ago. Currently I'm into fabric dyeing, quilting, Zentangle, fabric postcards, fused glass and mosaic. I document my adventures here. Categories
All
Archives
July 2024
|
 RSS Feed