|
It always seems to take me a day or 3 too get back in my routine after a trip but this time I seemed to adjust a little faster. It helped that I put everything away as soon as I got home Sunday so all I had left for Monday was a little laundry. 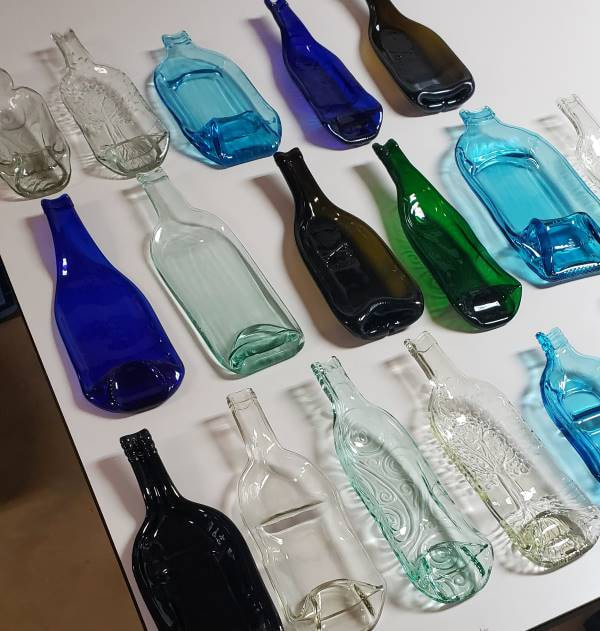 But the first thing I did Monday morning was get the kiln fired back up. I want all of these bottles done so I can get on with more fun things. Here's the collection so far. I took 3 more out this morning and have the last 4 in the kiln right now. So one task for the weekend is to get the glass table cleaned off and plan my first "real" projects. 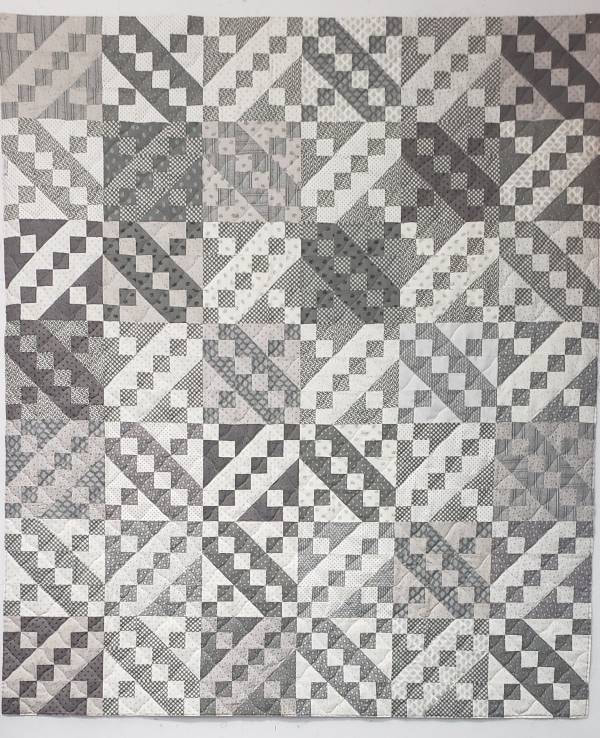 The other thing that gets me back in a routine is to quilt some veterans quilts. This one was made by Julie. She did a king size quilt with these blocks and used the leftovers for this soothing quilt. I expect that she's over her "gray period" now. 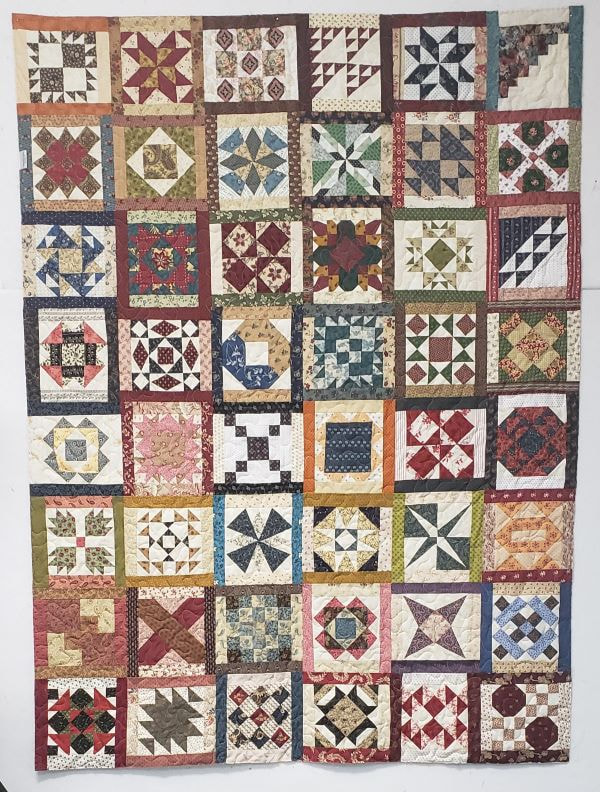 Nancy was cleaning out her sewing room and found these beautiful blocks. There were just enough for a veterans quilts. I've found that the veterans quilts are the perfect size for orphan blocks and other abandoned UFO projects.
Today my primary objective is to make my Mother's Day card which I will not share until Monday. I'm already cutting it close to assume that she will even get it Saturday but, fortunately my Mom has never been a stickler for absolute dates. ....plus I just took her on a quilt adventure so that's gotta count for something! 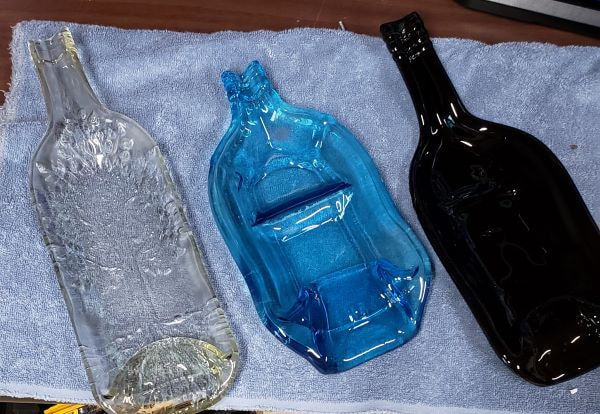 The weekend is here and my first order of business is to spread a truckload of mulch today. It's supposed to get into the 70s today so my car might even get washed too! But I started this morning getting the second set of bottles out of the kiln. I upped the top temperature for this one and I did get better definition on the slump on the tree image. The blue bottle is a Bombay sapphire bottle and the dark brown one is a Bailey's Irish Cream bottle. I got a little bit of kiln wash transfer on the Bailey's bottle that I cleaned up with vinegar. I started a new set up this morning with a little lower temperature to see if it helps with the kiln wash transfer. 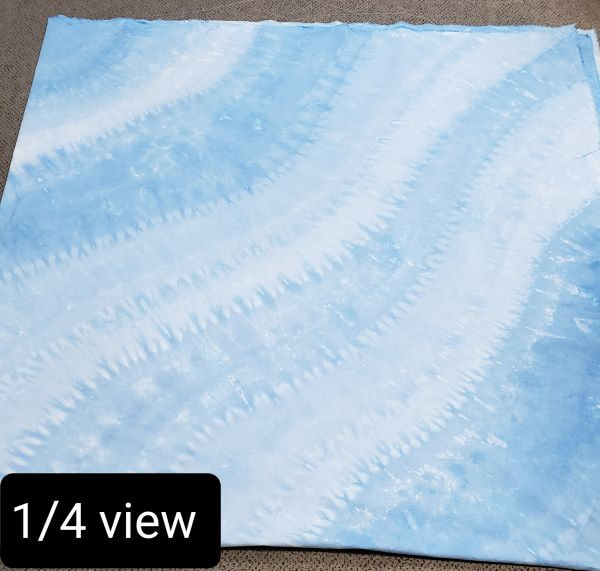 This week I also finished dyeing this custom quilt back for a friend. She wanted pale shades of Carolina Blue. The color isn't quite accurate in this photo. I think we picked a color that's very true to Carolina Blue. 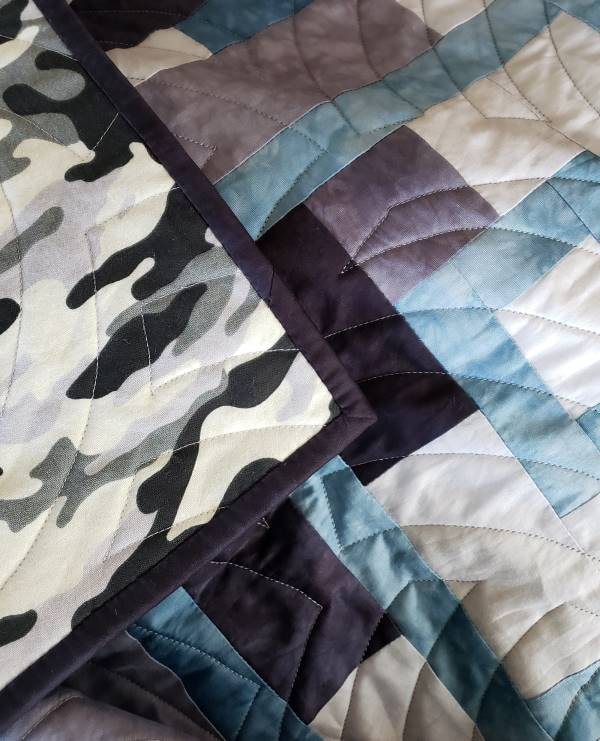 I'm also making progress on the wedding quilt binding. I do a couple of thread lengths every morning and I'm about 60% done. I'll keep plugging away at this. 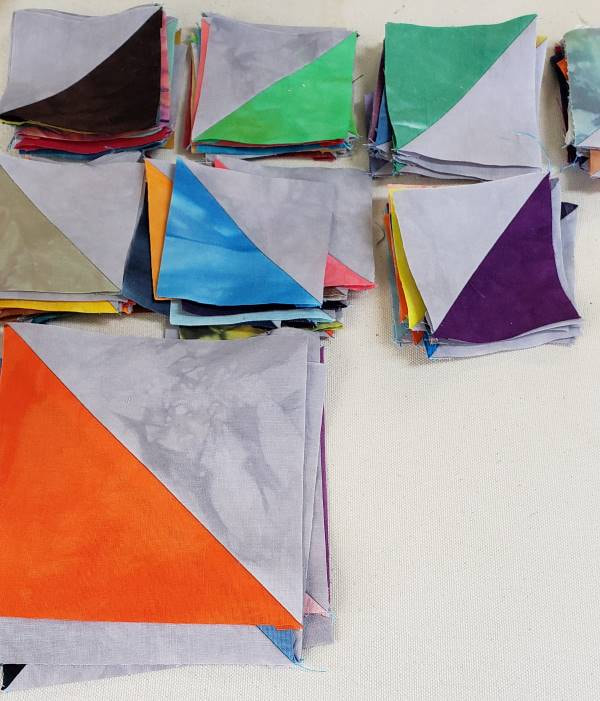 Usually in the afternoon I get some time to sit and sew half square triangles. I'll need 90 big squares and 90 4-patch squares for a veterans quilt so I have a long way to go. It's nice sewing to do while I'm listening to a book.....right now it's a really long book!
This is what I expect my weekend to be like. I hope you have a great one too. 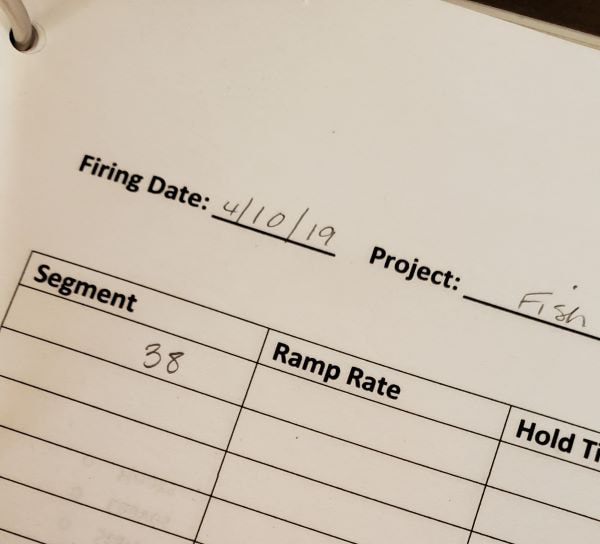 I keep a firing log for my glass kiln so I know that it's been almost 3 years to the day since I used the kiln. 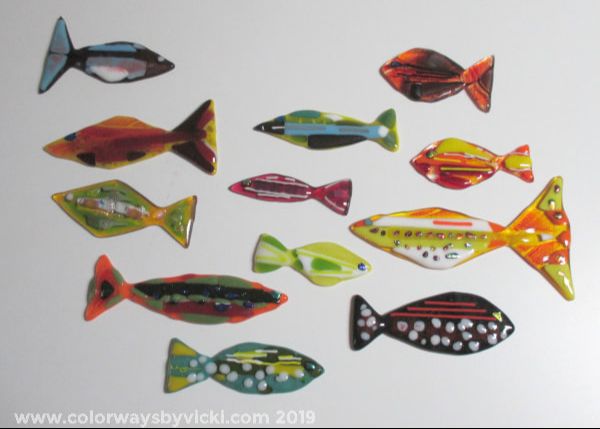 The last thing I fired were fish for my mosaic backsplash behind my dye sink. I think I got away from doing glass was because I was doing the mosaic and you can only have so many hobbies at one time! After the mosaic I got involved in a long project to make the Spirograph floor mats. You know how it goes, the further away you get from doing something the easier it is to ignore it. But glass has been nudging me again, so I cleaned off the workbench (a monumental chore) and decided to warm up with some bottle slumping to see if the kiln even still works. 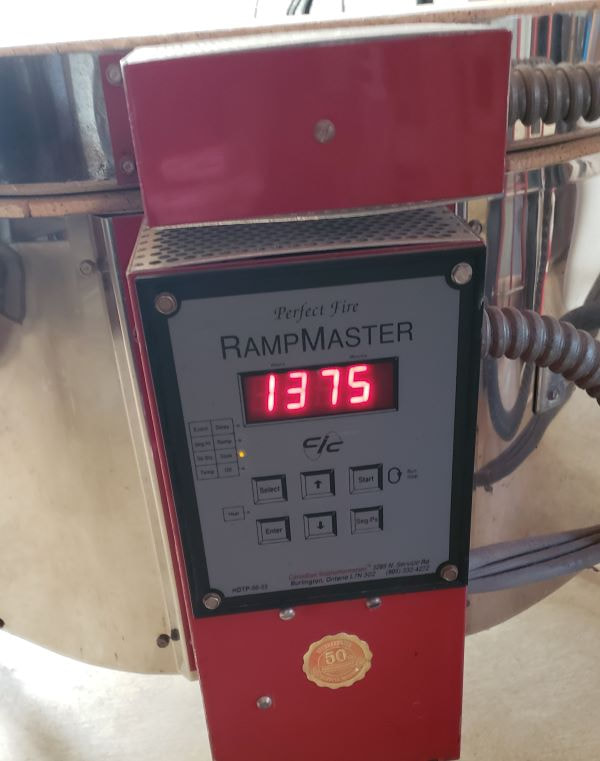 I prepared 3 bottle molds, cleaned the bottles, crossed my fingers and started the kiln. Halleluiah! It works! I was in the basement dyeing so I could keep an eye on it and verify that the temperature and timer were working properly, and they are. I don't know much about brands of kilns. I bought this one off Craigslist many years ago and bought it because it was available locally and cheap. It had been abandoned in a house and the new owner just wanted to get rid of it. But, right now, I have to say that I'm pretty pleased with the Evenheat brand. 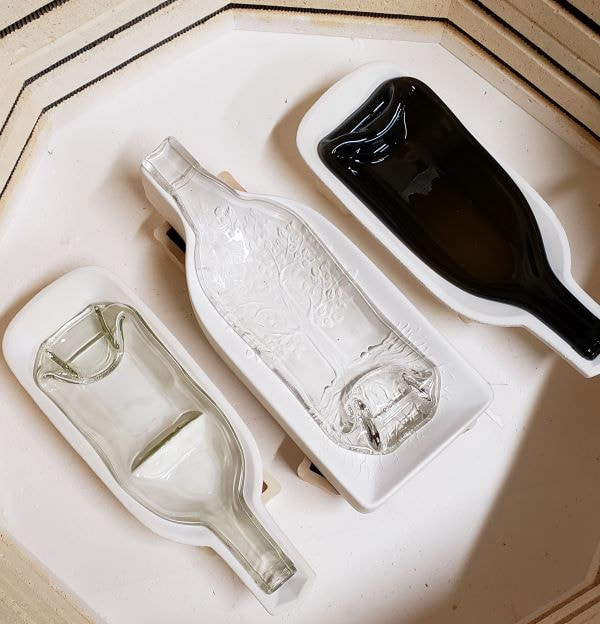 This morning I have 3 well-slumped bottles! I was surprised at how quickly it all came back to me. The kiln programmer is kind of weird and not-intuitive but it only took me a few tries to remember that the START button doesn't start it. Starting it requires SEG ENTER SEG. I'm still not sure exactly what the START button is for but I think it has something to do with doing a delay start, something that I would never do. Anyway, I got it to work and have 3 bottles done. 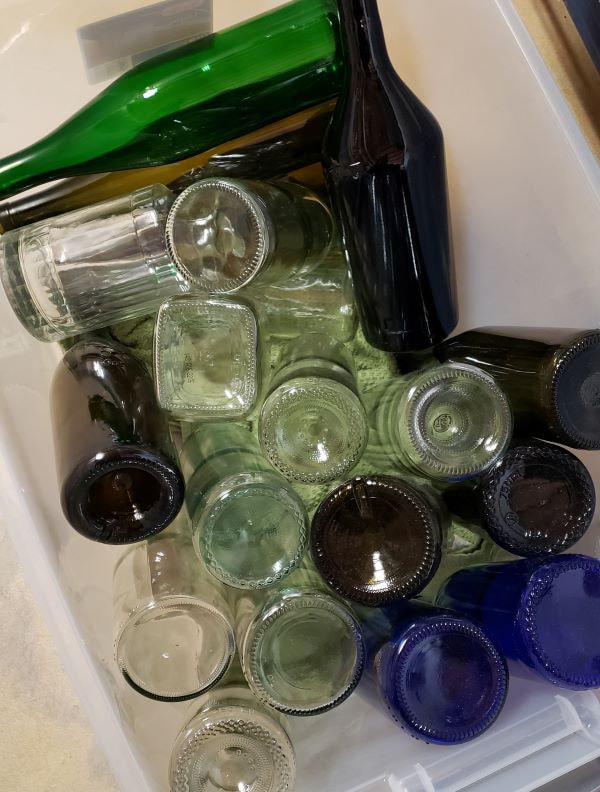 I'm not particularly keen on doing bottle slumping but I've had this bin of bottles in the basement for at least 3 years and I'm going to do as many as I can tolerate between now and the family beach trip. I'll take all of the results to the beach to give to the family. Then I'll get back to working with the pretty glass.  I've got the bottles selected for the next batch and I'm going to try a new program with a higher temperature for these. As soon as I get back from lunch and errands I'll get these cleaned in the kiln. Notice the bottle on the left looks like it has white paint on it. That is devitrification wash. It helps to keep the glass from getting hazy when it's fired. Sometimes it works really well and sometimes only a little. I put it on the glass either way.
It's nce to be playing with glass again! 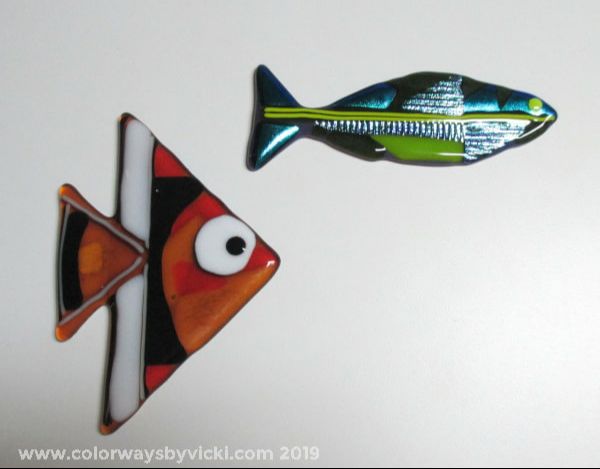 I got the fish fused and I'm mostly thrilled with the results. These are my 2 favorites.  These are all acceptable too. Yes, they are lumpy but the grouting process mostly smooths out the edges. 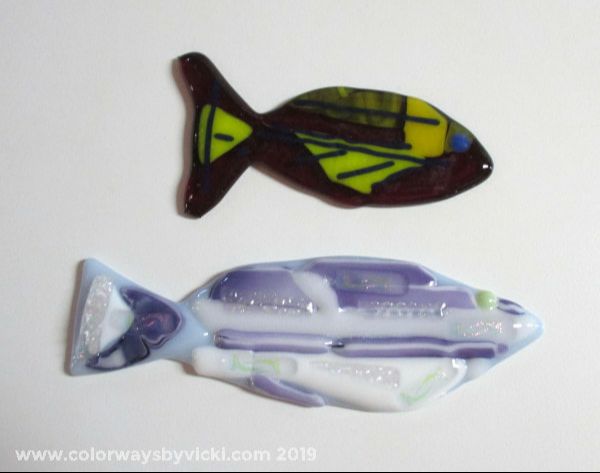 These are the only two that I'm declaring as outright rejects. For me, that's a really good success ratio! I have a stack of reject fish from previous firings. I'll break these up and use them in a scrap project so they will not go to waste. The pale one is a reject because the fish will not stand out well against white grout. The dark one doesn't have enough interest although it could work in a pinch. 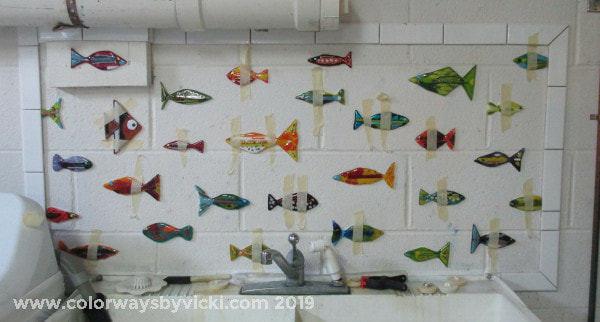 Here are all of the fish stuck to the wall. I "baste" them up with tape until the mastic firms up. If you look on the right and left edges you can see how I used a few of the reject fish. Sometimes the body is OK so I can cut off the tail and have the fish swim in from the edge. In once case only the tail was salvageable and it's a really fine tail. 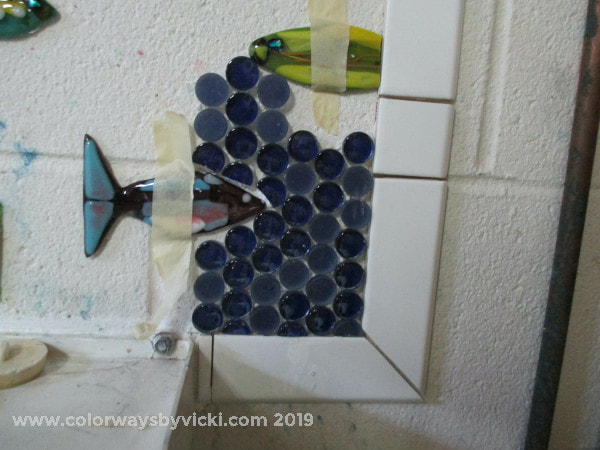 I added some of the background just to see how it's going to look. I did straighten out that one partial tile near the fish nose. It was bugging me in the photo. You aren't really supposed to cut glass tile but this isn't in a shower so it will be OK. I'll have to wait for the fish to set up before I do any more. The blue glass tiles are from my friend's bathroom remodel. I love free materials!
My goal is to have this done by the end of April so that I can grout both areas in May. 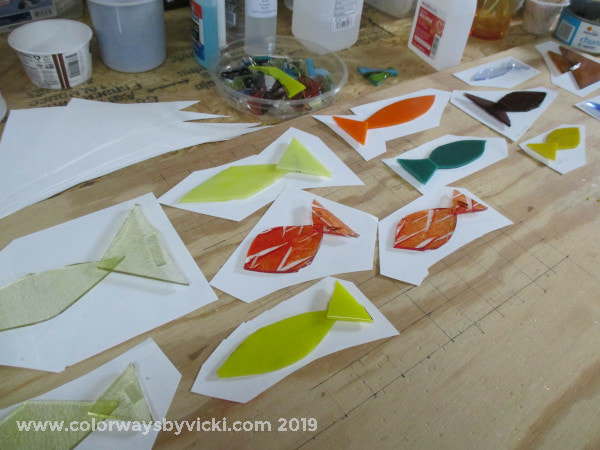 I showed you my fish bases the other day. Slowly I am working on building my fish. I can only do this for about an hour at a time because the fumes from the glue (just plain Elmers gel) starts to bother me. So I can get about 3 done in a session. 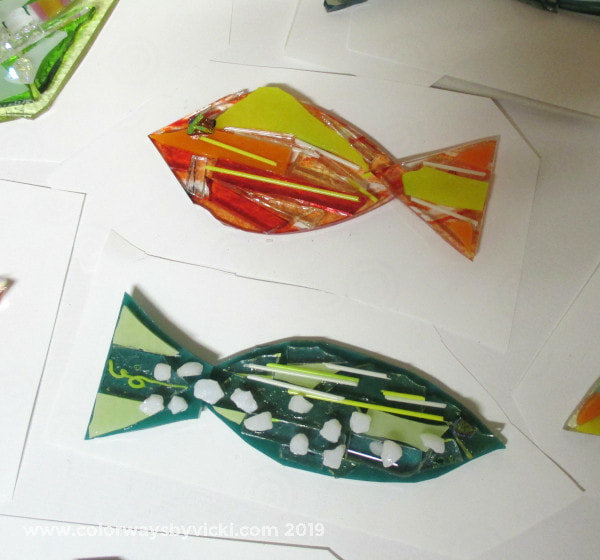 They are all built from scrap bits with some frit and stringers. As they melt in the kiln the surface will smooth out. 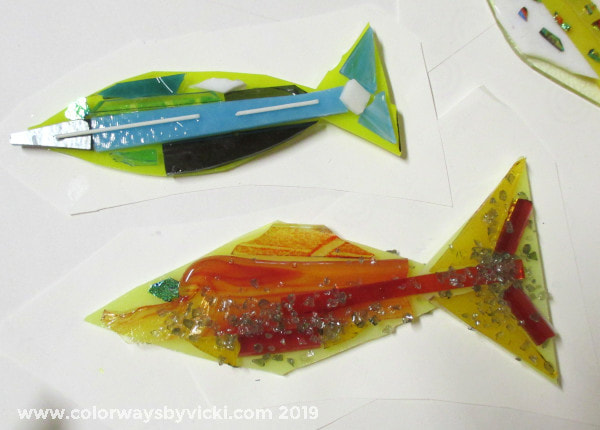 The colors are all based on whatever glass bits that I have and some of these are striker glass so I'm bound to get some big surprises in the end.  Some will turn out great and some will be rejects sent back to the scrap pile but I'm really hopeful for this one. 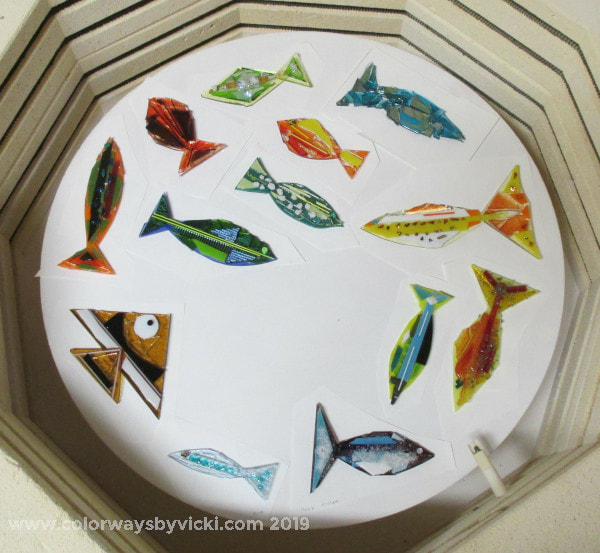 I don't need this many but I'm going to make enough to fill the kiln and hope for the best! There's so much glue in here that I'll have to vent the kiln and the basement really well. Hopefully I can get these fired this weekend and have some cute fishes to show you next week.
This weekend is sewing days with Country School and I'll get to go both days this time. I'm looking forward to working on the 4th of July quilt again. So you know about the wedding quilt. The newlyweds are also getting wedding bottles! 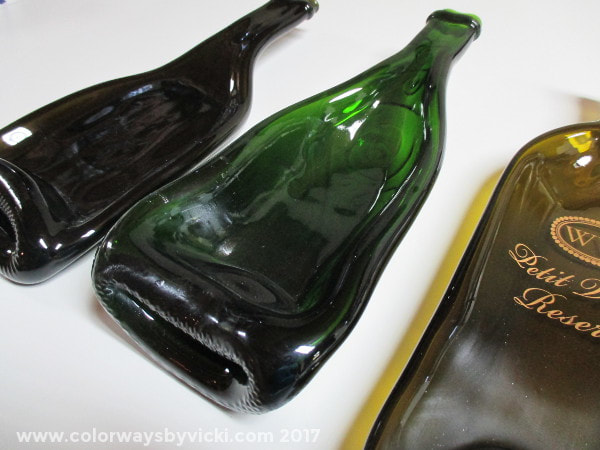 My cousin saved and brought home 3 bottles from her son's wedding reception that I could slump for them. August is the worst time to run the kiln but we had one cool day last week and I was able to get these done before I need to deliver them this Friday. 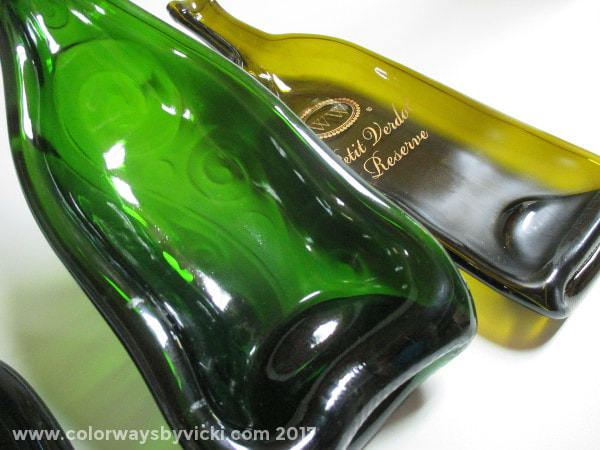 The green one is nice and shiny and has a swirl pattern on the back. Can you see the one with the one with the painted label has a dullness to it? That's devitrification. Bottle glass is really susceptible to it. I spent a ton of time trying to get a fusing schedule that would avoid that but bottle glass is of all different types and there's not one schedule that will work. 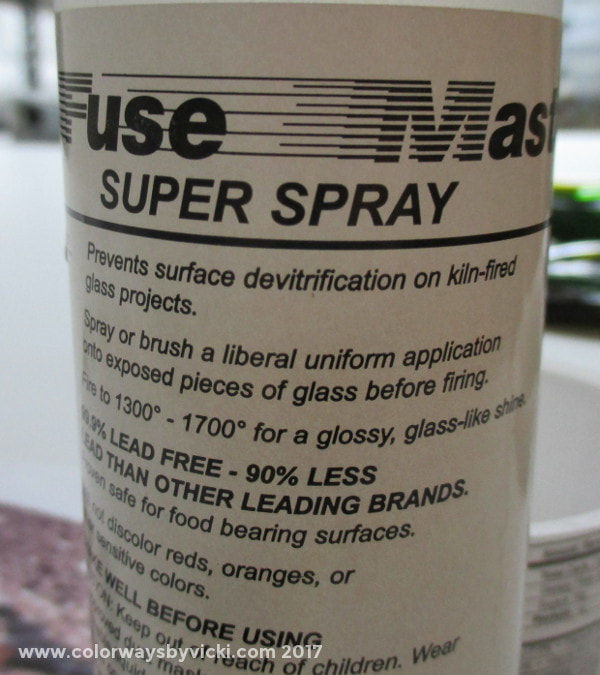 Devit occurs on fusible glass too and the industry came up with some products to prevent it. This is what I use on bottles.  You paint it on the top half of the bottle. There can't be one drop on the back of the bottle that will touch the mold. If there's any there it will stick permanently to the mold. I know that because I ruined a mold that way. Here's one treated and ready to be fired. In the 2 plain bottles above I was able to do this pre-treatment but I couldn't do it on the one with the label. I learned the hard way that the devit mix ruins the label. It's a trade off and the label looks so nice that I think it's a worthwhile tradeoff. I hope these will be nice wedding mementos for Clay and Lydia. I can't wait to give them the bottles and quilt this weekend and they haven't even been married a year yet. My gifts are early! 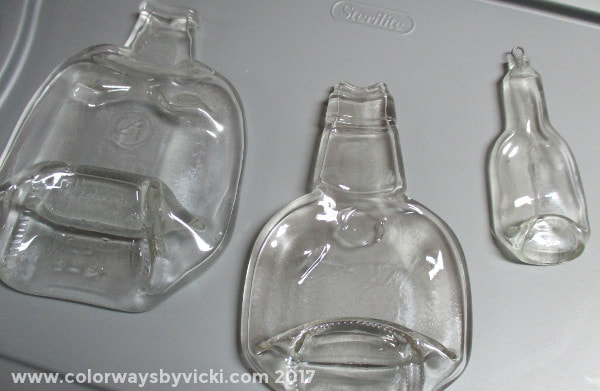 The bottle in the photo above is on the left in this photo. 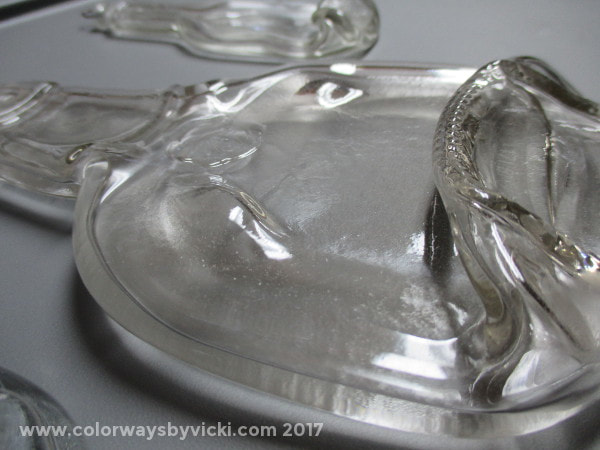 All 3 of these clear ones were fused flat because the bottles are such odd shapes. I have no idea what I'll do with them.  I did this whole group primarily because I needed to do this one for my next door neighbor. I can't do a bottle with paint on the back in a mold. I learned the hard way that they stick to the mold. So this one had to be done flat on fiber paper. It fused really nice and Melanie was very happy with it.
I'm still in fish-making mode and here are the newest additions to my school. 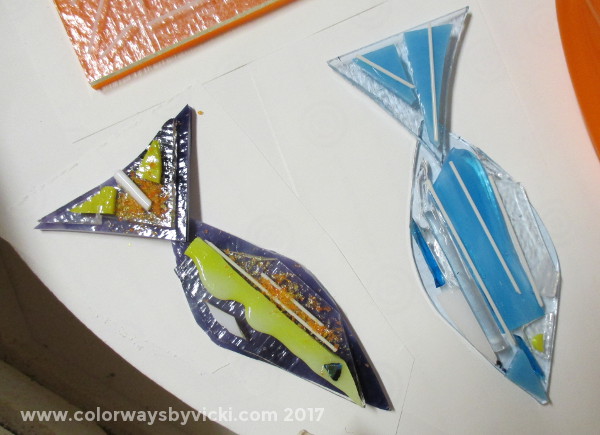 These first 4 photos are before firing. I've mentioned "striker" glass a lot. Striker glass changes color a LOT during firing so you have to pay close attention to what you are working with before hand. I mark all of my glass with the stock numbers, even the small pieces. But once it goes in the tiny scrap bin it could be anything. Pay close attention to the blue and turquoise fish to see what color it turns in the end. 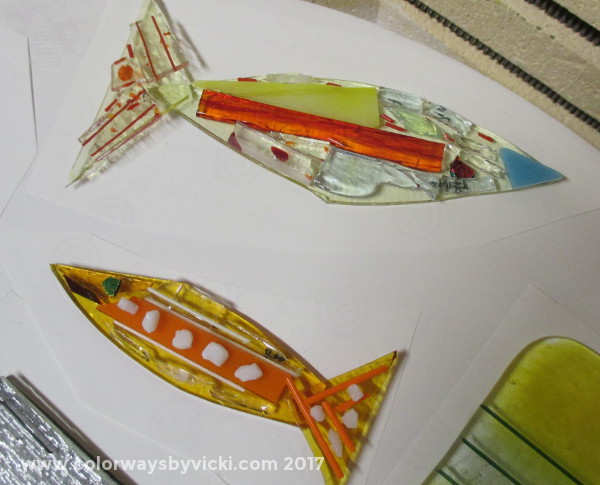 The bases of both of these fish are striker glass. 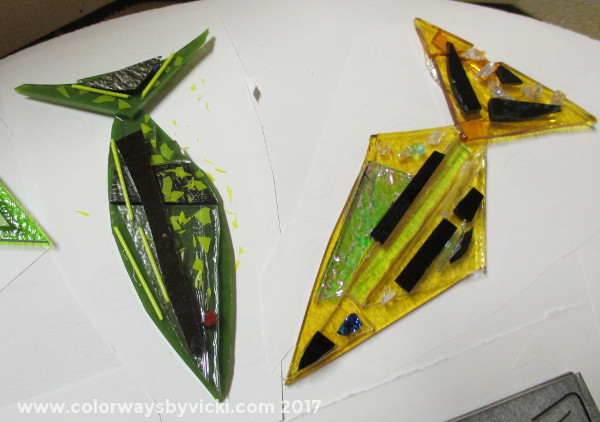 The green one is not striker but the orange one is. You might notice that his tail is kind of ragged. It broke on the way to the kiln. I decided to cobble it back together as best I could and let the melting glass fuse back together. Lots of fish had damage to their tail fins. 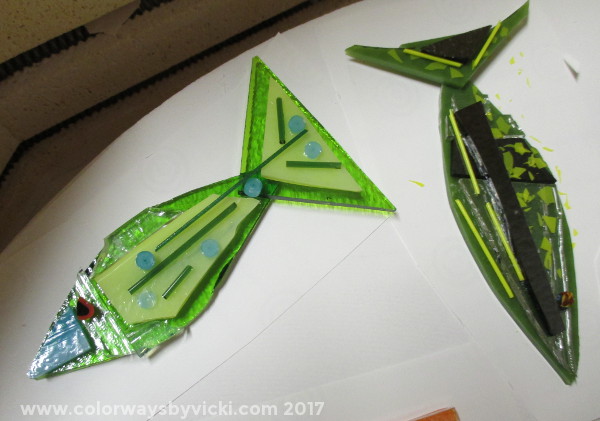 The dark green fish is the same one as in the photo above. The bright green one has some turquoise bits that are "reactive". It will react with some other glasses and leave a dark outline. It's a very cool effect that people use as a design element. My favorite part about that fish though is the eye. It's just a little sliver of glass that was in my tiny scrap tray. 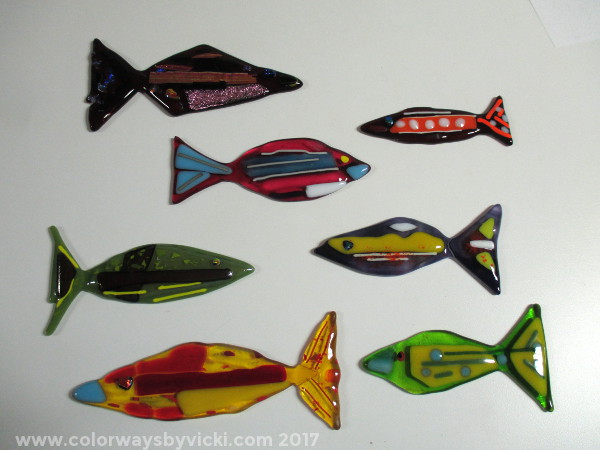 Here they are all finished. The light blue one turned bright pink and the orange ones turned a very deep red. Check out the little green one and you can see the reactive effect around the turquoise dots and his very cool eye. The big red one at the top has a little nip out of his tail fin and I'm OK with that. I used some dichroic glass on him and I need to use that a lot more on some new fish. 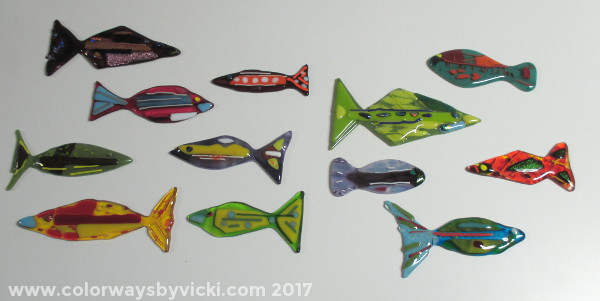 Here's the whole school so far. I probably need this many more to have enough for my backsplash. That's no problem because I love making them.
I'm not working on mosaic for the dye sink yet in that nothing has been stuck to the wall yet. But I am working on lots of glass fishes so that I'll have a full fish tank when I do start. Making these is kind of addictive. I use scrap glass so, like scrap quilting, there's not much to lose and that frees you up to just have a lot of fun. I use these to fill in space when I have some things I'm ready to fire in the kiln. Here's how I made 3 recent ones. 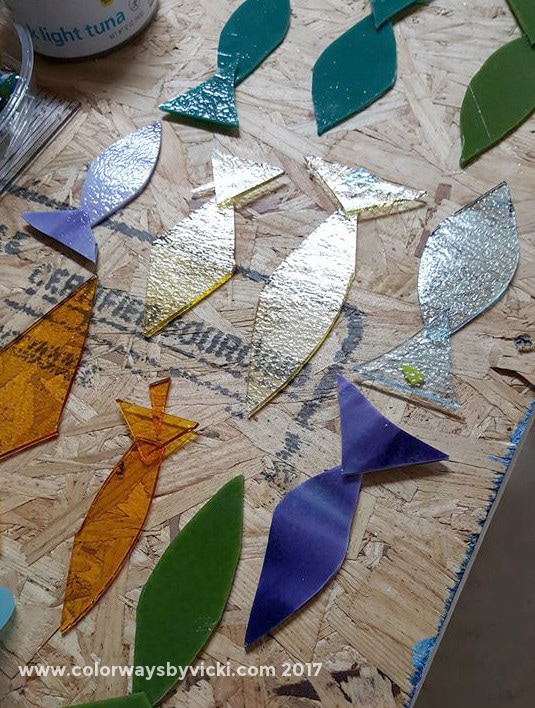 I start with a rough cut fish body and tail and I glue them together. You can see that I have little wedges of glass under some of the tails to hold them up while the glue dries. I use standard Elmer's glue gel. It burns off clean in the kiln. 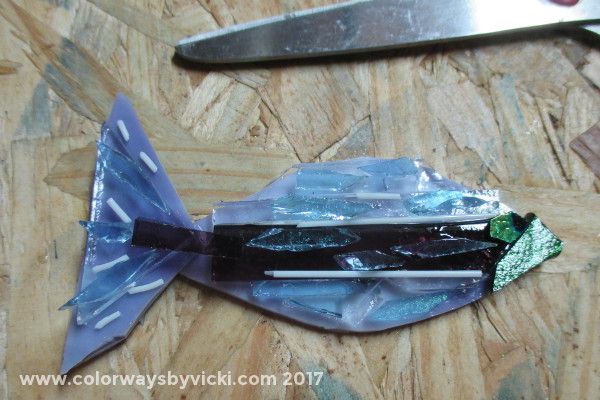 No matter what glass project I'm doing I save ever little sliver of glass. To make my fishes I just start piling up the bits and strips of glass trying to pay attention to color. But with some glass you don't really know the color until it's fired...especially if it's an unmarked sliver. Most of these bits are glued in place so I can easily move them to the kiln. 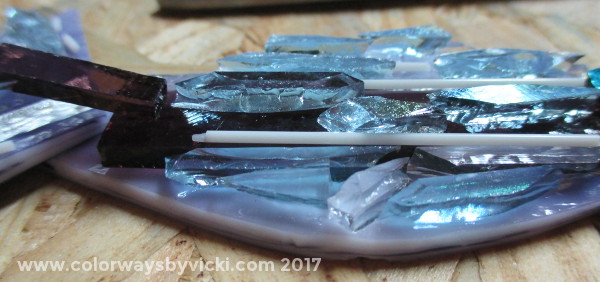 Side view. You can see there's nothing really logical going on here. 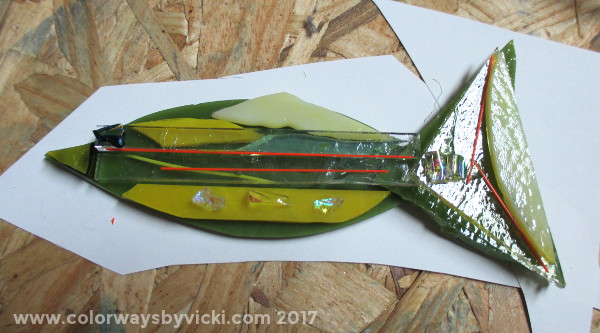 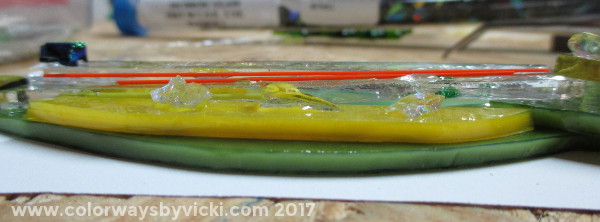 Here's the second one. 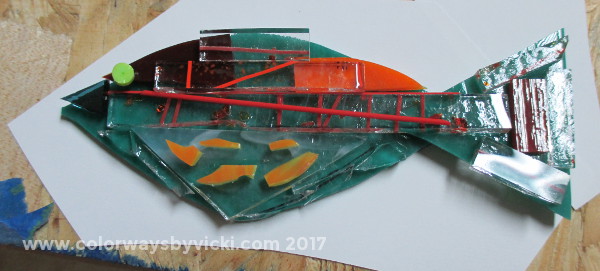 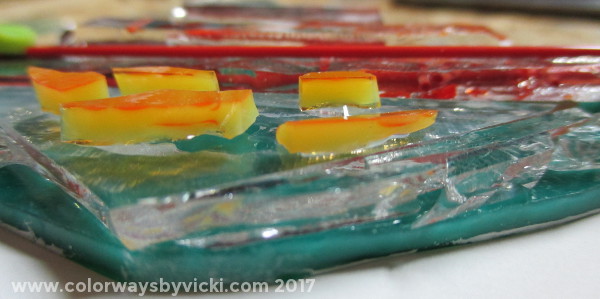 And the 3rd one with a creepy lime green eye. 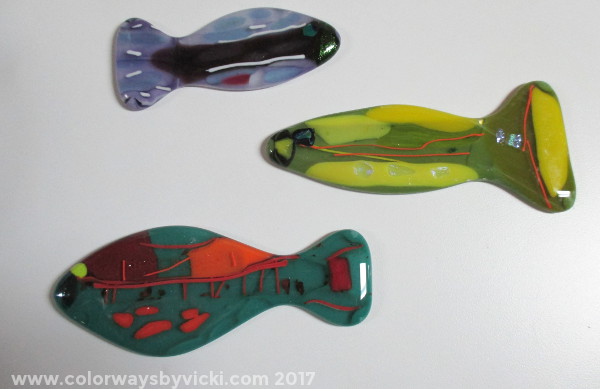 Here the are after firing. I was a little disappointed with their stumpy tails. That had not happened to me before. But when I saw how everything else in the kiln fired I realized that I had used the wrong program! I fired it to too high a temperature so they became much more rounded. I'm actually fine with the teal and purple ones. I might trim the tail joint on the olive one and fire him again.
Or I just might make more fish and use him for something else. He wouldn't be my first reject fish! Next time I'll show you how they look when I fire them properly. So last week I shared some of my recent glass disasters. Today I have updates on a couple of the projects. 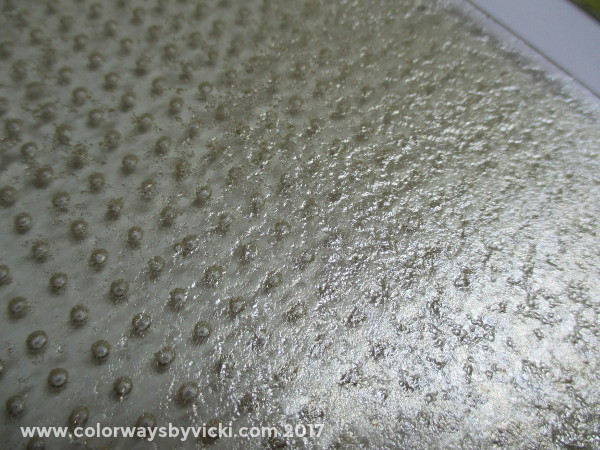 Remember this iridized bubble plate? I messed it up by fusing it on shelf paper instead of just straight in a prepared kiln shelf. 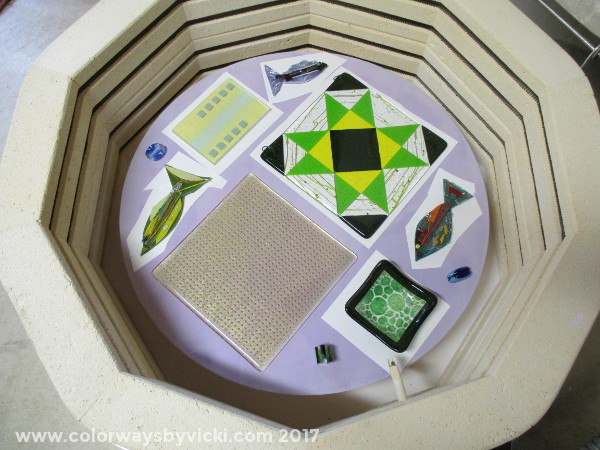 I decided to see if I could fix it by just fusing it again directly on the kiln shelf. You can see here that most everything else is on shelf paper.  It worked! Now I can slump this piece and finish it up. It's going to be a beautiful dish. I haven't flattened out the orange plate yet to fix it. If you look in the kiln photo you see a small piece with green bubble shapes. That's a dish that I put into this firing just to see if I'll have any problems flattening the orange dish. That also worked well so I can tackle the orange dish next. 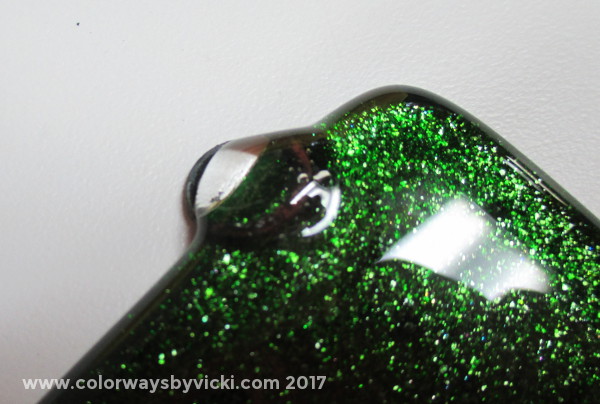 The third disaster was this quilt block suncatcher where the hanger loop got filled with glass. The solution is to grind the glass out of the hole and refire it to get a smooth edge. 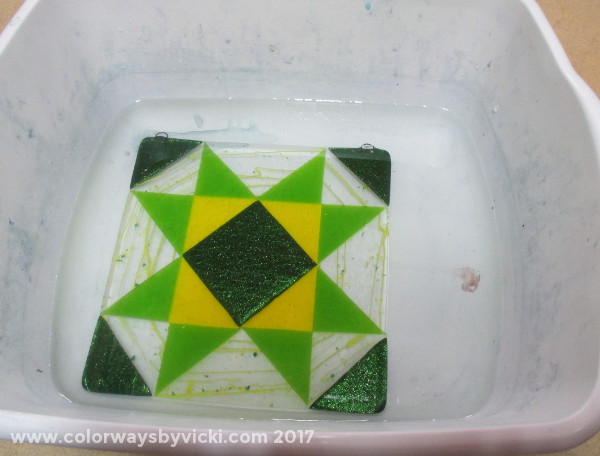 Grinding glass creates a lot of heat and also a lot of glass dust and possible flying chips of glass. So there are 2 things that must be done. The first is water. The grinding surface needs to stay wet to keep it cool. The water also helps keep the dust down. With smaller pieces I like to put some water in a bin so that I can grind with the glass submerged in water. 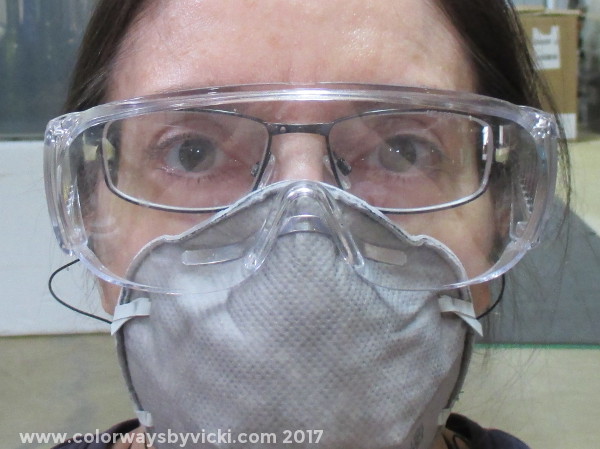 I'm also really obsessive about eye and lung protection. I'm outfitted like this every time I'm grinding, sawing or working with glass powders. 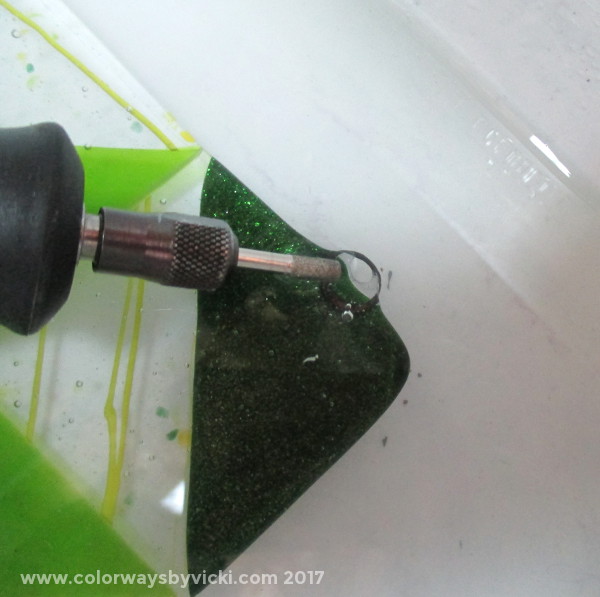 I just needed the Dremel, a diamond bit and some patience. 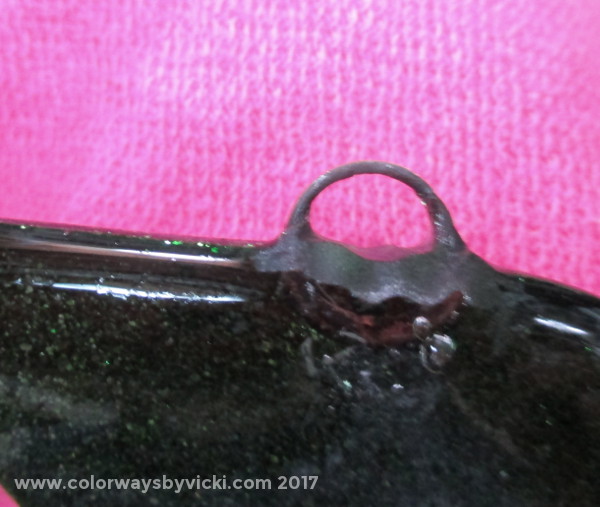 This is what it looked like when I was done and it was ready to be fired again. But take a close look at the ground area. I should have noticed that it was still too thick.  Foiled again! You see, glass wants to be about 1/4" thick and that extra thickness wanted to go somewhere else and that was right back into the loop.
No worries. I know just how to fix that. Today we are checking in on what's going on in the glass studio and mostly we're talking about disasters. When I first started doing glass I agonized over getting pieces perfect but I have since learned that with glass, like quilting, you can almost always fix something or, worst case, use it for scrap. Some of the scrap projects, again like with quilting, are some of the most fun and most interesting. I don't usually share my "disasters" but I've had quite a few lately so thought I'd show them and tell you what I'll do with them. 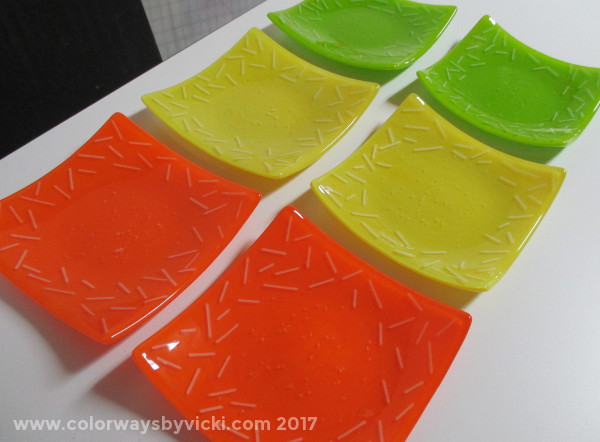 We'll start with the pretty set of sushi plates that I promised for a friend LAST YEAR! I have to get a kiln full of glass to work on these and I can only slump 2 at a time so that's one reason they are taking so long. But I was down to the last orange one this weekend and was looking forward to emailing her this week to tell her they were ready.  Oh my, what the heck is this? The back of the plate has picked up some kiln wash or something and it's permanently fused to the dish. There's a small spot on the front too. So, what to do? I'm going to first run it through a full fuse to flatten it out. Then I will use some wet sanding pads (specifically for glass) to sand the back of the plate and the one spot on the front. Then I'll full fuse it again to bring the sheen back and then slump it. It's got 3 more trips through the kiln before it's potentially done. In all honesty I'm probably also going to make another one just in case the repair doesn't work. Regardless, it's good for me to learn how to fix these problems. 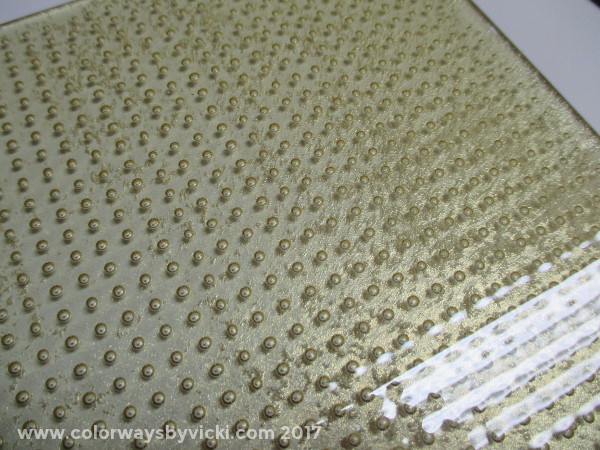 Next up is this bubble plate. It has iridized glass on the bottom and you can see that it's taken on a distracting texture.  Here's a better look from the back. That's called pitting. I have now learned why this happened and consider it a miracle that it hasn't happened to me before because I've been fusing the irid glass wrong all along! I'm going to send this through the kiln once with the irid side up to see if it fixes itself. If that doesn't work I may grind the irid off to leave myself with a nice amber bubble plate.  This is one of my quilt blocks suncatchers. I've been working on this thing FOREVER! After the first fuse I felt that the hooks for the hanger were not fused in well enough so I sent it through again to add a bit of clear so they would be seated better.  This one worked perfectly.  This one not so much! I will need to grind the clear away from the hole of the hanging loop and then fuse it again, hopefully for the last time. I'll use a Dremel with diamond bits for this and I'll keep the surface wet while I'm grinding. 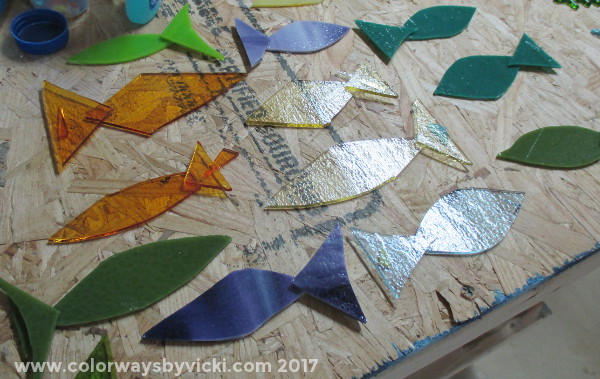 I want the kiln full every time I fire so I got a school of fish bodies ready (tails glued to bodies) and will get them "decorated" so that I can fill in the spaces between my other project with these. All of these fish will be swimming on my dye sink backsplash. 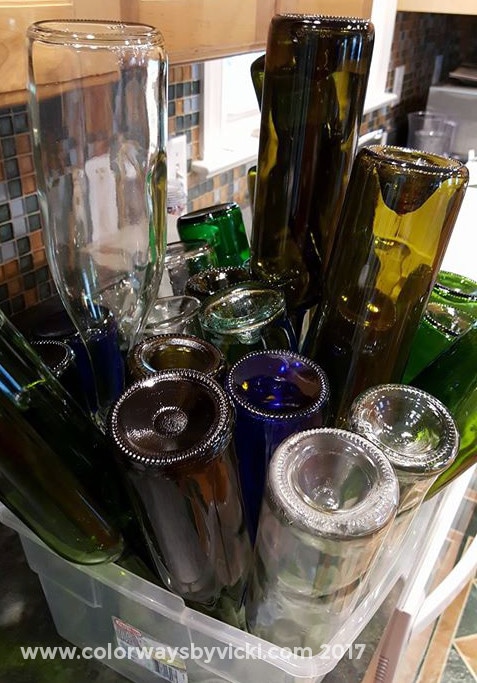 Also, people have been bringing me bottles so I spent a lot of time washing and removing labels from bottles this past weekend. I do these inbetween other firings. This is a particularly good batch. There are lots of clear ones to use with my tree of life and swirl molds.
|
FeedsTo subscribe click the RSS Feed button and copy the URL of that page into your blog reader.
In Bloglovin you need to search "Colorways By Vicki Welsh" to find the blog. About Vicki
I'm Vicki Welsh and I've been making things as long as I can remember. I used to be a garment maker but transitioned to quilts about 20 years ago. Currently I'm into fabric dyeing, quilting, Zentangle, fabric postcards, fused glass and mosaic. I document my adventures here. Categories
All
Archives
July 2024
|
 RSS Feed