|
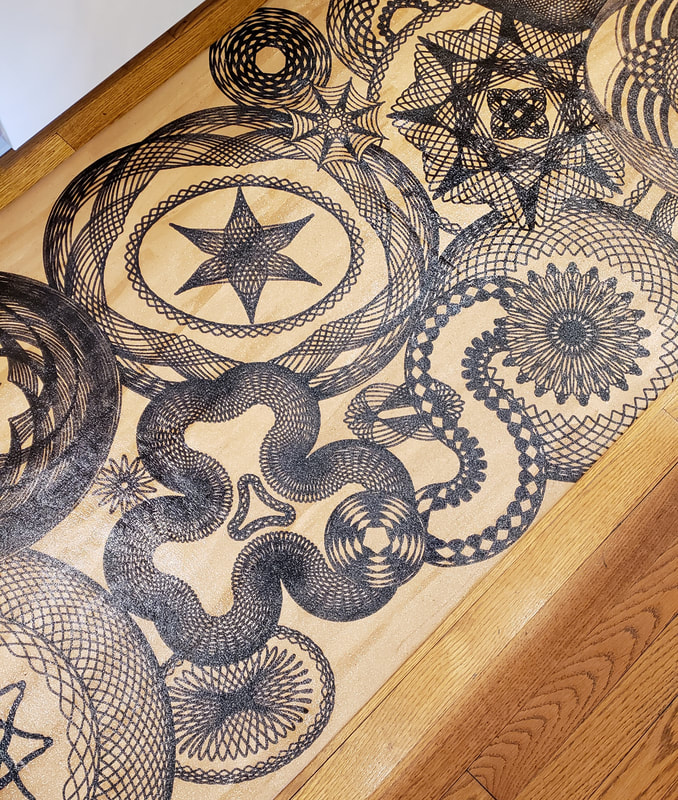
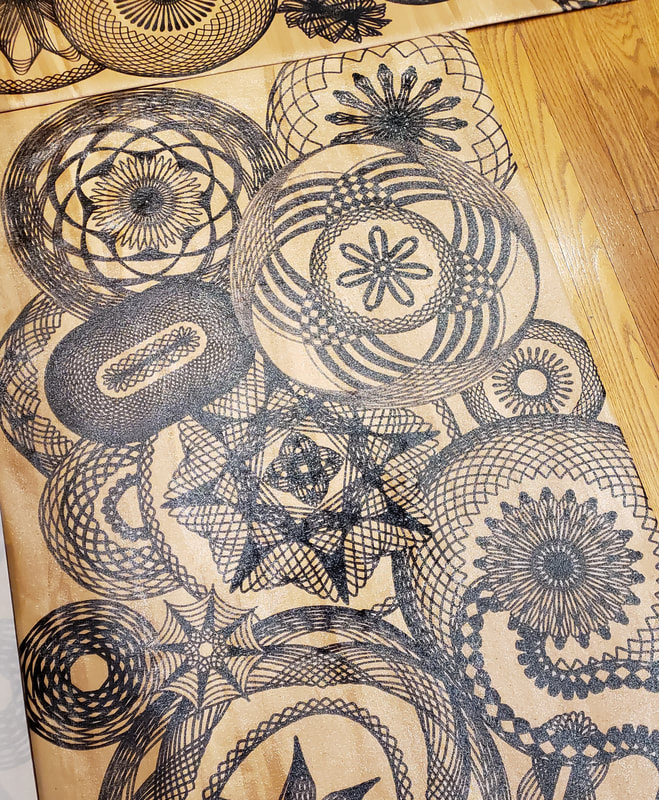
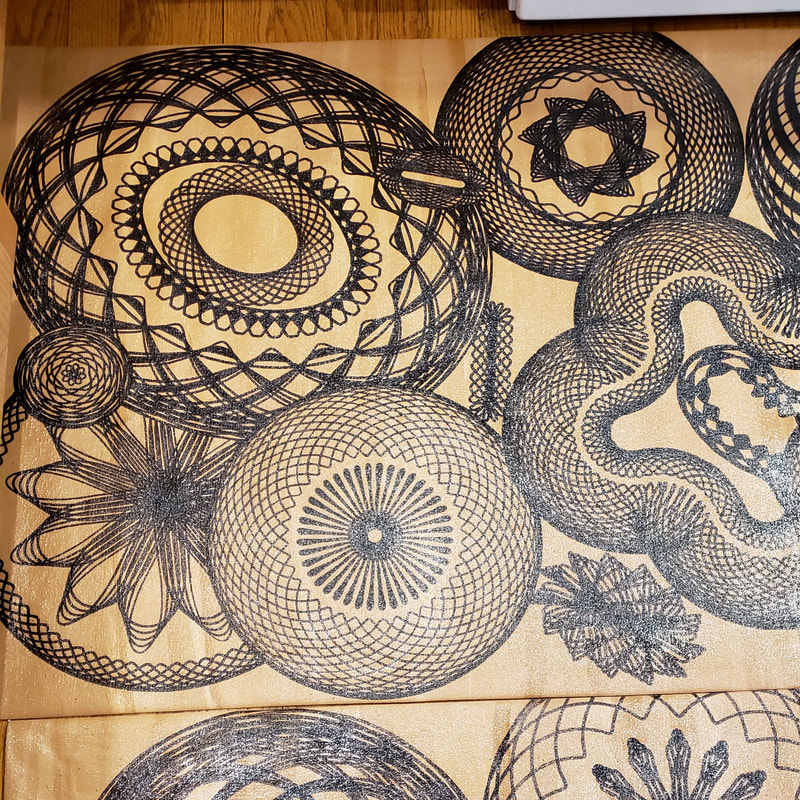
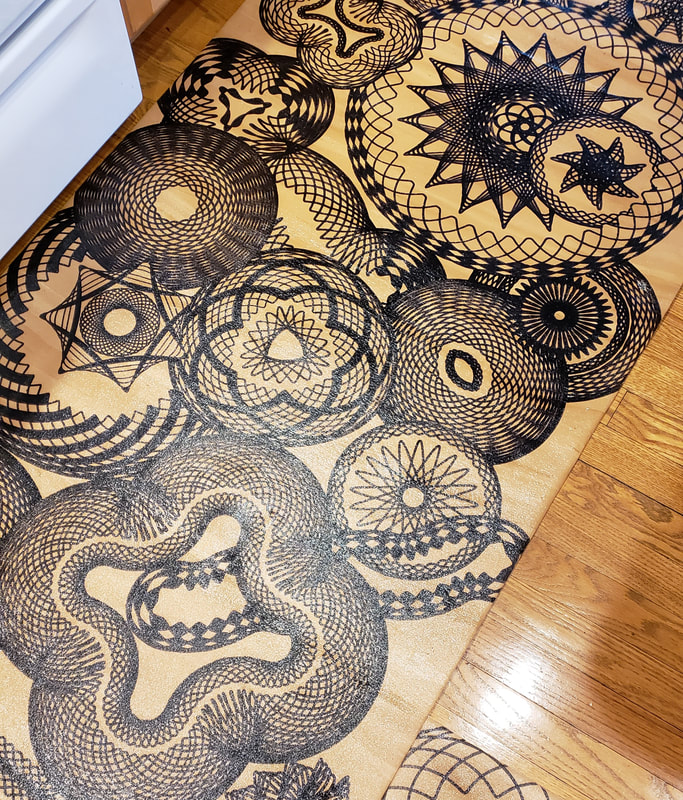
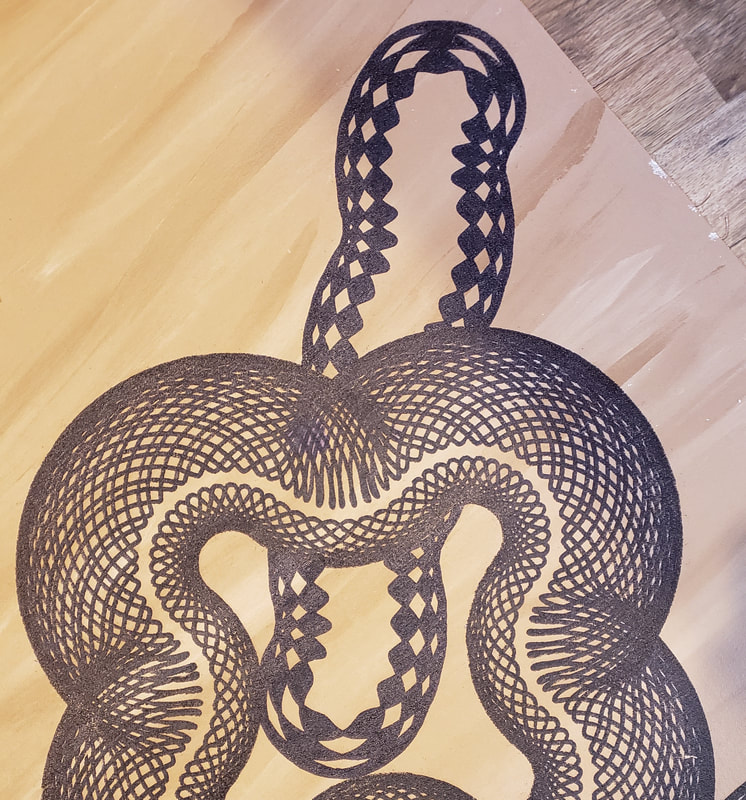
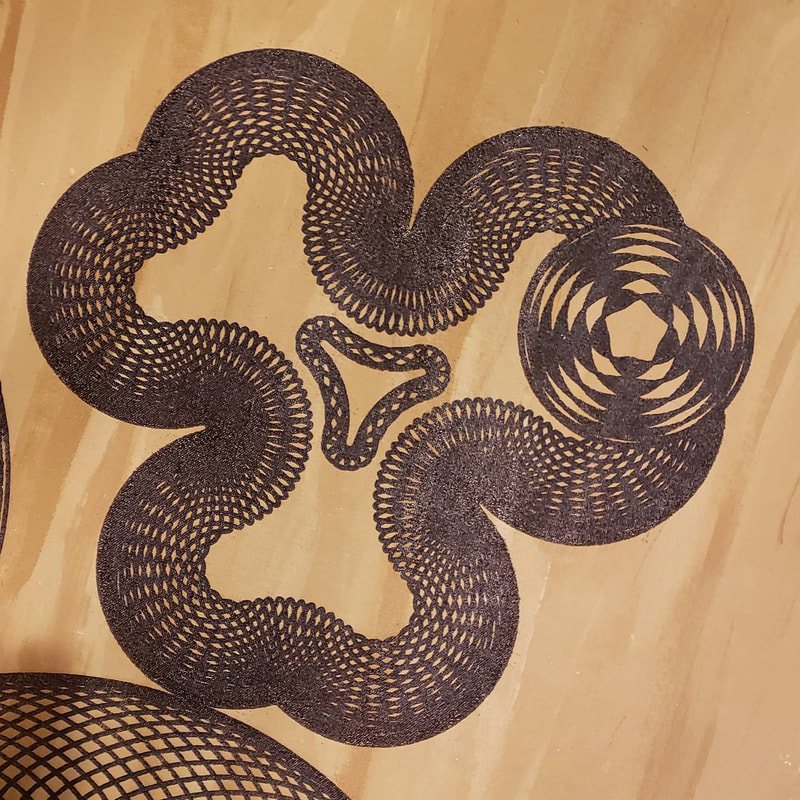
This project is officially done! Completing this project has a completion satisfaction rating right up there with The Great Wall. It was not easy, I had a ton of allergy issues with the Sharpie markers and it took a long time but it was worth all the pain and suffering in the end. Drawing the designs was great fun; it was the other elements that were kind of a drag. 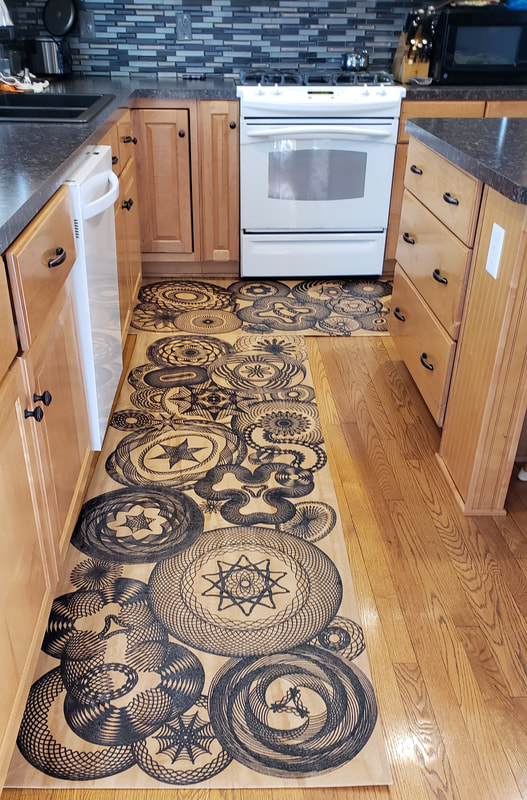 There are 2 cloths that are about 7 feet long in front of the sink and stove and one that's less than 3 feet long in front of the fridge. In case you are wondering, yes, we still have white appliances. Black or stainless will replace them when they die. I expect that because we want to replace them that they will never die and I'm fine with that too. 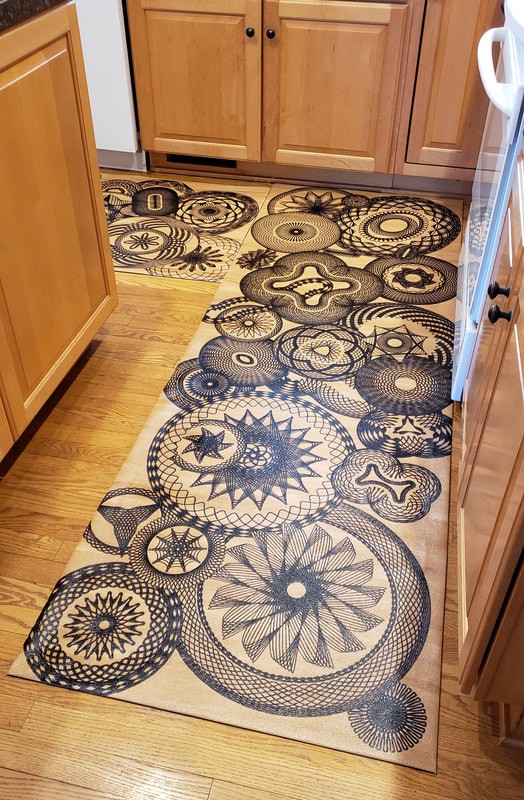 These started with plain artist canvas bought on a large roll. They were primed on both sides with gesso and then I painted one side with satin wall paint in three shades of a brown to blend with the floor. If you look close you can see that I painted them with grain line directions to match the wood planks. 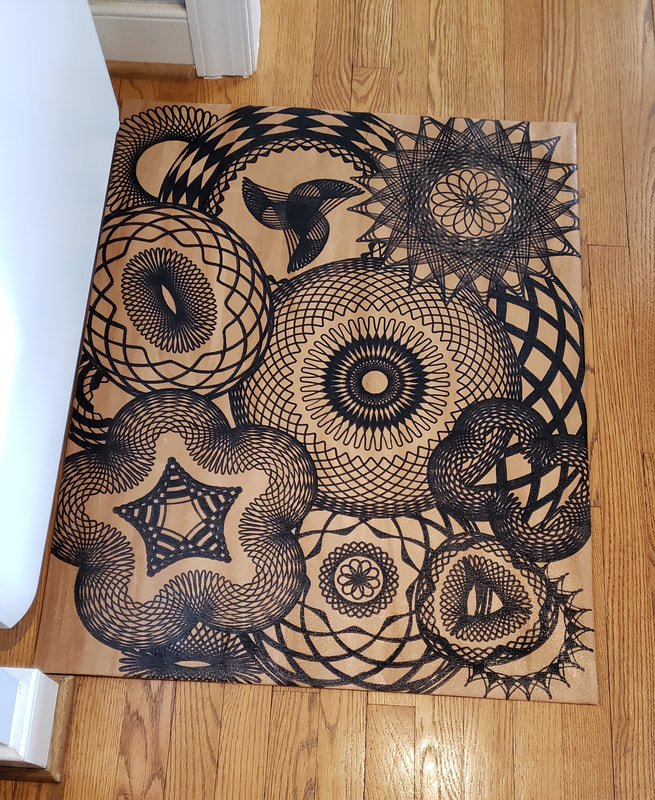 Here's the smaller one that's in front of the refrigerator. We had fabric covered floor clothes here before that had to be at least 10 years old. They did a great job of protecting the floor and they are still in fine shape. They will go into the guest house. Click on a gallery image to see larger views Here's a gallery with close ups of the designs. All of the designs were done with Wild Gears. Wild Gears are an ingenious upgrade of our childhood Spirograph. You know that Spirograph was brilliant because it's just as popular as ever. It was one of my favorite toys and Wild Gears is one of my favorite grown up toys. (I was going to say "adult toys" but it really doesn't fit in that general category.) I used Super Sharpie markers to get a really bold line and I probably went through a dozen or more on this project. As soon as I noticed any fading in the mark I got out a new marker. The designs that appear to be "on top" were the first drawn. To draw a layered design I had to be careful to stop and start lines at the edge of the design on top. There were mistakes and I did have to do some "erasing" with paint. Chris and I finished them by folding under a hem and using the glue gun to stick it in place. He coated the underside with one coat of polyurethane and 3 coats on top. The have rug pads under them to keep them from slipping on the floor. I hope these will last as long as the last ones or until we leave this house because making a 7 foot floor cloth is a pain. If you are interested the Wild Gear Sets that I used in this project are: Compact Set Enormous Hoops Full Page Hoops Modular Oval Plentiful Strange Shapes 3-Way Modular Connectors Triangle Hoops I did it. I finally finished all the Sharpie drawing on my floor cloths! They still have to have the hems turned and then Chris will glue the hems and coat with polyurethane. The designs will run off the edges of the finished cloths but here's how they look at the moment. 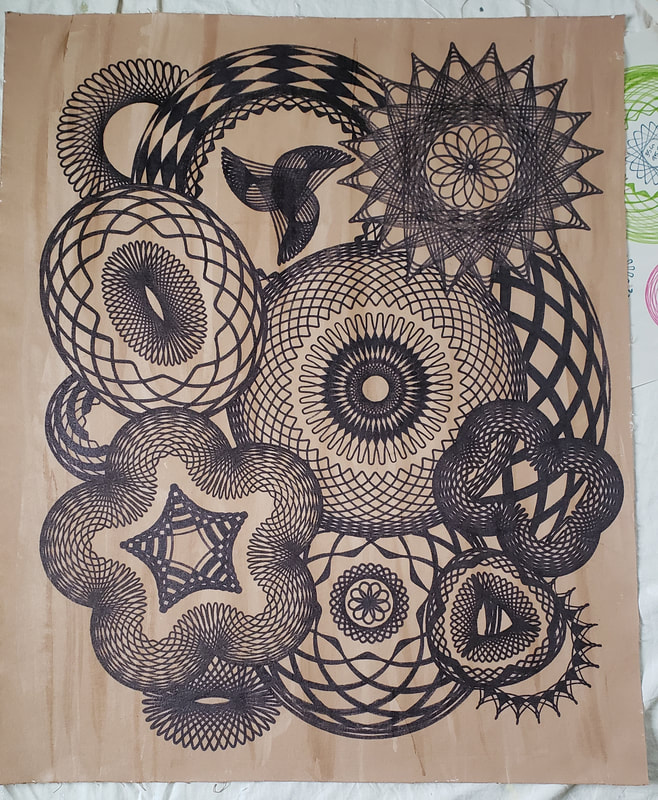 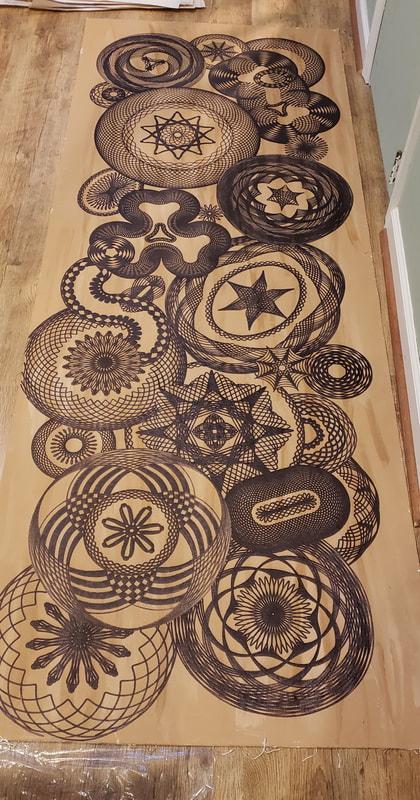 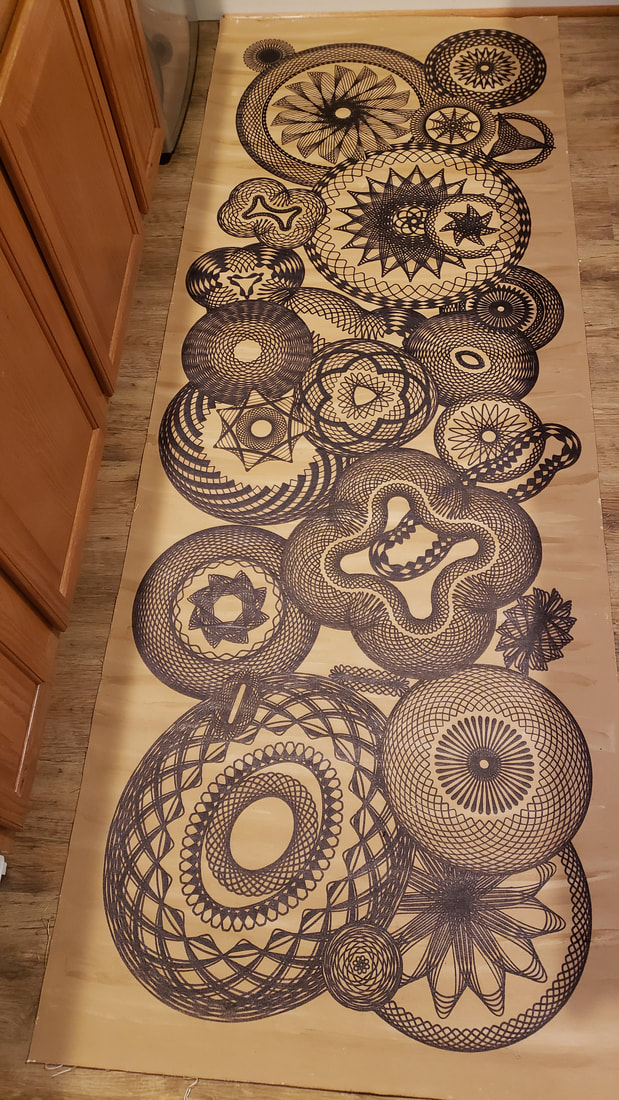 I can't begin to tell you how much I love these! The Sharie fumes were a nightmare but I'm so glad I did them. I will get back to them Saturday to prep them for Chris to do his work. They might be in my kitchen in a couple of weeks! 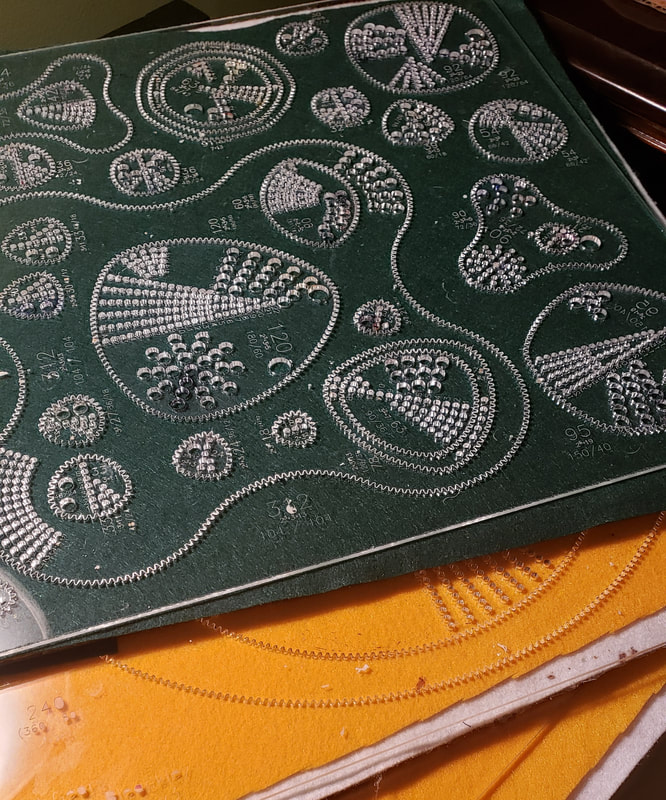 I even got the gears cleaned and put away. Alcohol is the answer for cleaning Sharpie ink. I do keep the gears in their original sheets so that I know if I'm missing any. I have 5 big sheets and 4 small sheets. It's a lot of gears. 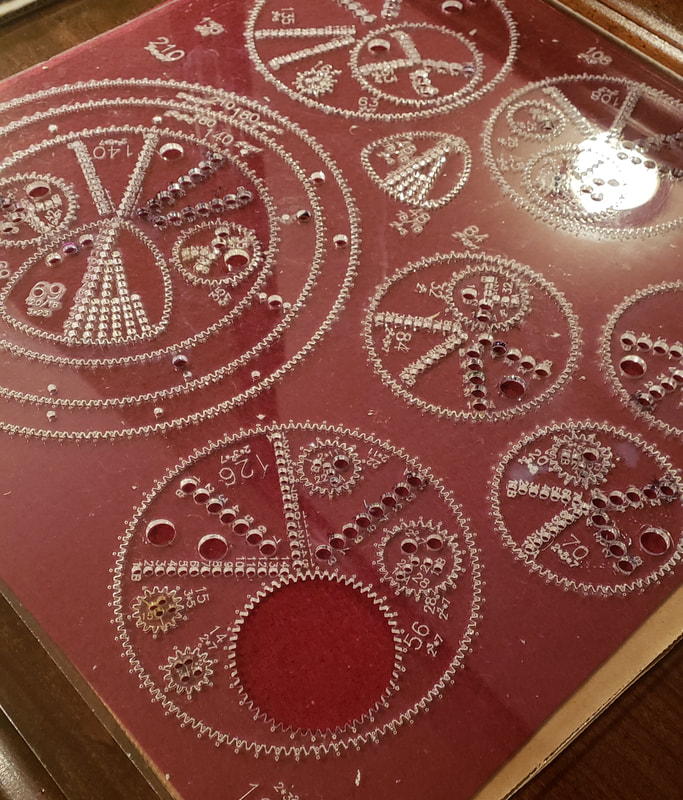 I'm only missing one gear. I'm surprised that all the tiny ones are accounted for. This one is big enough that I should be able to find it. It's in the guest house somewhere. After this project we have to deep clean it in preparation for a friend who will be living there for a while so I'm sure it will show up at some point.
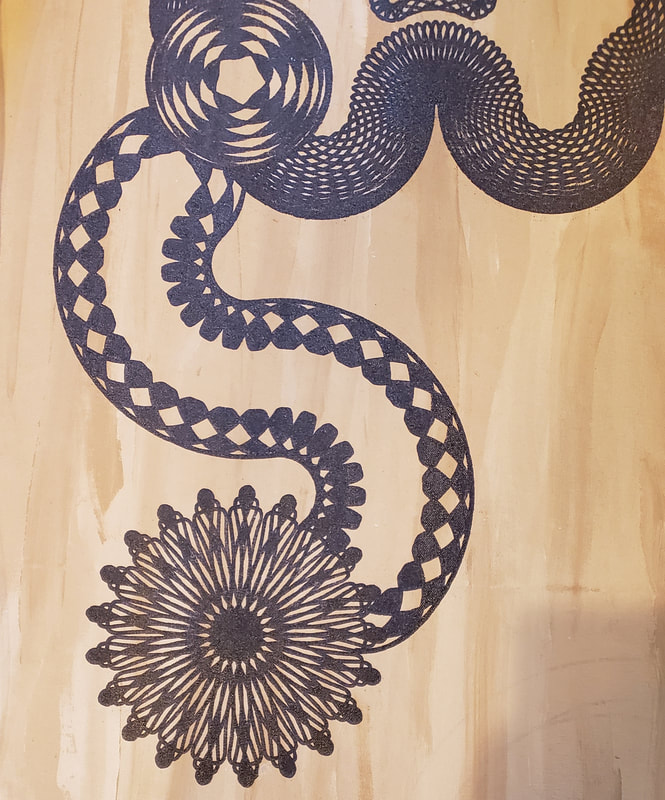
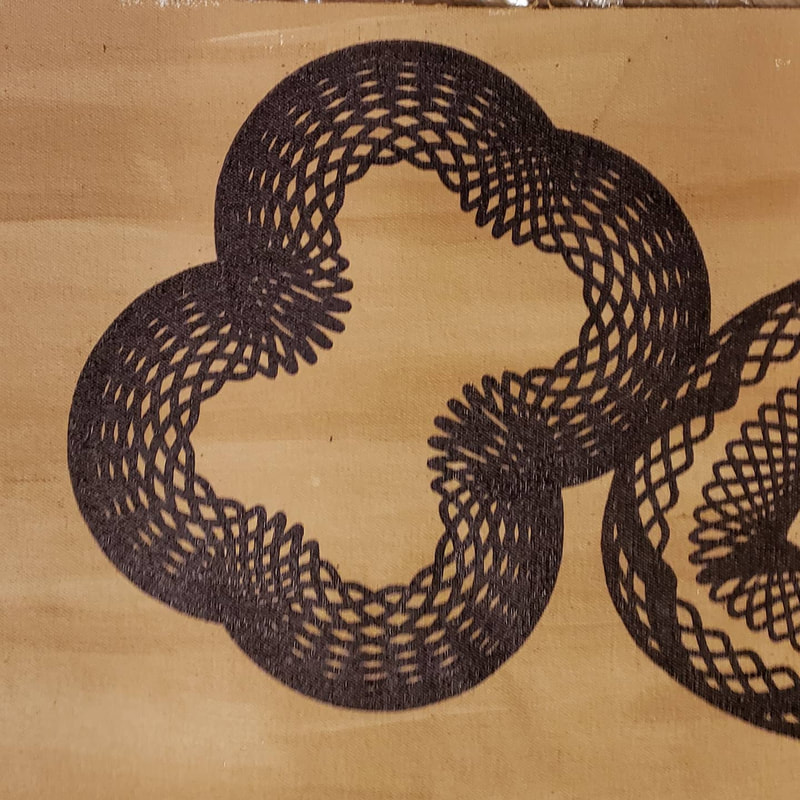
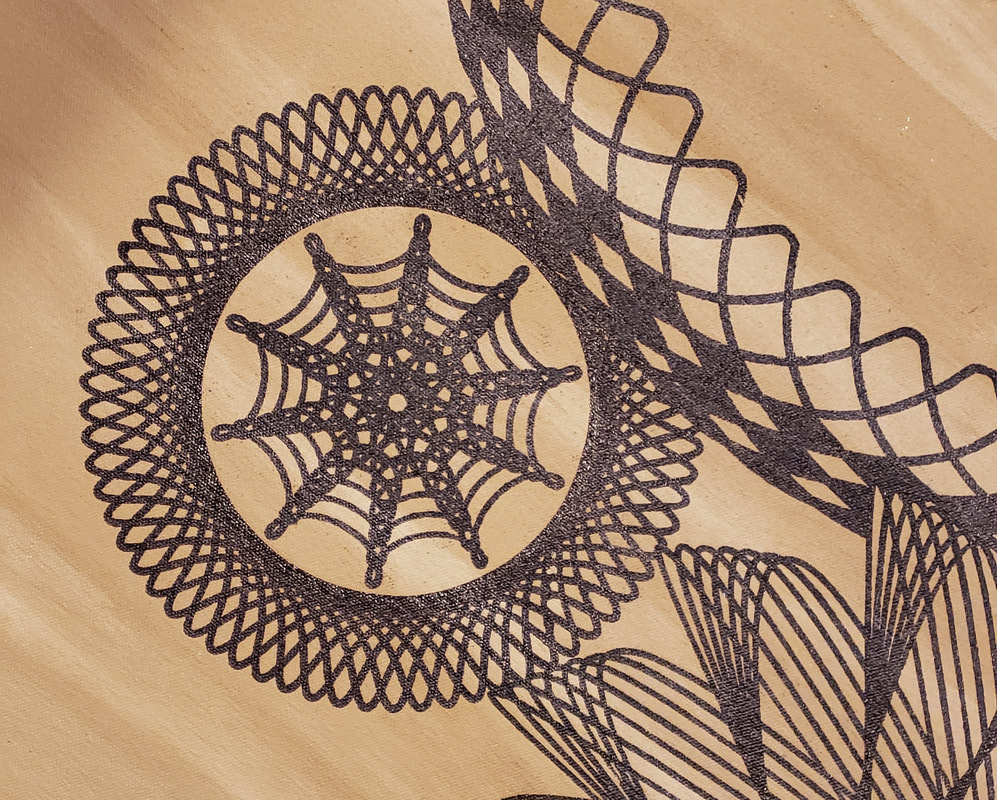
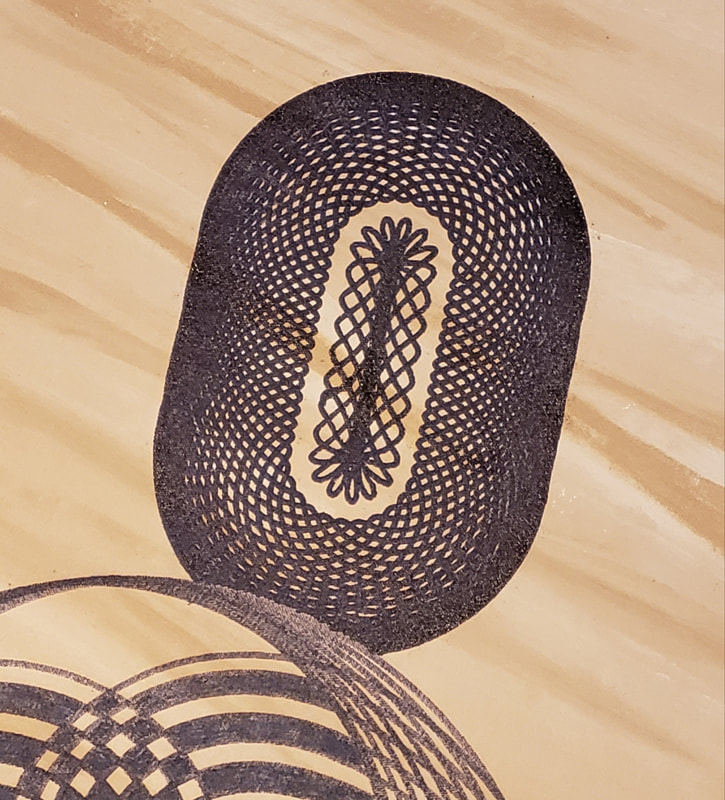
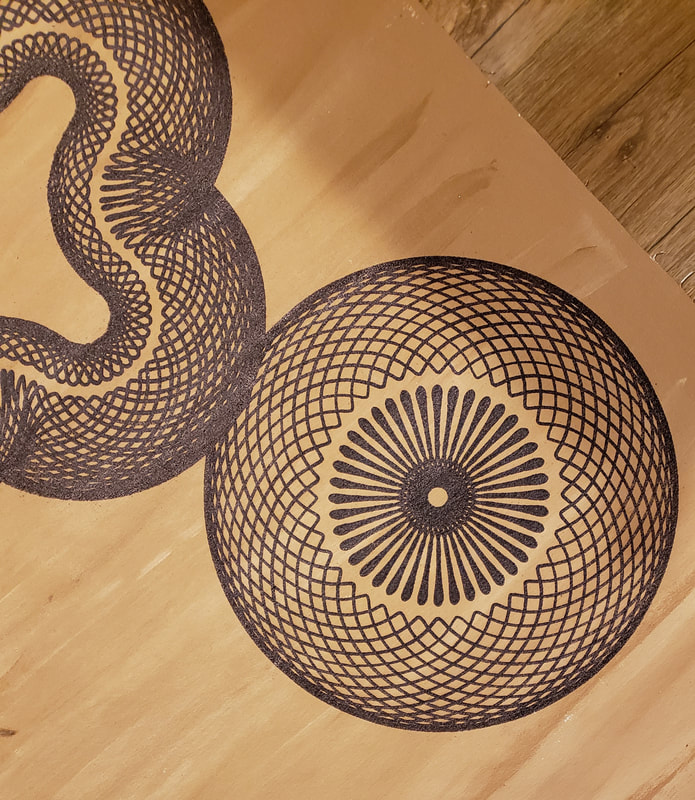
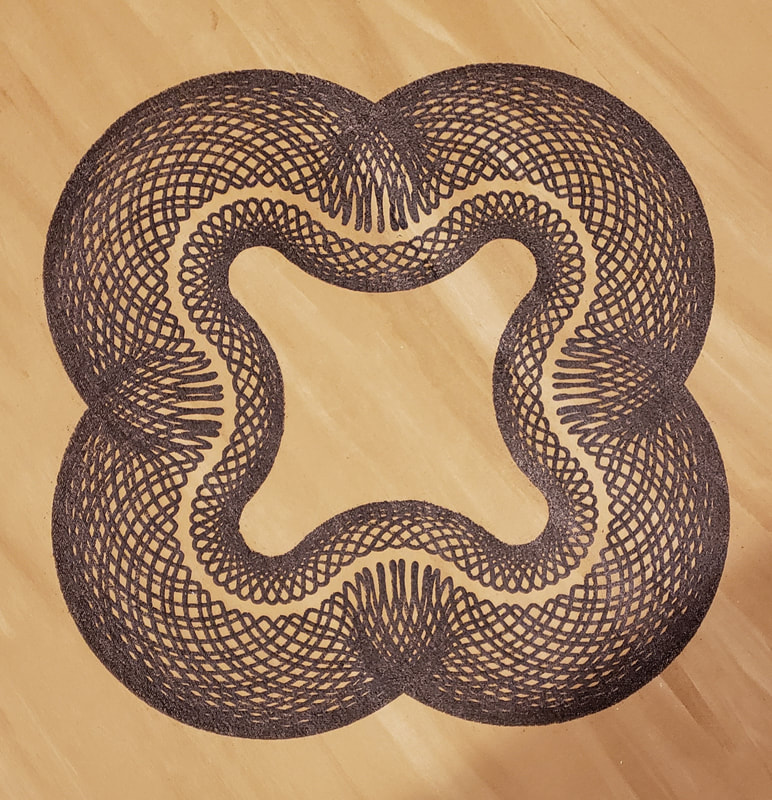
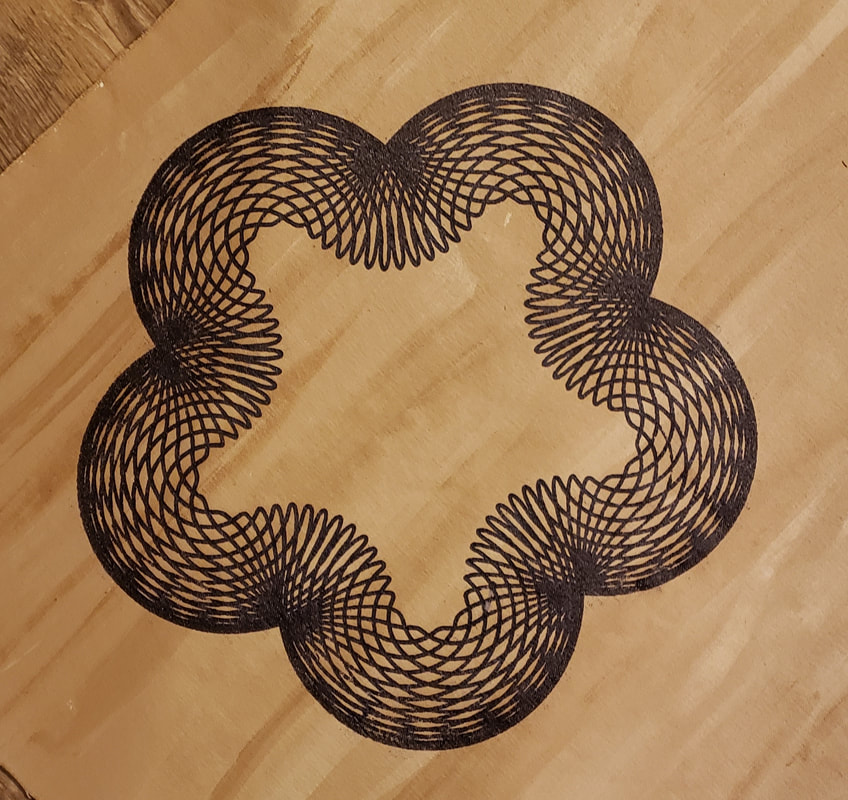
I can't wait to see these on my kitchen floors. Back to the floor cloths! The Sharpie markers are bothering me so much that I can't work on them every day. But I'm getting close to being done. 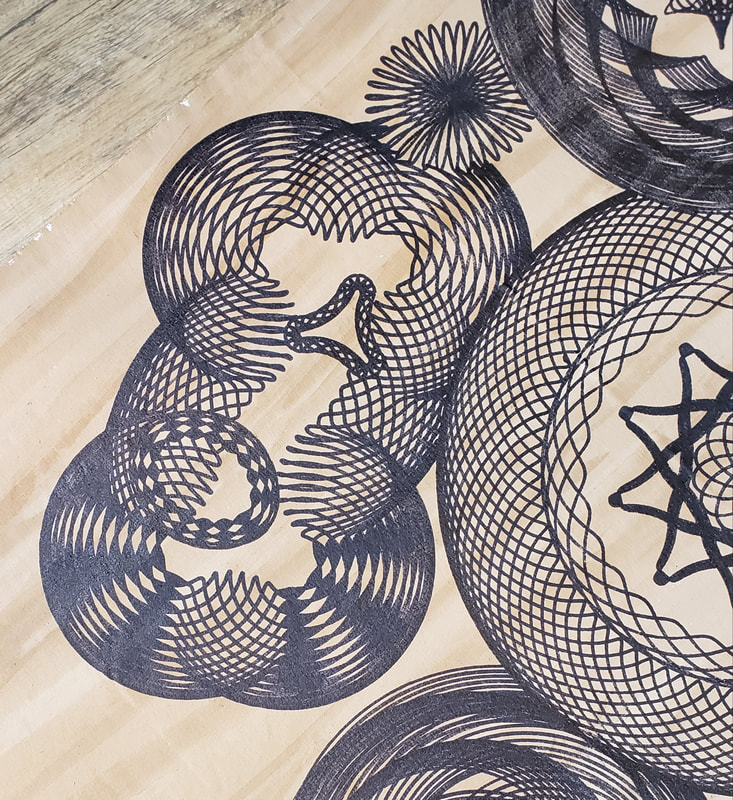 This is a new motif that I made using the snap together shapes. After I drew it I knew it needed some elements colored in. Here you can see the difference between plain (top) and colored in (bottom). 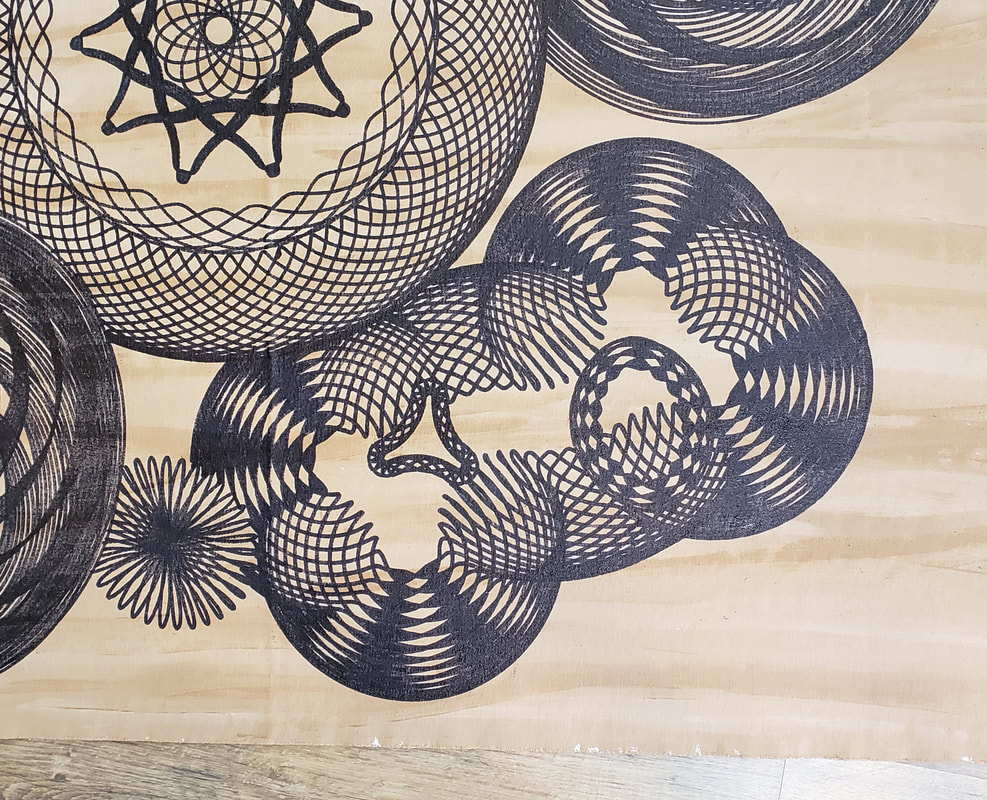 Here it is finished. Very funky and I really like it. 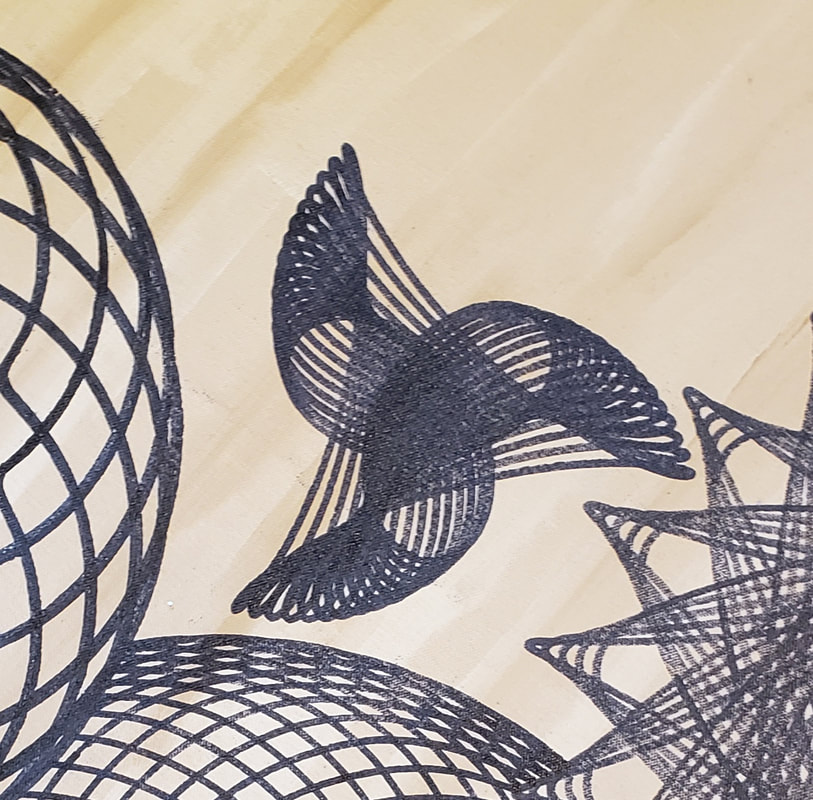 Then I did the medium sized motif on the small floor cloth. It will have a larger motif behind it. 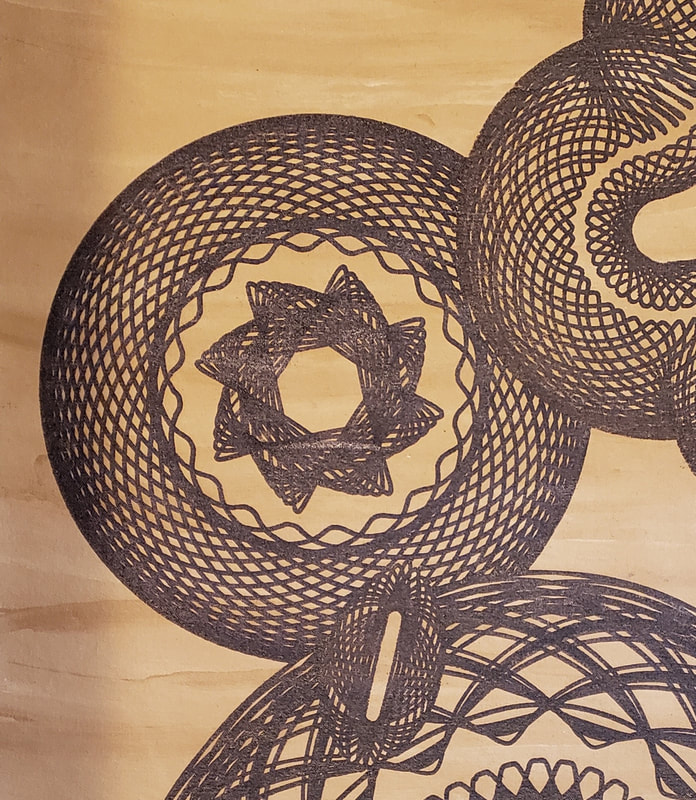 One more added to end this session. I love how the 2 different circle motifs joined to look like one. 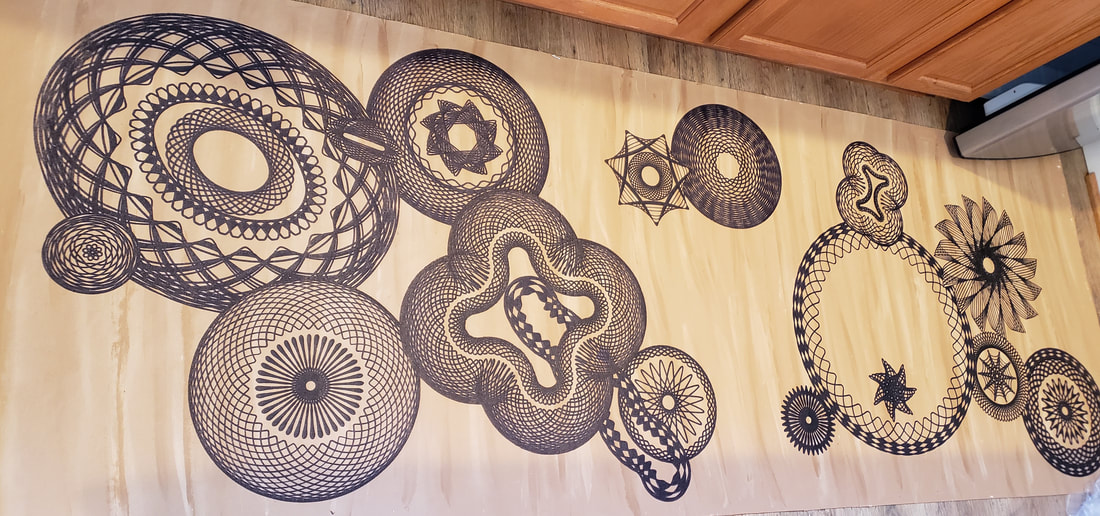 Here's that one on one of the large floor cloths. There's still some space to fill but I'm over halfway done! The other two have even less free space. 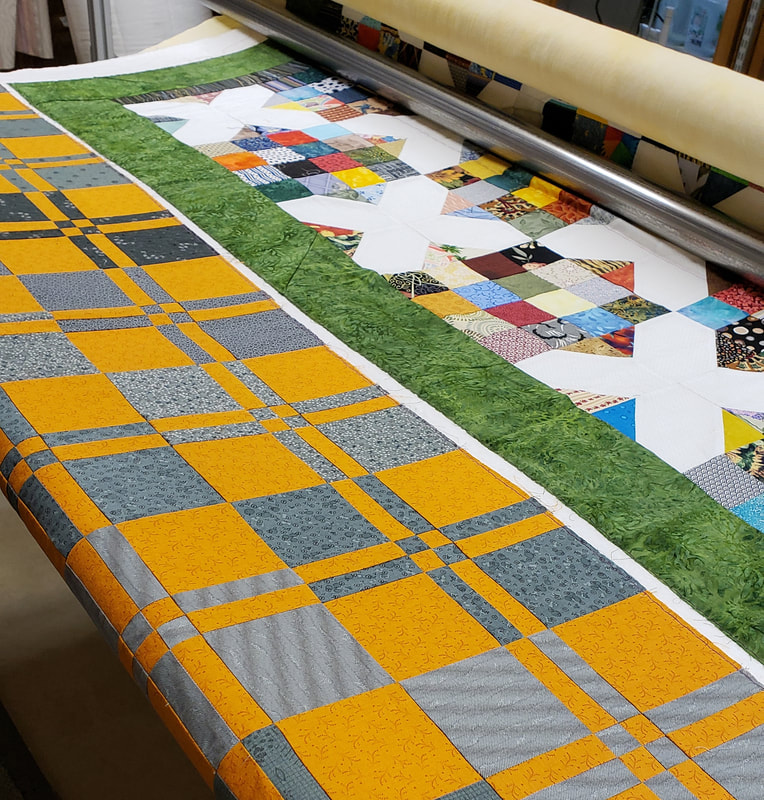 I finished the day loading 2 more veterans quilts. I only have 4 at the moment and will likely have all of then quilted this weekend.
I hope you have a great and creative weekend. I've been working on a little bit of everything but the most noticeable progress from the last 2 days is the floor cloths. 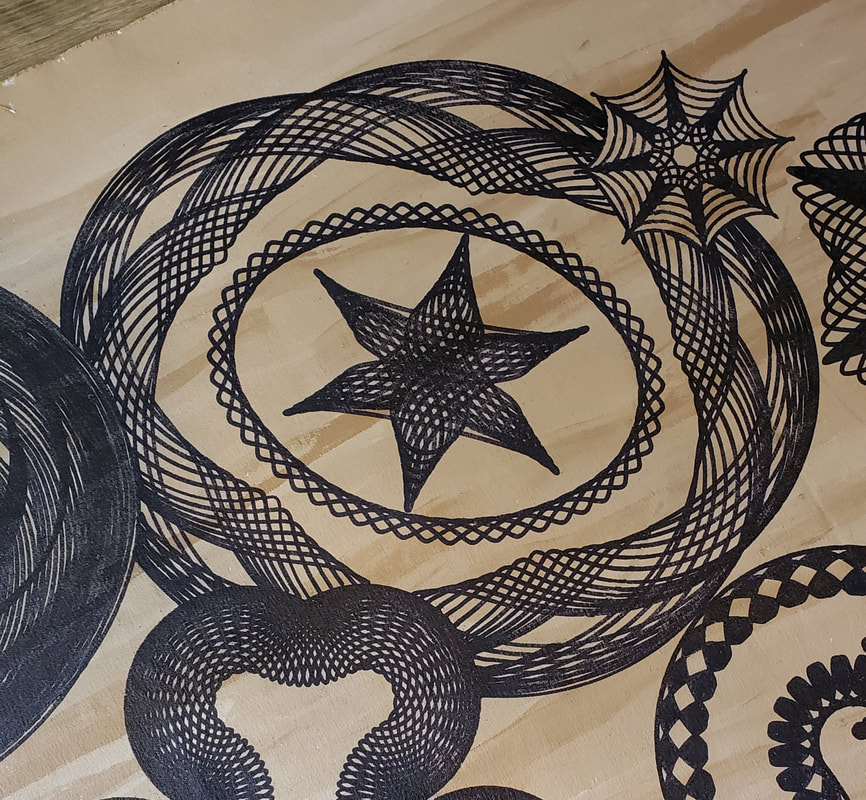 This new motif too FOREVER because of having to work it under 3 other designs and having to change holes on the gear and move it 2 spaces every time around. There is a mistake but I don't think it's noticeable enough to "erase" it and start over. 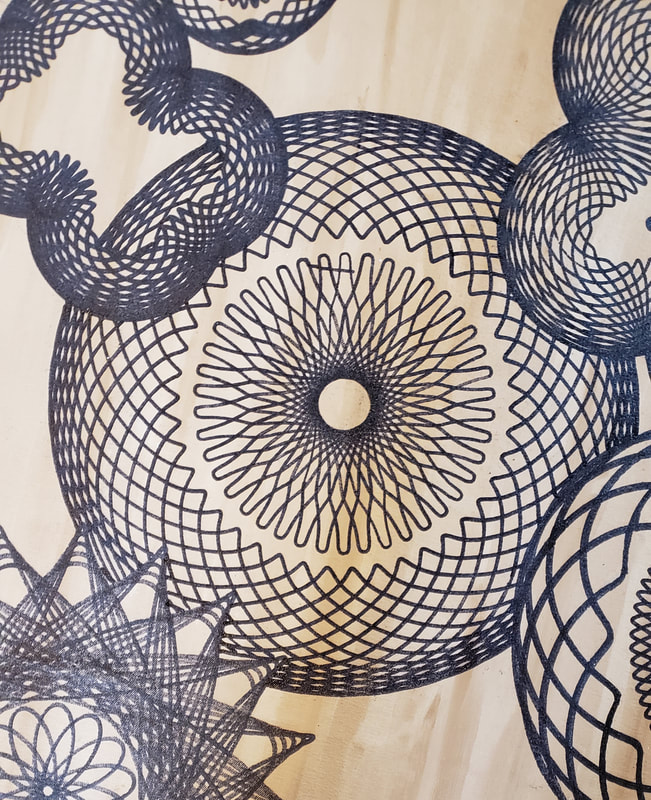 Then I added this design and I did make a a mistake that had to be erased. Erasing here means painting over with a tiny paint brush. This one was particularly complex to draw to get under and through the other designs. I had to go very slow. 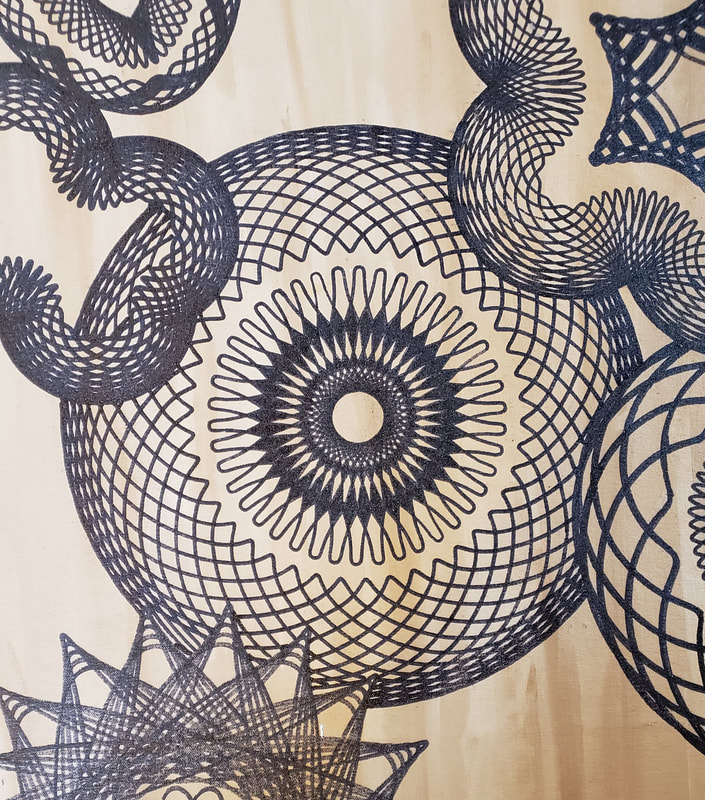 This is after fixing the stray mark and coloring in part of the design. 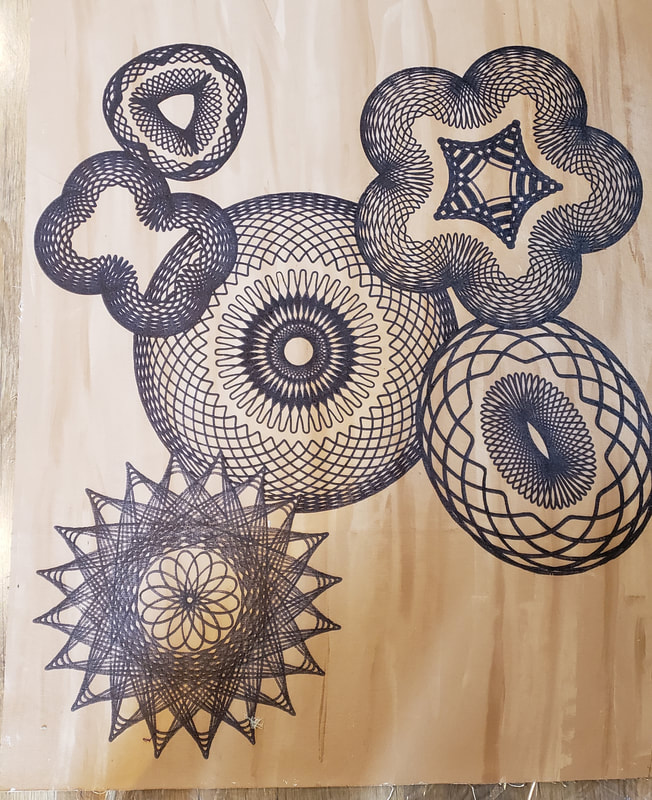 Here's that last design added to the small floor cloth that will go in front of the refrigerator. 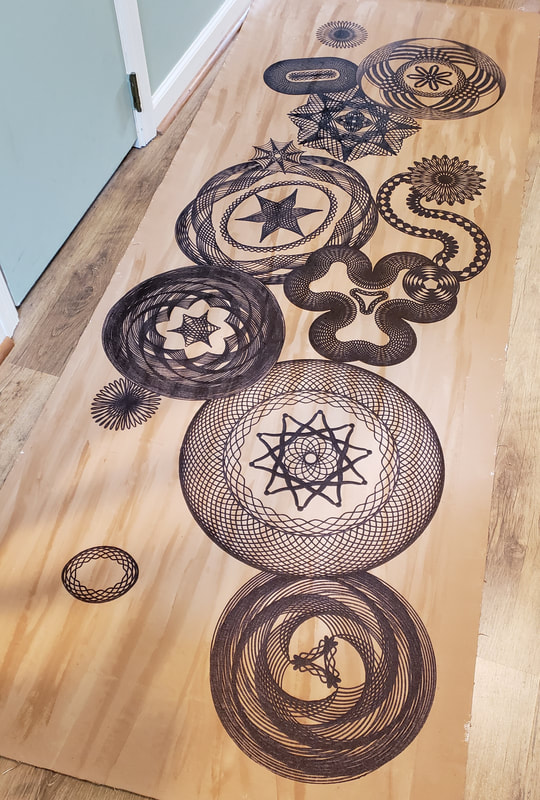 Here's one of the long ones with it's new design in place. I really feel the end in sight now. 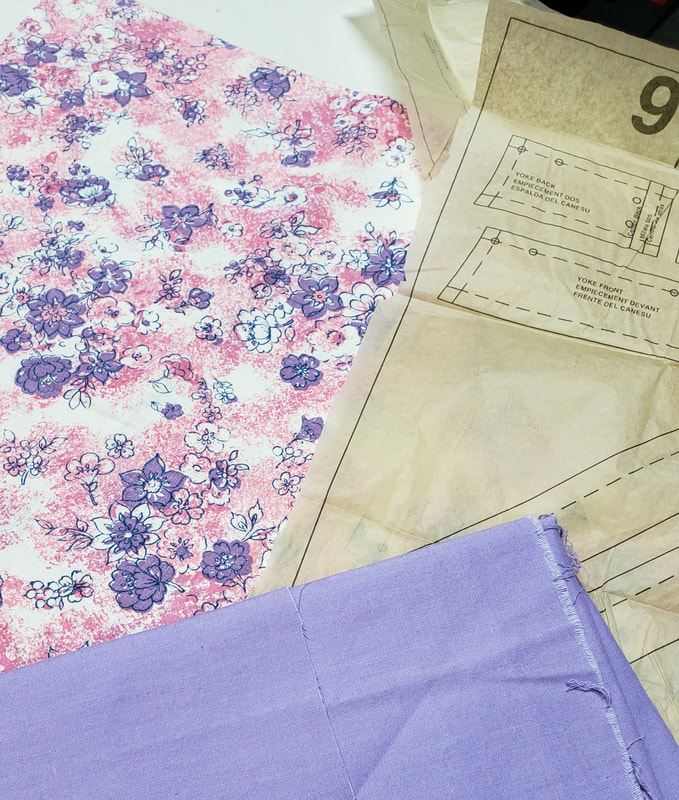 In other news, I got a photo of Ella happy with her new doll outfit so I'm cutting out a jumper and hat. I think I'll try to do a couple each month along with the Rainbow Scrap Challenge colors. January is pink. I, thankfully, don't have a lot of pink fabric but at least this one has pink in it. 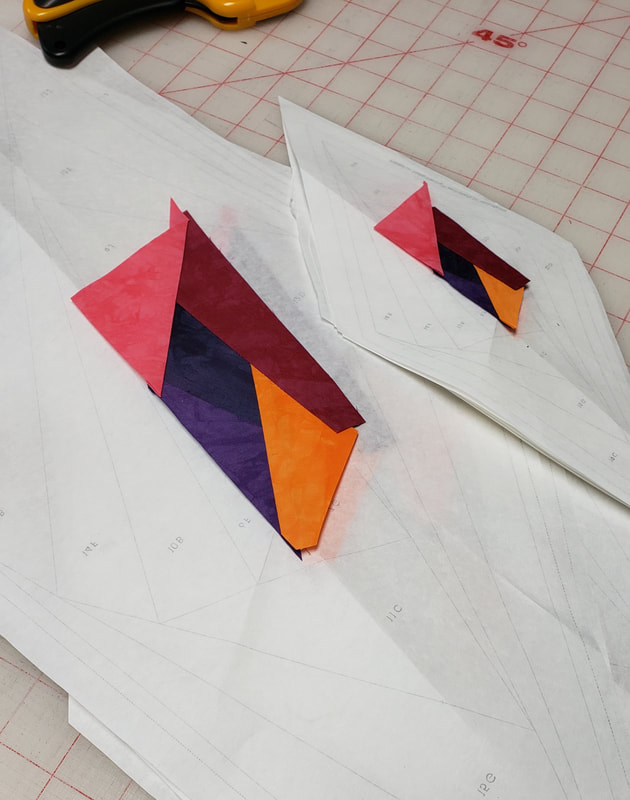 The next set of star points are underway too. Soooooo close.
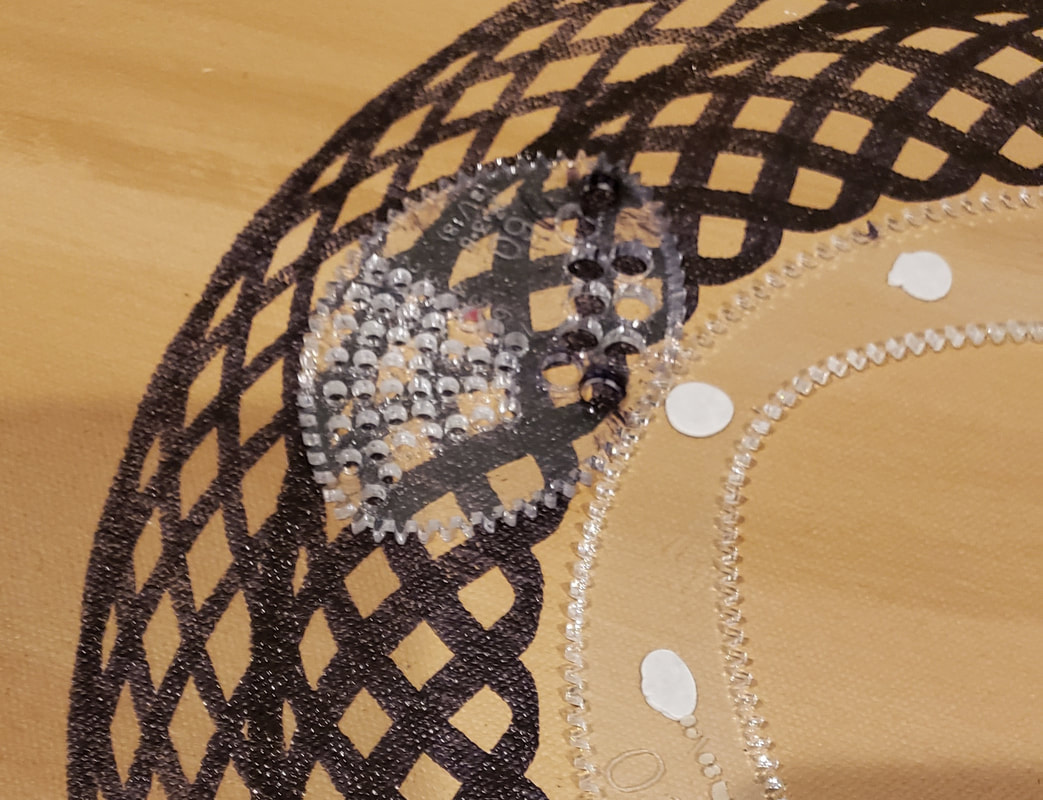
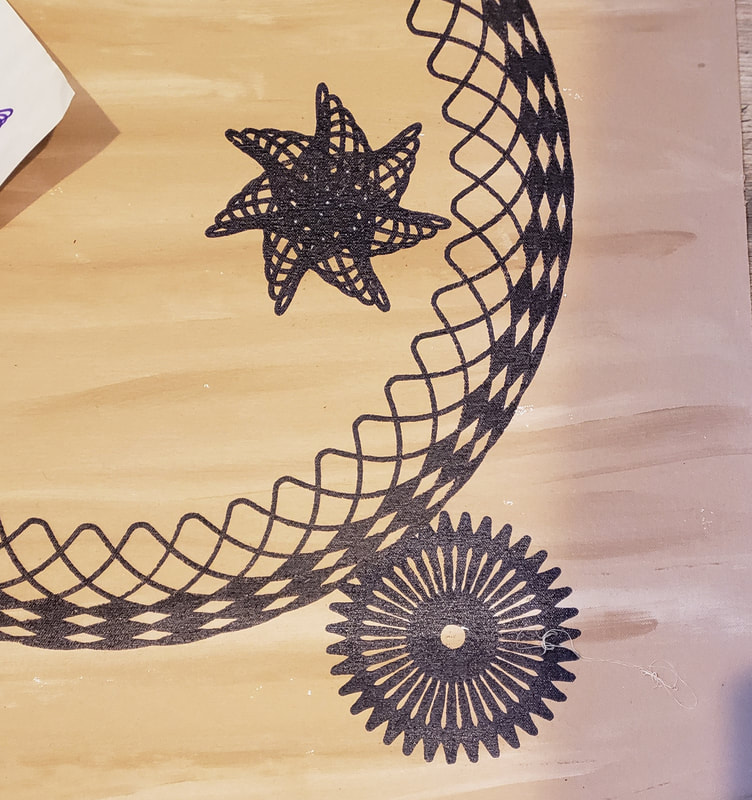
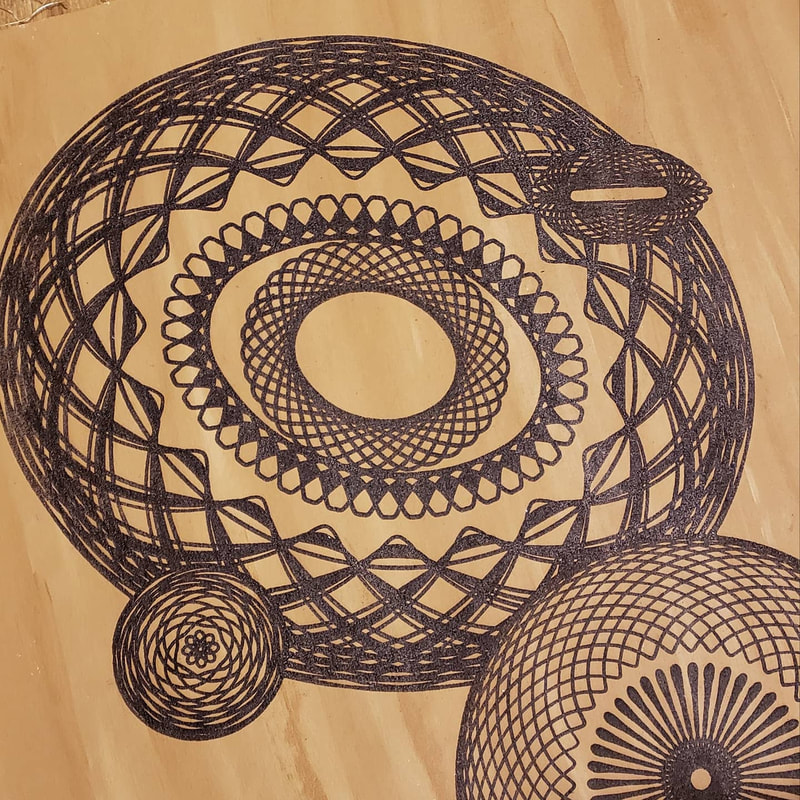
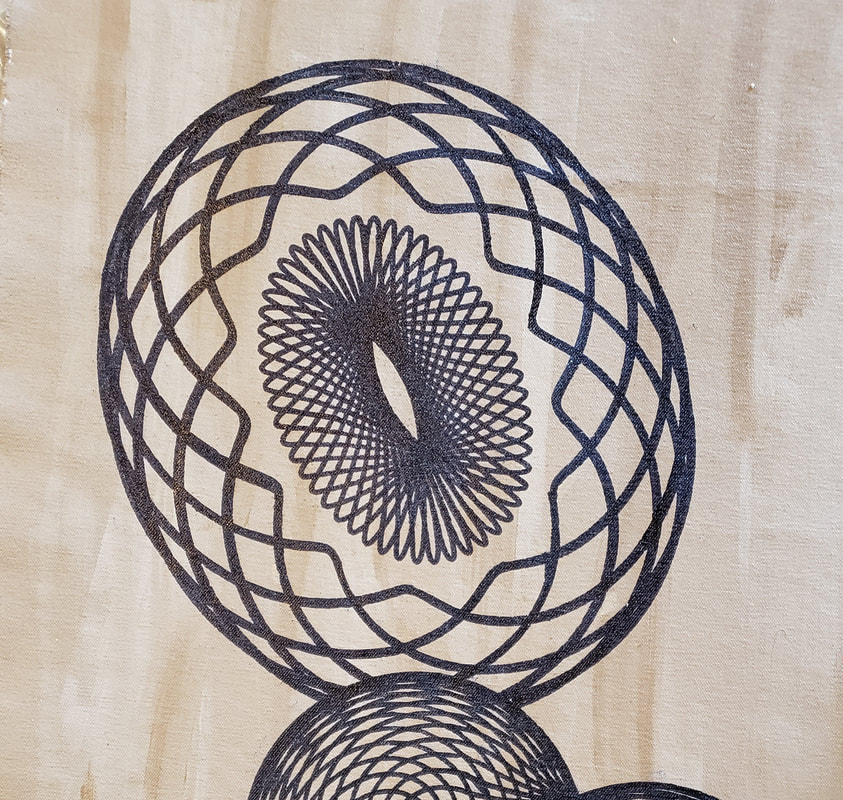
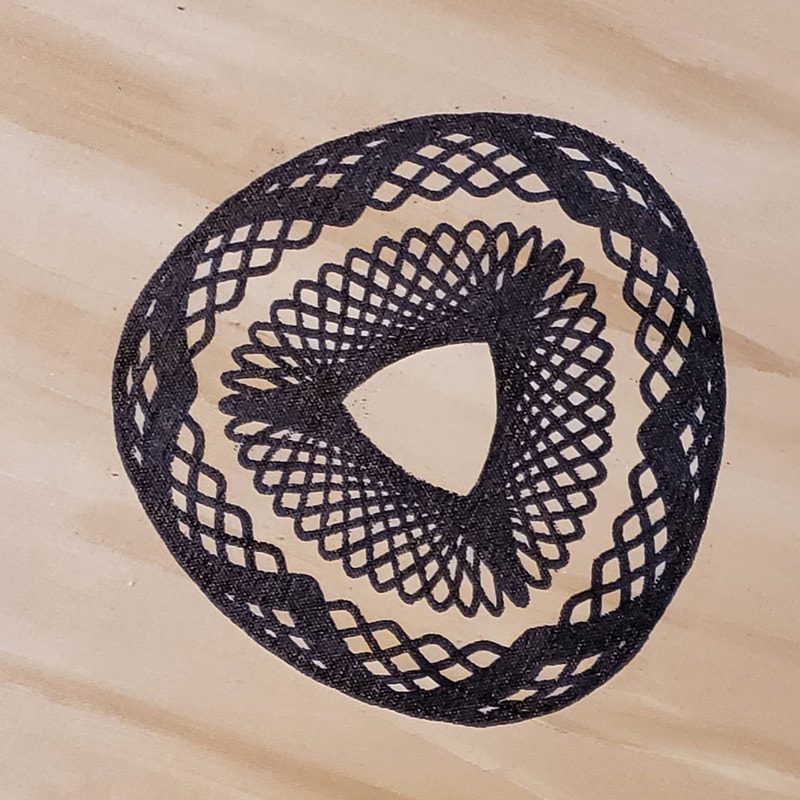
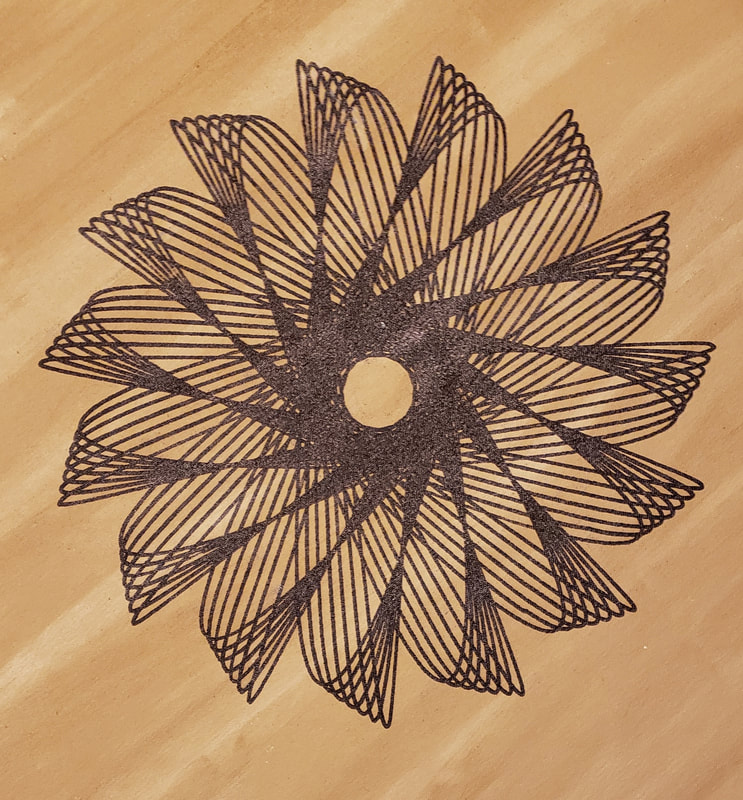
Yesterday our marriage was tested when we decided that it was the perfect day to replace 2 fluorescent fixtures in the basement. Both had died, one spectacularly with flames when I put in a new bulb. We replaced them with LED fixtures. Of course it couldn't be done without one extra trip to the hardware store. But they are done and I have light in my exercise corner again. They kind of look like 2 idiots installed them but they are in and they work and it's an unfinished basement. 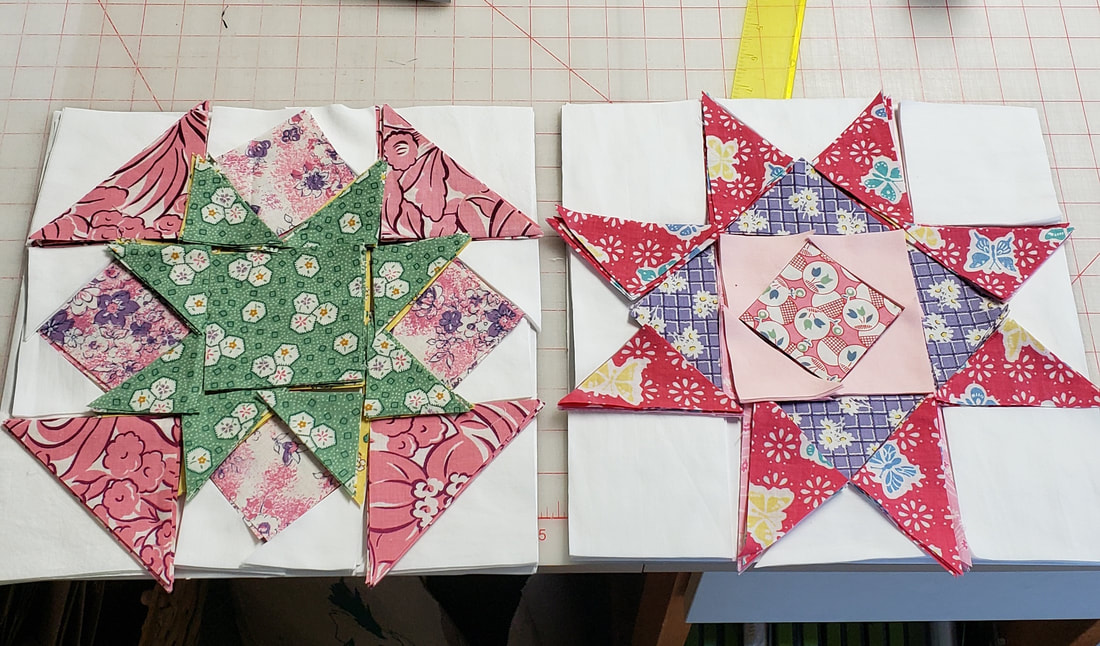 Next I decided it was time to cut my Rainbow Scrap Challenge blocks. Since I am making 8 quilts I did 8 blocks of each. All 8 aren't necessarily the same fabrics. I'm using what I have. I even decided to "use what I have" for white fabric. I was going to set aside a bolt of white fabric but I have a bin of various white and white-on-white fabrics and I need to use them. There's no reason that the background can't be scrappy too. Now that these are cut, I'm pondering saving the sewing until we go to Maine in August. I have these arranged on boards that can easily be stacked and wrapped. We will be there for 4 weeks this summer and I like to take projects that are already cut. Last year I took veterans quilt kits. I'll spend some time thinking about that this week but it would be kind of cool to just have a bunch of blocks cut and ready to sew. I cut something else out of pink and I'll share it tomorrow if it sews up nice. You will NEVER guess what it is. 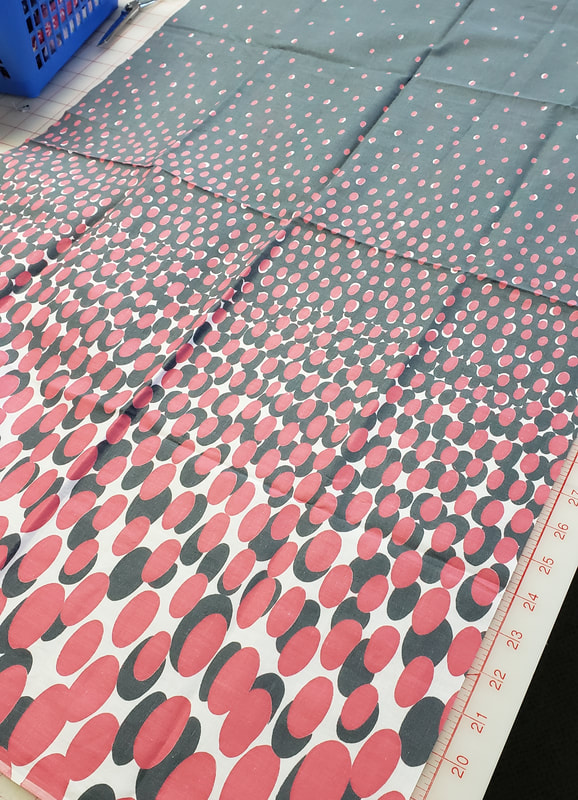 While I was pulling fabrics I found this really cool one. It's vintage but not feedsack and it's awesome! I must finally use it for something. It needs to come out in public and be seen. 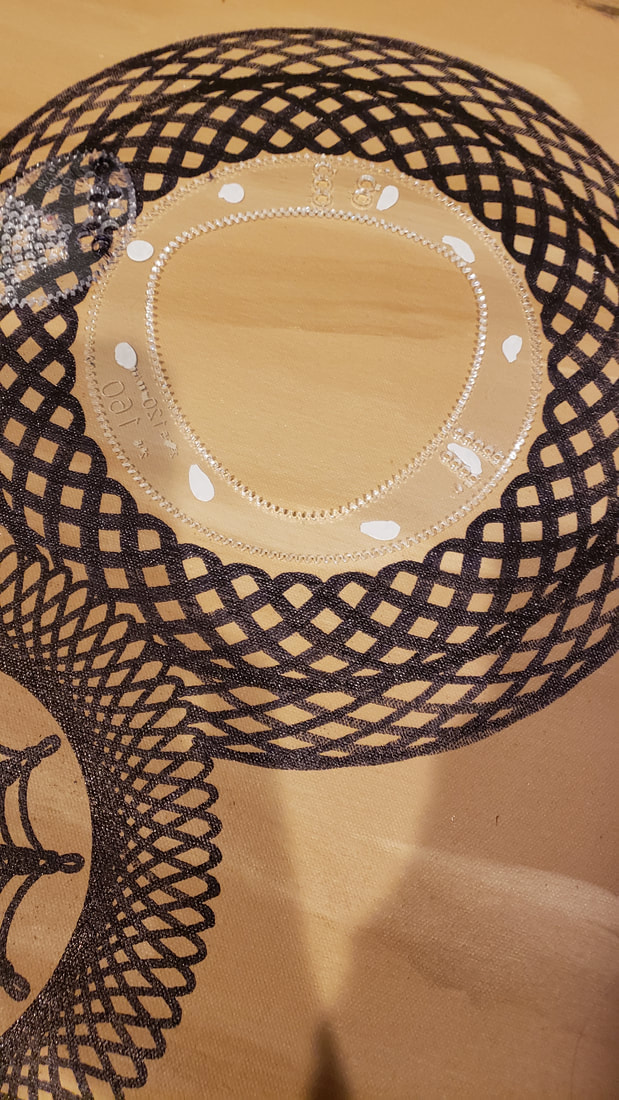 Then it was back to the floor cloths. Here's the first motif. I have a 160 tooth base circle and I drew with a 60- toothed football shape. I had to go around multiple (maybe 4?) times skipping 5 spaces between each.
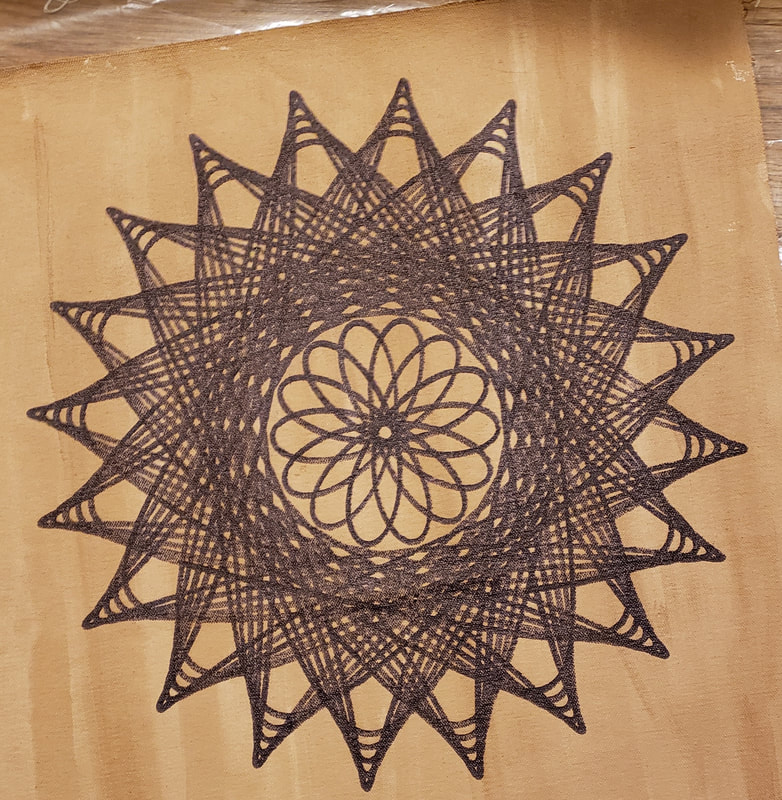
I did one set of lines using the hole that's on the point (left) and one set with the hole on the side (right) 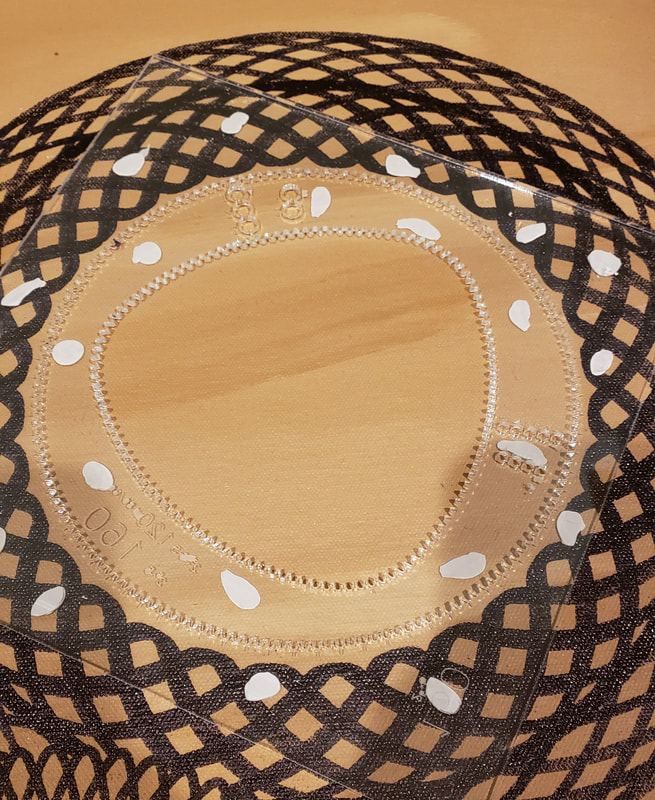 Then I wanted to do a design in the center using the inside of the 160 circle. To make sure everything stays centered I first fit the outside template over the inside template and then I remove the inside template. I use lots of that artist tacky stuff to hold the templates in place. 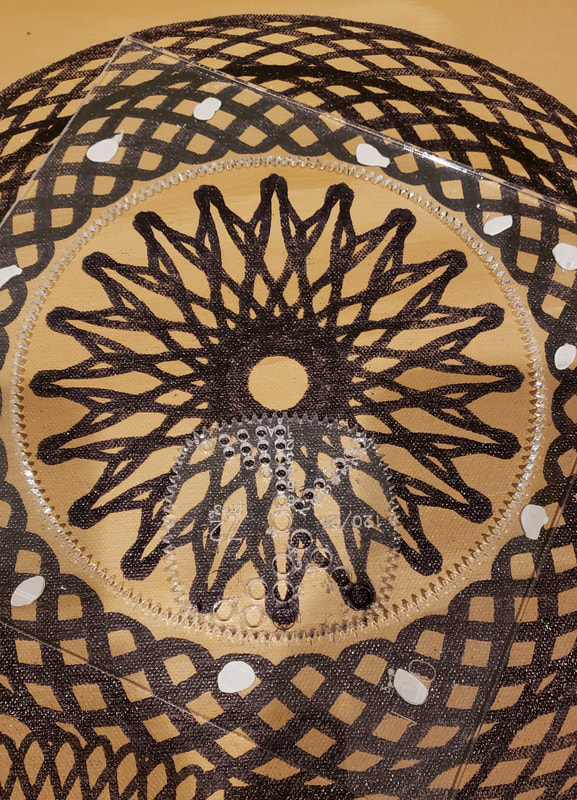 For the inside design I used a 72 tooth square and went around twice, once using the side hole and once using the hole on the point.  A little coloring in and this one was done. 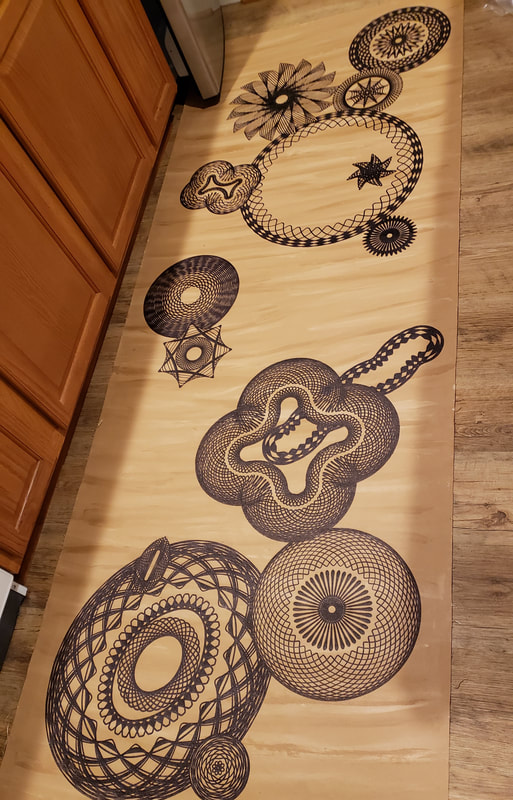 Here's how that floor cloth is looking. The new design is at the top right. 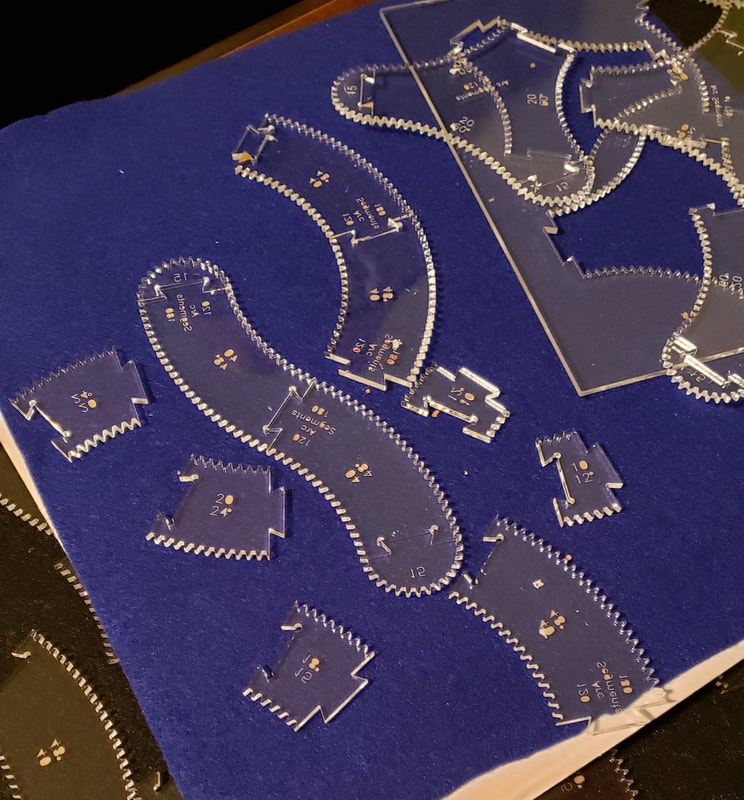 That photo reminded me to show you the gears that I used for the squiggle line. I've got loads of these shapes that I can put together any way I want. These are a lot of fun to work with. 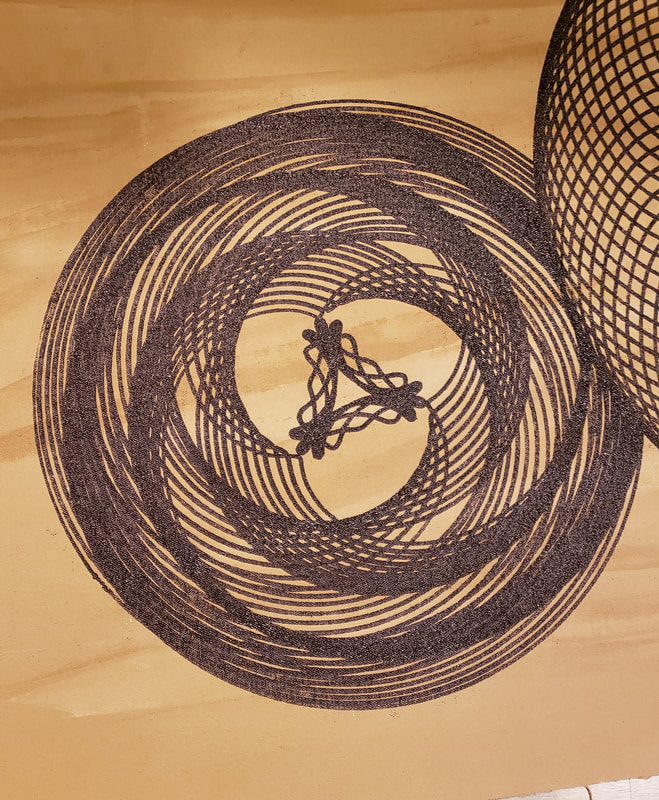 Here's the second design. I only got 2 designs done yesterday because both of these took a while. Planning, prep, drawing and cleanup took about an hour and a half for only 2 designs. The more they are layered with other designs the longer they take. I almost messed up and drew through the "top" design with this one. 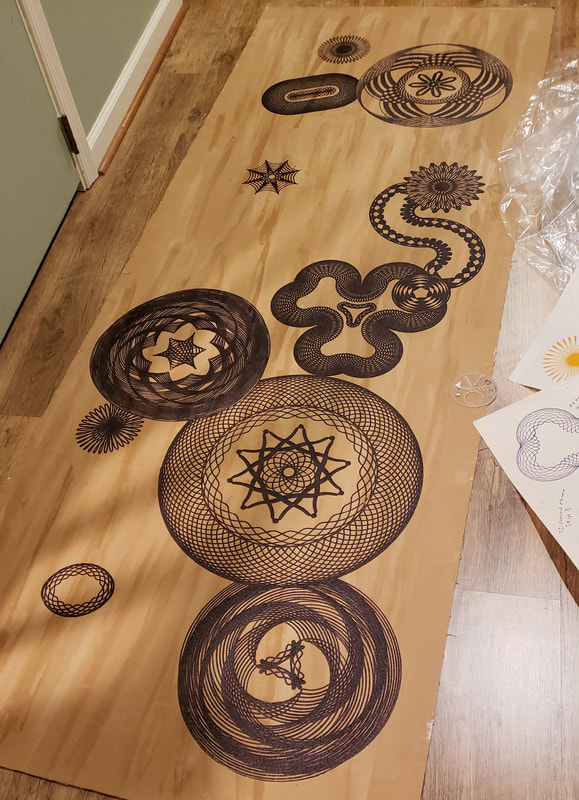 Here's how that floor cloth looks with the new design in the lower right corner of the photo.
They are coming along! I do love them. Well, I didn't make it to sewing with my quilt club. I started having some big allergic reaction Thursday and decided not to go because I didn't want to freak out anyone with my sneezes and sniffles. How do I know for sure it was allergies? Hives and abnormally low temperature (97.0). That's allergy. It was mostly cleared up by last night and it didn't keep me from being productive although there were a couple of Benedryl naps. 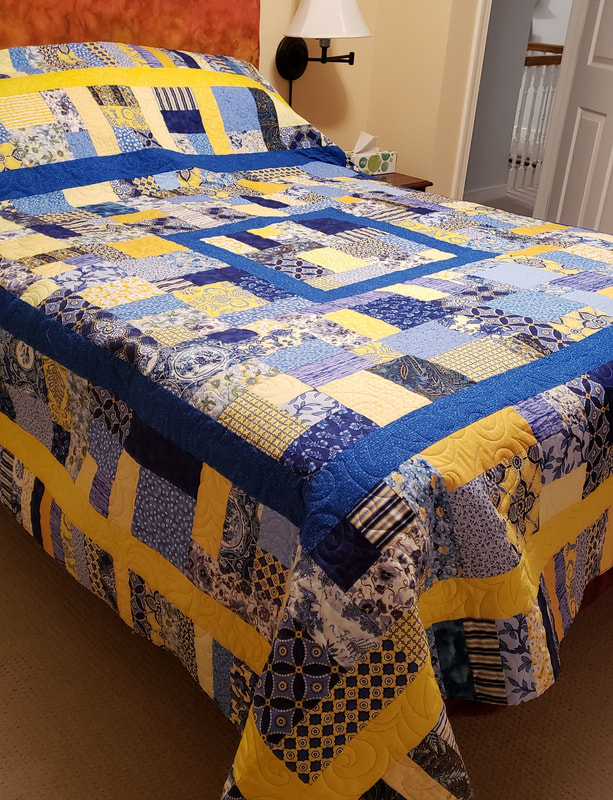 The biggest accomplishment of the weekend was getting Mom's quilt quilted. The quilt was started by a friend who passed away a couple of years ago. It was supposed to be a Yellow Brick Road. After getting the whole quilt together she didn't like it. She took it apart and added the 3 sold borders and the coins border on the edge. It finished at 102" square and this is how it looks on a queen bed. 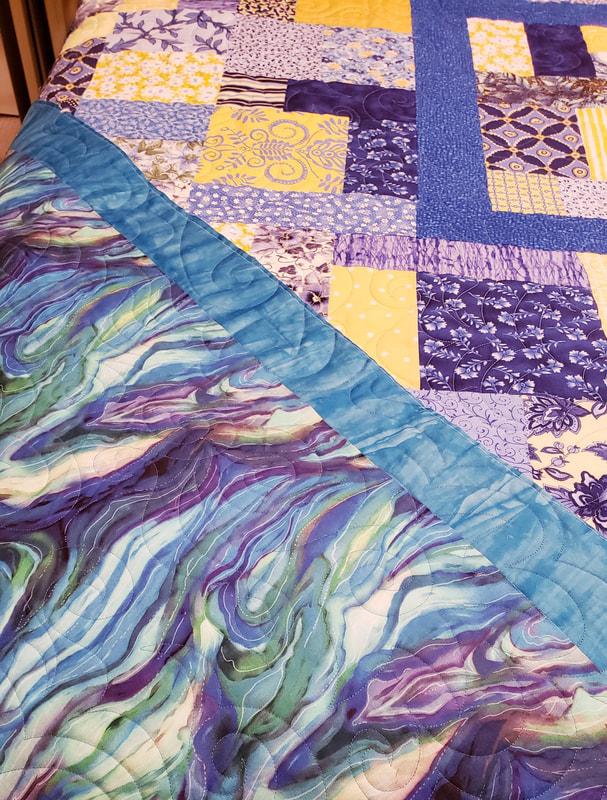 The color in this photo isn't quite right. I love the backing fabric hat she picked but I had to add another few inches on one edge because the backing fabric was exactly the width of the quilt. I'm glad I don't have to bind it! I also got back to the floor cloths after more than a month away. I can only do this about an hour at a time because I'm so sensitive to the Sharpie fumes. I wear a respirator and run a fan but that only helps so much. It's just as well because crawling around on the floor isn't the most comfortable thing to do at 60. During this session I added the 2 small motifs on the left and added 2 squiggly motifs on the right. I have some elements that can be snapped together for different shapes and that's how these were done. In some future posts I'll try to remember to take some photos of the set up for some of the special shapes. 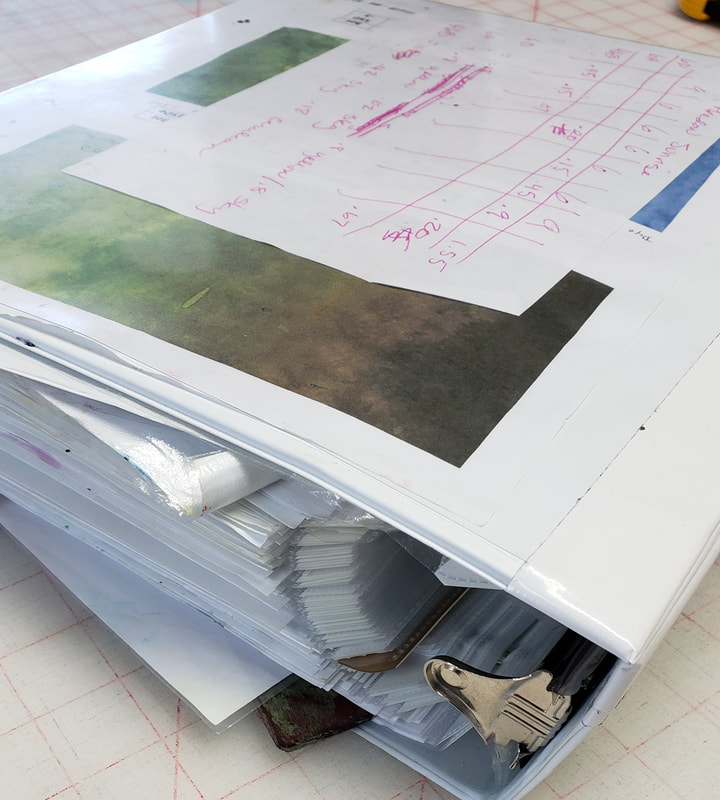 Because there were good football games to watch this weekend I decided to finally tackle this mess. It's my dye binder with all of my recipes and it's become a huge mess. 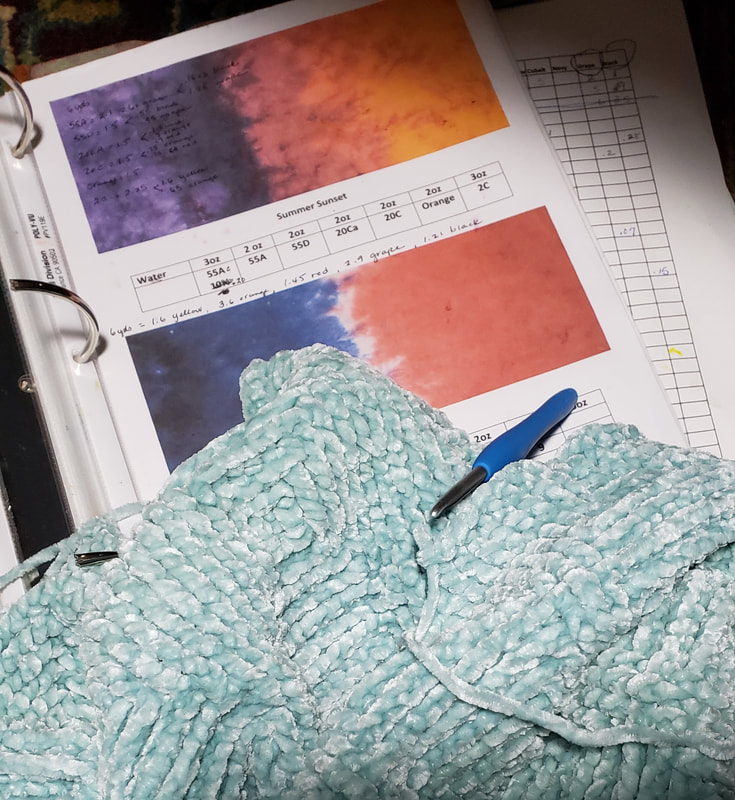 During the games I alternated between working on the book and doing some crochet. Once I get the book cleaned up it will save me a ton of time on Wednesdays. This chore should have been done 2 years ago.
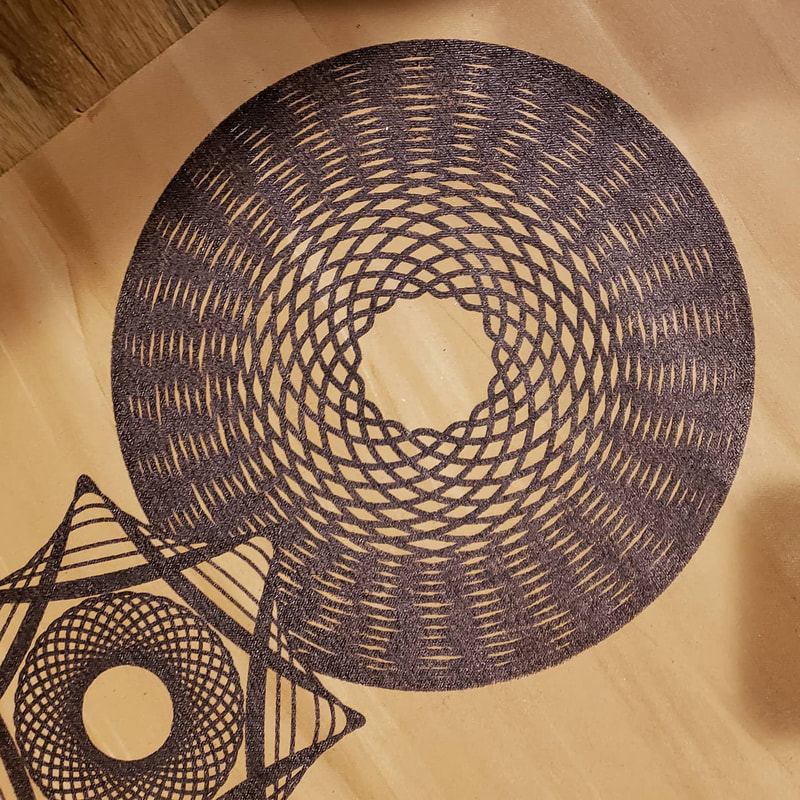
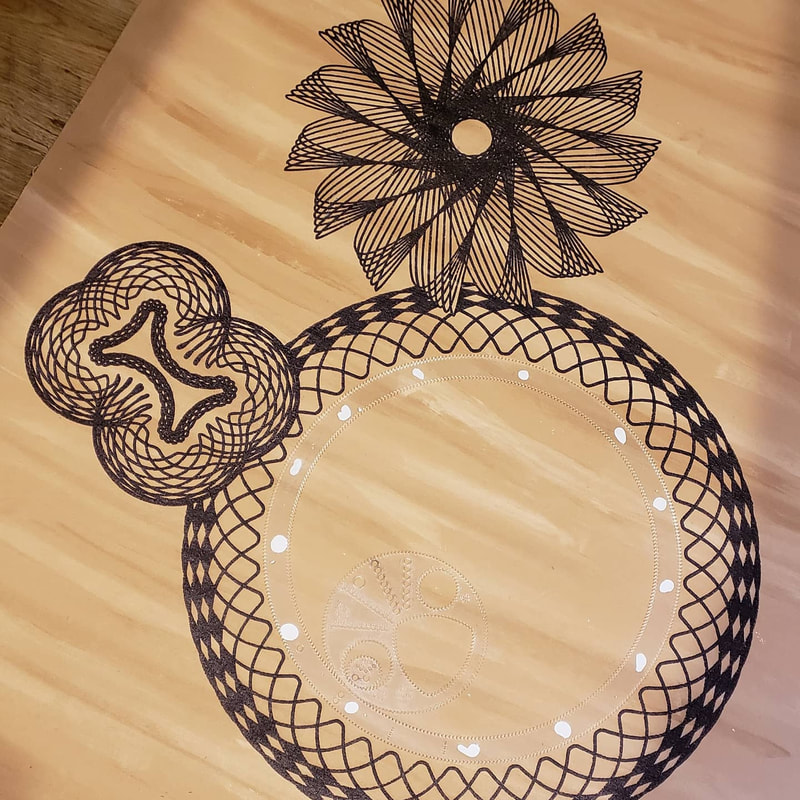
The crochet blanket is over half done. My goals for this week are to work on Summer Sunset and the floor cloths. We're almost packed and ready to go to a friend's house for a small Thanksgiving celebration. So I probably won't be posting again until Saturday. Yesterday I did a bit of baking to take with us. My baking is all gluten free and vegan (medically required, not philosophical) so they won't be particularly appealing for anyone but me. Every time we travel, whether overnight or for 3 weeks, I have to plan my own food. But before baking I got in another session on the floor cloths. I got 4 more designs added to the floor cloths. The one in the upper left is HUGE. It's about 16" wide I think. The one in the lower right is pretty small, about 7" across the widest side. I love how it's coming along. 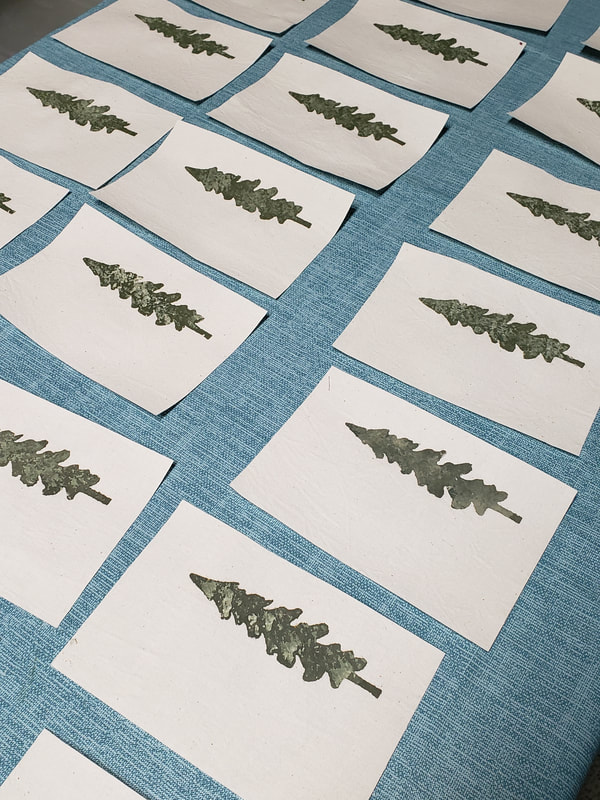 I'm also working on some other postcard ideas. I'm not sure this one is going to work out but I'm going to leave it for a couple of days. I'll revisit them this weekend. I need to get these things wrapped up in the next week!
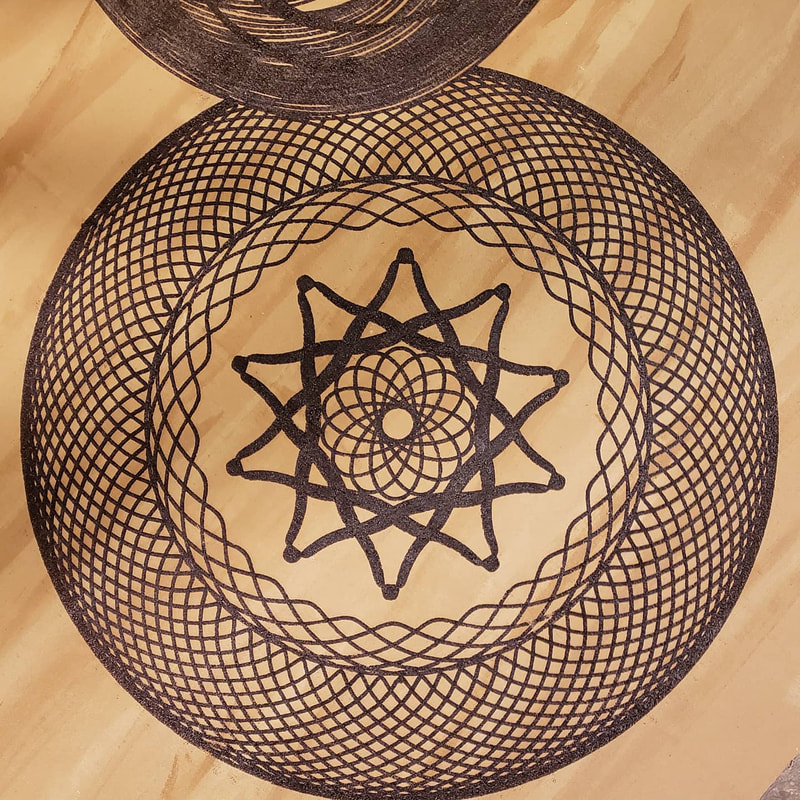
I wish you all a very Happy Thanksgiving. We still have a lot to be thankful for. I don't have a new customer gallery quilt to share today so I'll catch you up on the floor cloths. I actually got to do lots of things yesterday. Mom's quilt is half quilted and the tree postcards have half the stitching done but I didn't get photos of either of those. I got 2 sessions on the floor cloths in yesterday and it was warm enough in the afternoon to leave the door open for more fresh air. Here's where they stand at the moment. As a reminder, these are canvas pieces primed with gesso and then painted with satin finish house paint. When I finish the spirograph designs I'll fold under and glue a hem and then they will get a couple of coats of polyurethane. They will hold up on the kitchen floor for years. I started with some small designs. I'll add big designs "behind" these for a layered effect. These 2 medium sized designs show how I do the layering. It requires drawing slowly and carefully. Fortunately mistakes can be erased with the tan paint and there have been more than a few slips to cover up. Below are all 3 floor mats and how they look today. There's still lots of drawing left to do but I do love them so far. 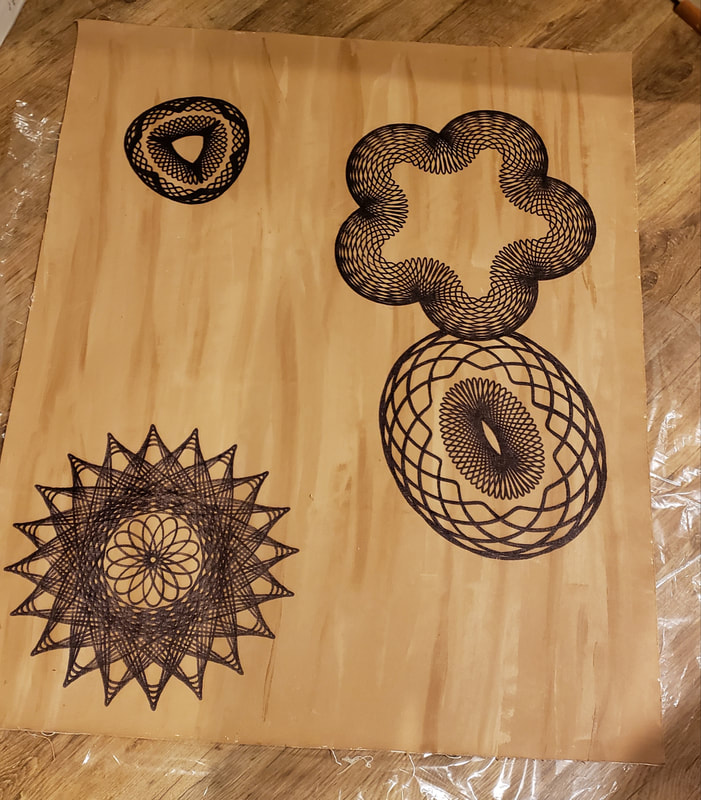 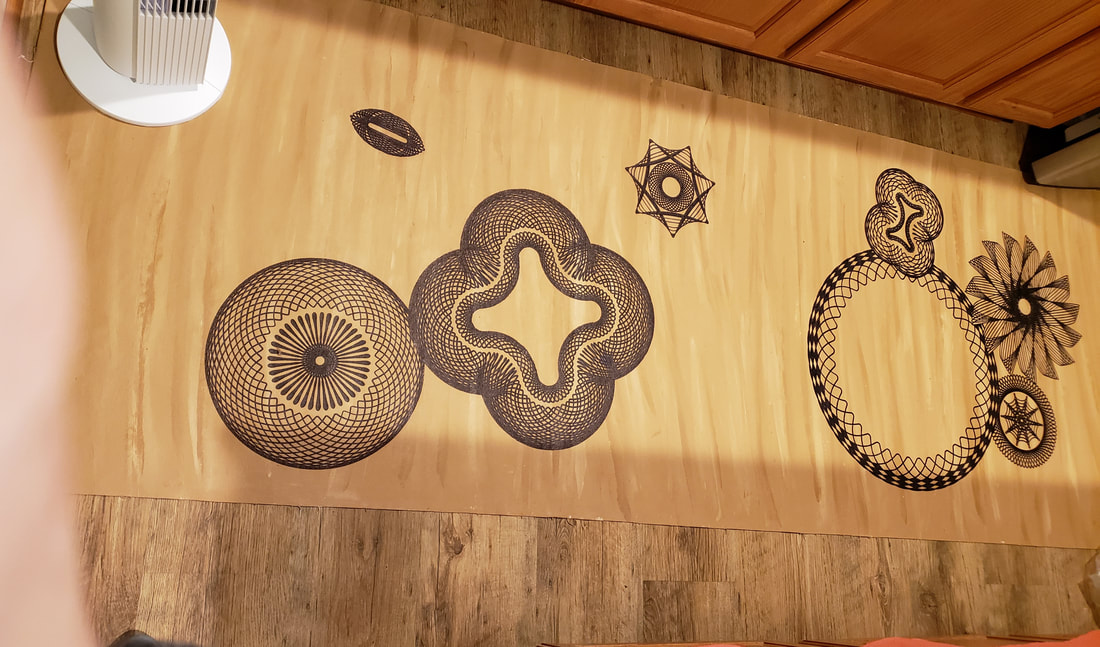 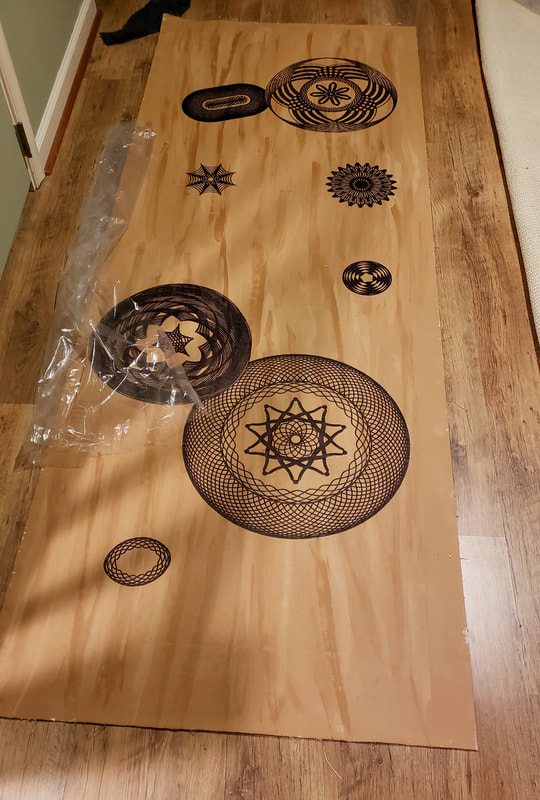 Yesterday was a really good day. I ran errands in the morning and found almost everything I needed between Walmart and Wegmans. The only think I need to order is printer ink. There seems to have been a run on printer ink lately because it's been out of stock for weeks. I also noticed that there's another toilet paper run. My friend in California told me about it there so I looked down those aisles today. How much more toilet paper do people really need? Isn't everyone stocked for a year now? Crazy. 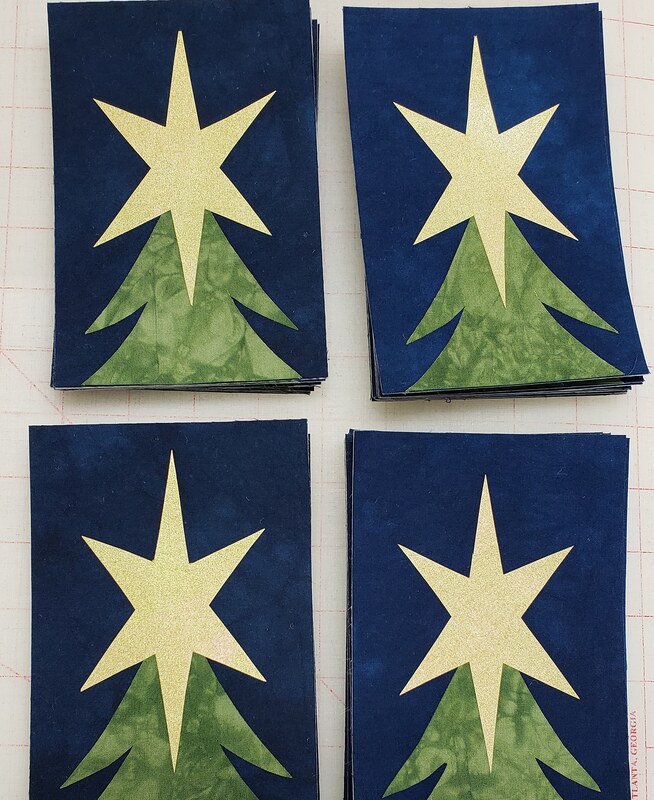 Back at home I now have 36 postcards ready for stitching! These will be done in no time and then I'll need to think about the next design. I quite like how these are turning out and I think the simple stitching that I have planned will look really nice. I also spent a couple of hours on the floor cloths. I'm sorry that these photos are a bit chopped off. I uploaded them from my phone and I might have selected the unedited images so the blog software cropped them for me. I'm writing this late at night on Thursday and don't have the human or cell battery to reload them. You will see loads more photos to come but here's a peek at what I did yesterday. 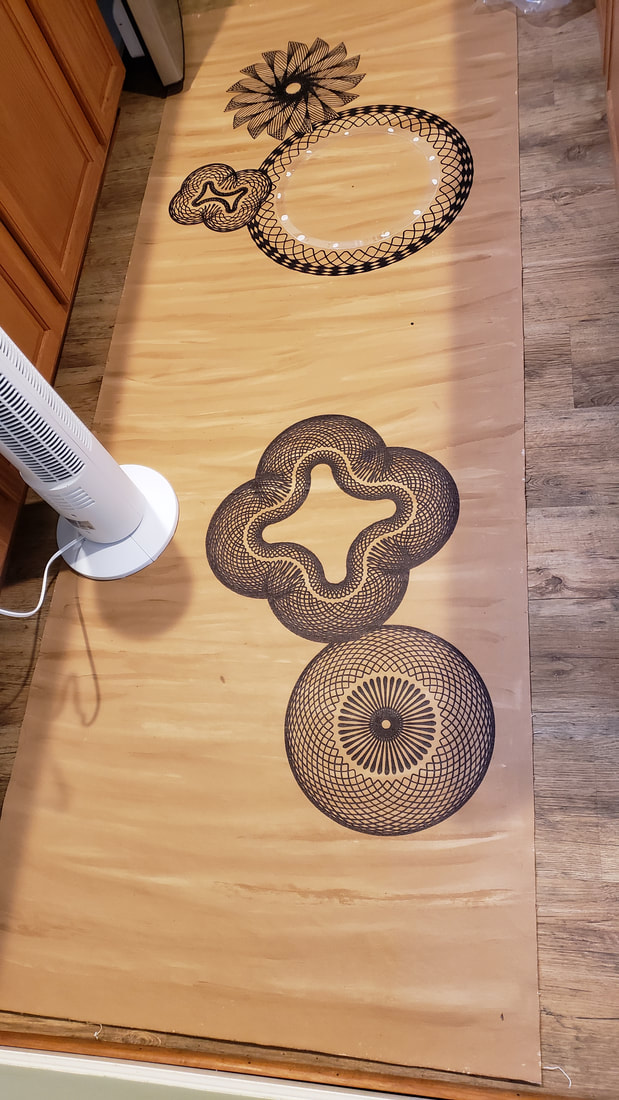 This the second of the 6 foot rugs and you can see that I'm starting to layer the designs. It takes more time but it's so worth it, don't you think? I've got lots more space to cover. I'm working no more than and hour and a half at a time and I do wear a respirator but some of the fumes still sneak through. I'll be back out there this afternoon to finish the inside of that big circle and to add more elements to all three rugs. It's so zen and relaxing to work on these. You have to concentrate so you have to purge everything else from your thoughts.
It was sewing weekend with my quilt club Friday and Saturday so, of course, it was a great weekend! 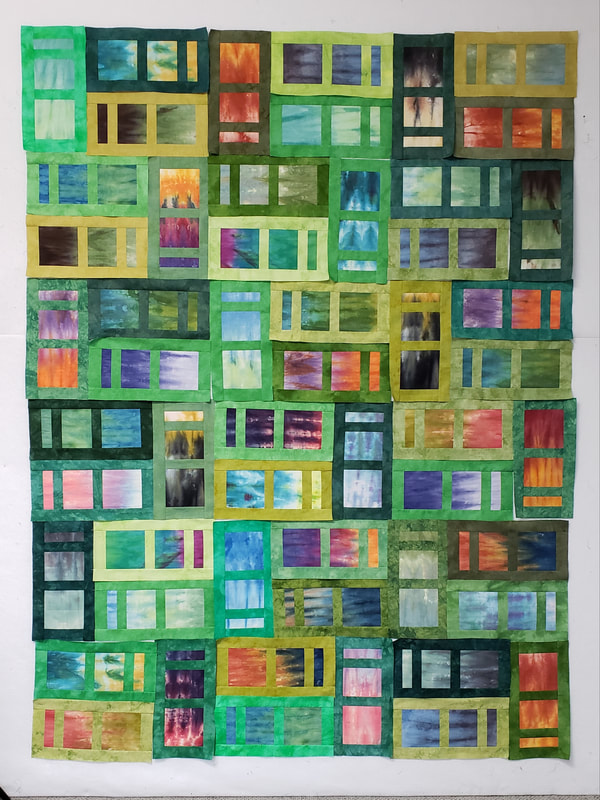 This is the project that I am working on. I'm using every green from my green hand dyed leftovers drawer and a lot of my favorite "waste" fabrics. I like having one project dedicated to sewing weekend so that it's always ready to go and I don't have to do too much thinking to get ready. This is likely to eventually be a king size quilt and I'm contemplating a couple of different layout options. One would include sashing. I love the effect I'm getting with the waste fabrics in the windows. I have a lot more to make before I have to make any decisions. At home I'm slowly working on the floor cloths. I'm so sensitive to the Sharpie marker fumes that I can only work on then about an hour at a time and that's with a respirator. I can get 2 designs done in an hour so this is going to be a long term project. I'm totally cool with that because I love working on them and spend a lot of time thinking about how I want to do each one. I still need to add something in the centers of the 2 on the bottom row.  As a reminder there will be 2 6 foot by 2 foot rugs and one 2 x 3 foot so I've got a long way to go! In fact I'll be ordering a lot more markers today. They don't last so long when you start coloring in!
This week I'll get started quilting Mom's quilt and I will finally start the Christmas postcards. I've got the first design figured out so I'm ready to go. I also need to get photos of Kim's quilt but it's sooooo big! The idea of photographing is is kind of daunting. Maybe I can get some people to help me photo it at the quilt club meeting Tuesday night. |
FeedsTo subscribe click the RSS Feed button and copy the URL of that page into your blog reader.
In Bloglovin you need to search "Colorways By Vicki Welsh" to find the blog. About Vicki
I'm Vicki Welsh and I've been making things as long as I can remember. I used to be a garment maker but transitioned to quilts about 20 years ago. Currently I'm into fabric dyeing, quilting, Zentangle, fabric postcards, fused glass and mosaic. I document my adventures here. Categories
All
Archives
July 2024
|


 RSS Feed