|
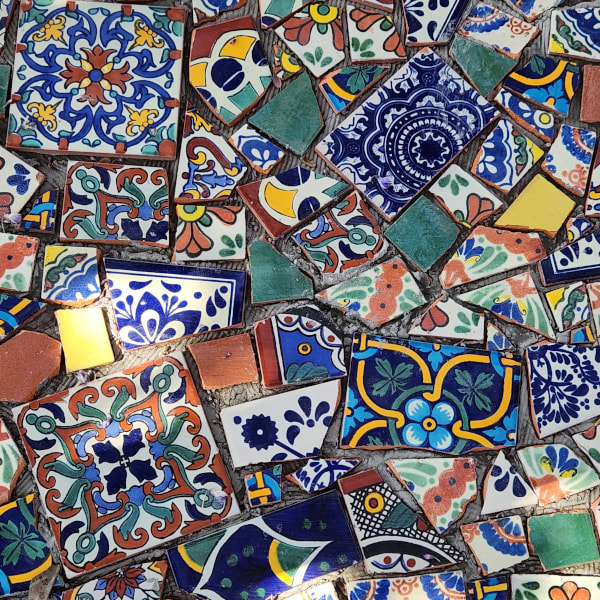
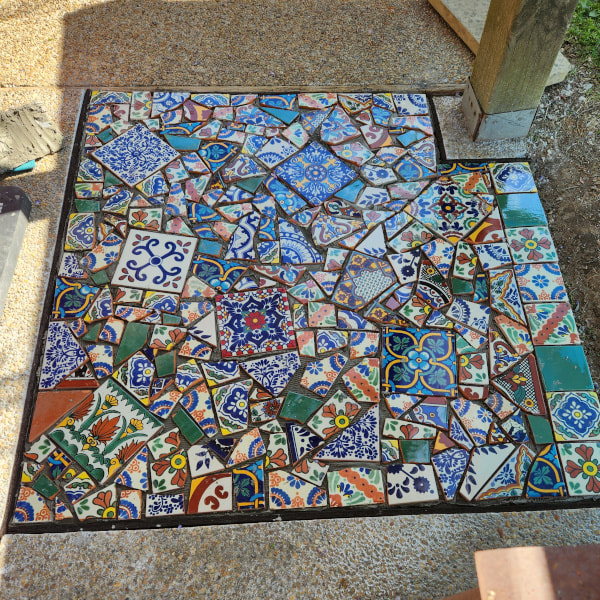
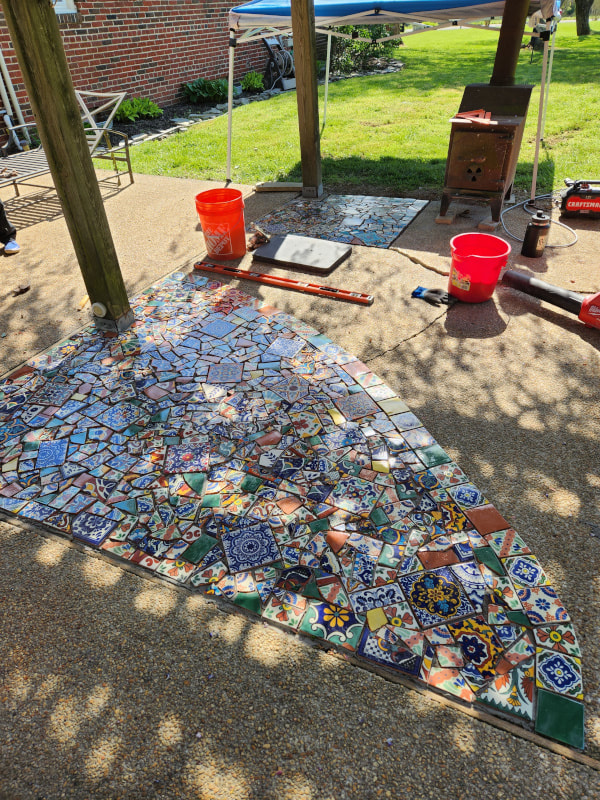
Last night we were invited back to Nadine and Jim's to see the finished mosaic. Her son did the grouting and the finished mosaic looks fantastic! This mosaic was a great solution for a difficult problem. Their patio is under a very old Wisteria plant that has become so heavy on the pergola that it's cracked the patio. they can't replace the patio without risking killing the Wisteria. The patio had become a bad trip hazard, especially in this corner. This corner was 3" lower than the point where the other 3 slabs meet. Her 99 year-old mother tripped on it last year. We had talked a couple of years ago about the idea of doing a mosaic to address this issue and the time came 2 weeks ago to get it done. She had a big collection of Mexican-style tiles. Her son poured concrete to bring the level up for us to lay the mosaic on. He also cut out the corner in the back of the photo and poured new concrete. It was fun to smash up the tiles and I was thrilled to not have to do the grouting. But grouting makes suchs a difference in the look of the whole thing.
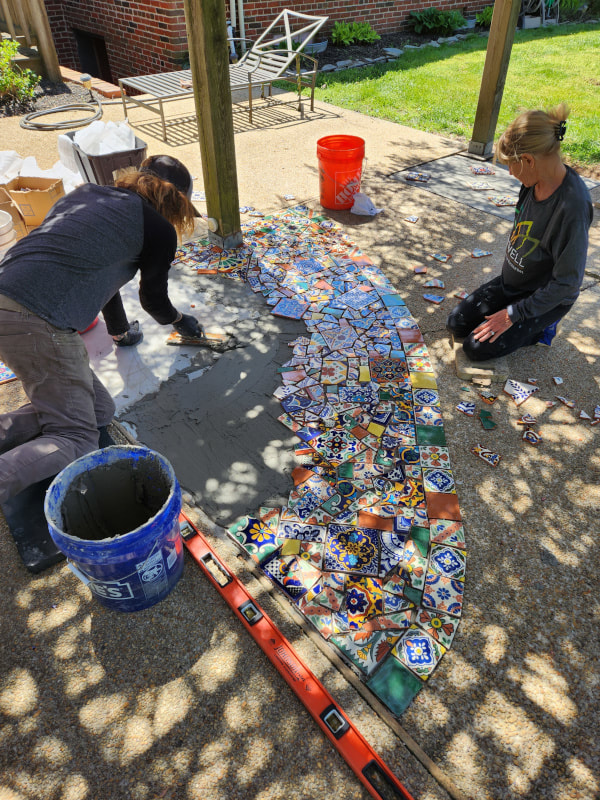
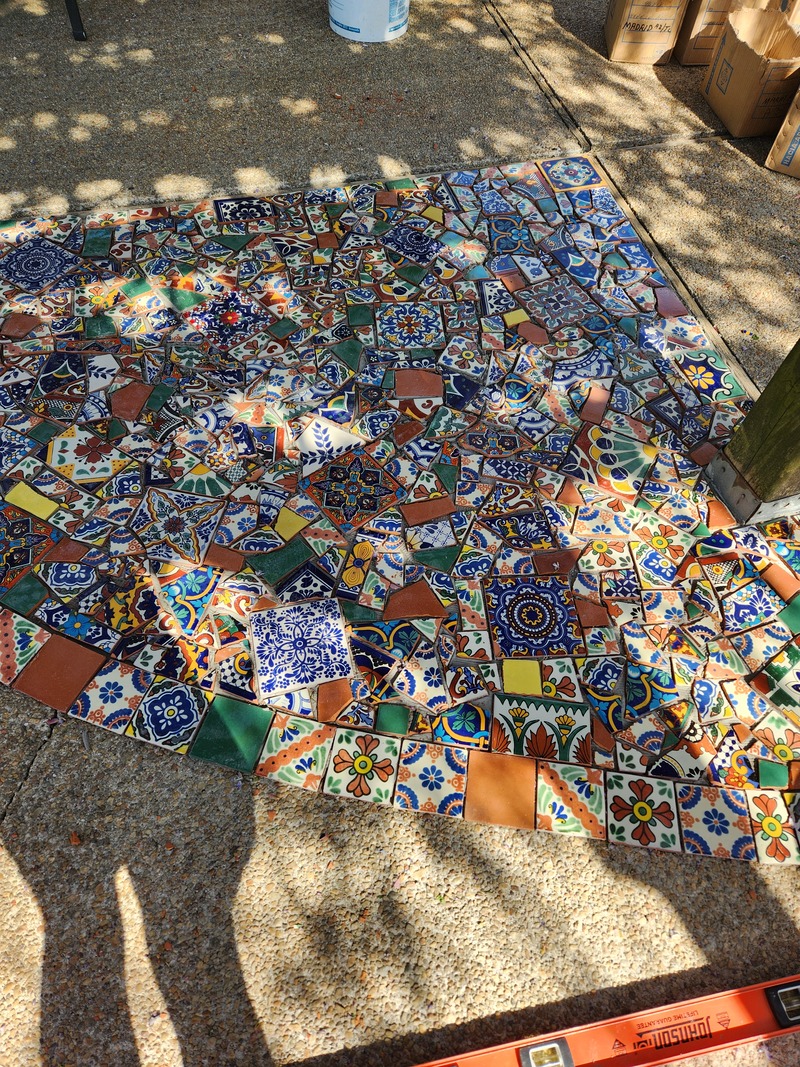
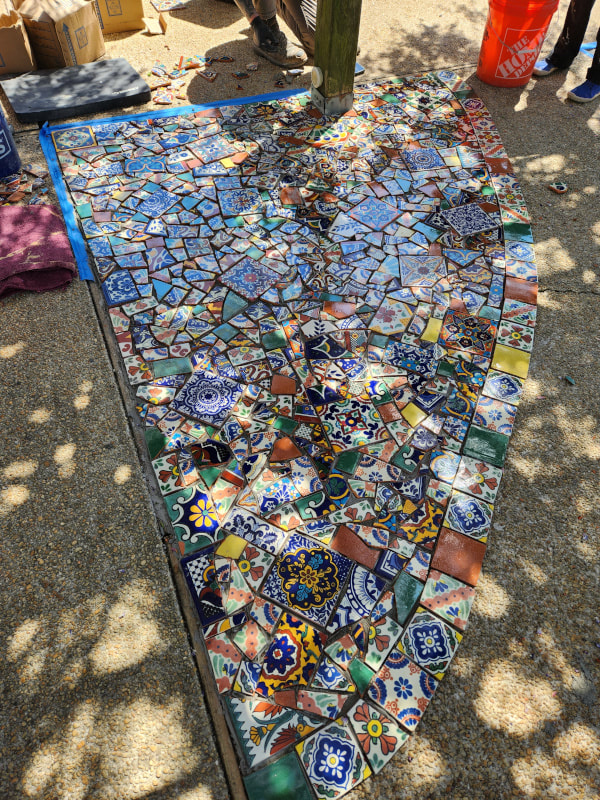
I accomplished a lot of things this weekend but today I'm only going to talk about yesterday. It's the first time since July 2020 that I've had an opportunity to mosaic. It was a great day although my back is a little unhappy. My friend, Nadine, has a back patio with a pergola and a HUGE Wisteria tree on it. The weight of the tree on the patio slabs has cracked and tilted the slabs over time. It's a huge trip hazard. They are afraid to replace the slabs because it might kill the Wisteria. We've been talking for several years about doing a patchwork mosaic to level out two areas of the patio and yesterday was the perfect day. The weather was absolutely beautiful, the Wisteria was in bloom and the bees were having a blast around the blooms. They didn't come anywhere near us. This the the biggest section where we started. The tiles are mostly Mexican-style tiles. We edged the area with small square tiles, placed some big tiles randomly throughout and filled in with broken tile pieces. Nadine is on the right. Her son is on the left and the impetus for getting this done is to prepare for his wedding in June that's going to be held at the barn on their farm. Before we started that corner in the upper right was at least 3" lower than the surrounding slabs! Her son poured concrete earlier in the week to give us a level surface to work on. Here are the last tiles going in behind the post on this section. This took is about 4 hours, start to finish. This is the second section and it took us about an hour and a half. We were all EXHAUSTED by the end but really happy with the results. My back is not happy at all but I don't care. It was so much fun to mosaic again. Here you can see both sections finished.Nadine and her son will grout it later this week and then I'll go over and get some photos of it finished.
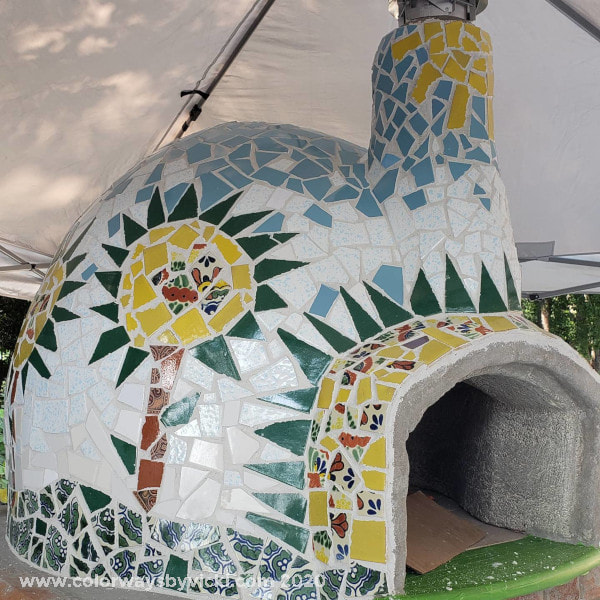
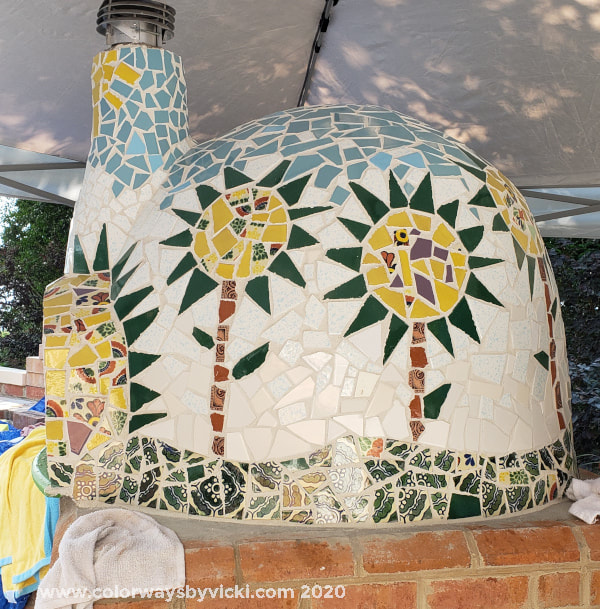
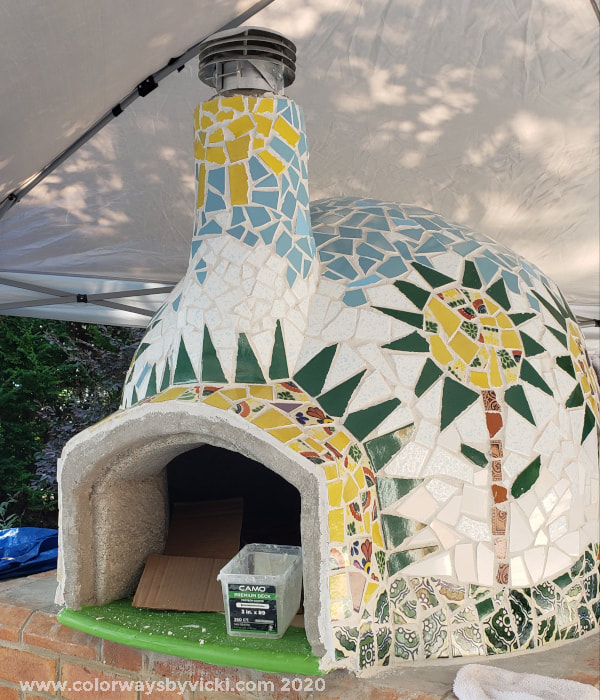
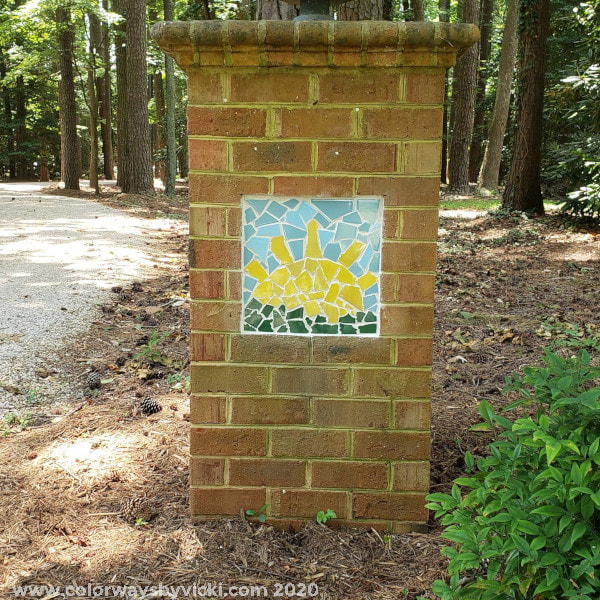
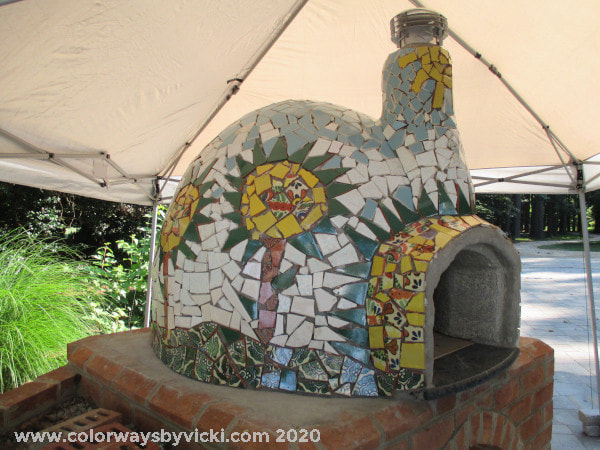
Next on tap for this week is helping a friend move. I may be doing some today and will definately be helping Wednesday. I'm leaving my schedule open for later in the week too. So I don't know how often I will be posting. Well, it's (mostly) done! I think my part is done anyway. The backstory on this is that my best friend has a house on a Chesapeake Bay tributary and recently her husband and BIL built a nice brick grill worstation with a pizza oven on one end. Anne has been wanting to mosaic it ever since it was finished. She finally poked me enough that we picked last week to get started. The Mexican tiles were leftover from my mosaic collection and they had been gifted to me by another friend. There are so many tiles that we could probably mosaic 2 more pizza overs, but we are not going to! She bought the background tiles from a reclamation place in Richmond. They are basically tiles from 50's era bathrooms. The design process started with her deep dives into Pinterest and some really complicated ideas. I reminded her that neither of us could draw and the we didn't have a palette that would work for most of her big ideas. I did some quick searches for "mosaic Mexican tiles" and found a really cute sunflower idea. It was well within our skills to trace around a bowl for the centers and the rest was easy.....as easy as mosaic can be. It took the better part of 2 full days to do the tile work. The nightmare was (and always is) the grouting. Chris went with me Monday night because he was going to hang out with the dog while we grouted but, luckily, he got bored and came out to help. We would have never finished without him. Working solid starting at about 8:30 on the hottest day of the year, we finished a little before 4. Anne had a conference call and we needed to get home. She will have some touch up grouting and will need to seal it. Then she will be able to take down the tent and get some glamour shots. All-in-all we are really happy with it. I ended the day with 6 fingers bandaged and with multiple cuts on each but pleased with the project. As you drive down the driveway to her house this will be the first thing you see. We did this little bonus project at the end of her driveway. The original builders of the house put 2 of these light poles at the end of the driveway and put a hideous tile (picture of a castle) in it. I don't know what a castle has to do with this particular house or this location so you can imagine how much my friend hated it. A little sun image to go with the sun at the top of the pizza oven chimney seemed perfect. It's a huge improvement.
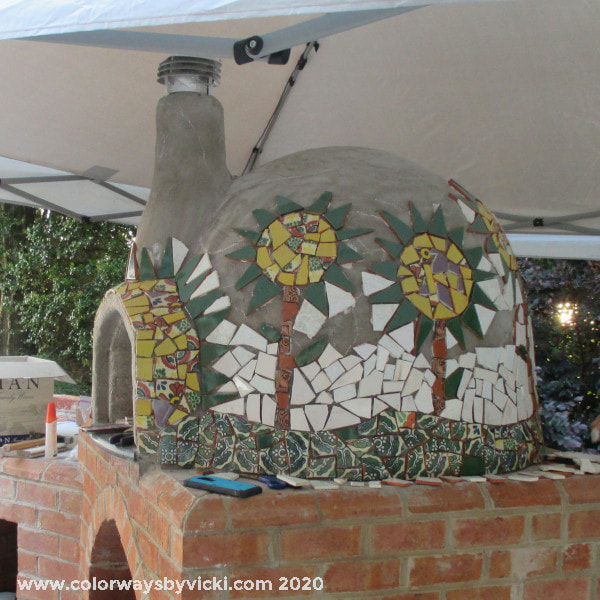
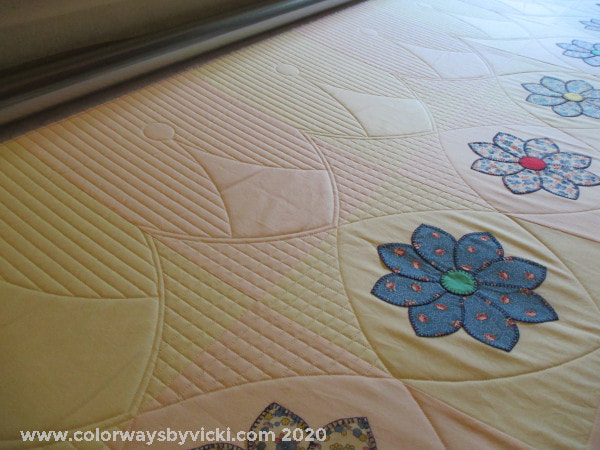
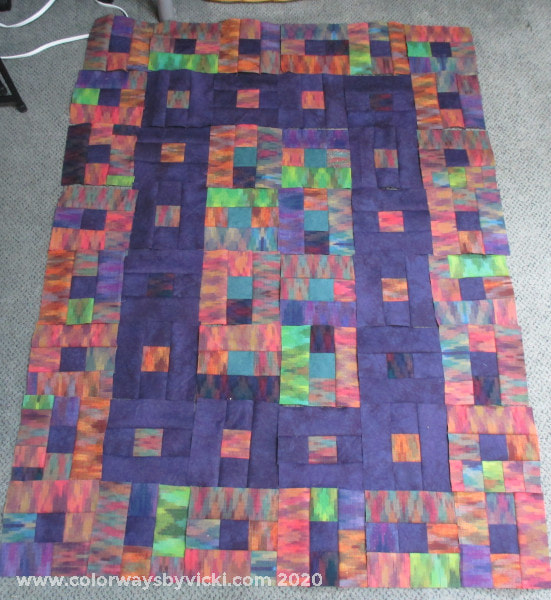
If I ever mention mosaics again please remind me of the torturous grouting on this project. Last Tuesday I went to Anne's house so that we could mosaic the pizza oven that her husband and BIL built a few months ago. We Started Tuesday trying to figure out a design that would work with the free/almost free tiles that she had. Some were Mexican tiles and some were pastels reclaimed from 1950's bathrooms. She had some ideas like octopus, crabs, fish.....all things that neither of us could draw. Given all the yellow and green that we had, we settled on sunflowers. We got this far near the end f the second day. It was hotter than blazes and we had to put up a tent because of passing storms. By the end of Thursday we had finished all the tile work. It wiped out both of us but we are thrilled with the end result. I'm headed back this afternoon so that we can grout it tomorrow. If all goes to plan I'll have lots of photos on Wednesday. I came home Friday morning and proceeded to pretty much collapse for the day. Mom came over for our 4th celebration dinner and I went to a friend's pool yesterday. That's my way of saying that I didn't get a ton of other things done. I started quilting the background diamonds on my quilt before I left but haven't gone back to it yet. I'll focus on it this week. When Mom came over Saturday she wanted to do some sewing so I pulled out the next veterans quilt kit to start on. The ikat fabrics are leftovers from a quilt that Anne made for her BIL (the pizza oven builder). There was just enough fabric to make this quilt. But I'm going to see if I can eek out enough additional pieces to replace the darkest ikat bits. The next round is teal blocks with ikat centers. I'll work on this during this week too.
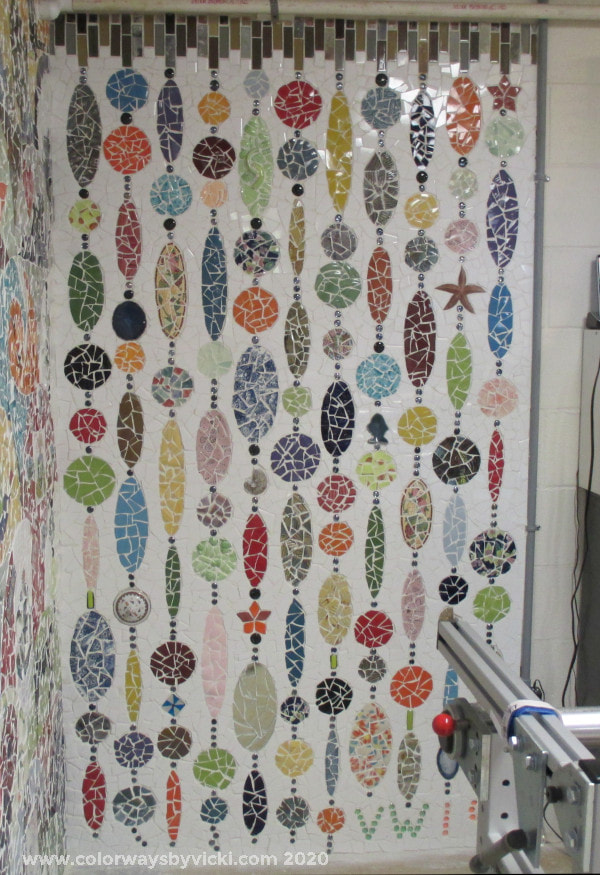
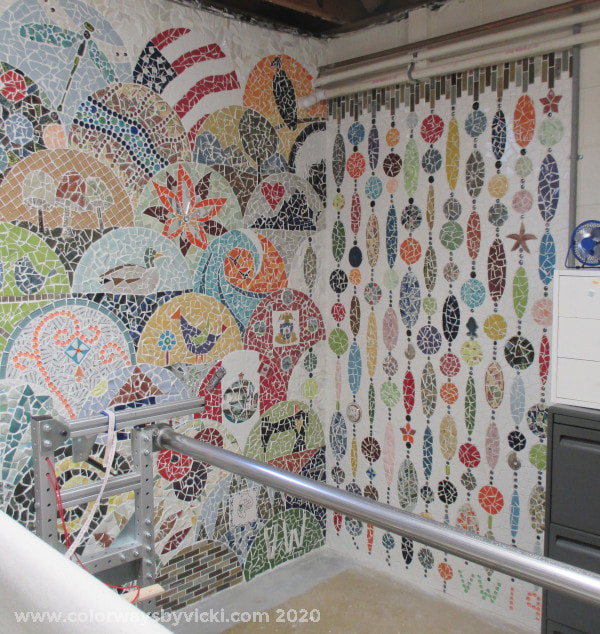
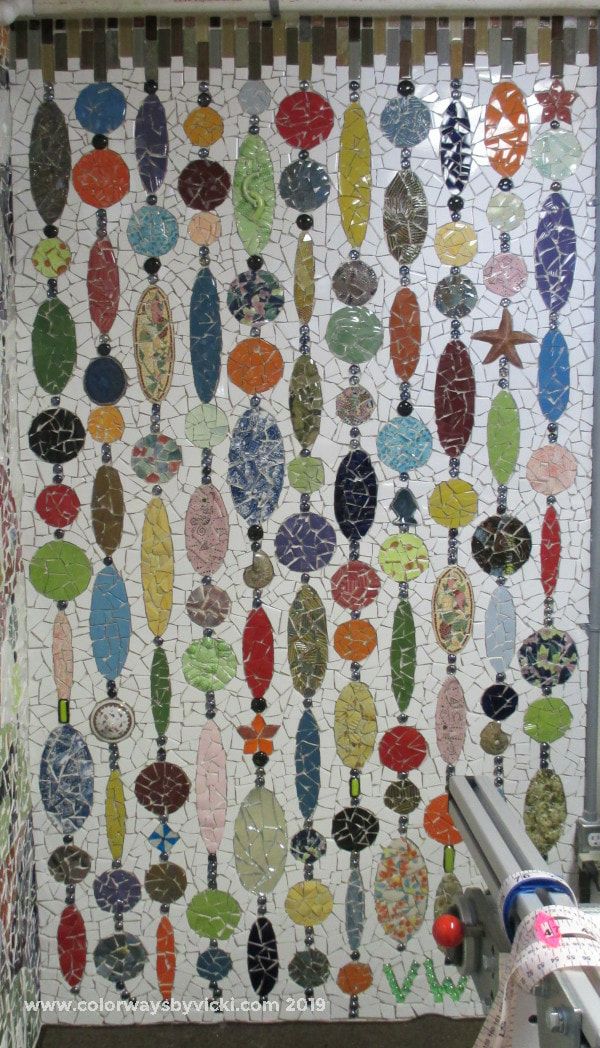
I'll be back tomorrow afternoon if all goes well and will have lots of mosaic photos Wednesday. Then I can get back to regular programming. I'm so happy to finally share my last mosaic project, the beaded wall! The whole purpose for this wall section was to use up lots of the leftover bits from the big wall. I had stacks of cups and containers full of mosaic bits and this was the perfect project for them. Here you can see that the beaded section is right next to The Great Wall in my longarm room. There's something really cool about knowing that these are hidden in the basement and I'm pretty much the only person who sees it. This is my last mosaic. It's been a fun 4+ years diversion but it was time to get all the mess out of my basement and to get back to doing my glass work. You cannot believe the mess that mosaic art makes and how much space it takes up. It's much worse than a huge fabric collection.I needed to get all of that stuff out of my house. It was starting to dampen my creativity. You can see all of the mosaic projects and more photos of this wall in the Mosaics Gallery. So after getting the mosaic grouted last week and giving it a few days to finish off gassing, I spent the weekend cleaning the basement. As I'm writing this post it's Sunday evening about 8:30 and I am exhausted. I cleaned and cleaned and culled and culled. It was brutal but I'm happy to have some clean and empty shelves in the basement. One of the curses of having space is that you can always keep things "because I might need it some day". The next thing you know you basically have a space full of garbage. Some of the gems that I found there are:
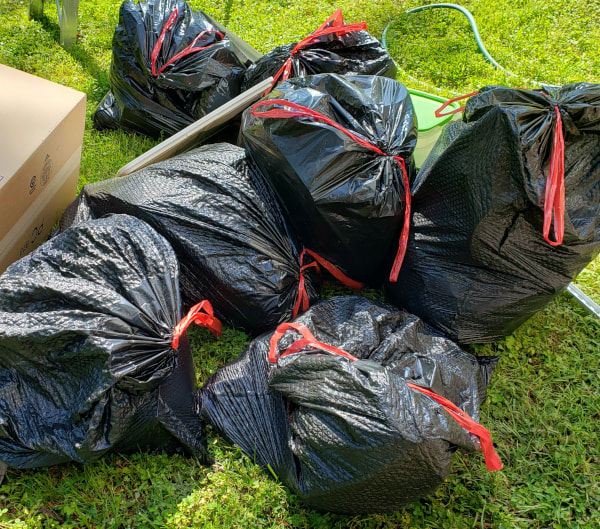
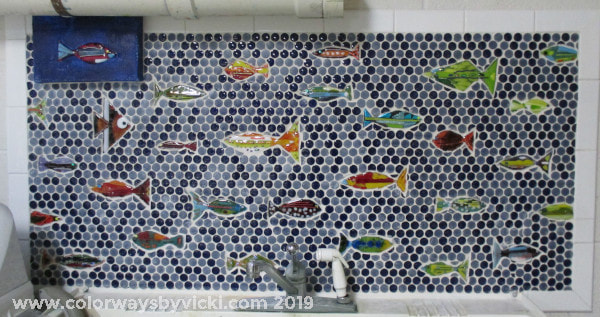
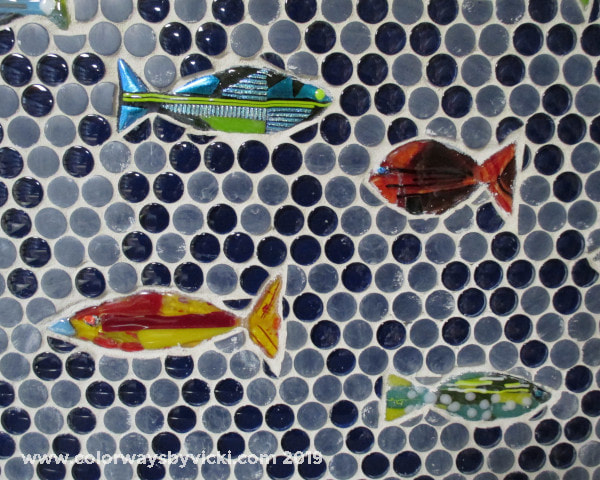
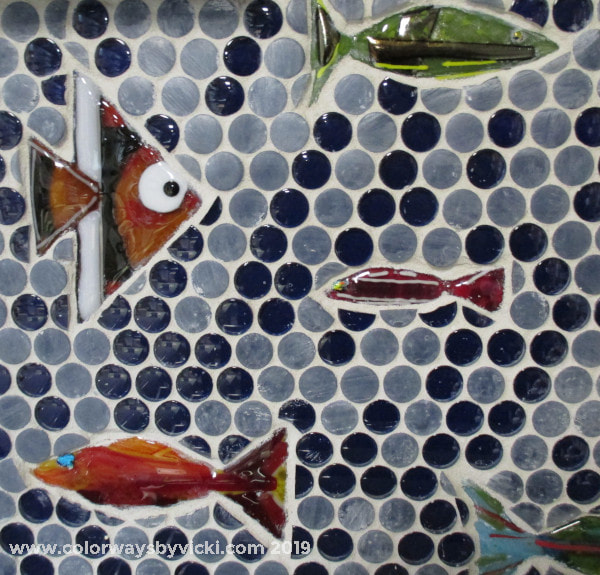
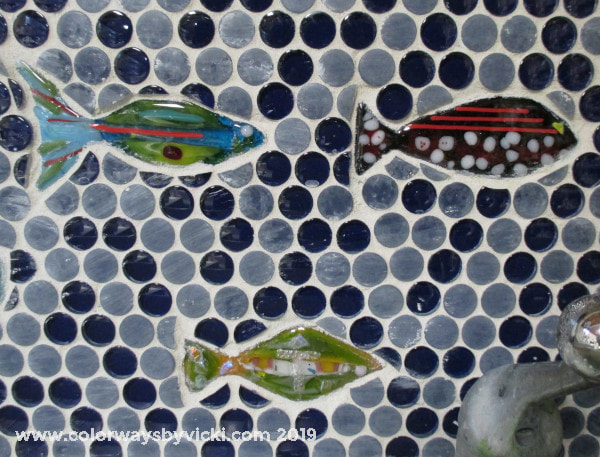
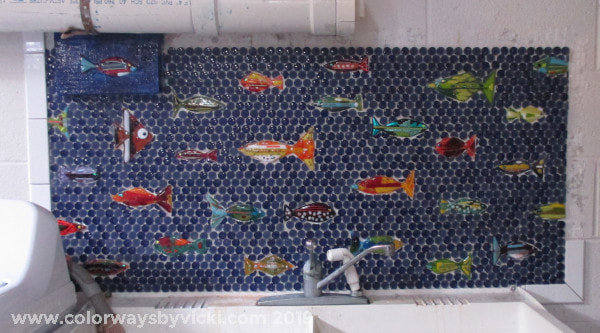
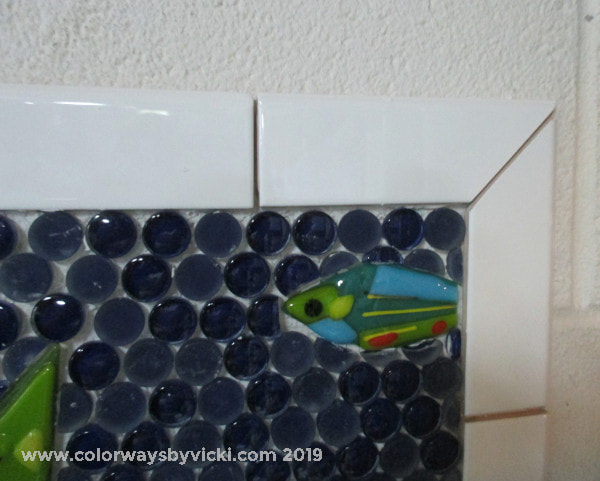
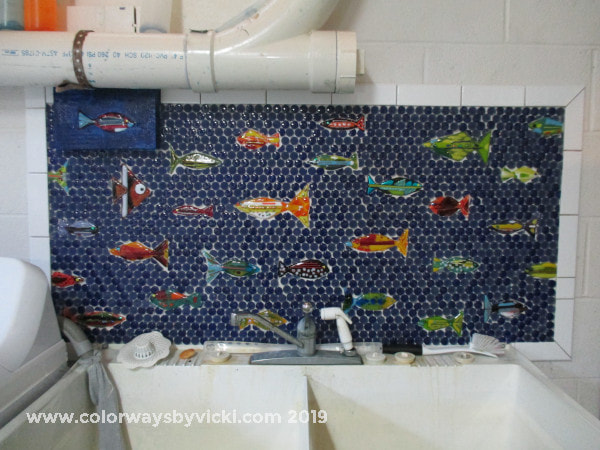
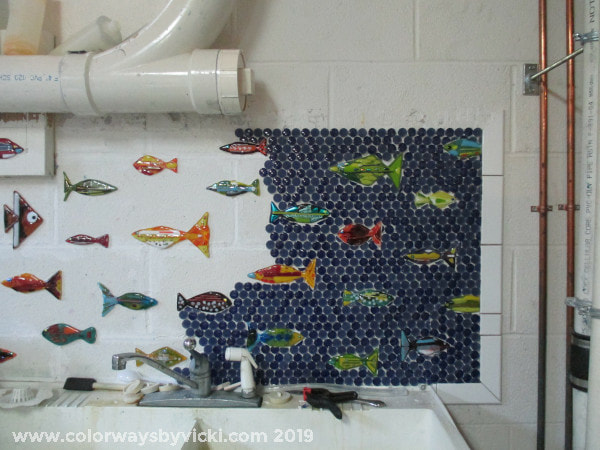
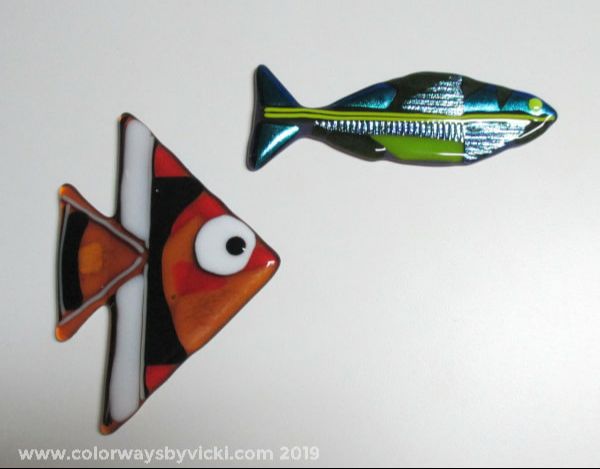
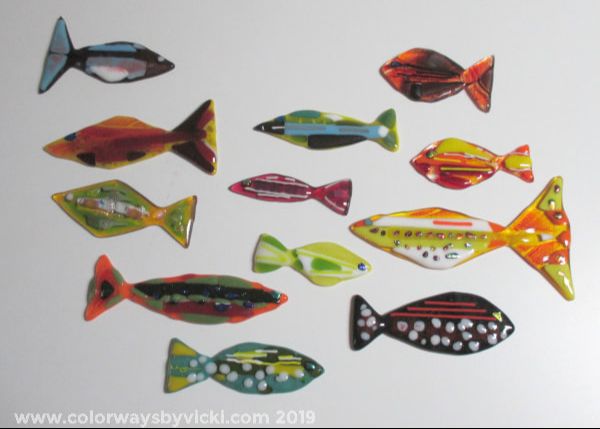
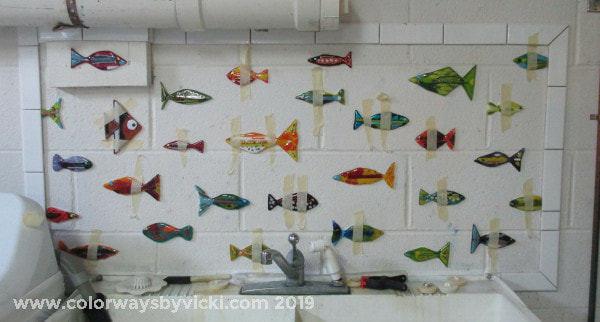
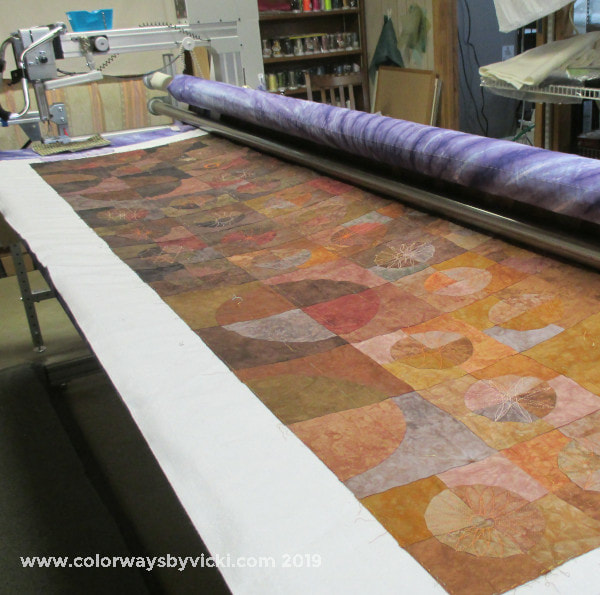
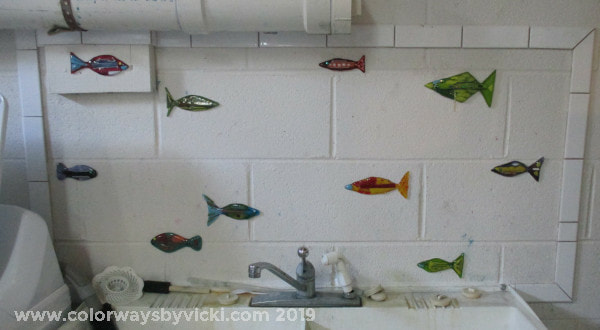
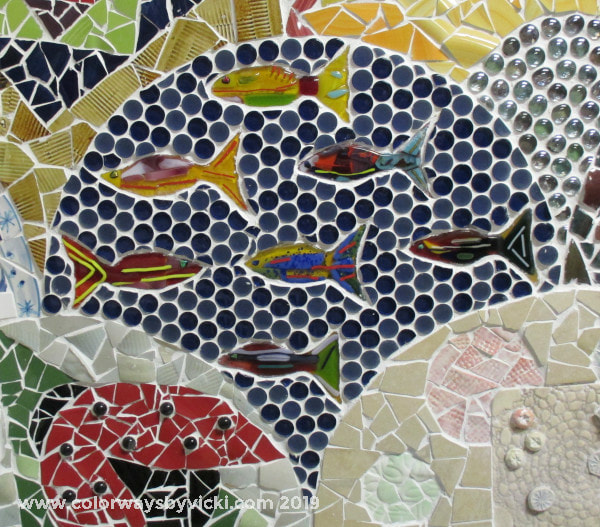
- wallpapering supplies that I haven't used in 20 years - a bag of PVC elbows left over from making ice dyeing screens - about 40 plastic containers with lids that Chris used to use for his painting business that he stopped doing about 2 years ago - homemade jam dated 2012! and loads of dust bunnies. I have to deep clean the basement once a year because we have a wood stove down there so even the floor gets mopped. I didn't even have the energy to carry these bags to the truck so I had to tell Chris that I had some "gifts" for him by the basement door. As you can imagine, he was incredibly grateful. Now that the dangerous products are away from the longarm I can start quilting again this week. I'm working on the second Blockade veterans quilt from the symmetry fabrics so I might put those on first for a quick win. I also have 2 quilt tops from Mom and the cat quilt will be done soon. At least that's the plan! I've had the grout to finish this mosaic for weeks now and have been putting off finishing it. Yesterday while contemplating what I could get finished by the end of the month this came to mind. The weather was nice so I could open all of the windows for ventilation. This is the backsplash behind my dye sink. The idea started with one of the sections on my Great Wall.All of the fish were made in my glass kiln using scrap bits of glass. The dots are glass penny tiles left over from my friend's bathroom remodel. I made a frame from ceramic bullnose tile.This time I bought pre-mixed grout and I'm not totally happy with it. When I grout the beaded wall I will purchase a different grout but this worked fine and I don't really care now that it's done! Here are a few close ups of some of the fish. It will be so nice to work here next week without the constant reminder that it needed to be finished. Now I can just enjoy it. Hallelujah! Another UFO dispatched!
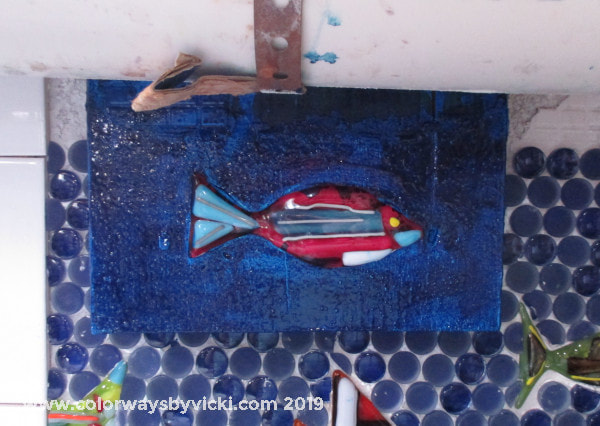
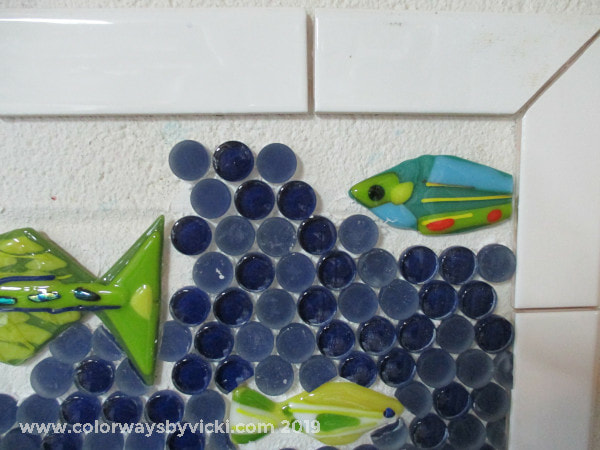
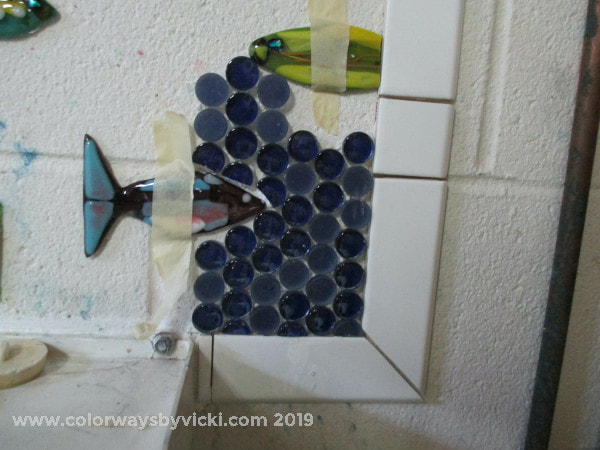
It's been over a month since I worked on this mosaic. You might remember that I got this far and realized that I was going to run out of blue glass penny tile. It took a lot of driving around town, but I finally found it and was able to order an extra sheet. It was NOT cheap but at this point I didn't care. Nothing else was going to work. I finally got back to it this week. It really didn't take that long to finish the blue penny tile. Just a couple of hours and it was done. I originally planned to tile over this block of wood (that I can't remove because it holds up the sewer pipe). But one day I decided that panting it would be so much easier and It worked out just fine. Then I was able to get my wet saw out and cut some time for the frame edge. I'm pretty darned pleased with my mitered corners. Here it is! Ready for grouting. I had hoped to do that soon but because the grout has VOCs I have to heave the windows open so that will wait until mid to late September when I can have the windows open for a few days. Compared to that bog wall, grouting this will be a piece of cake.
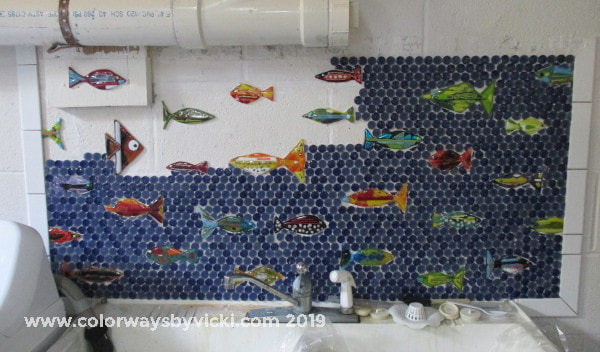
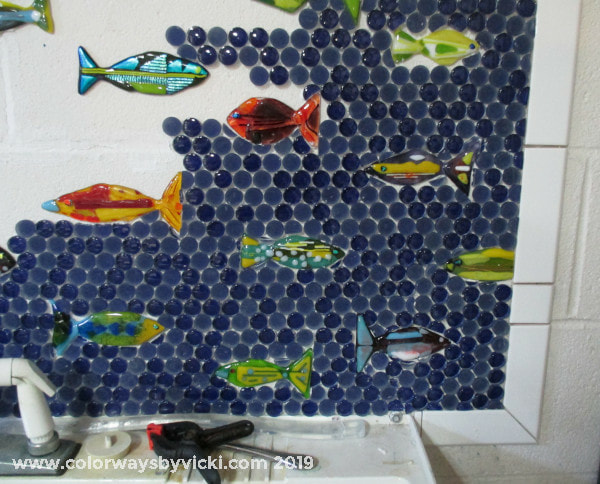
In between Spirograph quilting session I've been working on the fish backsplash a bit. I'm filling in the background with these round glass tiles that my friend gave me. Luckily I started at the bottom. About 3/4 up the right edge I realized that they might not fit perfectly inside my frame. I have a lot of cut tiles around the fish but I don't want a whole row of cut tiles at the top. When I set the frame I never even thought to check the size of the frame with the tile. But I can fix this. I have half a box of the frame tile so I just chiseled off the existing frame and I'll redo it after the water is done. I'll probably have to remove the right side too. No biggie. I'm just making sure that the top row of tile is level. You can see that the dots aren't going to line up perfectly in this and I'm cool with that too. There are some gaps and shifts int he pattern. It's pretty much impossible to keep everything straight around the fish and it actually gives a little movement to the water. More importantly this is a backsplash that's under a sewer pipe so how perfect does it really need to be?
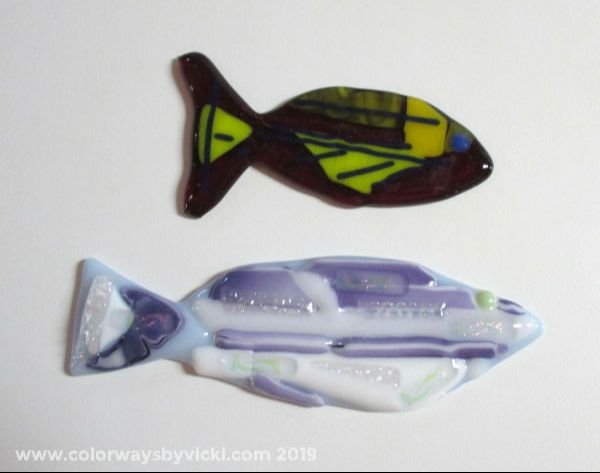
Don't worry, the fish will really stand out once it's grouted. They will all be outlined in white. I got the fish fused and I'm mostly thrilled with the results. These are my 2 favorites. These are all acceptable too. Yes, they are lumpy but the grouting process mostly smooths out the edges. These are the only two that I'm declaring as outright rejects. For me, that's a really good success ratio! I have a stack of reject fish from previous firings. I'll break these up and use them in a scrap project so they will not go to waste. The pale one is a reject because the fish will not stand out well against white grout. The dark one doesn't have enough interest although it could work in a pinch. Here are all of the fish stuck to the wall. I "baste" them up with tape until the mastic firms up. If you look on the right and left edges you can see how I used a few of the reject fish. Sometimes the body is OK so I can cut off the tail and have the fish swim in from the edge. In once case only the tail was salvageable and it's a really fine tail. I added some of the background just to see how it's going to look. I did straighten out that one partial tile near the fish nose. It was bugging me in the photo. You aren't really supposed to cut glass tile but this isn't in a shower so it will be OK. I'll have to wait for the fish to set up before I do any more. The blue glass tiles are from my friend's bathroom remodel. I love free materials!
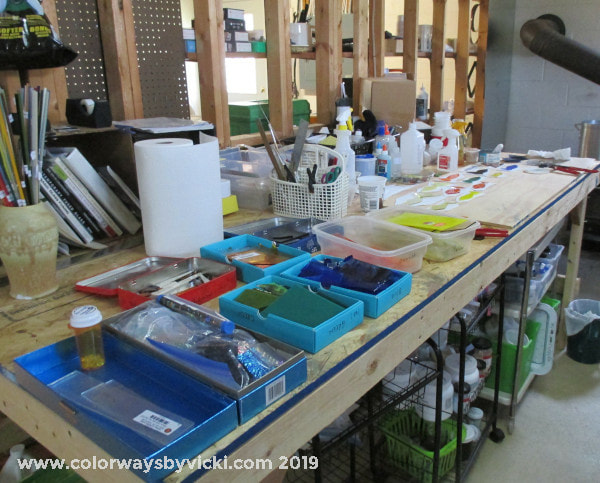
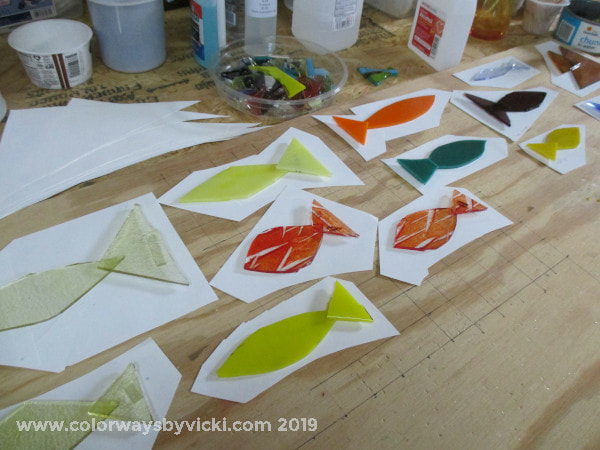
My goal is to have this done by the end of April so that I can grout both areas in May. In two sessions since Thursday I was able to get the wall finished. I really am getting too old to sit cross-legged on a concrete floor for hours at a time. But it's done! Of course, it's not DONE done, but the messy stuff is done and I was able to clean up around the longarm. I could put this back on the frame now that all the pottery bits are off the floor. Before I grout the wall I'm going to get the backsplash finished so I can grout both in a weekend. It's going to look like this. Both the wall and the backsplash are sponsored by my best friend's house remodel! The background tile from both came from her bathroom remodel project. I need to make more fish first and that meant most of Sunday spent clearing off the glass workbench. I haven't done any glass for about a year. I hurt my shoulder in May and then got caught up in dyeing 100 yards of fabric every week. The glass bench turned into a dumping ground covered in 17 layers of dust. Yes, this is cleaned up. The boxes of scrap glass are my materials for making new fish. Last night I got a bunch of fish bases cut out and glued together. They are ready for decorating now. Hopefully I'll get these in the kiln later this week.
It was a really good weekend! |
FeedsTo subscribe click the RSS Feed button and copy the URL of that page into your blog reader.
In Bloglovin you need to search "Colorways By Vicki Welsh" to find the blog. About Vicki
I'm Vicki Welsh and I've been making things as long as I can remember. I used to be a garment maker but transitioned to quilts about 20 years ago. Currently I'm into fabric dyeing, quilting, Zentangle, fabric postcards, fused glass and mosaic. I document my adventures here. Categories
All
Archives
July 2024
|


 RSS Feed