|
I haven't put one stitch in the postage stamp quilt yet but I kind of have good excuses. Tuesday I took Mom to Farmville to visit her former next door neighbor. The wife (a quilter) died a couple years ago and Mom made two quilts from her stash for her granddaughters. We went to deliver them, The husband was anxious for us to take more fabric back with us and I'll have that update at the end of this post. Yesterday was dyeing day and I dyed over 50 yards of fabric so I didn't do anything at all (except a little bit of crochet) before heading to bed. 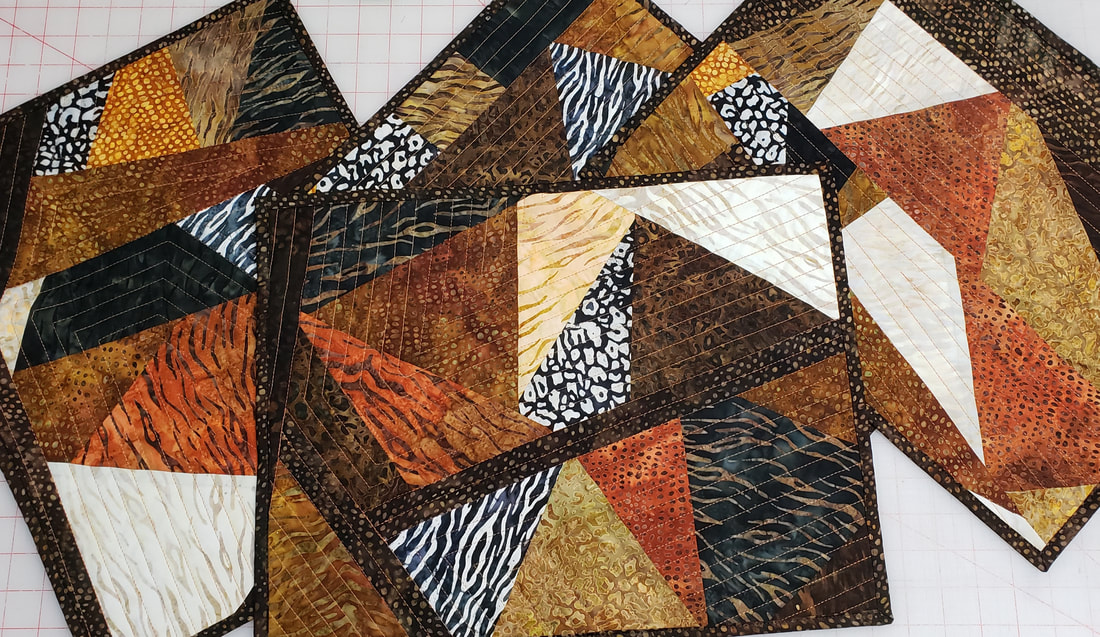 But, in little bits of time I got the 4 safari scrappy placemats done! I love making placemats from quilt scraps. It's a great way to use them, it's a nice memory of the quilt and I actually use them! These are made from the scraps of the Safari Quilt that I made for my SIL. I used the scraps whatever size they were and just pieced giant crumb blocks. I got 4 placemats out of the pile of scraps. 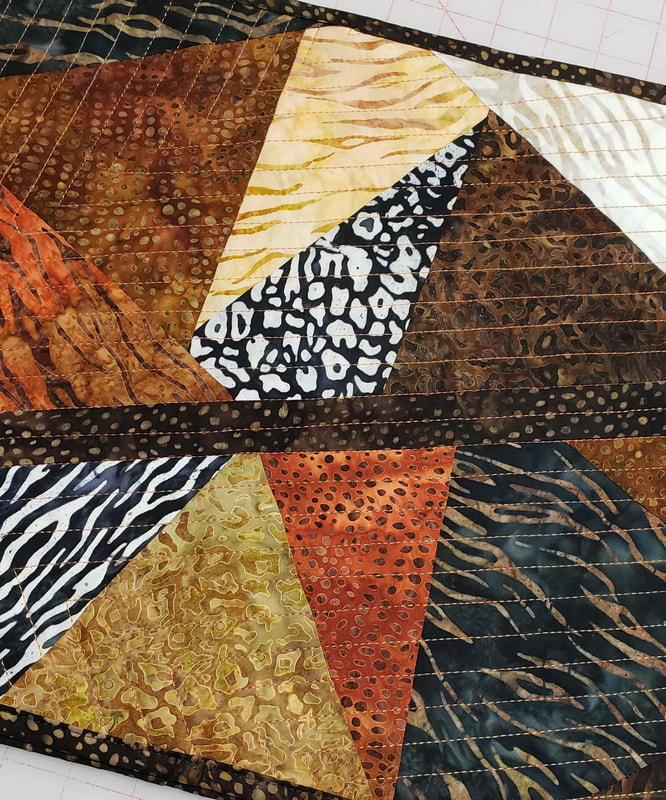 I've mentioned before that I use old (clean, of course) flannel sheets as my batting so that they don't wad up too bad in the washer and dryer. I like quilting them pretty heavily too as another way to control them getting out of shape. For these I did lines 1/2" apart, more or less. While I was quilting them I was thinking about what color to dye napkins and I couldn't stop thinking about the possibility of shibori dyeing them. 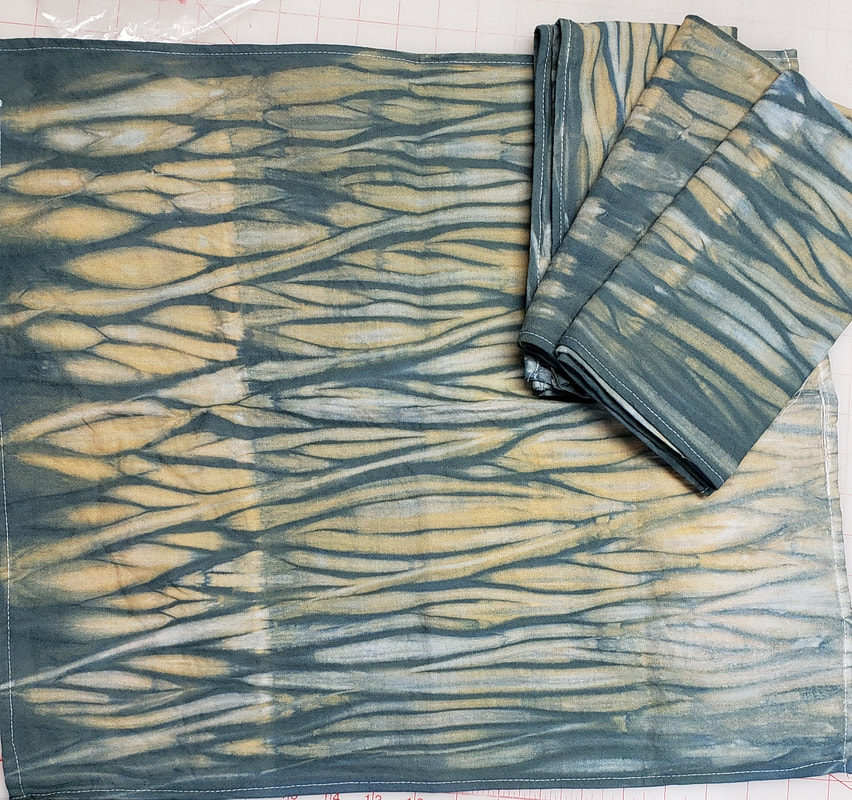 Well, imagine my surprise to find that I can shibori dye napkins! These turned out much better than I expected. 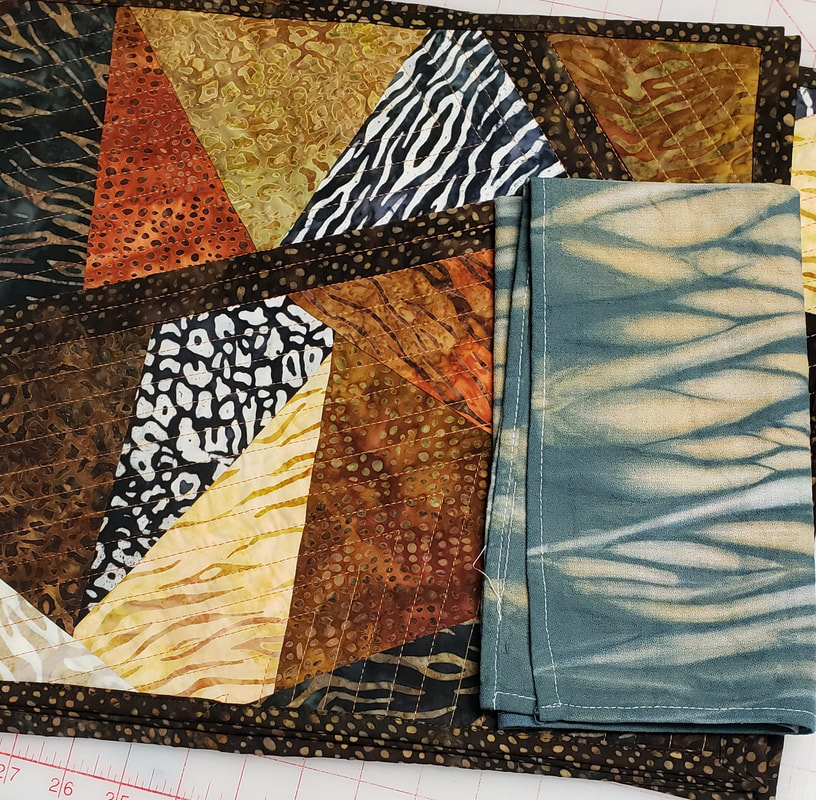 They don't match the placemats on color but they do match in spirit so I'm keeping them. The reason that they don't match in color is that my color recipes don't work for immersion dyeing. They work perfectly for the low water immersion dyeing that I developed them for, but they don't translate to immersion. In my normal dyeing that blue/gray would be a deep chocolate brown. There will be more shibori napkins in my future. Some dyed with clamped designs would be really cool. Next time I might dye the napkins first and then pull fabrics to match but that would kind of defeat the "use scraps" purpose of placemats. Quite a dilemma. 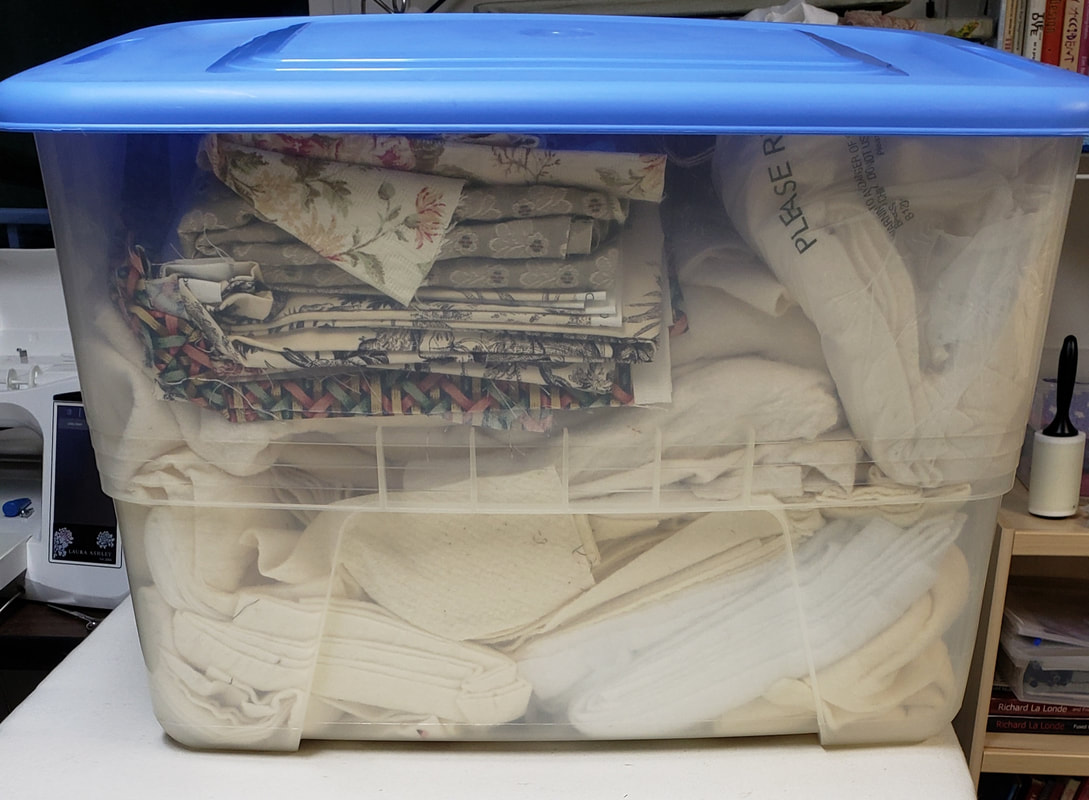 So, back to the Farmville visit. Mom's friend really wanted us to take a lot of fabric and supplies. Mom did take a bag of mostly batiks but I don't really do much with commercial fabrics and I don't like to take things that I am not sure I can use. But I did clear out a small drawer of heavy weight fabric scraps to use for walker caddies or dog beds and I took this bin of batting scraps. If the scraps are big I'll piece them together for small quilts or I'll chop it all up for dog beds. He was very happy to have a little spot on a shelf emptied out.
 If you read my book reviews you might remember that I mentioned that I read The Art of Invisibility and consider it the most important book that I've read this year. I decided that all of my friends are getting it for Christmas this year. Maybe a few of them will actually read it! But just in case they are disappointed with the book I thought it might be a good idea to wrap it in something hand made.....or at least dyed. That something turned out to be tea towels. The photo above is how I folded them.  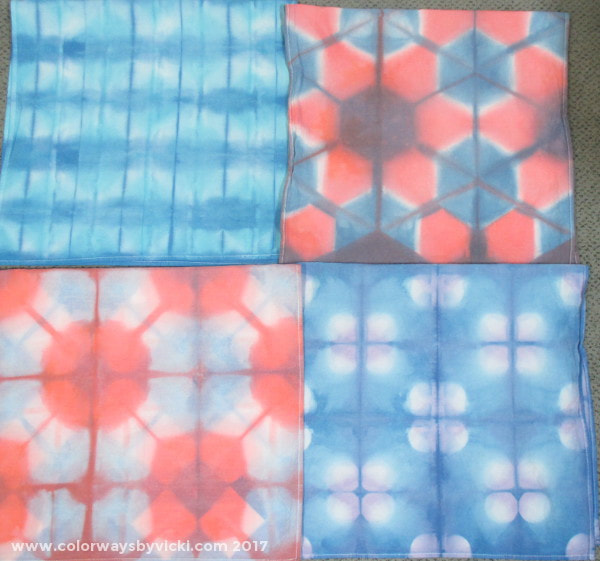 Well, after the first dye I thought they were kind of bland so I refolded, clamped and dyed them again. I like them much better now!  I wrapped them around the books to be the wrapping paper. They are tied with the string that I use in shibori dyeing. Ahhh, what synergy! 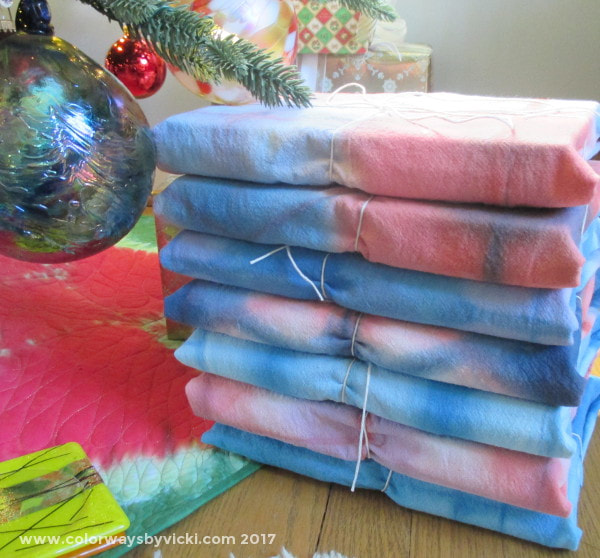 Here they are wrapped and ready for last night's delivery. At least I know they like and will use the towels!
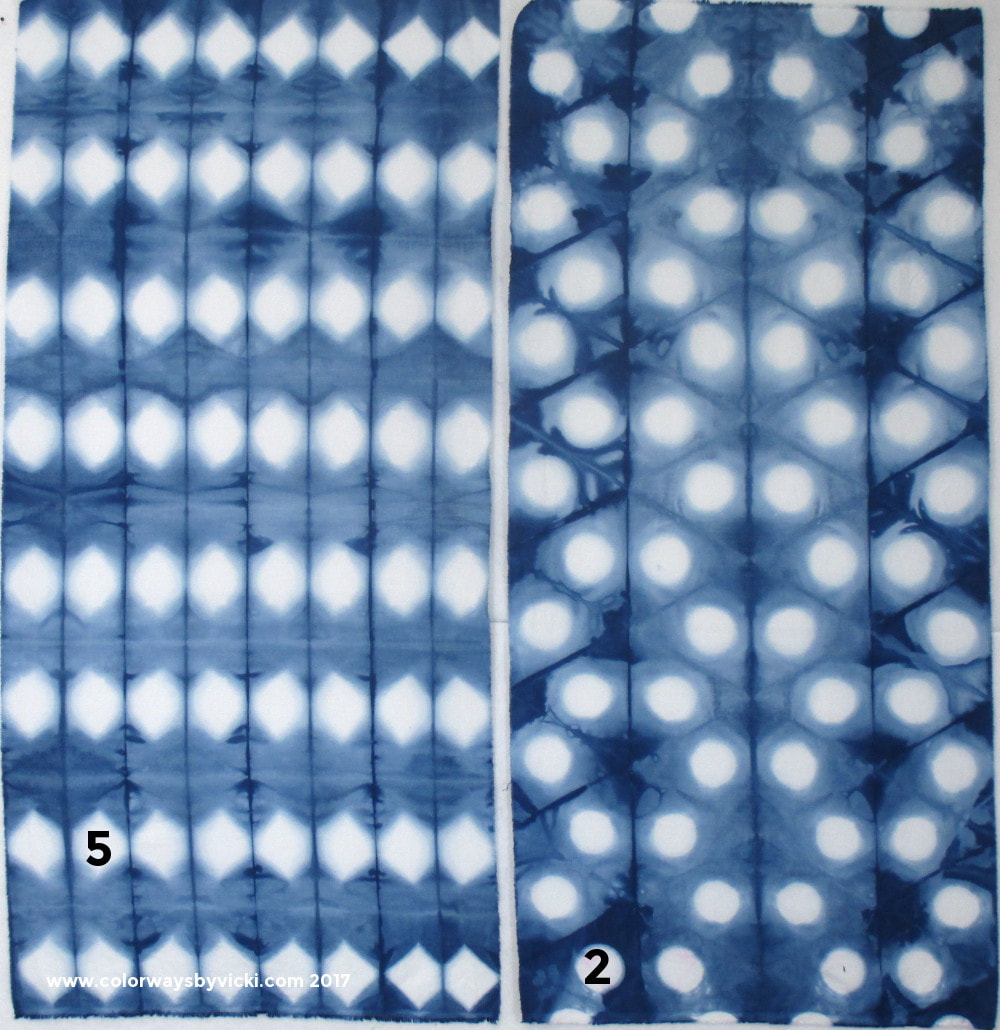 While I was dyeing my stitched shibori I decided to dye some folded and clamped pieces. I figures that some day I will want to make something with the stitched pieces and figured that I might want some clamped pieces in the final piece. 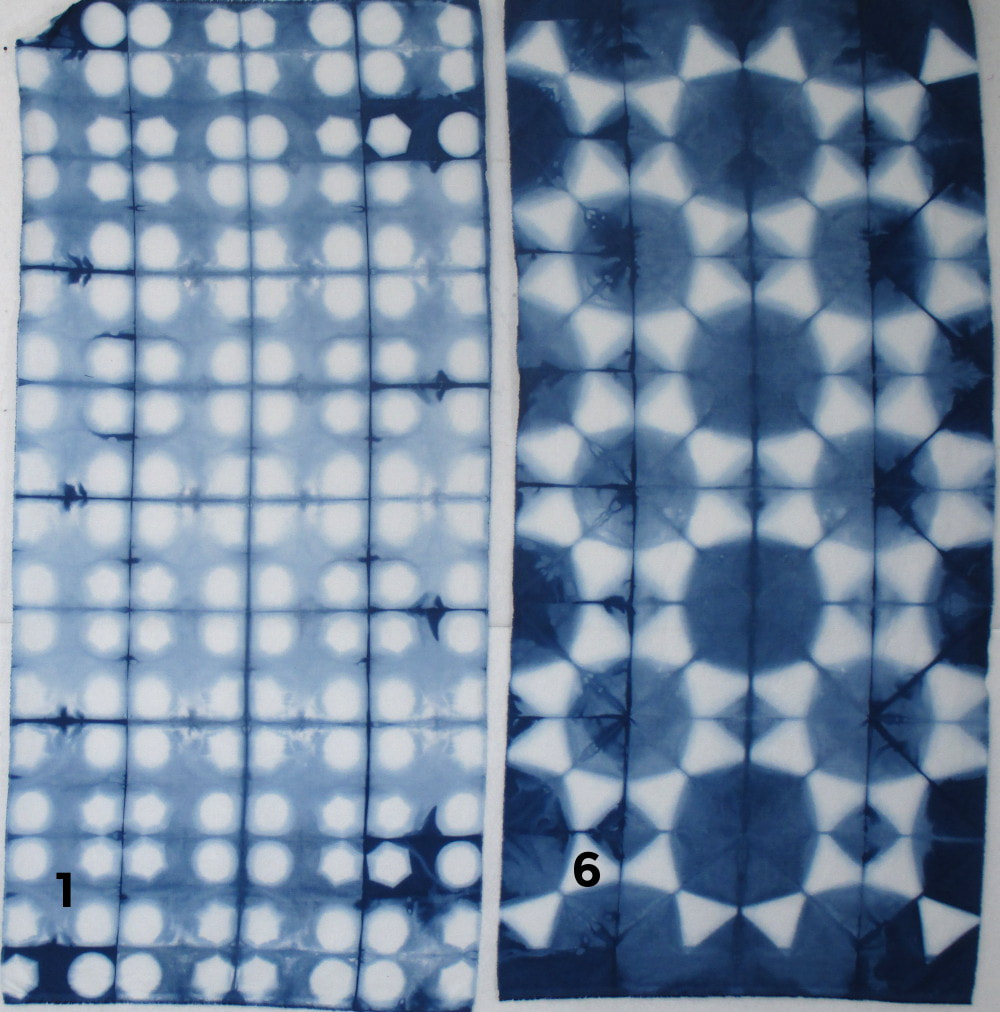 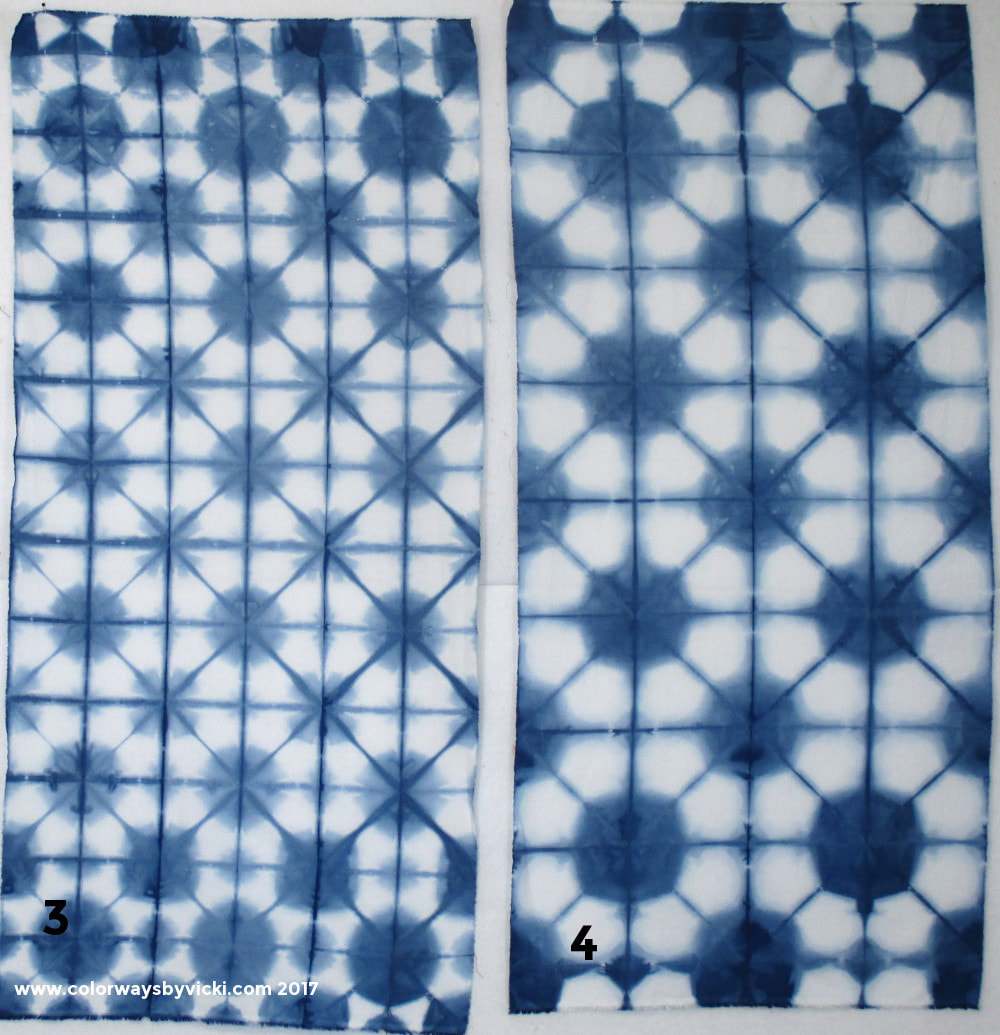 As I was ironing these I decided that I needed some lighter values to contrast against the dark stitched pieces so I see doing some others in light blue. 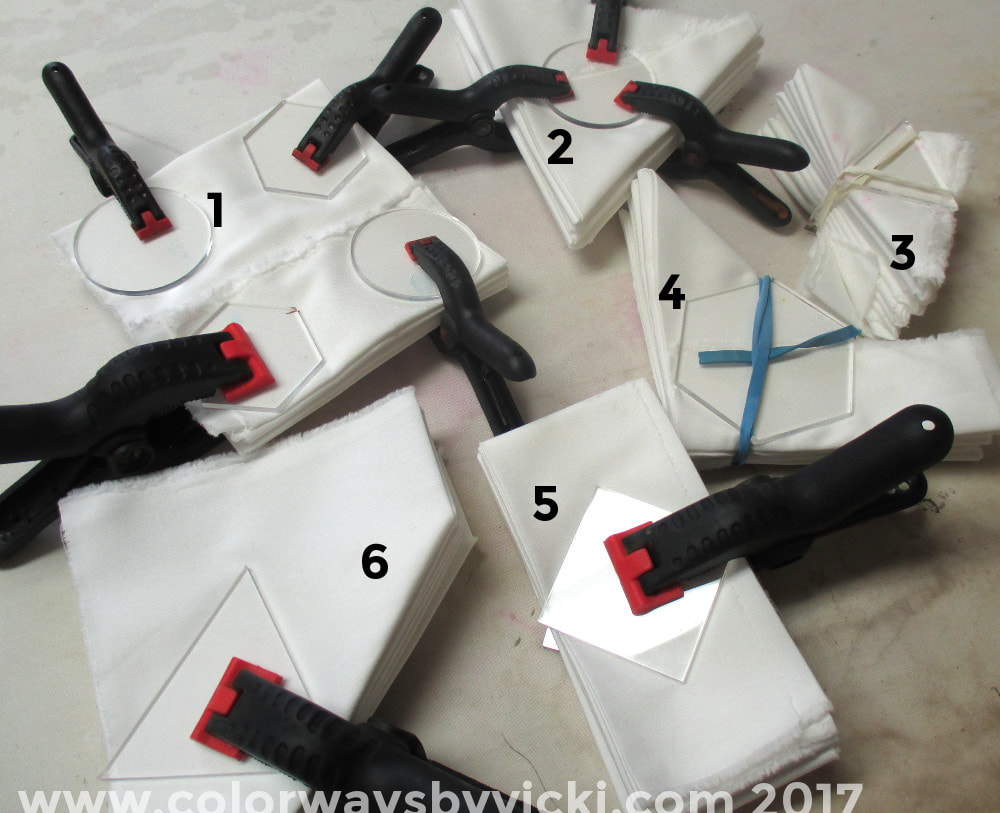 Here's how each looked clamped so you can match them up. I replaced the #4 broken rubber band before I dyed the fabrics!
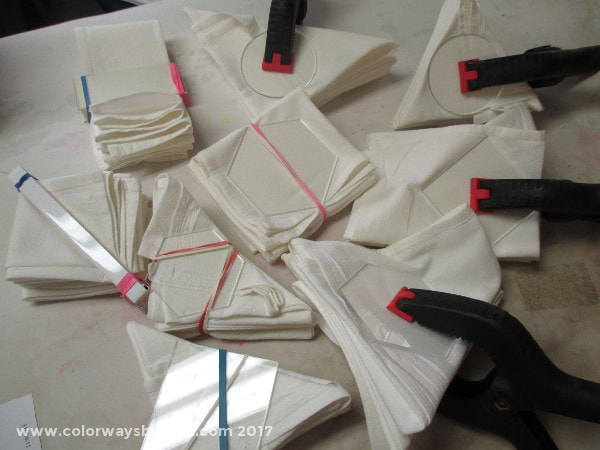
 Way back in August I mentioned a new project to work through this book to practice stitched shibori. I took the book on vacation and stitched several pieces during the drive. Since then I've been distracted by other projects (like those darned beaded ornaments). Now that the ornaments are done I'm ready to get back to this and the first step was to dye the stuff that I stitched in August. 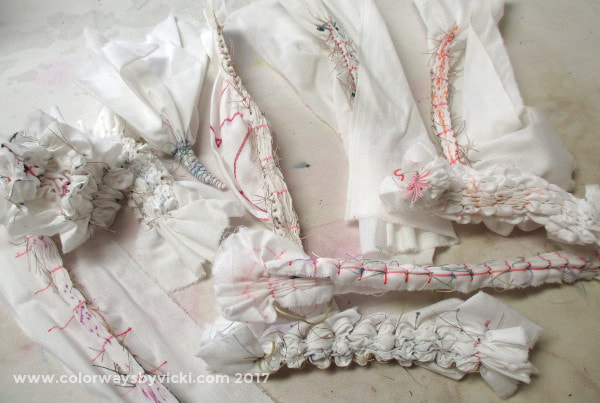 Here they are before dyeing and you are welcome to try to match them up with the finished pieces but I'm not sure that I could even do that! The stitching step takes up to 2 hours for each piece. 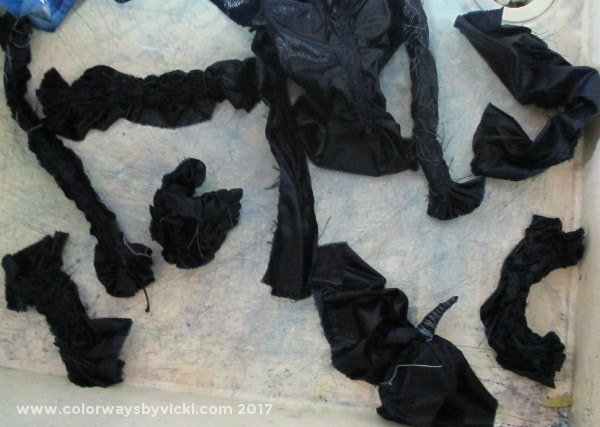 The down side of stitched shibori is removing the stitching after it's dyed. The fabric is still wet and you have to be careful not to cut the fabric. It took about an hour and a half to remove the stitching in all of these pieces. This is why you can never profitably sell stitched shibori pieces. 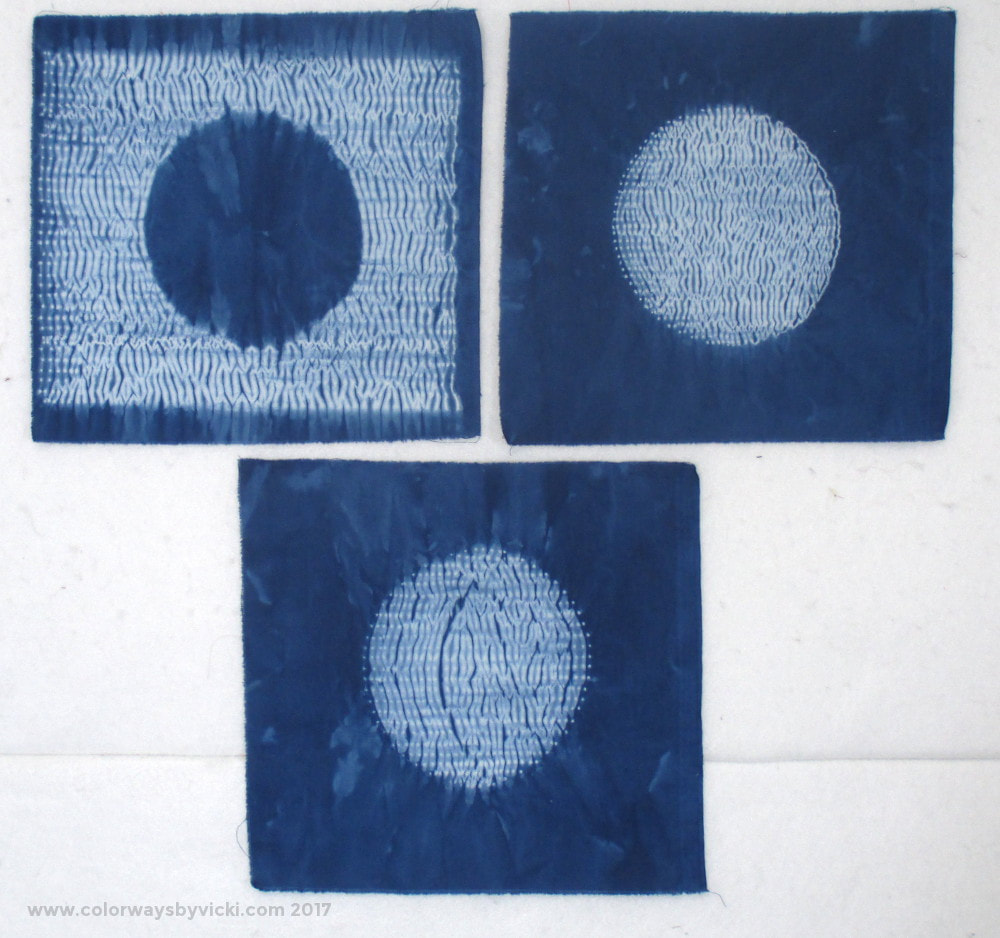 Some of the pieces will be done again until I get them right. The top 2 moons are perfect but the bottom one didn't turn out quite right. That gap is supposed to go from edge to edge so I'll do another of these. I also need to be more attentive in my dyeing and swish the fabrics around more. If I had done that the center of the top left moon would be more solid.  Both of these turned out exactly like I wanted. 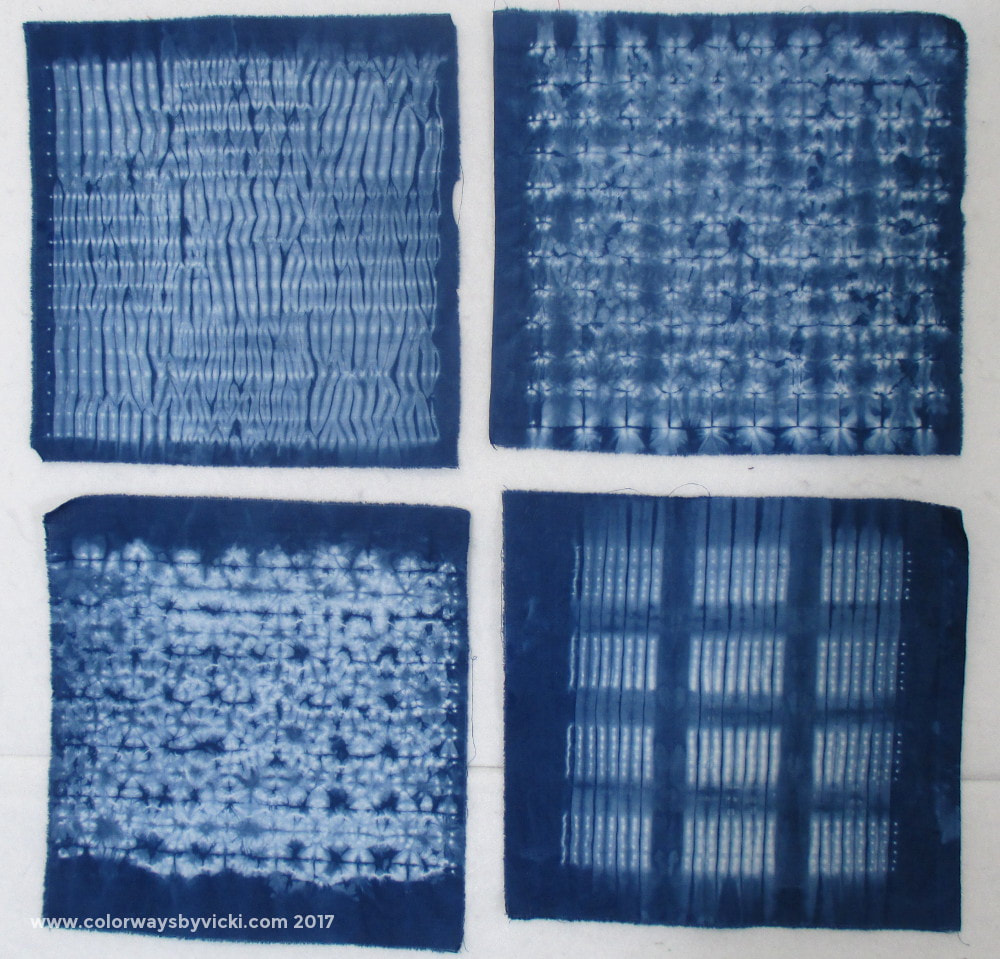 The only one in this group that I'm really happy with is the bottom right. The stitching was fine in the other 3 but I would have had better effects with the rows of stitching spread further apart. I'll do them again.
Now the rejects aren't really "rejects". I'll use them in a project sometime along the way. But I want to make my pieces look like the pieces in the book and I'm not even past chapter 1 yet! 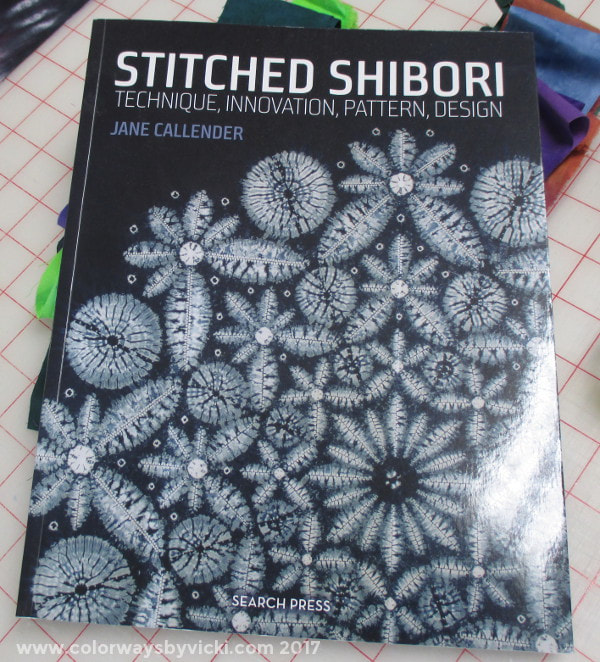 A couple of years ago I had another shibori book that I used to make a lot of samples of shibori fabric. You can see them all in my shibori gallery. It was a very good exercise and I've never pressured myself to do anything with those pieces. It was all about the learning. Earlier this year this book came out. I believe that most books that are published in the craft arena are pretty much crap but this one is outstanding. So I'm going to start a new personal sibori series and this one will focus on all stitched motifs. I think I'll take a chapter a month and do as many pieces as I can. You are welcome to stitch and dye along with me. If you think you want to do this but don't want to dye them contact me and we can work out something where I can dye your pieces for you. Let me give you a peek into the book so you can see if you want to buy it to work through it yourself. 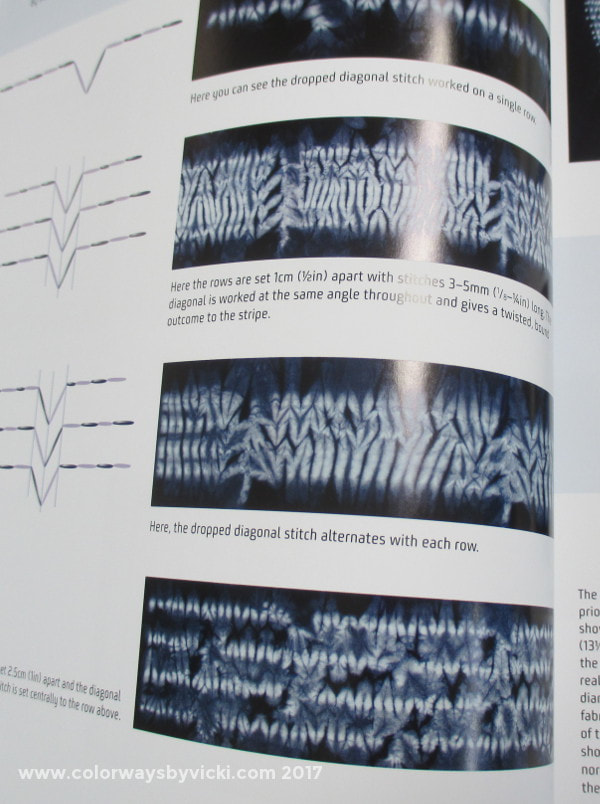 There's single layer stitching. 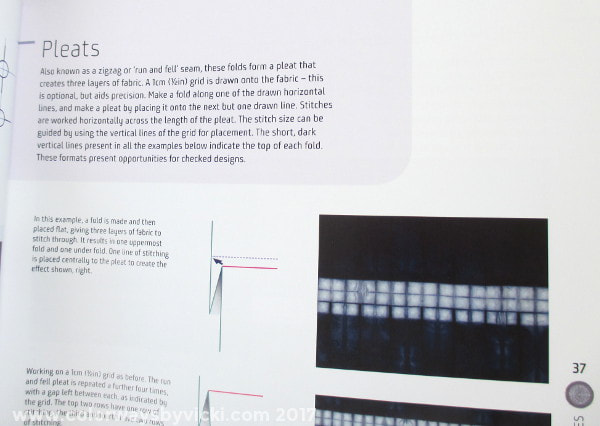 Pleating techniques 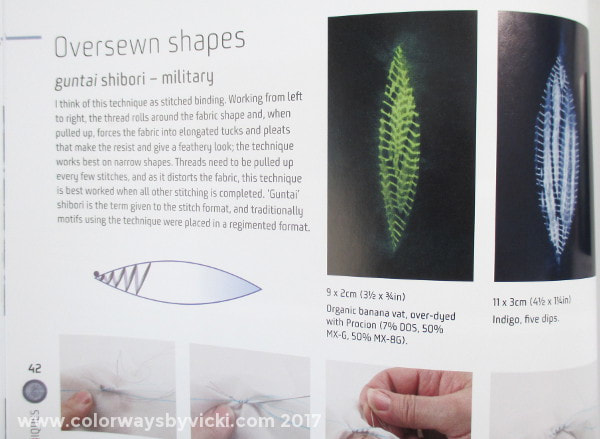 Shapes 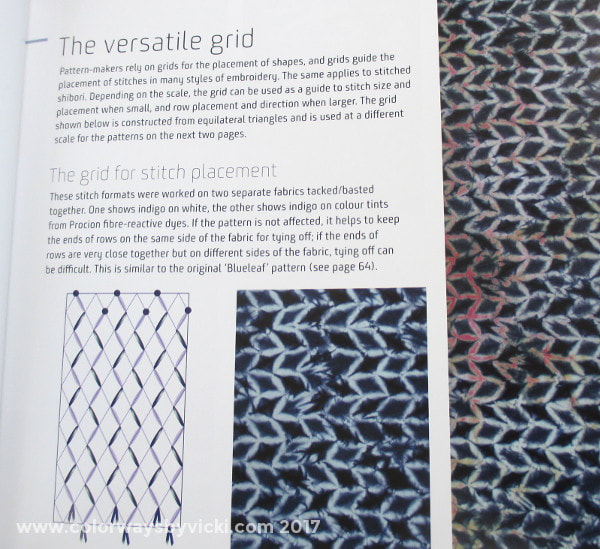 Grid patterns 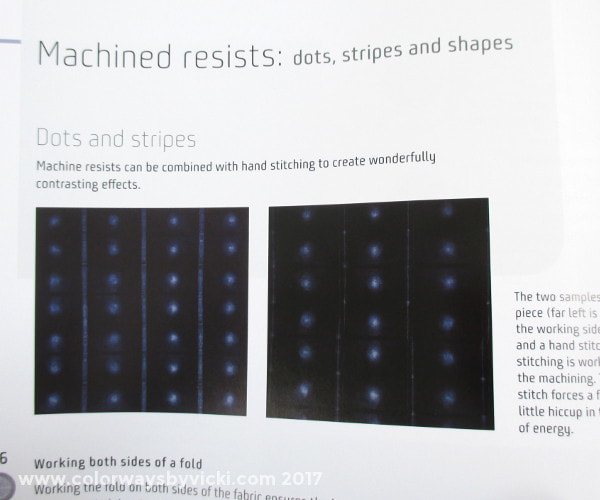 Machine stitched resists and tons more. In the book that I used before the designs were mostly historical and traditional designs and most were out of my skill set. This book is different. Jane Callender gives very detailed instructions and I've already learned some great techniques that I didn't grasp before.  I took the book and some fabrics on vacation the past 2 weeks and got started on some stitching. It was great work for the 14 hour card drive in each direction. Now I have to figure out if I want to dye them traditional blue (like the last set I made) or go in a different direction. Meanwhile I'll keep stitching and will try to show progress at least once a month.
|
FeedsTo subscribe click the RSS Feed button and copy the URL of that page into your blog reader.
In Bloglovin you need to search "Colorways By Vicki Welsh" to find the blog. About Vicki
I'm Vicki Welsh and I've been making things as long as I can remember. I used to be a garment maker but transitioned to quilts about 20 years ago. Currently I'm into fabric dyeing, quilting, Zentangle, fabric postcards, fused glass and mosaic. I document my adventures here. Categories
All
Archives
July 2024
|
 RSS Feed