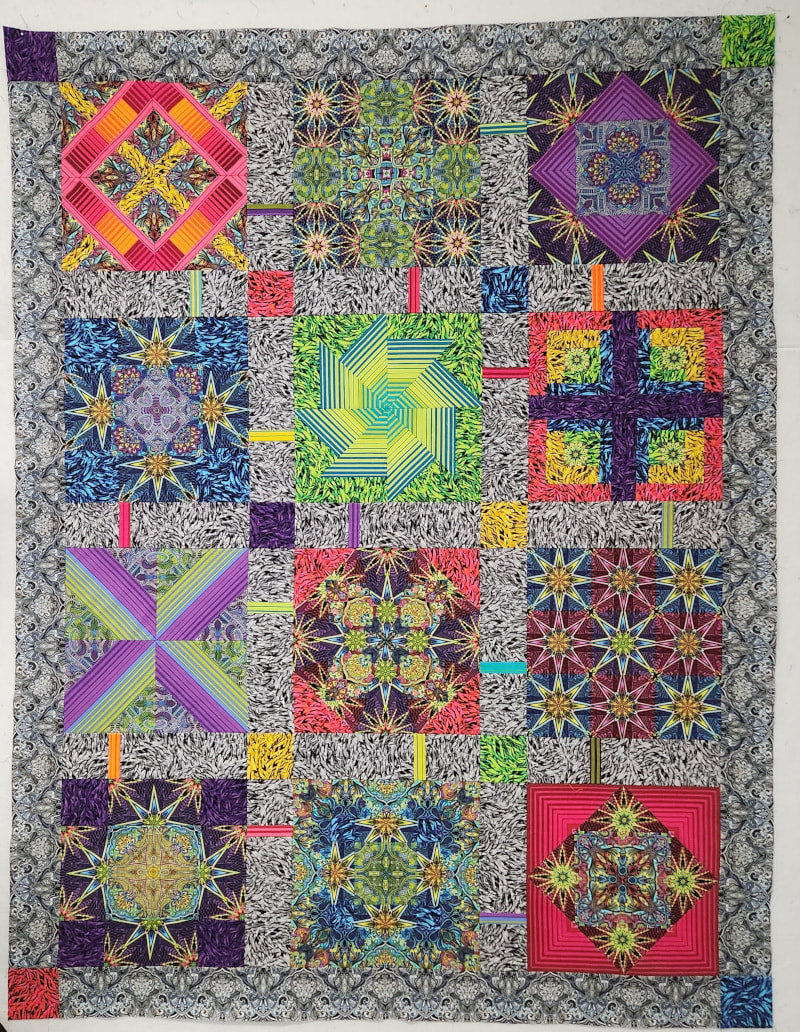
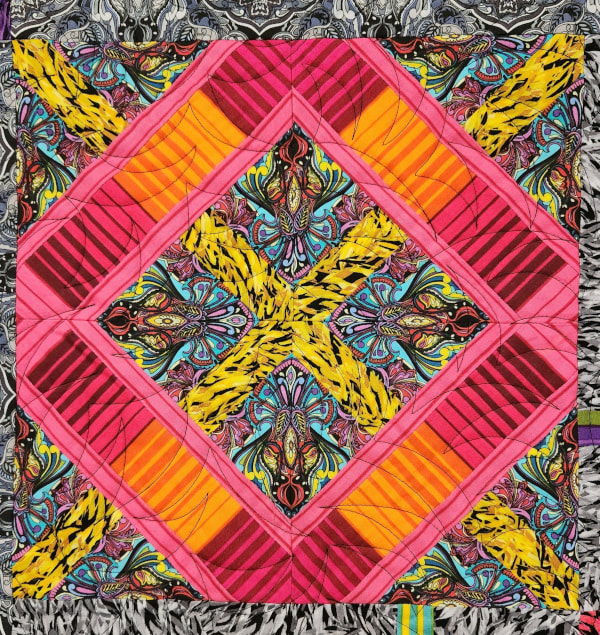
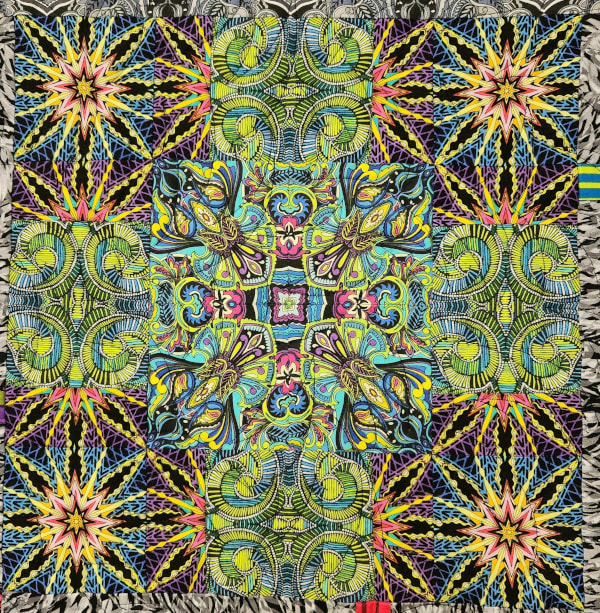
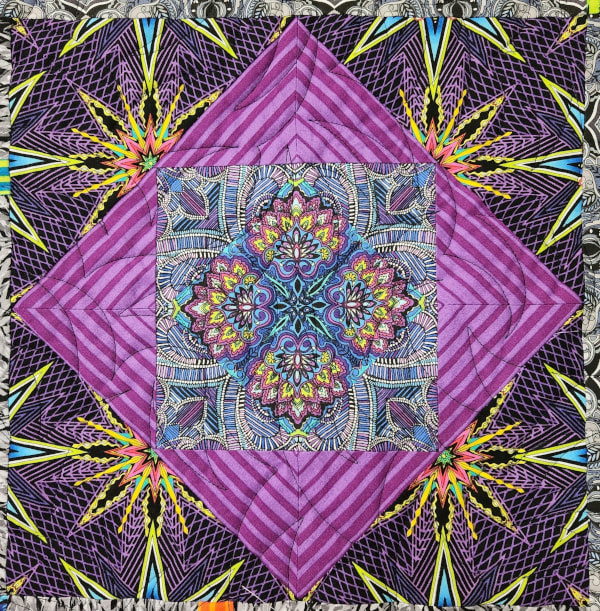
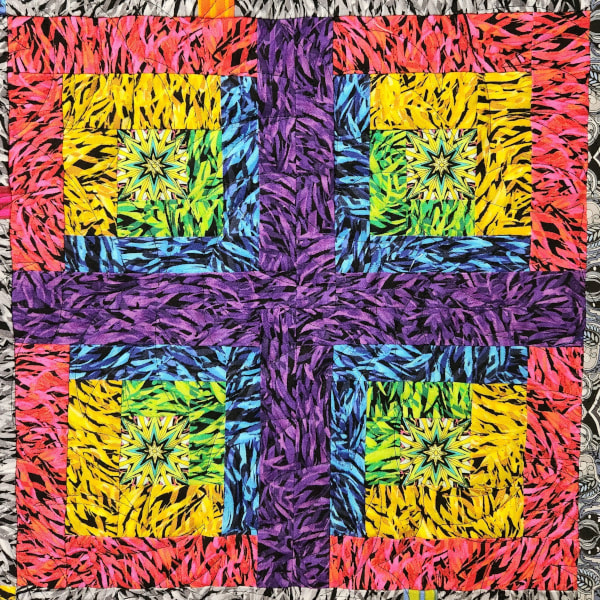
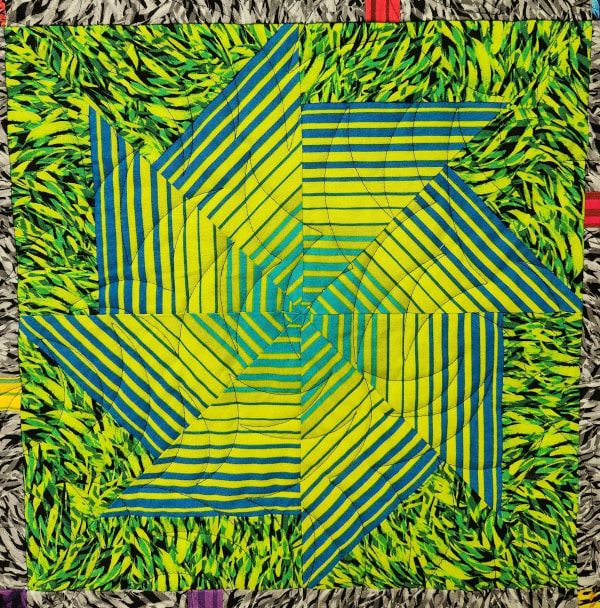
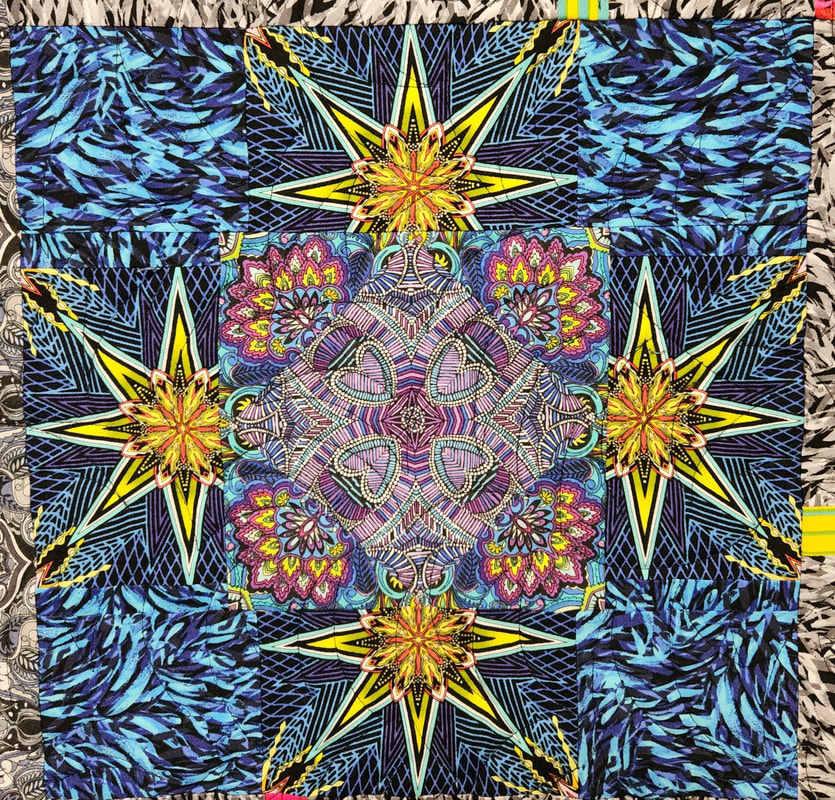
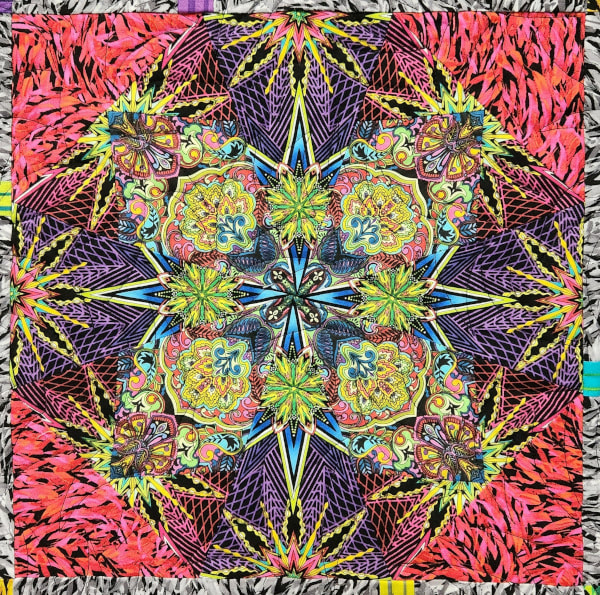
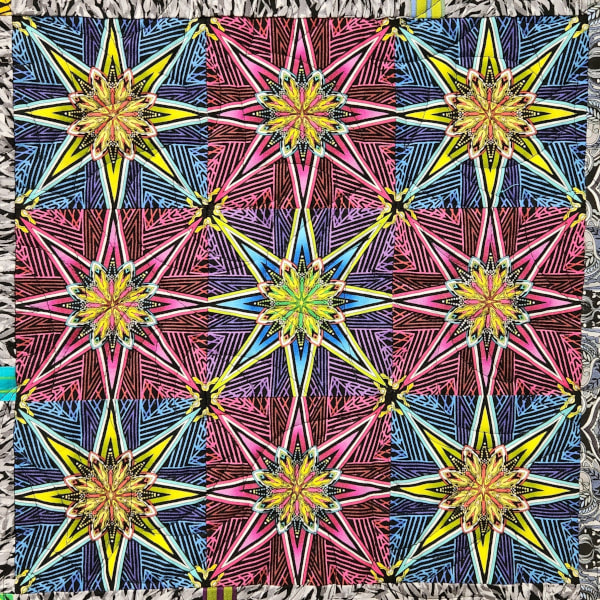
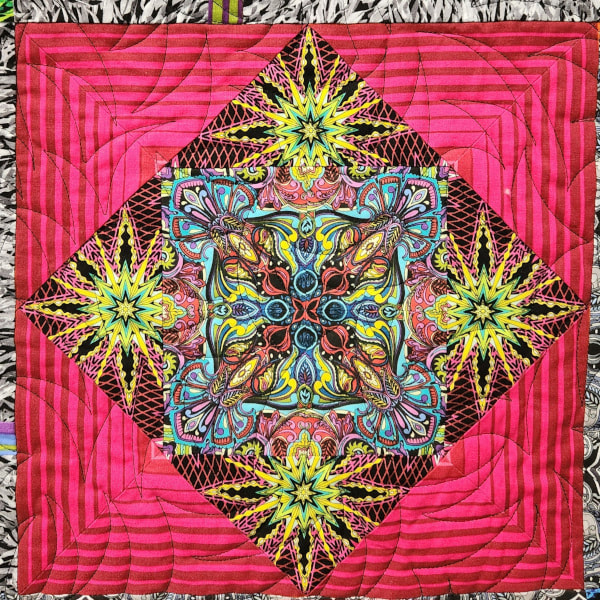
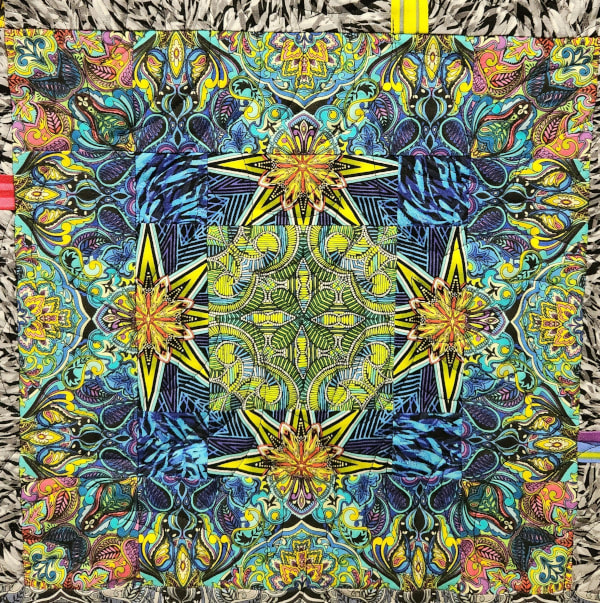
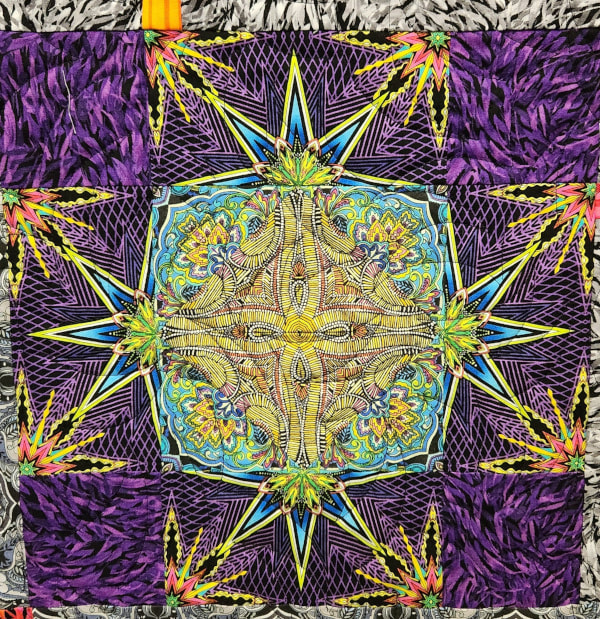
 A Little of Everything, 48 x 60 I got permission to share my "Paula" quilt this week! Here's the backstory: I don't buy many commercial fabrics but I buy most of the fabrics designed by Paula Nadelstern. I fell in love with her symmetry fabrics when I took a class from her sometime around 2008. For many years now she has invited me and a few other quilters to make samples from her new fabric line. We used to have to make 36" square wall quilts but now we can make whatever we want. I choose to make 48 x 60 quilts that can become veterans quilts. The fabric line this year is called "What If" and you can see all of the fabrics here. I was particularly excited to see the stripes this time and I plan to stock up on them when the fabrics arrive in stores in the Spring. I hope you have a few minutes to check out the Virtual Fabric Show to see the other quilts that were made. Go to the 35:05 mark to see Paula's section. The other quilts are really fabulous! There's one by Peggy True that I want to make. Hint: it's not the applique wreath! I was on a really tight timeline for my quilt so it had to be simple with 12 blocks and some sashing. My only goal was to use a little of every fabric in the line. I'm quite happy with the way it turned out. You can look at each of the blocks in detail by clicking on them. If you look close you will see that they are all very simple. The fabric does all of the work. 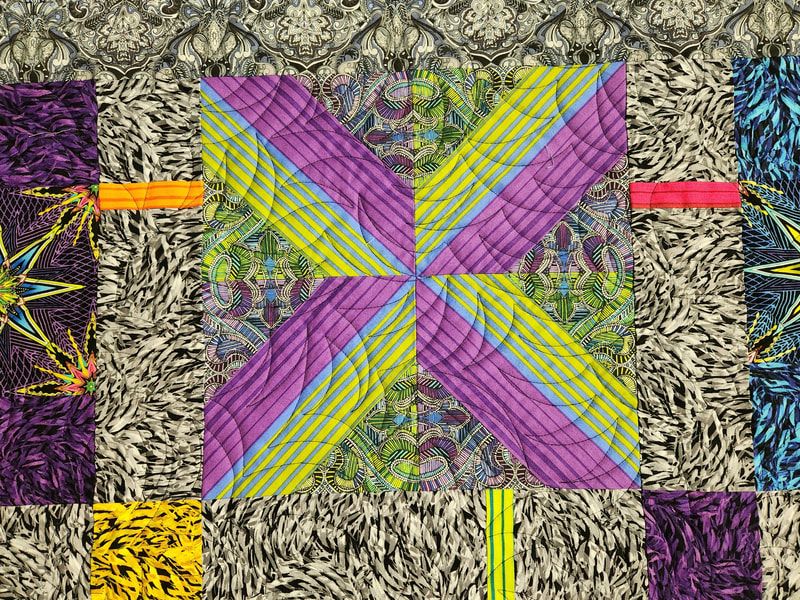 I decided to use the two grayscale fabrics for the sashing and border but felt it needed a little extra. That "extra" came with stripe inserts in the sashing.
When it came time for quilting I was down to the wire so it got a quick overall design. 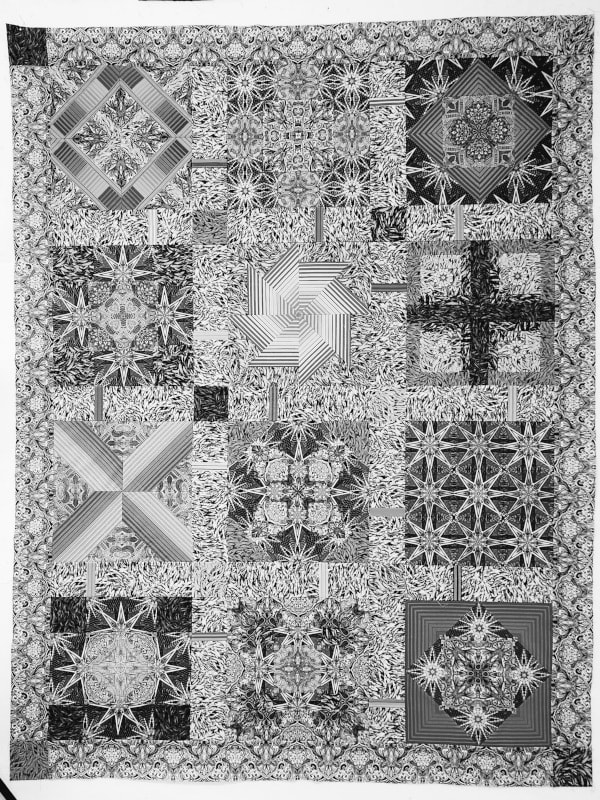 I don't have a newsletter today because I didn't get to do any dyeing last week so today I'm sharing the progress on the Paula quilt. I got it pieced this weekend and quilted yesterday! All I have left is the binding, a sleeve and a label. I might get it bound today after my dentist appointment and some errands. I can't wait to show you this in full color in early November because it's bright! The sashing and border are gray prints but everything else is very bright. This will eventually be a quilt to be donated to the veterans hospital so when I quilted it I used the backing and batting that our quilt club purchases and I needed another quilt to tp pair it with. 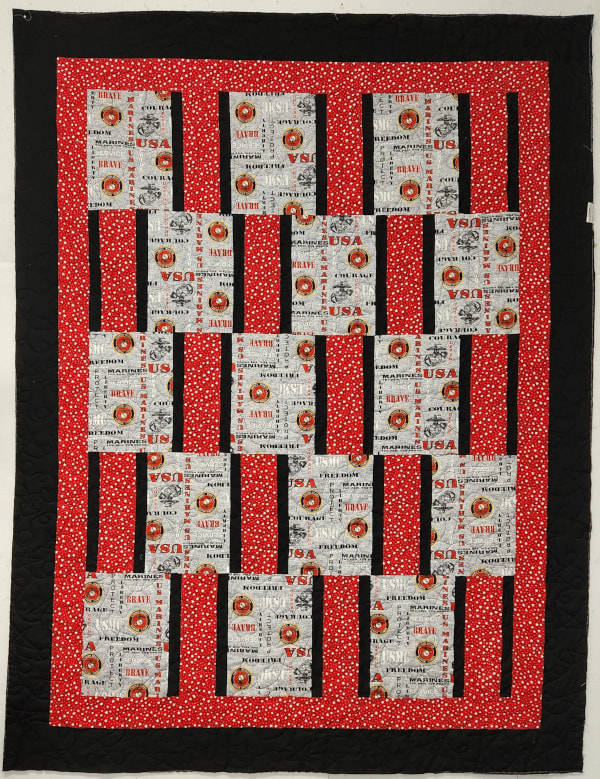 I was using a gray backing and black thread and Gwendolyn's quilt fit perfectly.
So, at least I've finished one thing! 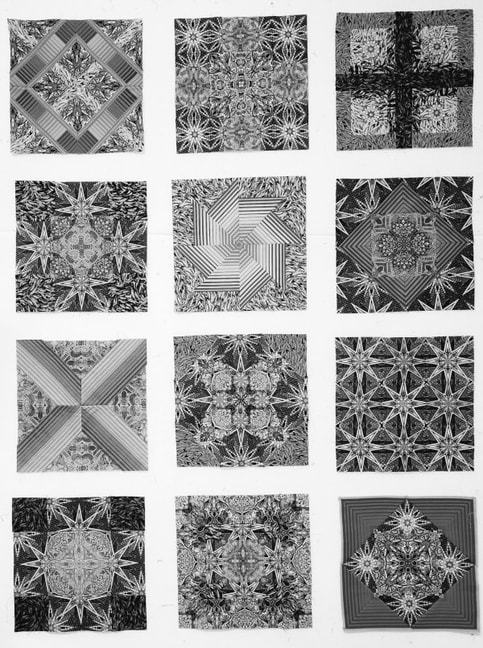 Hallelujah! The 3 newest are on the top row. Now onto the sashing and border.
That's all I have to show for my time the last 2 days. 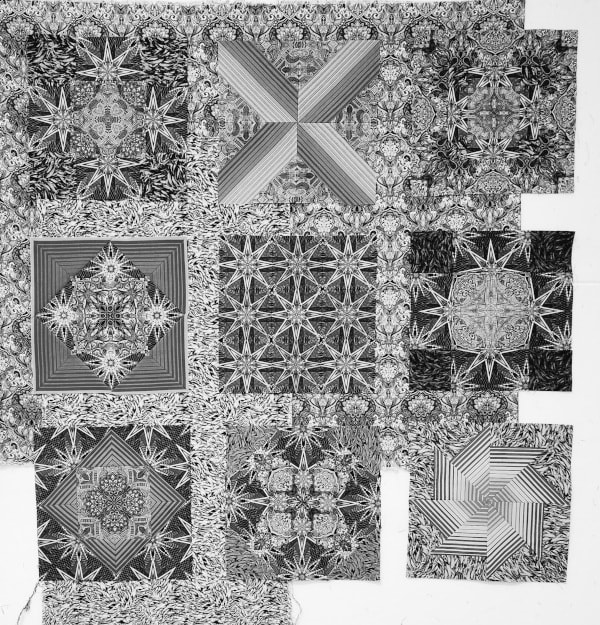 I was hoping to get all of my "paula"blocks done this weekend but I came up 3 short. I ended up spending a good chunk of Saturday dyeing 7 quilt backs for veterans quilts. But I did get 9 of them done and I'm really happy with how they are looking. #10 is underway.
I've got a newsletter to write today and will go visit my friend's new puppy so I might not make progress on these again until Wednesday. I still want to have the top together by Sunday and I think that's totally doable. 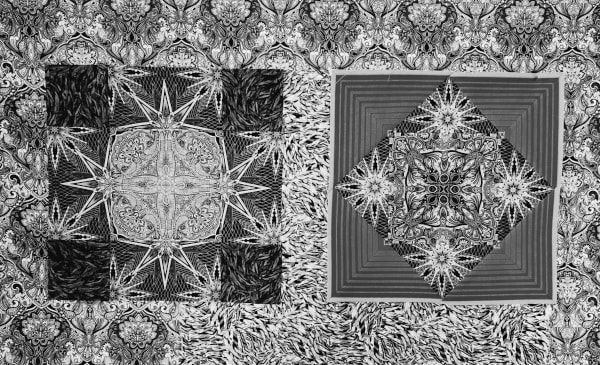 I'm usually a big time procrastinator when it comes to the annual Paula Nadelstern quilt but this year I don't have time for that. I decided on a traditional layout with 3 x 4 blocks and some sashing and a border. I will make this to eventually be a veterans quilt.
Yesterday I had a little warm up session and got 2 blocks made. I can't show you the fabrics in color but I figure black and white might be OK.What are they going to do? Fire me from a volunteer job? I'm happy with my first 2 blocks and hope to get all 12 made by Sunday evening. I was totally heads down this weekend to get my second "Paula" quilt done. 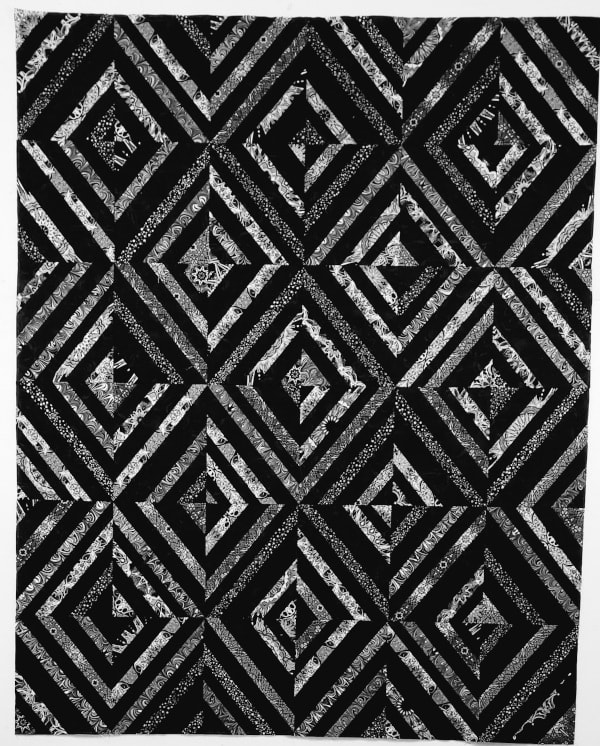 My goal this year with Paula's fabrics was to design quilts that didn't require a lot of cumbersome fussy cutting. That aspect of using these fabrics turns some people off. So I wanted to show that these fabrics are really special no matter how they are used. They really do sparkle and I can't wait to share them in color with you. Both of my quilts will be veterans quilts and I will do more just like this one. It was fast and easy but has a huge impact.  My other goal was to get the stitching done on my postcards. One day I stitched the moon and the next day I did the star. 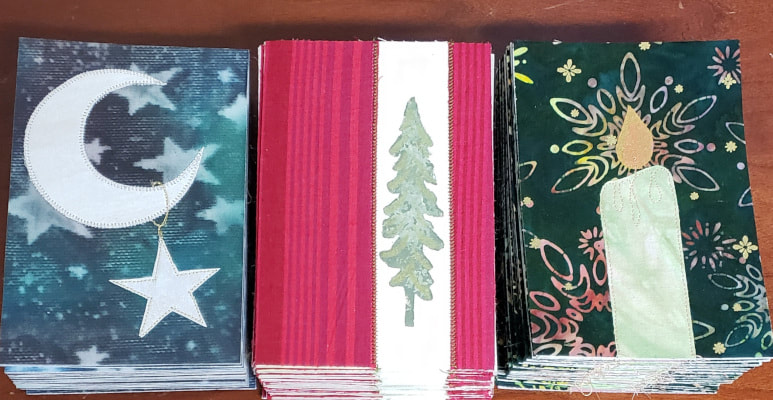 All three designs are through the steps to do stitching. I have to add the backs, serge the edges and add a few embellishments to finish them off. All of those things will be pretty fast to get done this week. My goal each year is to have the Christmas cards in the mail by December 10 and I should be able to do that. 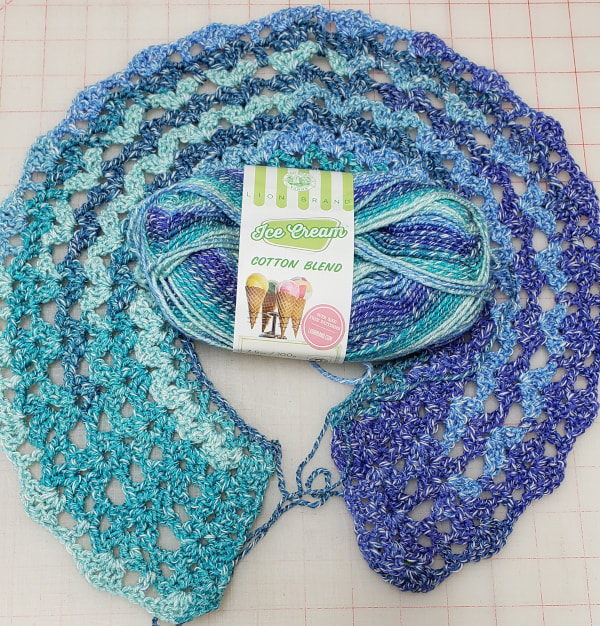 There was plenty of football to watch and I get my second scarf with this yarn started.
This week I've got to get caught up on my actual business and spend a day putting up the Christmas decorations. I also want to finish the postcards and get those out of the way. Then I have to come up with a gift for my girlfriends and get those made by December 9. After the 10th I should have the rest of December free to relax and enjoy the holiday.  Well, I had a post ready for Monday and I suppose that I forgot to schedule it. It's out of date now so I'll just jump in to where I am at the moment. Working on the Paula Nadlestern quilts each year are a challenge for me. It's a challenge that I like because it really pushes me. It's really difficult for me to 1) work with a limited group of fabrics and 2) try to estimate which ones I will use and how much I need by just seeing an image of the fabric. Every year I plan my quilts, order my fabric, receive the fabric and realize that my plans won't work. This year I made it a little more difficult on myself by deciding to make larger quilts that I can use for veterans quilts. In the past we were limited to 36" square quilts because they were sent in and displayed in Houston. Now they are being advertised in a lookbook so we can make whatever we want. I don't have a need or use for 36" square quilts so I'm happy to be able to make lap size quilts. Here's where I am on the first one. Paula likes for us to keep the pattern simple so that we can include block and quilt layout diagrams in the advertising material. That worked out really good for this quilt because I didn't order enough fo the star point fabric to make something like an Ohio Star block. I've gotten the blocks done and will work on the on-point setting and triangle border blocks tomorrow between some Thanksgiving preparations. For the second quilt, I've worked through a couple of failed design ideas but something fun came to me yesterday and I'm excited to get to it this weekend. 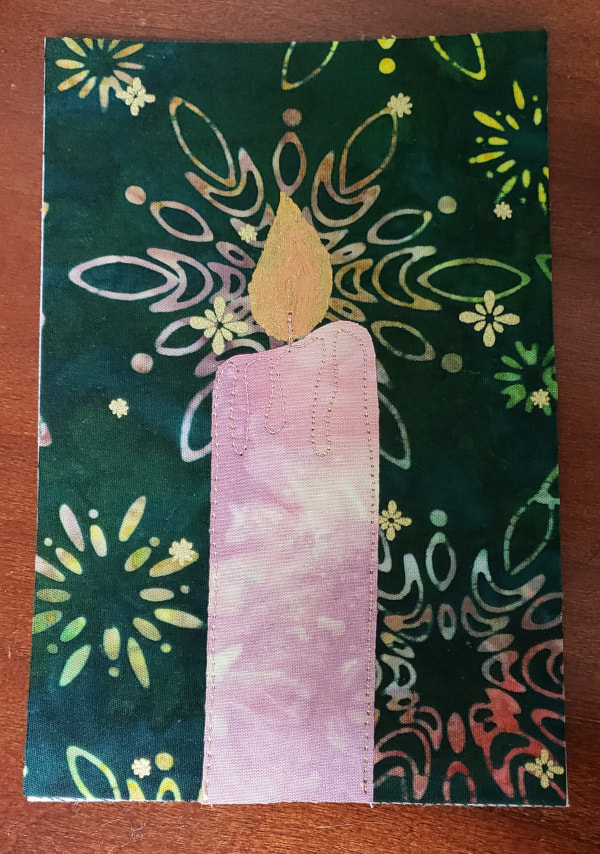 I'm also trying to spend a little time each day (only about a half hour) to do some of the stitching on my Christmas postcards. If I can get the stitching done by December 1 I will only have the backs, edges and extra bling to get done and that will only take a day.
This design too several iterations and samples but now I have 30 of them through the stitching phase. The background fabric is a batik that I purchased in Maine this summer. I knew that I wanted to use it for postcards and I knew that I would fussy cut it so that a star motif would be a focal point. I have a finished crochet project to share Thursday or Friday and hopefully the first finished quilt top to share by Friday. 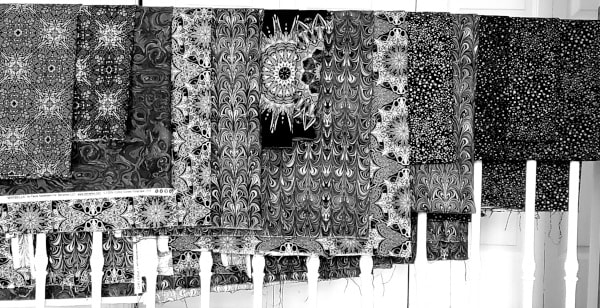 Laura left us today. We had a great visit and already miss her but she wants to get home to her family, especially the 3 grandkids. Today I will get back in the sewing room working on the Christmas postcards and my annual sample quilts for Paula Nadelstern. I've been given permission to share my progress with black and white photos. Here are the fabrics all washed and ready to cut. I'm excited to work with them.
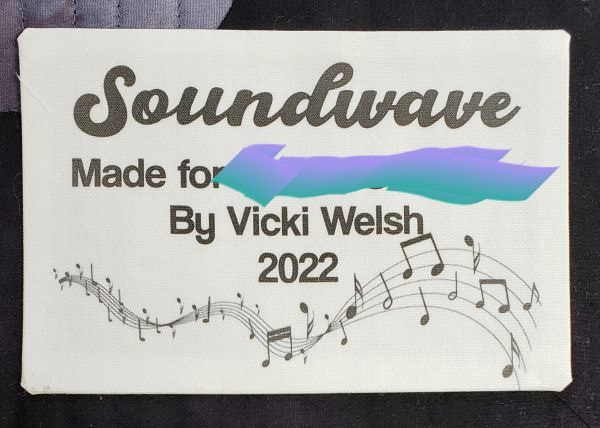
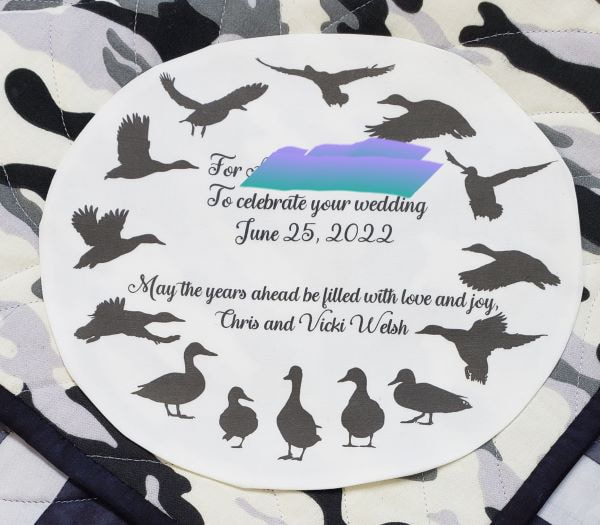
Updates to come! 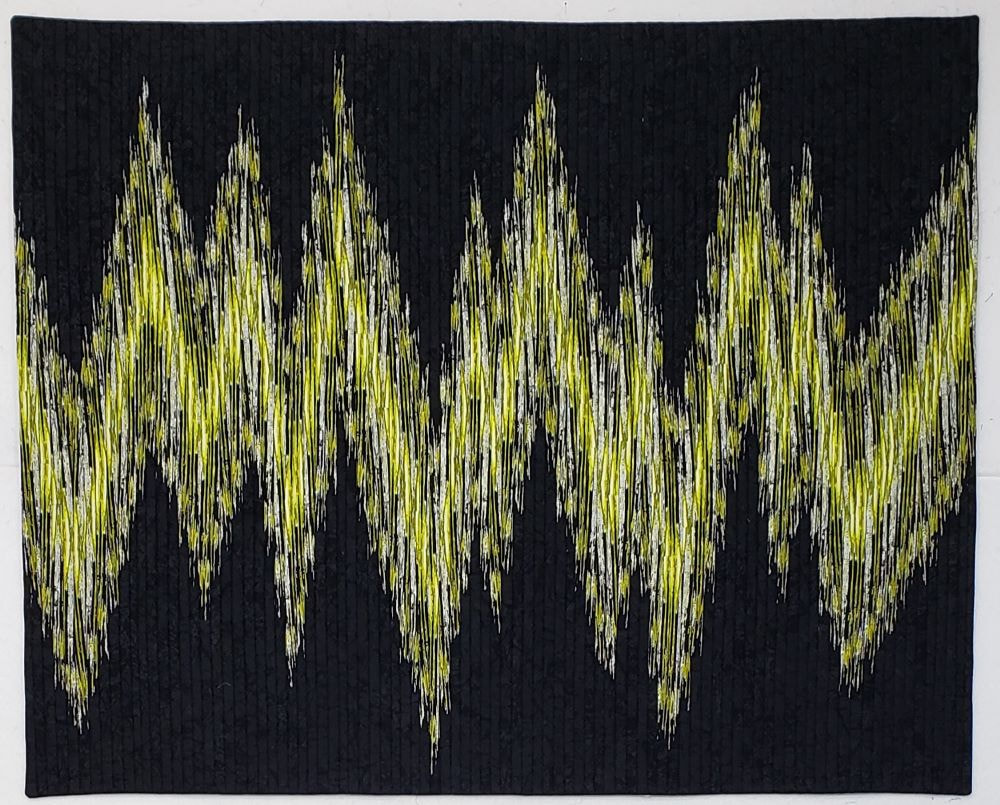 Soundwave 45 x 36 I consulted with a couple of my local art quilt friends and we all decided on option 2 for the orientation. I think my nephew is going to like it. I'm really pleased with the way it turned out and I even had time to make the label for this and the wedding quilt. You can click on the image to go to the page with the details of this quilt.
To make the labels I downloaded fonts for each and downloaded the music bar image and the duck frame. They were all from sites where I could make donations to "purchase".  I even had some time to work on my scrappy HST veterans quilt.
Today will be all bout baking and packing for the trip. I have to prepare a lot of my foods for travel so that my week will be relaxed. Don't forget to stop here every day next week to enter the Beach Week Giveaways! 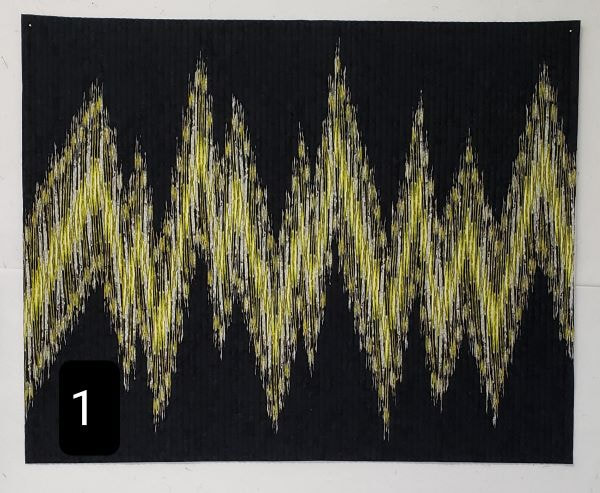 The top is done and trimmed! It's ready for getting a facing and hanging sleeve today. I cut around 100 strips and used all but one of them! But once I got it off I actually trimmed a few strips off the left side.(on view 1). 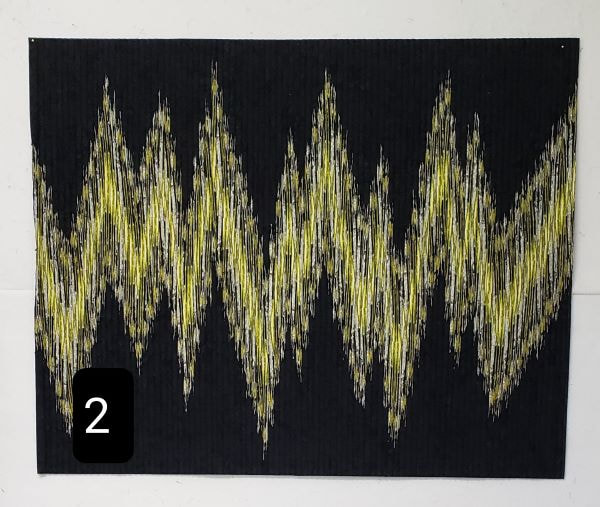 I planned the orientation one particular way but now that it's off I'm reconsidering. I have to decide before the sleeve goes on.
Which is your favorite? |
FeedsTo subscribe click the RSS Feed button and copy the URL of that page into your blog reader.
In Bloglovin you need to search "Colorways By Vicki Welsh" to find the blog. About Vicki
I'm Vicki Welsh and I've been making things as long as I can remember. I used to be a garment maker but transitioned to quilts about 20 years ago. Currently I'm into fabric dyeing, quilting, Zentangle, fabric postcards, fused glass and mosaic. I document my adventures here. Categories
All
Archives
July 2024
|

 RSS Feed