|
Work has resumed in our kitchen with the partial installation of the countertops. The bar top was measured wrong so it's being remade and should be here next week. Meanwhile we will march forward and have the backsplash tile done this weekend. By next weekend we should be back in business! Meanwhile I know that Spring is coming because our Airbnb activity has picked up. I had 2 guests this week and I give them fabric postcards. My stash of cards is dwindling so it was time to get busy and make more. It was also the perfect thing to do while the kitchen work was going on yesterday. 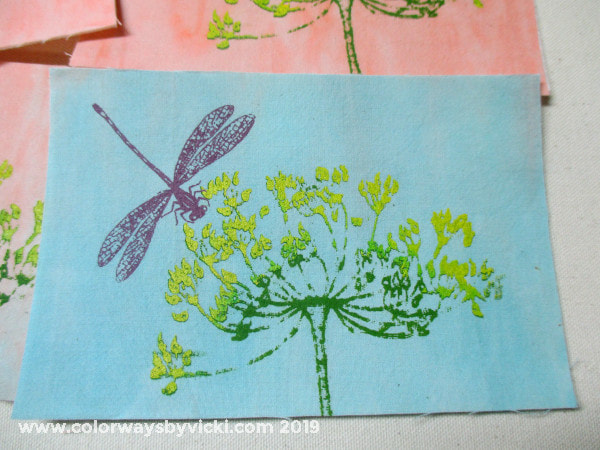 I have stacks of postcard size pieces that I have sunprinted and screen printed and this is one of my favorites. 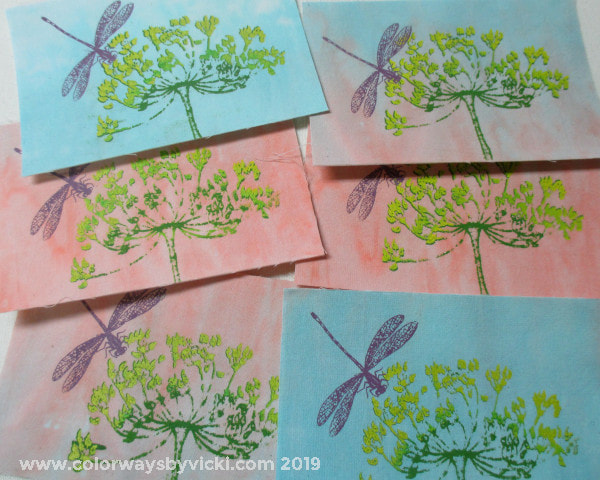 I printed these on a waste fabric from my Southwest Gradient.The dandelion was screened twice, once in dark green and then the tips in bright green. After that dried I added the purple dragonfly. I had not done anything with these because I couldn't figure out what kind of stitching to add. 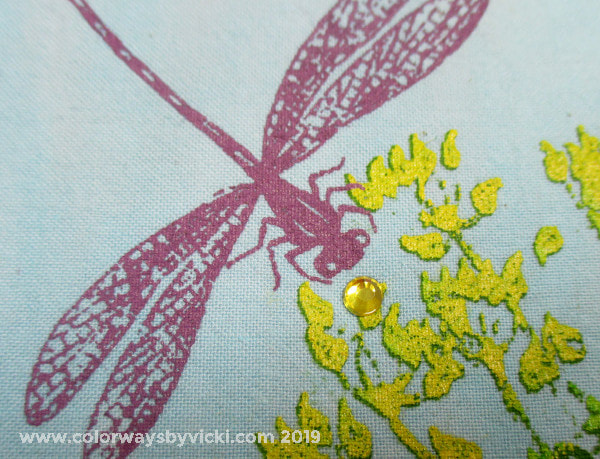 It took me long enough but it finally hit me that it didn't need stitching at all. One little crystal was just enough. 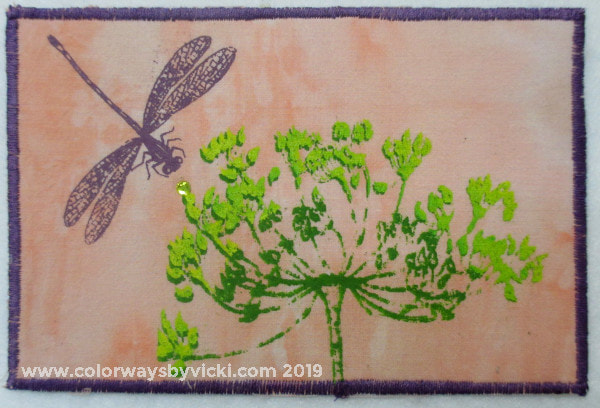 A purple edge, to match the dragonfly, finished it off perfectly. 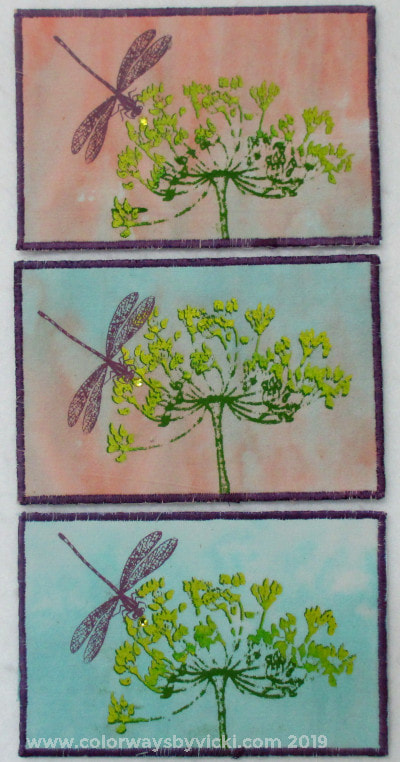 I made 7 of these and they are the first cards of 2019.
By now you know that I'm a little obsessed with Spirograph motifs. When one of my customers told me about Wild Gears, the adult Spirograph, I was all in! I immediately bought a set for my best friend for Christmas and then a week ago I borrowed them from her. After one day of playing I went ahead and ordered her a new set because I have gears spread all over my cutting table and I don't know if I'll get them all organized again.  I'm just starting to figure out what I can do with them but they have some really cool features. They have odd shaped wheels (squared, triangles and ovals) and lots of sizes of rings. 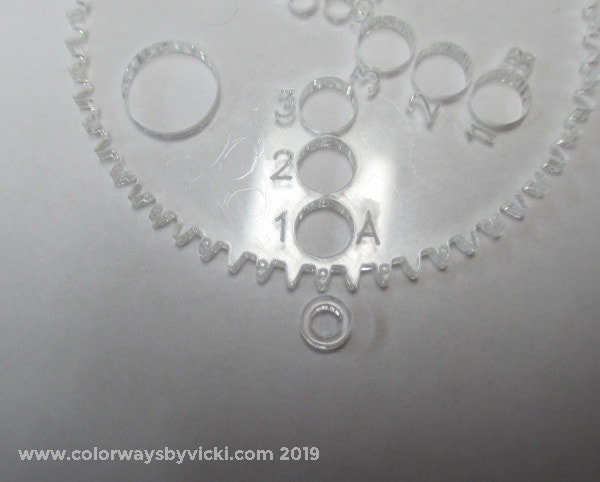 But one of the coolest things is the ability to do designs in parallel lines with these little inserts. You draw the design once in the big hole and then put the little circle in that hole and do the design again.  This is a really simple design that I did in parallel lines. As I was working with these I thought that I might be able to combine the WG designs with Zentangle for my quilt labels. Fortunately I just happen to have 3 quilts that need labels right now! With this one I will color in the space between the lines and then fill the sections with Zentangle designs. 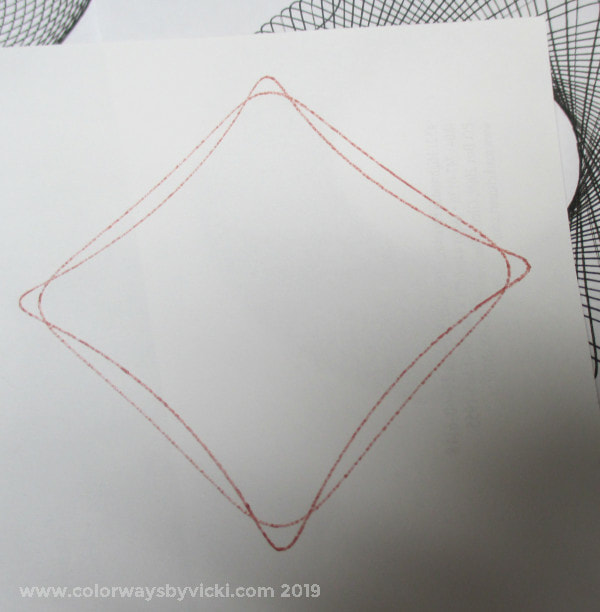 I'm still getting the hang of figuring out how to read the codes on the gears and rings to predict how the design might turn out. At first I was disappointed with this....but then I got an idea. 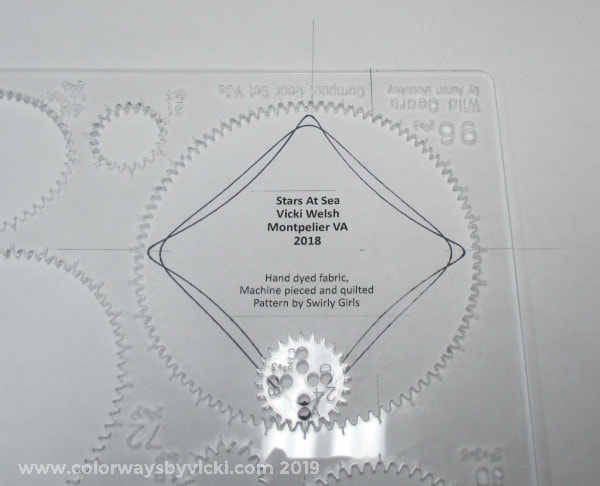 I wanted a small, simple label for my Stars At Sea quilt and this design gave me an easy way to create a simple frame. I used pencil to mark the center of the design side-to-side and top-to-bottom and used those marks to center the ring. 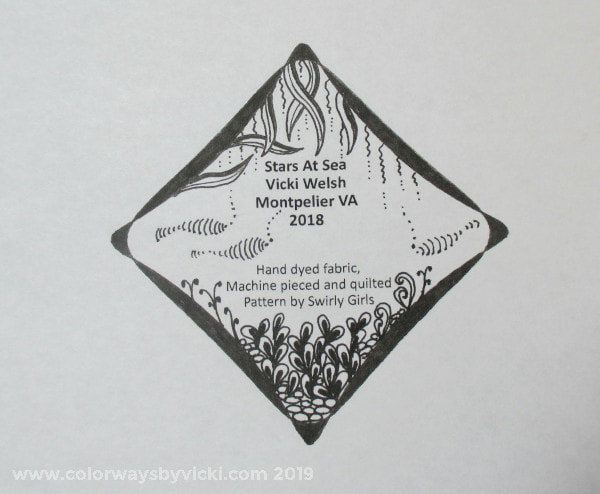 Here's the completed label. I can now copy it to fabric to put it on my quilt. I think it's pretty darned cute. 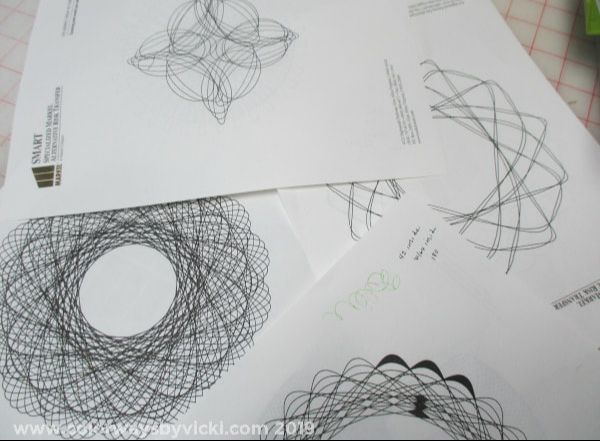 Now I'm playing around to try out more gears and hopefully will find a good frame for my third label.
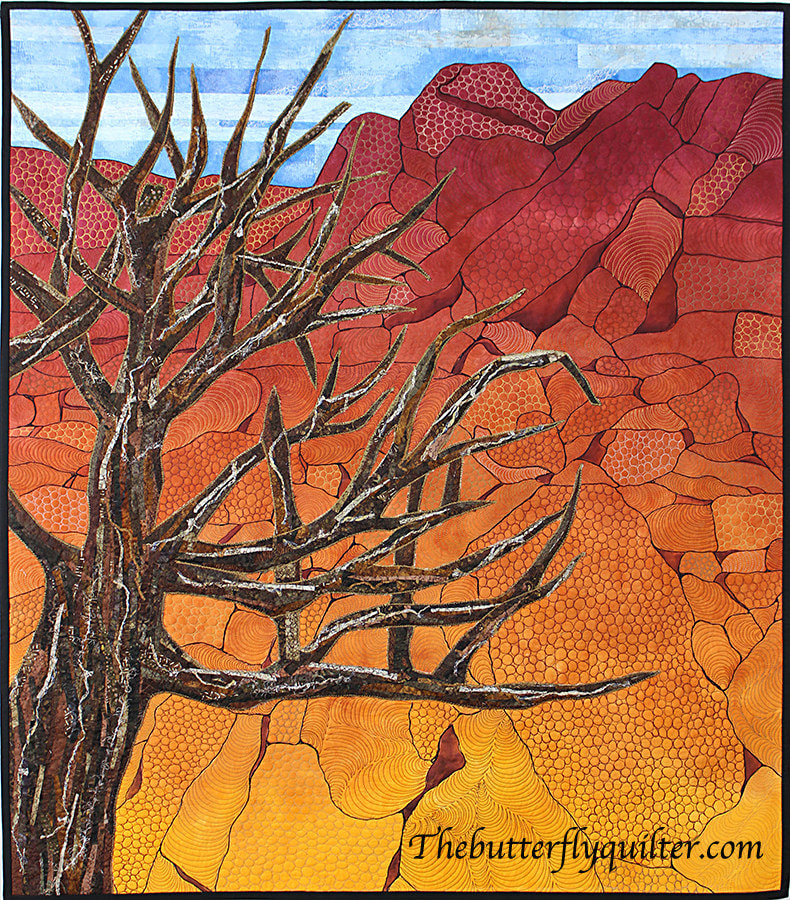
In case you need some for yourself, I ordered the Compact Gears and the Full Page Gears for Anne and I just ordered a new set for her plus a couple of other sets for myself. If you like Spirograph, you will love these! If you are on Instagram search #wildgears and you will see some amazing designs that others have done. My designs are baby steps compared to what other people are doing. Go ahead, you know you needed a new hobby. I'm on a roll and ready to get the small marbles done. I will have 18 large marbles after that. But I'm going to get the small ones done and then take it off to catch up on veterans quilts and then get back to the big marbles. Here are the newest ones. If you want to see all of the marbles so far you can find them here. Thank you for your kind comments on last week's post! 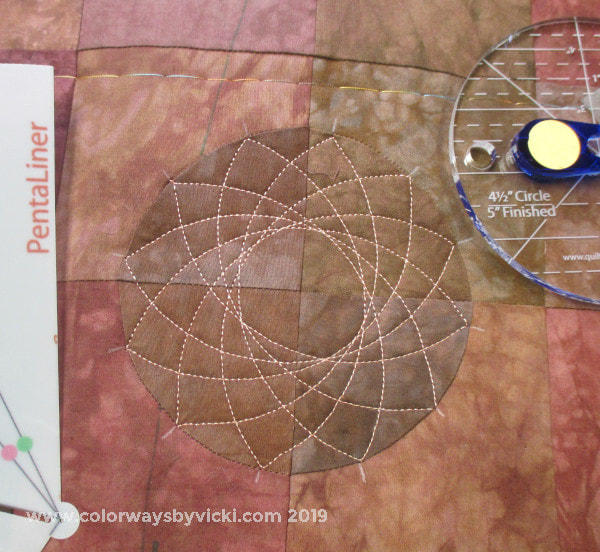 12 segments (should show the Tri-Liner), 5" circle, skip 5 spaces 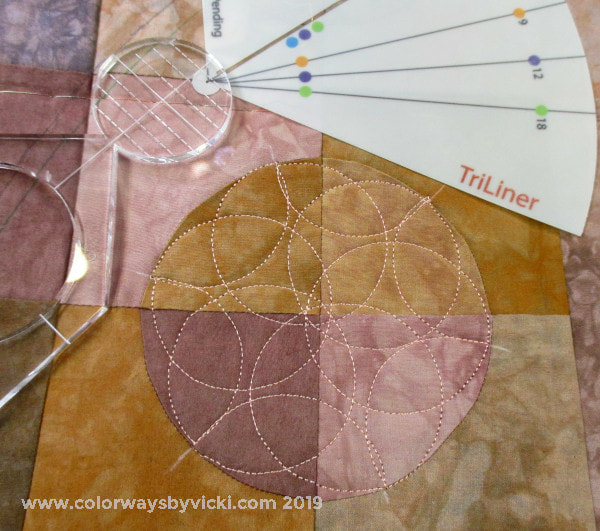 6 segments, 2" Pro-Pebbles (Lisa Calle), full circle at each point and travel with half circle 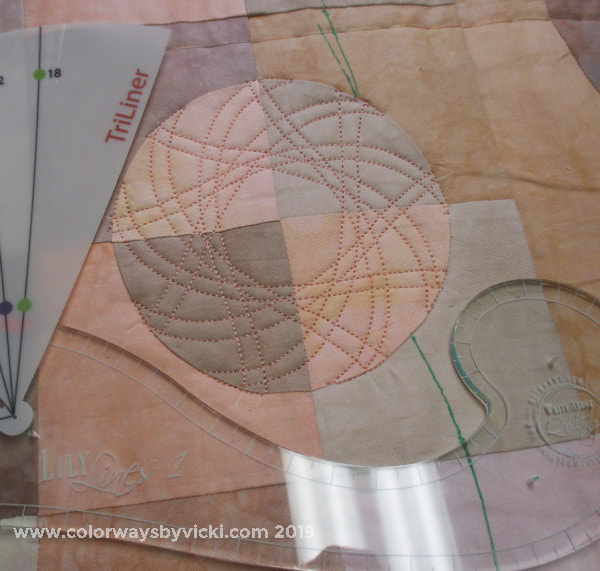 9 segments, Lily Lines 1 ruler (Bethanne Nemesch), skip 5 spaces, second round with lines parallel to the first lines 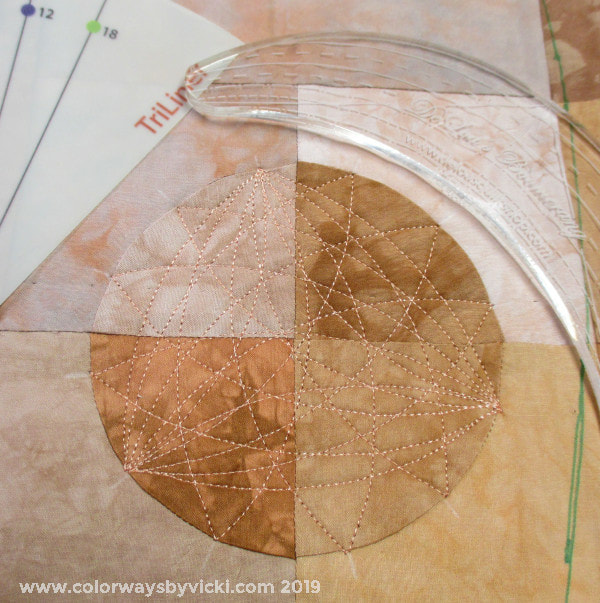 12 segments, 8" Boomerang (Deloa Jones), stitching radiates from 3 points, from each point stitch out and back to the 5 points opposite 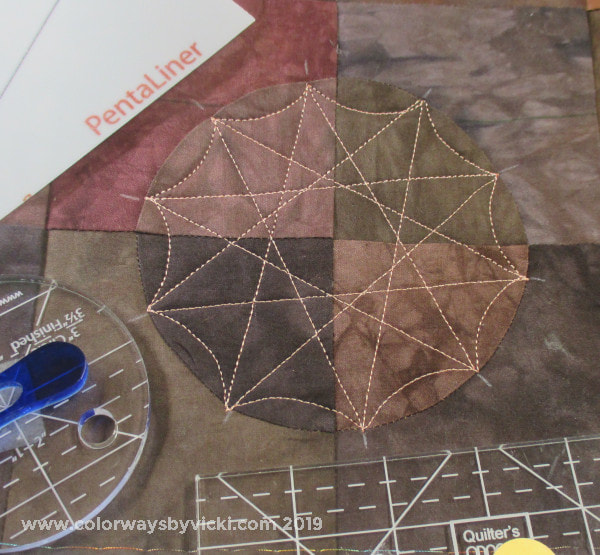 15 segments, straight ruler skip 4 for a 5 point star, travel one space with 3.5" circle and stitch another 5 straight line point star, finish the edge with the circle. Fabric of the Week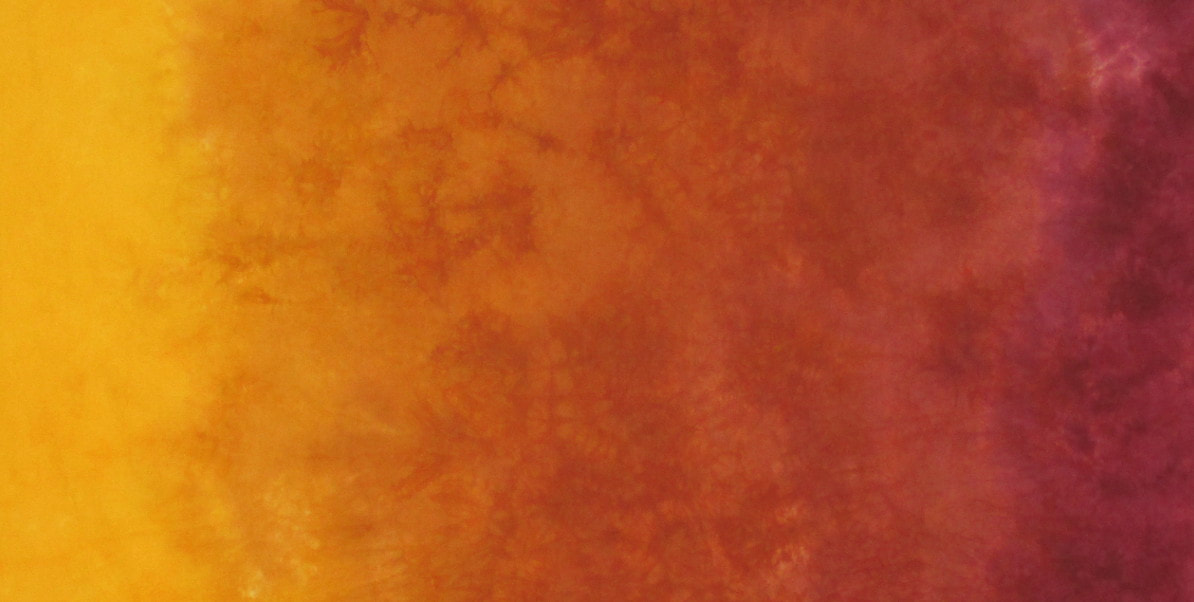 Sassafras Gradient is 20% off this week It's Gradient week in the shop this week. First, we have Sassafras, which is the fabric of the week. It's 20% off through Sunday! Patricia Caldwell used Sassafras in these quilts from her Red Rocks series.
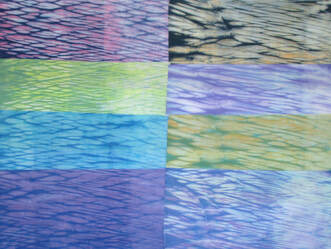
New Gradient! Blue Ridge Gradient Blue Ridge is the newest gradient in the shop. It was inspired by sunsets over the Blue Ridge Mountains of Virginia.
The end of the kitchen work is in sight! Counters are coming Thursday and the tile guy should have the backsplash done a week from today. I have to admit, it hasn't been bad at all so far. We've gotten pretty comfortable eating at the sewing room cutting table and the kitchen is still functional so it hasn't been much of a hardship. The hardship has been in Chris. For some reason I've decided that a new countertop means that every appliance and cabinet must be deep cleaned. It took a day last week to clean all of the cabinets and change all of the hardware. Fortunately a friend had a kitchen that needed the old hardware so that was a nice recycle bonus. The fridge is now spotless and the oven has been cleaned. All that's left is the stove and I've convinced Chris to clean the carpets when everything is done. After that we should be able to blindly ignore everything for at least a few years! 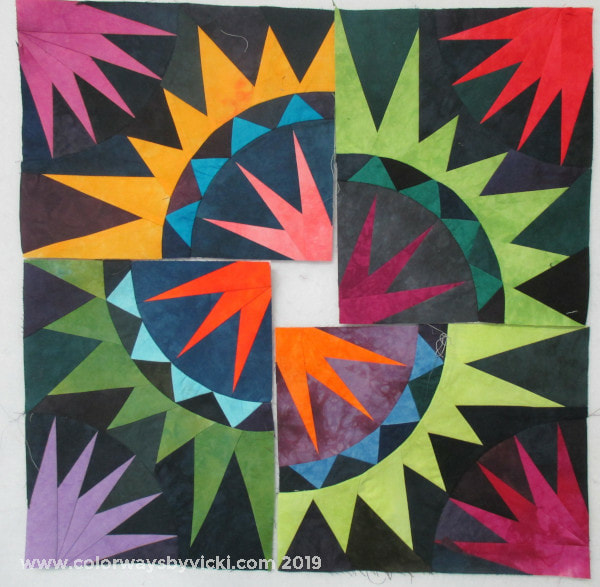 But I did get away for 2 days to do some sewing. It was our monthly sewing days with Country School Quilters and this is my project. I got 1 block done last month and one more started. This weekend I finished the second block and cut 4 more. The components are done for are 4 and I got 2 of the blocks sewn together. 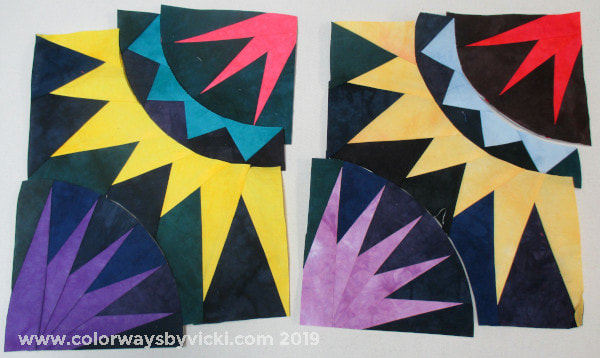 I may put these blocks together here. The curved seams will be easier on my Juki with the knee lift. Cutting the parts would be easier here too where I have more room to spread out so I might make kits that I can just sew there.
I know many of you will think I'm insane, but I forgot just how much I love foundation piecing.v This week I want to finish all of the little circles on my Marbles quilt and make some more progress on the wall. I also need to make some more postcards for birthdays and Airbnb guests. I'm running low. It's supposed to be crummy weather all week so it should be good for sewing. 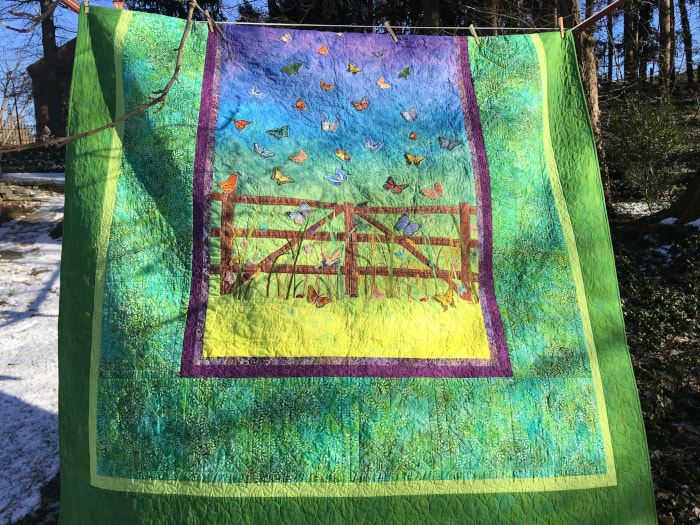 Butterfly Garden by Mary Fyock, 88 x 106 Mary Fyock made this beautiful quilt for her granddaughter who loves butterflies. The center panel was a custom dyed version of the Abundance Gradient. She designed the pattern and created the appliques using Bernina embroidery software and quilted it on her Bernina Q20.
For sharing, Mary received a 20% coupon for the shop that's good for 3 months! If you have made anything with my hand dyed fabric I hope you will consider sharing it in the Customer Gallery. The only rule is that projects have to be complete. It doesn't have to be made totally from hand dyed fabric, just include a recognizable amount. Yay! More progress on the wall this week! I'm on a roll and I hope it keeps rolling. 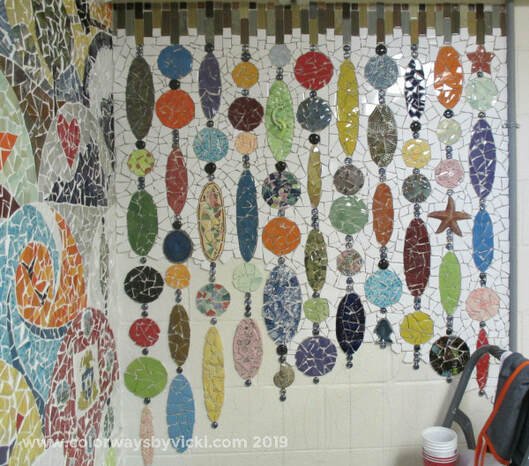 Here's where I left off last week. I had some new beads on the left side that needed background tile. 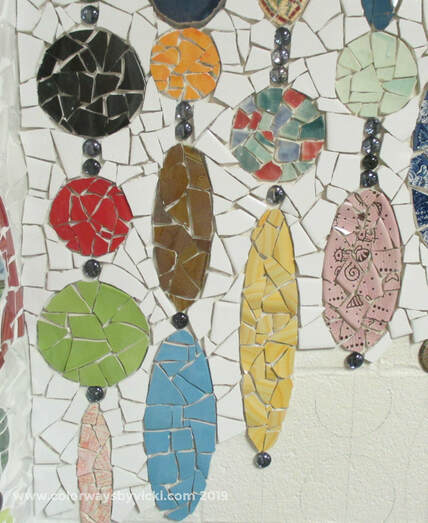 I started by filling in the background in that section. 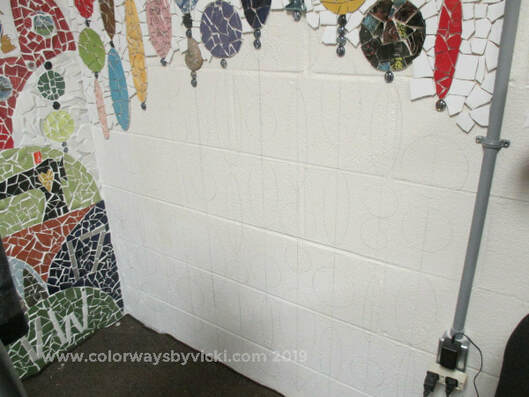 Next I had to draw the rest of the beads on the wall. That required vacuuming so that I could sit on the floor without getting pottery shards in my butt. That led to vacuuming the whole basement but eventually I made it back to this corner to draft out the beads. Thank goodness for all of my circle and oval longarm rulers to make that task fast and easy! I have all of Jamie Wallen's oval and circle rulers and I seem to use them all the time for lots of different things. 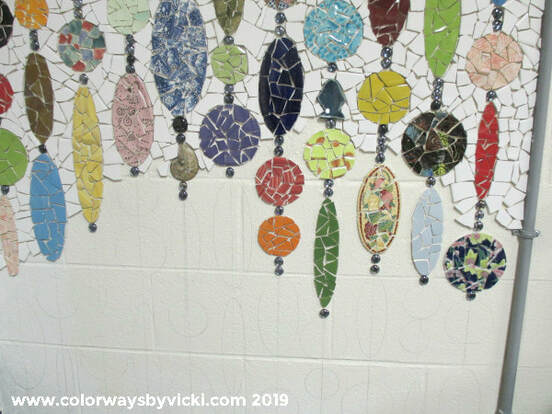 I got 7 more beads added. I'll stay at this level all the way to the blue one on the left and then do that background. Working at this level is "sitting on a stool" level. Below this is "sitting on the floor" level.
Almost everything on this wall is left over from the big wall but there are a few "special" things. The little blue pottery fish was picked up in a shop on our vacation in Hatteras and the ammonite (spiral) fossil is something I bought on a trip that Mom and I took to New Mexico. I have another one that's going to be placed loser on the wall. I love how it's coming along. But today and tomorrow I will not be working on the wall. It's sewing days with my quilt club friends so I'll be working on my 4th of July quilt blocks. The second lesson the EQ8 Designing Quilts book is Using Borders to Create Negative Space for Modern Quilt Layouts. 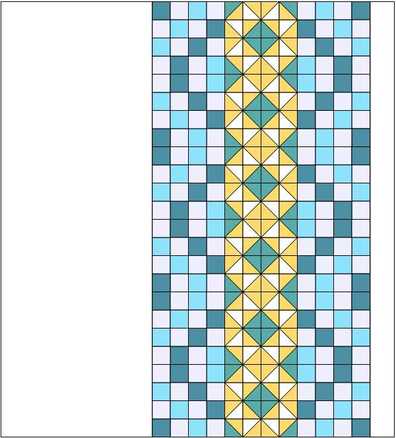 I already knew how to use borders like this but I did learn a couple of cool things like how to change the default widest width for borders. I didn't even know that settings for worktable options existed! We added 2 blocks from the library to get the above layout. 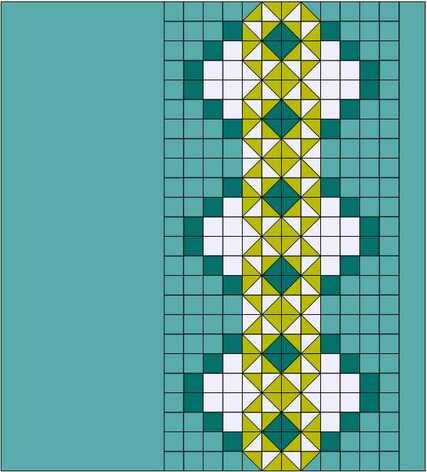 Then we played around with color and rotating the blocks to get this.  The we simplified the block for piecing...also nothing new.  But I did learn how to replace the blocks in the quilt and keep the rotation! This is also in the Quilt Worktable Options (the setting gear on the left tool bar). I wanted to play with this "modern" style layout some more and I had visited Mom that day and saw that she had a big box of 2 1/2" squares. That seemed like good inspiration so I thought I'd see if I could come up with something to do with them.....not that I'm volunteering to take them or anything. I simply used them for inspiration. I'm not about to sign up to takes someone else's scraps when I have plenty of my own.  Veteran's quilts are 48 x 60 so I decided on a block that's 8" x 10" for ease of designing.  This version is symmetrical so a little more traditional. The 2 outside borders are 8" wide (finished) and the 2 narrow sashings are 4" finished.  This version is more like the one in the lesson. The borders left to right are 16", 2", 2" and 4" - all finished widths. Not bad.  Then I played around with the block a bit and came up with this version.  This is the result of the new block set 4 blocks wide and 6 blocks long. The border on the left is 12" and on the right is 4", finished. I rather like this.  Or, back to a traditional layout with 6 blocks across and 6 down. I like this. I actually like all of them but I'm still not volunteering to make any of them!
I haven't tie dyed in ages but I had just the right motivation to get back to it last week. Jamie, the contractor who is working on our kitchen and a laundry list of other things, loves tie dye. I actually had to bribe him to do our job by promising him some new tie dyed shirts. While we wait on the countertops to be installed (on Valentine's Day), I got busy on his shirts. 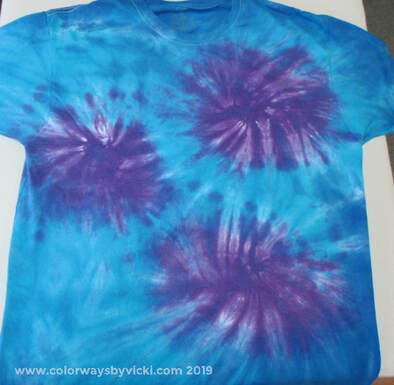 Jamie is expecting 4 shirts but I dyed 6 to make up for any duds like this one. This was supposed to be 3 spirals but it didn't work out. The colors are still good though and this really is the worst one of the bunch so that's good. 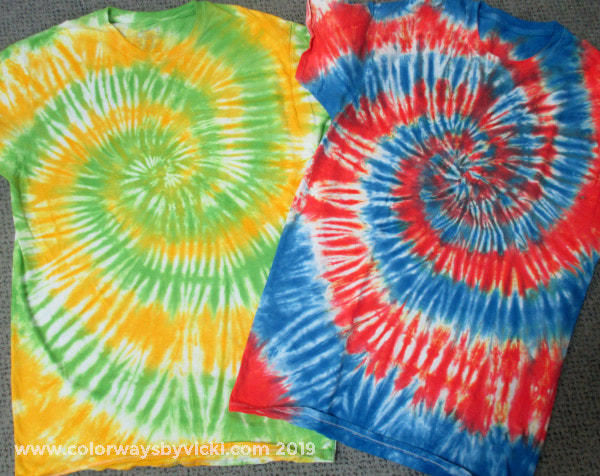 He picked the designs and he wanted a spiral. he also lives lime green. The yellow and green spiral is one that he expects but I always love a patriotic spiral for holiday wear so I made both. 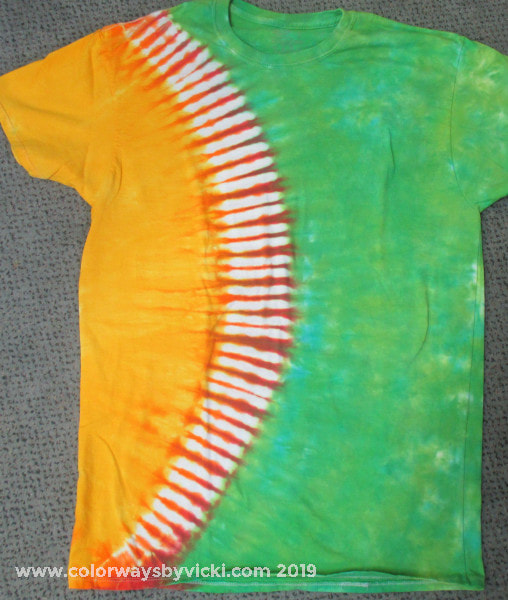 This was another design that he picked. I sure hope I got it bright enough!  Jamie love the beach and he loves fishing so I think he will be thrilled with this one. I've done this design several times but this is the best version that I've ever made. After making these I was stymied for what to do on the last shirt. I wanted to use the leftover dyes and needed a design that would be good for that. 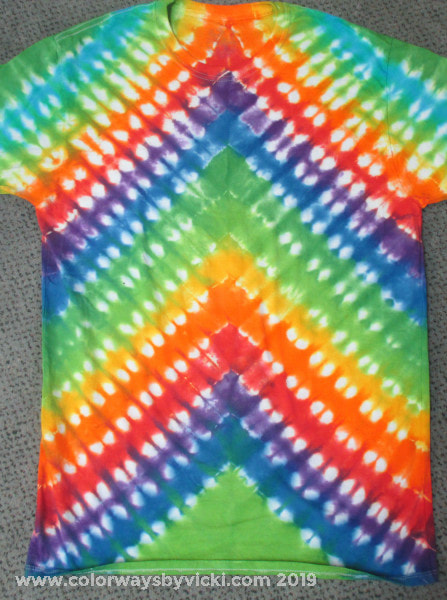 Oh yeah, that's a darned good grand finale! Now the reason that he thinks he's getting 4 shirts is that the first pack of shirts that I bought had 4 shirts. But when I was tying them I saw that they were 40% polyester. I had to go back to the store and get 100% cotton. That package had 6 shirts. But I had to do something with the 4 poly/cotton blend shirts. 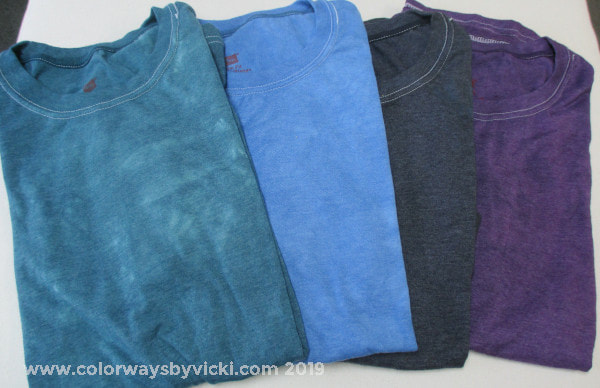 I dumped some leftover dyes on them and made him some new work tshirts.
I already apologized to his wife, my friend Kim, because I know she's going to get sick of seeing him wear tie dye every day. I can't wait to give him these next week. Fabric of the Week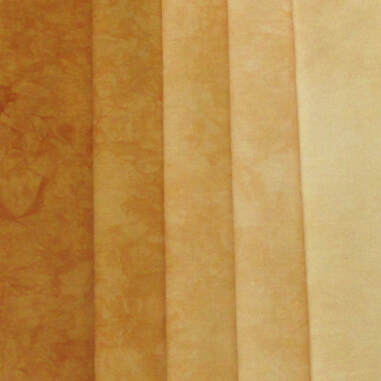 Maize Shades Pack - 20% off this week! 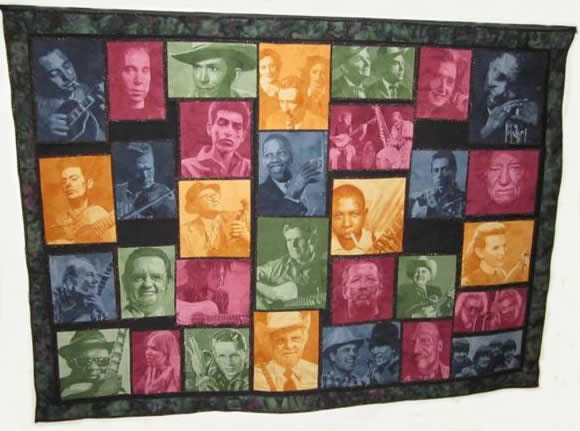 Faces of Music by Stephanie Wilds Faces of Music by Stephanie Wilds Maize Shades Pack is the fabric of the week this week. This is a very popular deep gold color. Stephanie Wilds used Maize along with Claret, Denim and Forest Shades Packs in her Faces of Music quilt. Maize is 20% off through Sunday. New Shibori Stash Packs!
 Nagano Shibori Stash Pack Nagano Shibori Stash Pack A couple months ago I made up a Stash Pack of shibori fat eighths. That's the Nagano pack at left. The fat eighth size was very popular so when I decided to dye more Shibori this week I made two more Stash Packs: Omura and Sasebo. Each pack has an assortment of 8 fat eighths. It's a great way to get a variety of Shibori to use in your next art or landscape quilt. I'm using them in my Loony Moony blocks. If you wanted to make a similar quilt you can get 3 moons out of each fat eighth.
|
FeedsTo subscribe click the RSS Feed button and copy the URL of that page into your blog reader.
In Bloglovin you need to search "Colorways By Vicki Welsh" to find the blog. About Vicki
I'm Vicki Welsh and I've been making things as long as I can remember. I used to be a garment maker but transitioned to quilts about 20 years ago. Currently I'm into fabric dyeing, quilting, Zentangle, fabric postcards, fused glass and mosaic. I document my adventures here. Categories
All
Archives
July 2024
|

 RSS Feed