|
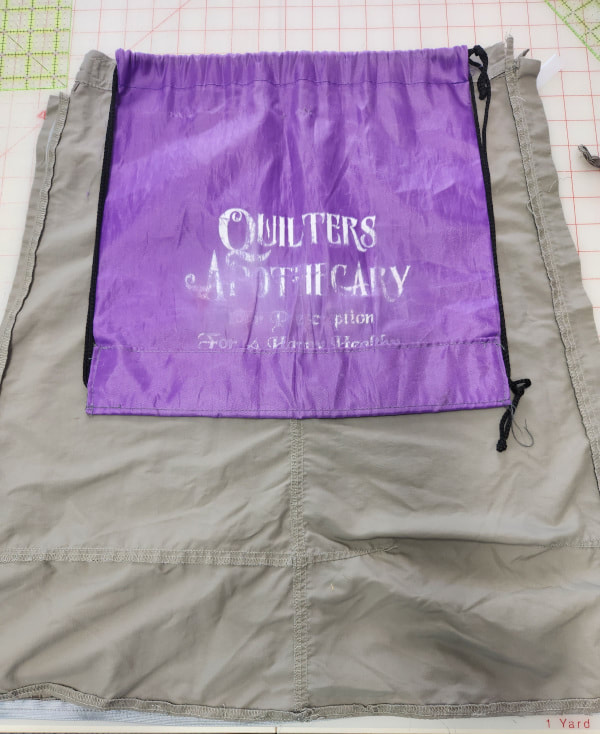
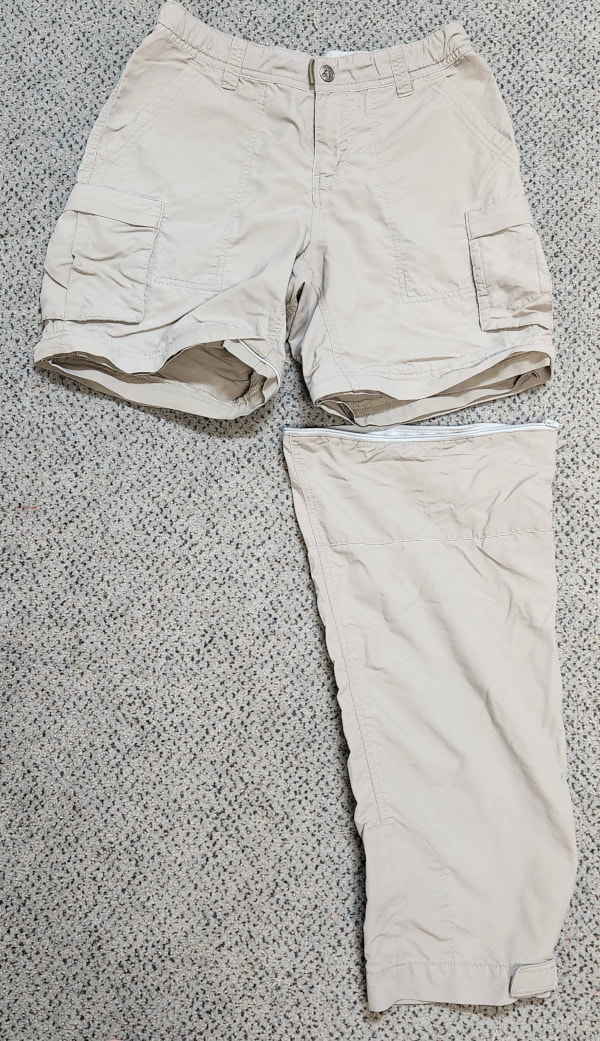
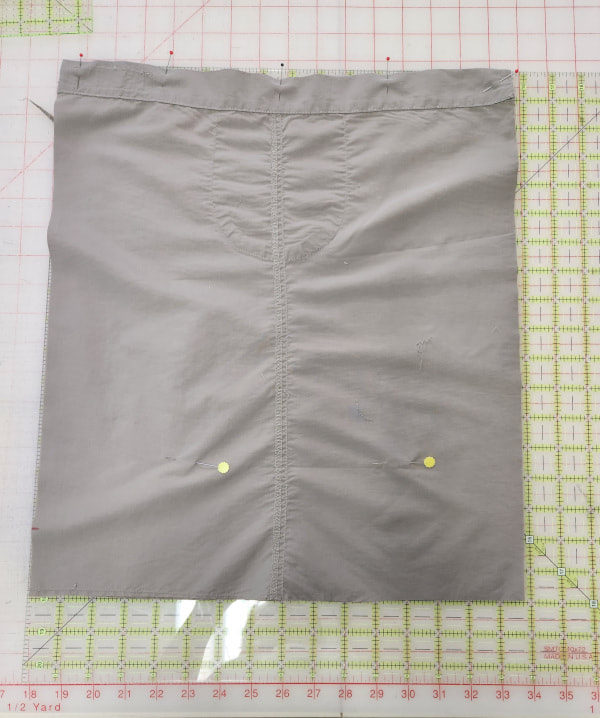
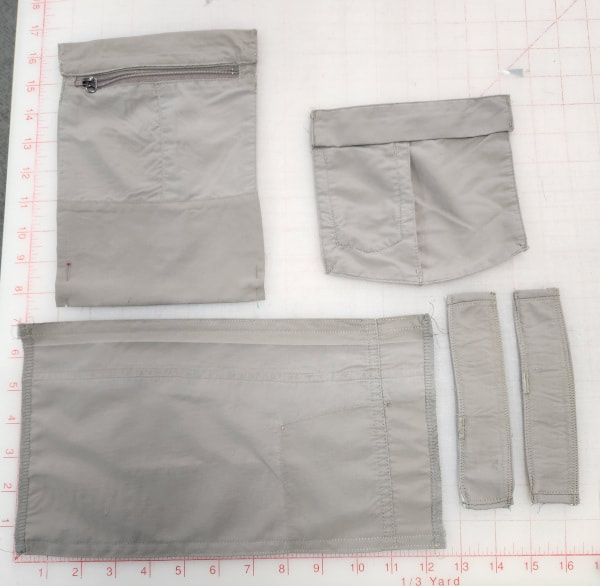
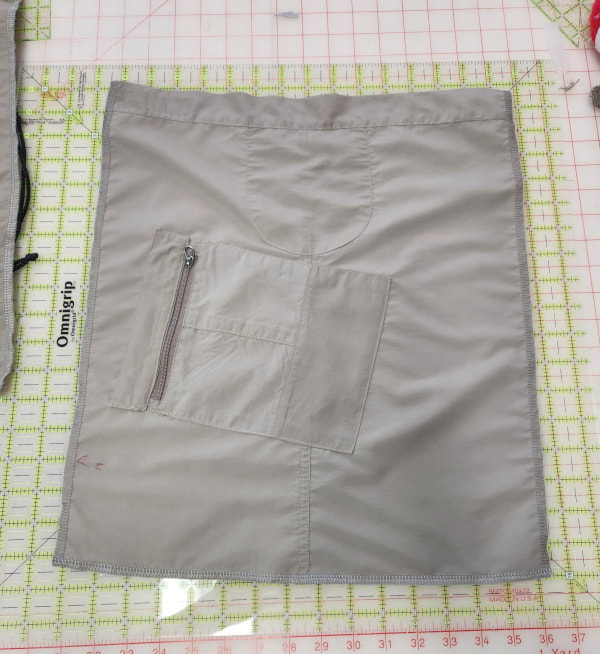
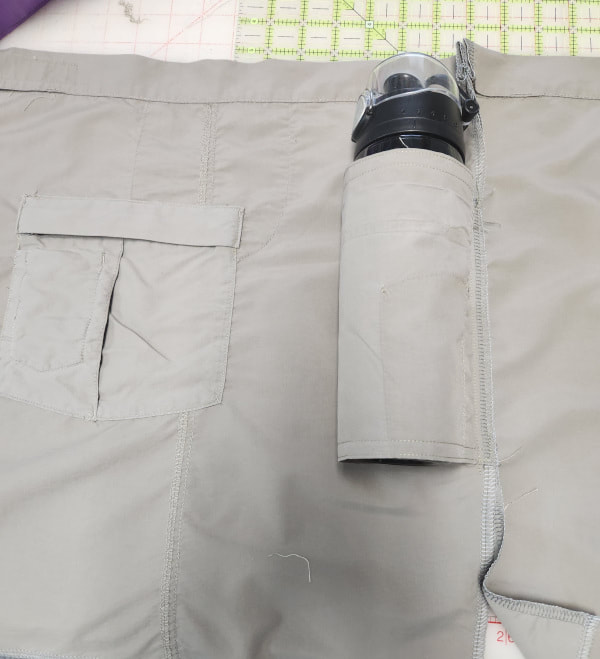
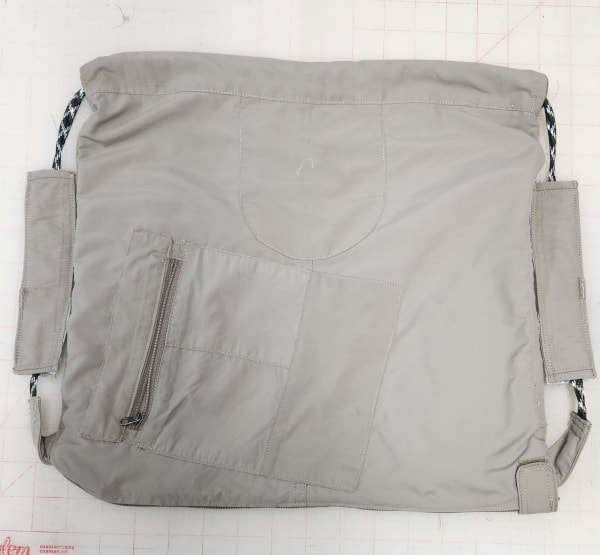
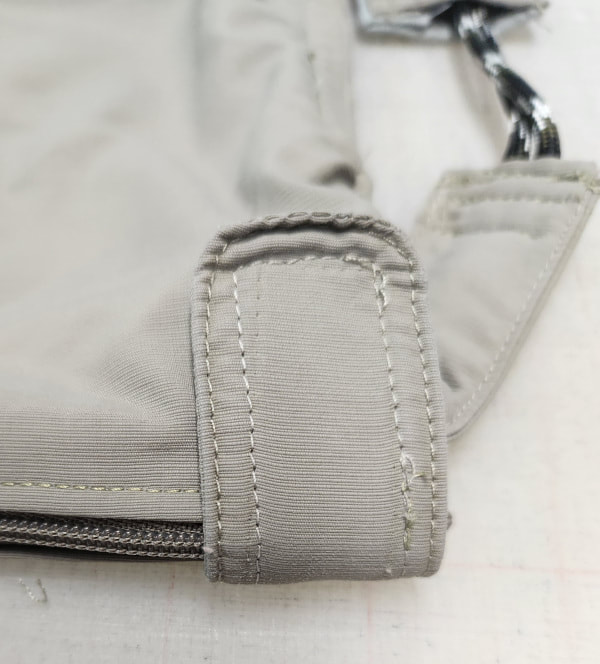
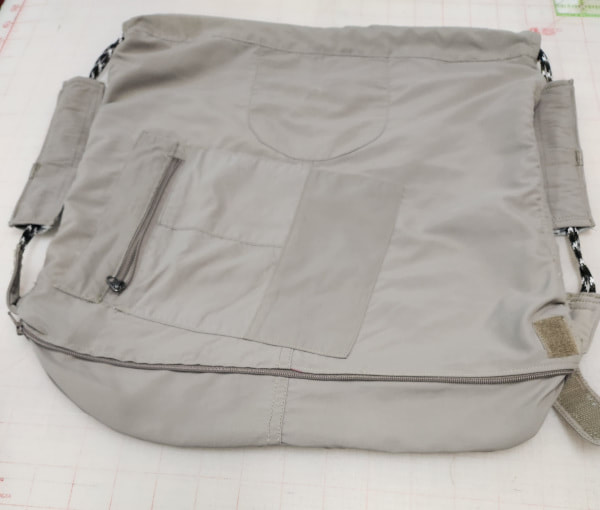
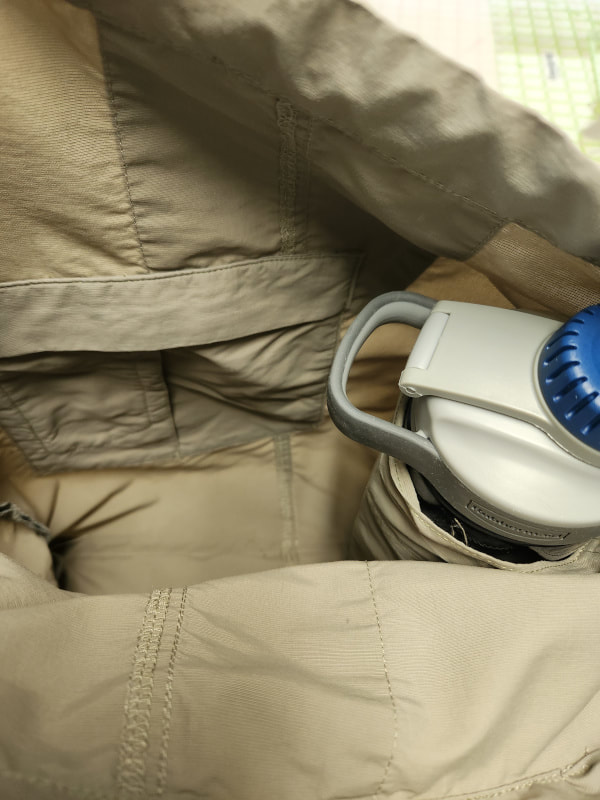
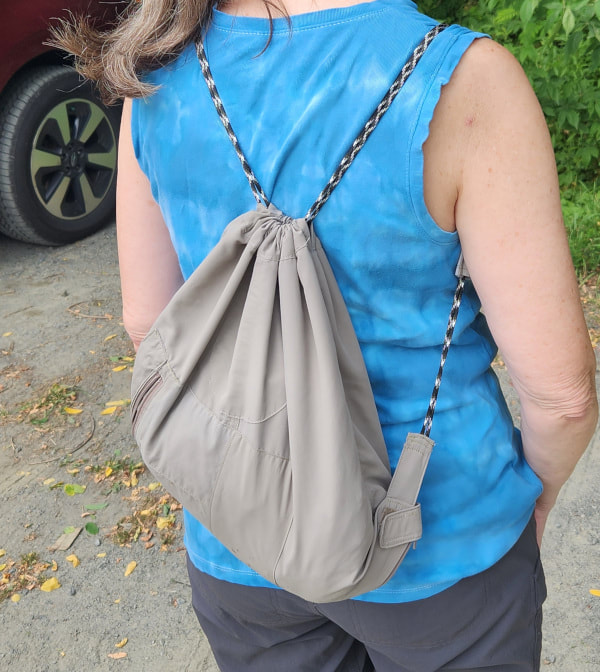
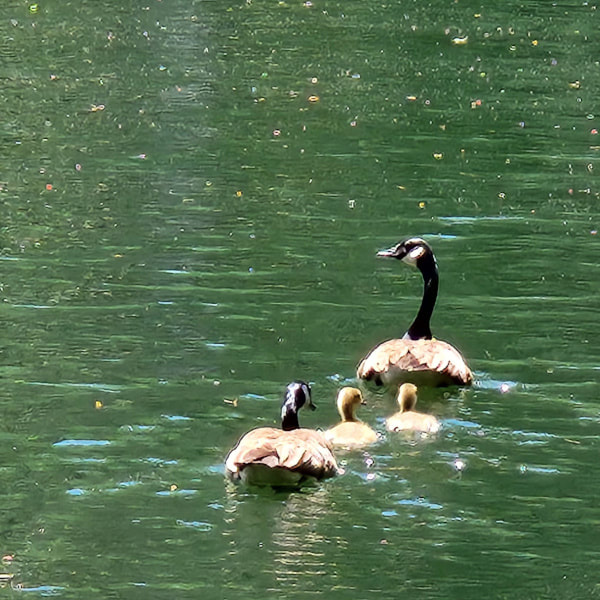
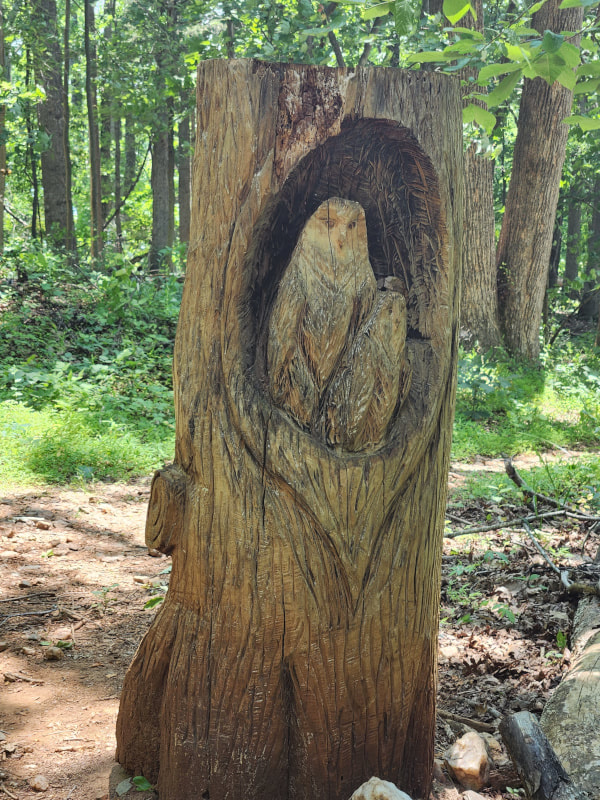
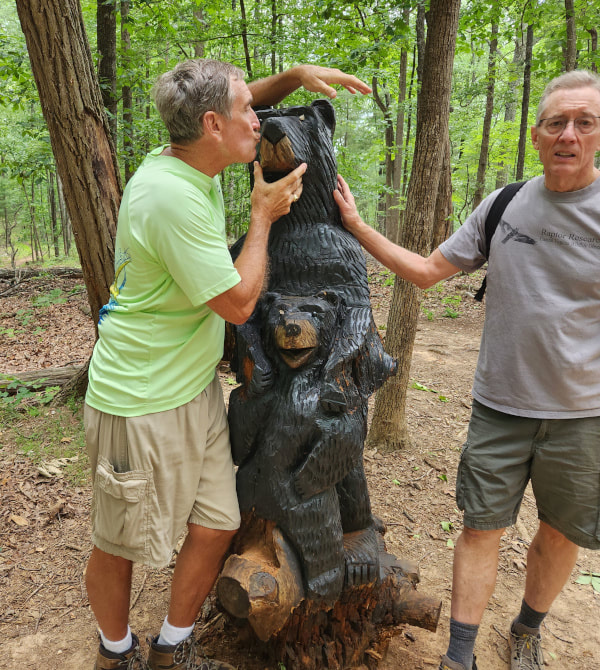
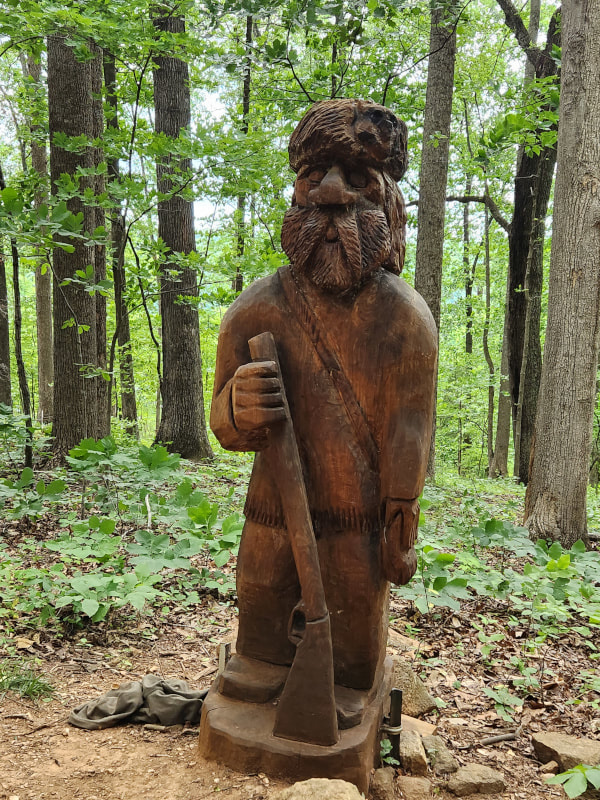
Settle in, this is going to be a long one. The backstory is that I like to use a lightweight backpack when hiking. I just want to carry some water, my phone for photos, some snacks and some small supplies, like bandaids. I've been using this purple pack that I picked up from Quilter's Apothecary several years ago. It's very lightweight and I've shortened it to the length that I like. But it's not really made for the wear of hiking and I've had to do a few repairs. I've been shopping for a couple of years for a replacement but I couldn't find exactly what I wanted. Most of the commercial ones are heavier and bigger than I need. At the same time, I've needed some new hiking pants. I have 2 pair of these REI Convertible Sahara pants that I love but they just don't fit anymore. The pants wear like iron and are still in good shape. I was going to donate the old ones but I had made some alterations and didn't think they would fit anyone. Then the idea struck to use the lightweight fabric from these pants to make a new backpack. I had a few features that I wanted in a custom backpack: - a pocket on the outside for my phone so that I could get at my phone easily without taking off the pack - a way to keep my water bottle vertical because I had an incident last summer with a bottle laying sideways. I didn't notice the bottle was leaking until my rear was soaked. - an inside zipper pocket to keep my id, tissues, Benadryl and other smalls In the left photo above, the purple pack is against an unzipped pant leg. I was able to cut the body pieces from the legs and used the hem as the top casing for the pack. This is one of the body pieces. The yellow pins mark the finished size that I wanted but I had an idea that I could make an option for a pack that would convert to a larger size. First I had to do a lot of seam ripping and, let me tell you, these pants are made REALLY well and it takes some work to take them apart. I cannot overestimate the time I put into this project. It's insane. I spent a lot of time figuring out the best parts to use for my elements and exactly how I wanted them placed. - the upper right is the cell phone pocket made from one of the hip pockets with an extension added. - The upper left is the other hip pocket. Can you see that it has a little pocket stitched on the inside? It's the perfect size for a few bandaids! - The large piece will be a sleeve for the water bottle. In the end it needed to be about 12" long. I used the fabric that I had available, hence the seam and hem folds. - The two pieces on the right are shoulder straps for padding. They are made from the waistband. First up was the cell phone pocket. It's a simple patch pocket on the outside of the bag. The bottom of the bag is marked by the red arrow on the left side so this pocket is placed with the zipper on my left side for easy access. It's on an angle so that the phone will naturally sit back in the pocket, away from the zipper opening, that will keep pressure off the zipper and keep it from opening accidentally. On the inside I sewed the water bottle sleeve into the right side seam. The smalls pocket is placed about midway down the pack. That will keep the bulk of the zipper and flap from interfering with the drawstring closure and it's high enough to be out of the way of snacks and things in the bottom of the pack. I don't have photos of the steps of the rest of the construction because it took a lot of thought to get the right order and I was on a time crunch to finish it so I could use it yesterday. But I did something really complex with the bottom of the bag. It has a zipper sewn into a pleat and there's extra length if it's needed. Here's the outside of the bag and that cell phone pocket worked perfectly on our hike yesterday. I was able to easily access my phone and put it back in the pocket and zip it up, all without taking off the bag. This little Velcro tab came from the hem of the pants. On the pants it covered the end of the zipper and I used it for the same purpose here. It covers the zipper pull at the bottom of the bag to keep the zipper from opening accidentally. With the zipper open the extra length give me more packing space if I need it. Everything, except the cording, came from one pair of pants. Here's what it looks like on the inside with the water bottle in it's sleeve. The sleeve worked perfectly on the hike! Chris took this photo for me at the end of the hike. I am thrilled with my new backpack and with the new REI Sahara pants that I bought. In it I have a water bottle, snacks and a light weight jacket. It was very comfortable for 3+ hours. We hiked the Ragged Mountain Trail near Charlottesville, VA and it was a beautiful day for a hike. The trail is 6.7 miles around a beautiful reservoir. We saw some geese on the lake. But the real treat was finding 3 wood carvings along the trail. We think these owls are pretty new. One of our friends who hikes this trail had not seen this one before. The nose on the mama bear of this sculpture had fallen off so Chris held it on for me to get a photo. The mountain man was the last surprise on the trail.
I mentioned at the beginning that I had TWO pair of pants so I'm planning to make another of these packs to give to a friend. The first one seemed to take about 50 hours. The second should go a little faster because now I know which parts I want to use and I now know how to put it together. Since I have backpack mess spread out in the sewing room I'll probably get that done before I get back to the Goldfinch.
Kristin F
6/15/2023 12:06:17 pm
You are so clever and resourceful! Great idea for the water bottle holder. If you ever want a backpack pattern, Noodlehead has a couple. I haven't made them, but they look simple enough. 6/15/2023 08:56:47 pm
I can't imagine making something so complicated and then having it work so well for you. Congratulations on perseverance. Hope you took notes or photos so you don't have to remember what you did to repeat it.
Gene Black
6/16/2023 08:11:03 am
I have had several of that type of drawstring backpack. I love that they are lightweight and easy to use. I may need to try making one with sturdier fabric too.
shirley bruner
6/16/2023 08:14:35 am
That is awesome. I'm impressed. You got skills, girl. hahahaha
patty
6/16/2023 09:42:39 am
The backpack turned out great! You know it will wear like iron and last a long, long time. I am particularly impressed with the zippered extension part to make the bag bigger. That had to take some serious thinking!
Mary Anne
6/16/2023 10:02:04 am
You could probably sell the pattern for your pack - I'm sure lots of people would like to make one.
Laceflower
6/16/2023 11:16:39 am
Such a clever girl. Looks like a lovely hiking spot.
Alycia Quilts
6/16/2023 08:24:59 pm
That is a great idea!! and it is perfect just for you!!! Comments are closed.
|
FeedsTo subscribe click the RSS Feed button and copy the URL of that page into your blog reader.
In Bloglovin you need to search "Colorways By Vicki Welsh" to find the blog. About Vicki
I'm Vicki Welsh and I've been making things as long as I can remember. I used to be a garment maker but transitioned to quilts about 20 years ago. Currently I'm into fabric dyeing, quilting, Zentangle, fabric postcards, fused glass and mosaic. I document my adventures here. Categories
All
Archives
July 2024
|
 RSS Feed