|
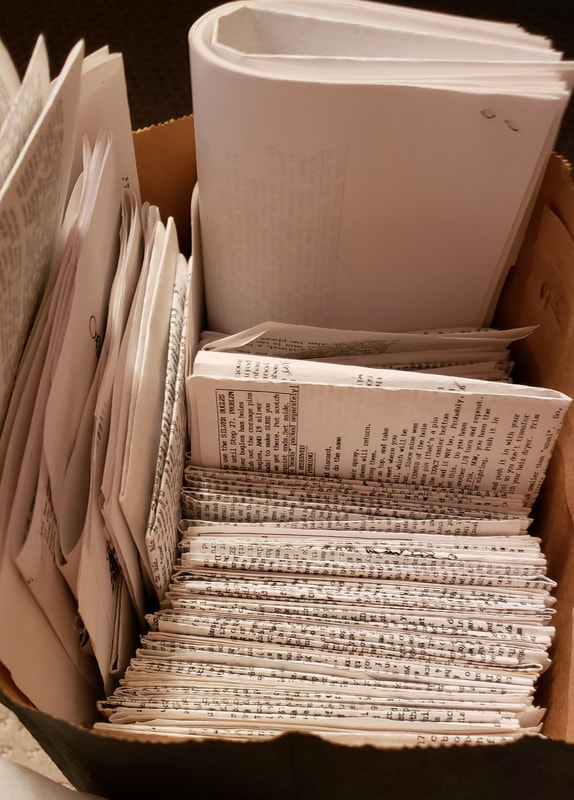
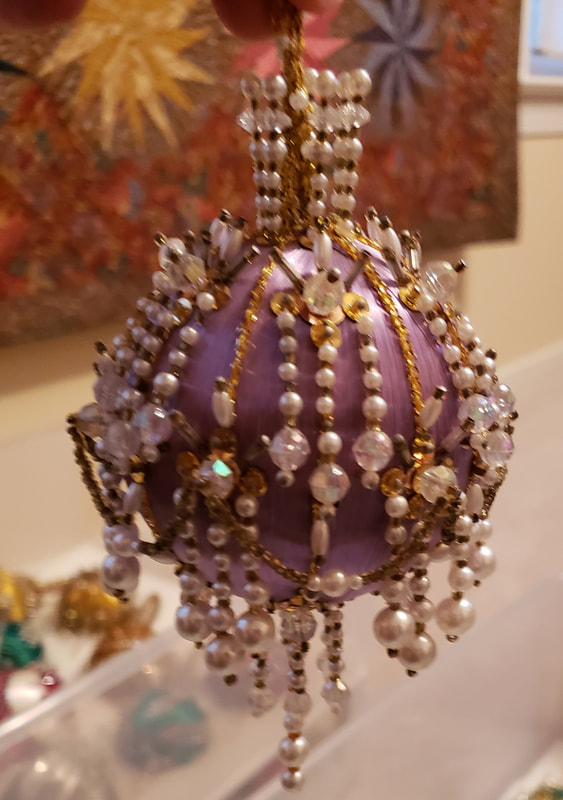
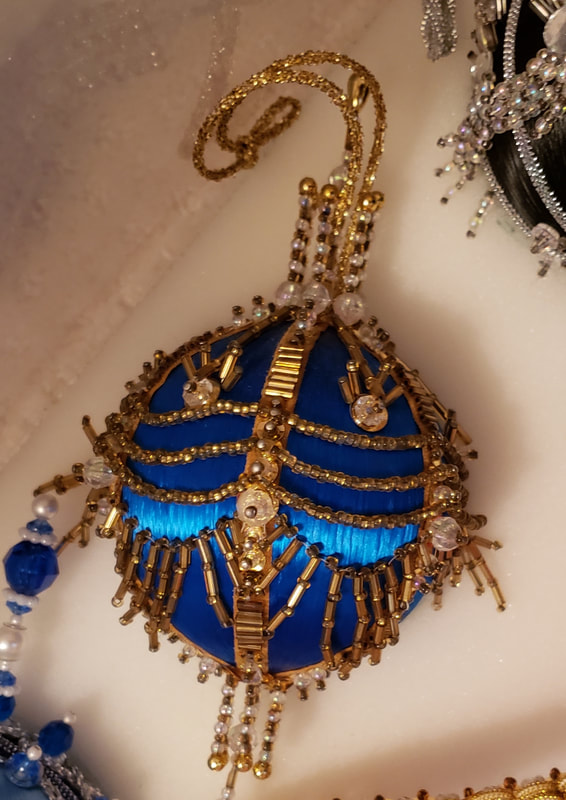
But first, I can report that the binding on the postage stamp quilt is now 37% complete. I actually didn't work on it at all this weekend because of the rest of this post, but I set a new of next Tuesday so I can take it to show-and-tell. I'm working on it diligently now and have finished one full side and 2 corners. It's progress. What I did all weekend was work on the ornament storage. For new readers, I'll give a little background. Are you old enough to remember when we used to get a catalogue of catalogues? There was no internet so we could only find out about new shopping sources by getting a catalogue that literally was only a collections of catalogues that you could subscribe to, mostly for free. It was in one of those that I discovered Cracker Box Kits. I was working at Bank of America and living in Charlotte, NC. Chris was stationed in Charleston, SC and we were lucky if we saw each other on weekend. He was deployed 9 of the 18 months he was stationed there. I already had acquired TWO knitting machines and, of course, I had my sewing. But making Christmas ornaments seemed intriguing. I ordered a couple of kits and I was hooked. Even back in 1993 one of their inexpensive kits was over $20. The most expensive was about $70. That was one called Cinderella's Coach and I did eventually get it too just before it priced over $100....FOR A KIT! Each ornament took a minimum of about 14 hours and up to 40 hours to complete. It was fabulous entertainment and stress reduction from a really stressful job.  Fast forward to 1998 and we moved here. I found this awesome upside-down tree and we used it for display for years but it was a complete paint in the next to set up. I eventually found three rotating trees and used those until recently. I tried to find the photo of the most recent display but I can't find it. I did love displaying them but no one ever saw them. When Christmas happens around here we are always going somewhere else. They are now on their way to my sister-in-law (and brother but he has no say in this transaction) to display on her beautiful white Christmas tree. After almost 30 years, it's time for the ornaments to move on and I am thrilled that my SIL and niece want them. You will not be surprised to discover I kept records of the the kits I made and when I made them. I even kept all of the instructions. I remember that someone actually once contacted me to buy one of the instructions. Of course, I just gave it to her. But that shows the devotion of the people who made these kits. I easily have $3000 (but probably closer to $5000) invested in these. But, that's nothing compared to what I have invested in sewing machines. I justify it as my drug money. The instructions were VERY detailed and you had to work on the step-by-step, reading ahead was to be avoided. There were very few drawings so the instructions had to be very specific and they were! I never had to contact them for clarification.
These are the first 2 kits I made in 1993. On the left is Wind in the Willows and on the right is Curtain Call. Every ornament had a name and an inspiration story. The guy who designed them had previously designed costumes in Las Vegas. You can see the influence for sure. The business is in New Hope, PA. The original designers/owners (Paul and Walter) are, sadly, gone but someone who loved the ornaments bought the business and continues it. I got to go to New Hope once and visit their little showroom and meet them. They were real characters. 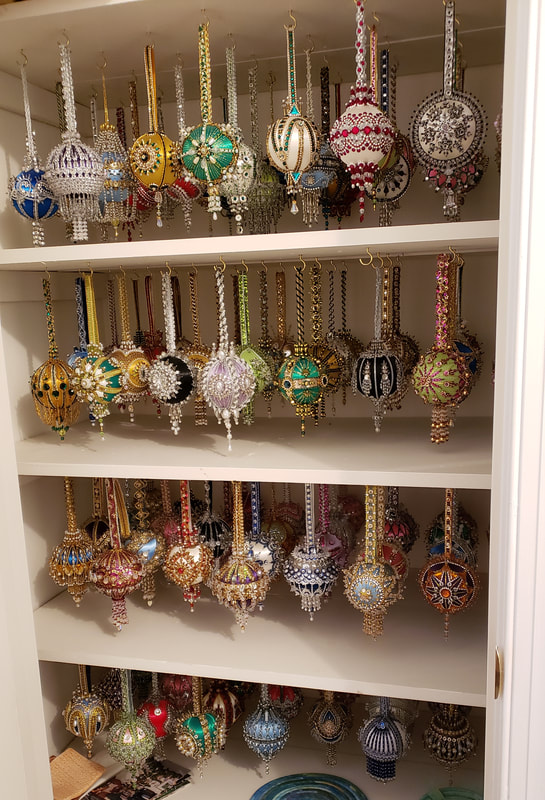 I have this linen closet in the upstairs hallway and that's where I stored them. Hanging them is the best way to store them. My college roommate once commented that if she ever had to explain to the FBI what I was like that she would just bring them here to see this. That's about right. I do love organization and precision. Which brings me to the transfer storage. My SIL doesn't have a closet like this so I needed to come up with a way to store them. It has to be in bins that she can stack and that led me to 1" thick foam with circles cut out for then to rest in. 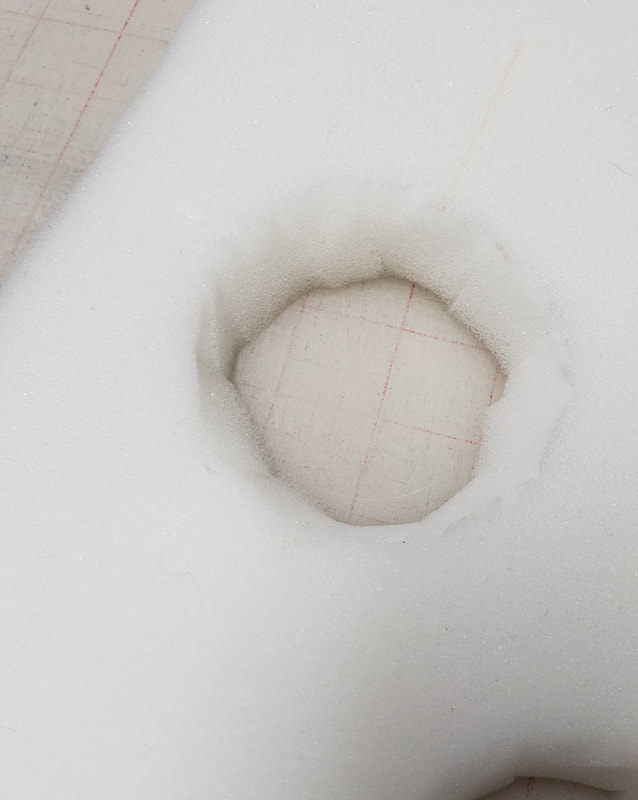 The problem started with cutting circles. I just couldn't figure out how to cut them so I spent HOURS AND DAYS working out a plan to add a layer of fabric to hide the ugly foam cuts. The fabric needed to be pleated to sink down into the foam holes and it was a nightmare. Finally on Saturday night I gave up and decided that I had to find a better way to cut the circles. I walked through every corner of the house and every craft space and even looked through that trash. That's when I saw the discarded tin can from making hummus. I thought I might be able to heat the open end and melt the foam. That does not work at all and you are in real danger of burning the crap out of yourself. Dont' try that. Then I thought of the tin can lid. That sucker is really sharp. People cut themselves on lids all the time. How could I make the edge of the can sharp like the lid? Well it turns out that you can hold the can opener sideways and cut off the rim of the can! Yes, yes you can! You do have to use some pliers to smooth out some bends but it works awesomely. 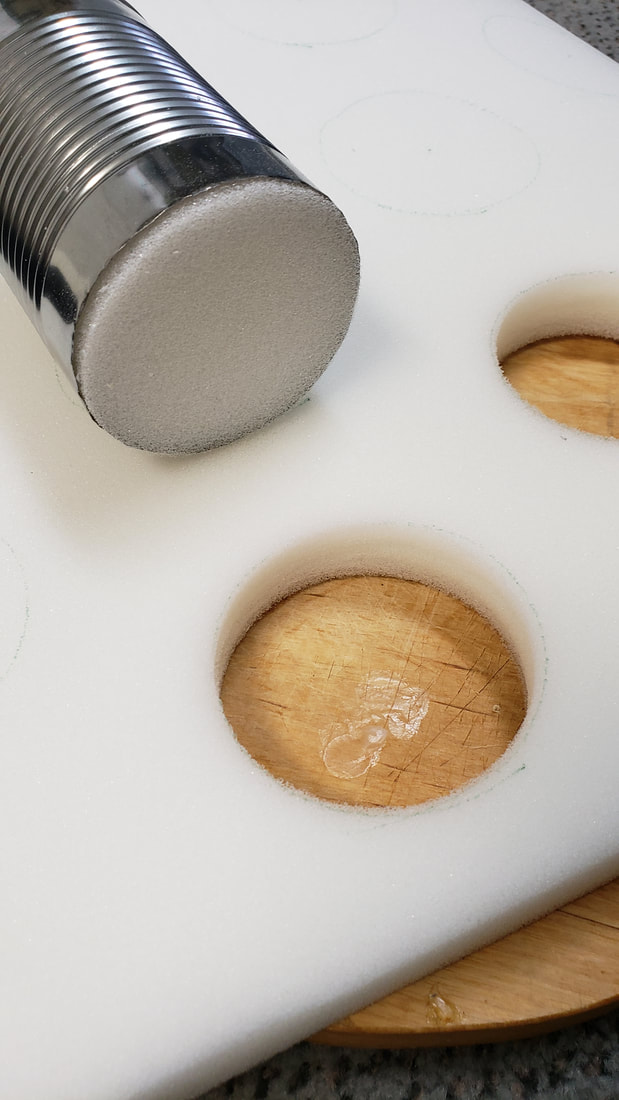 Dig it. Freaking awesome perfect circles! Think of all the sizes of circles you could cut with all the different sizes of cans. Oh, the possibilities! 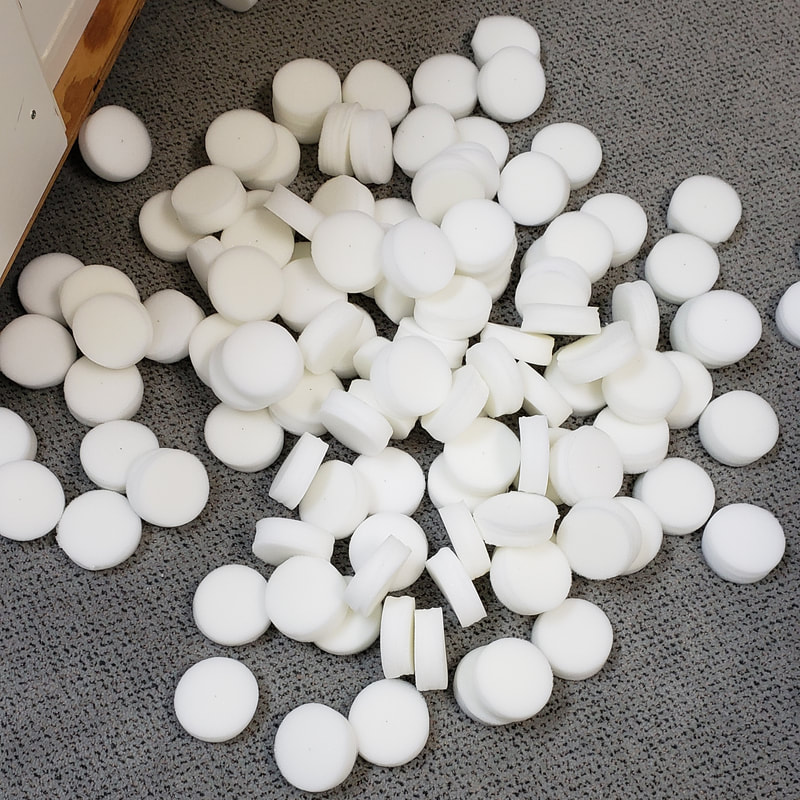 120 of them to be exact. 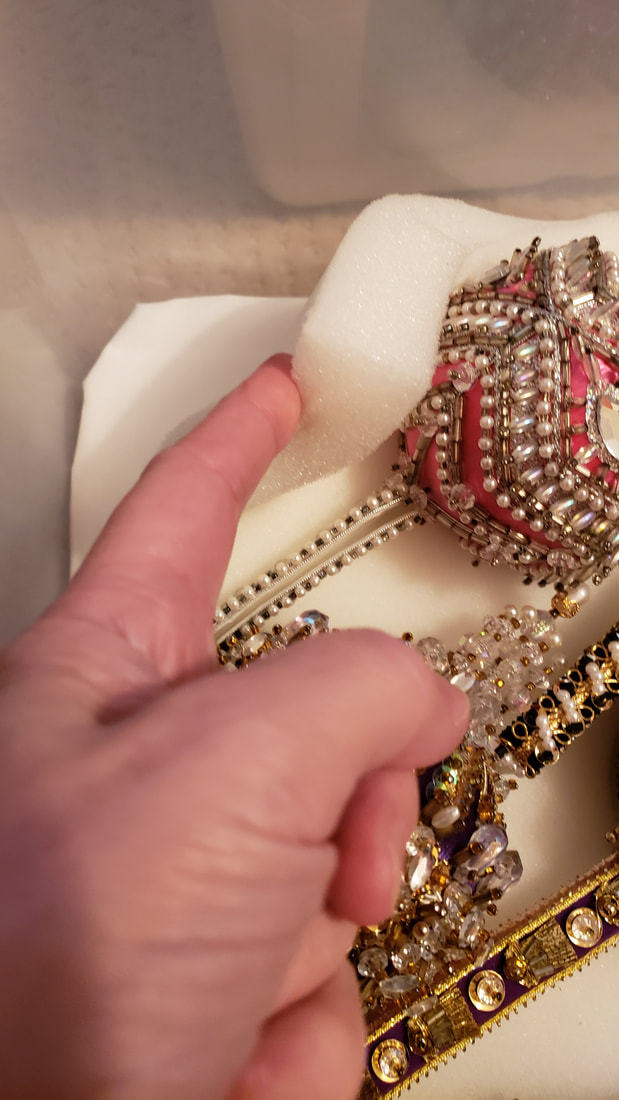 So the final solution is a layer of puffy polyester batting covered in fabric to provide padding for sticky-out parts of the ornaments under a layer of 1" thick foam. 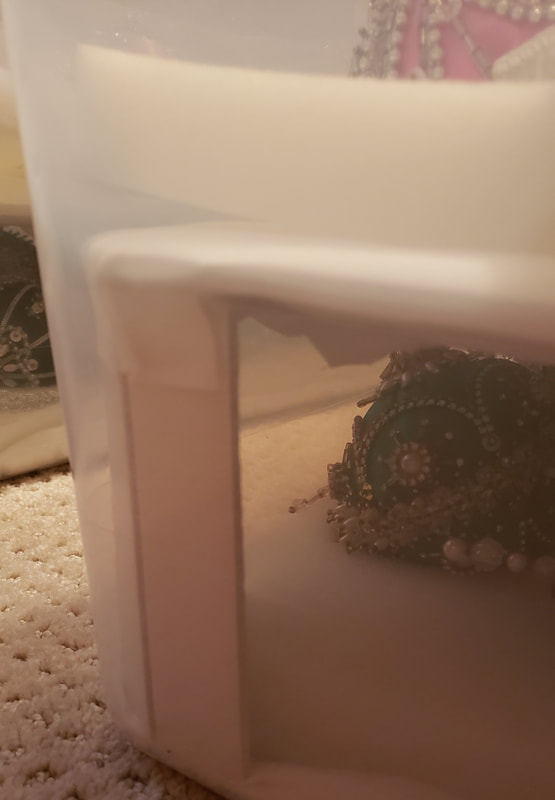 Each bin has 2 layers of ornaments. I made a shelf from foam core board. I tried to get 3 layers in a bin but it was just too tight and the top ornaments would be smashed by the lid. 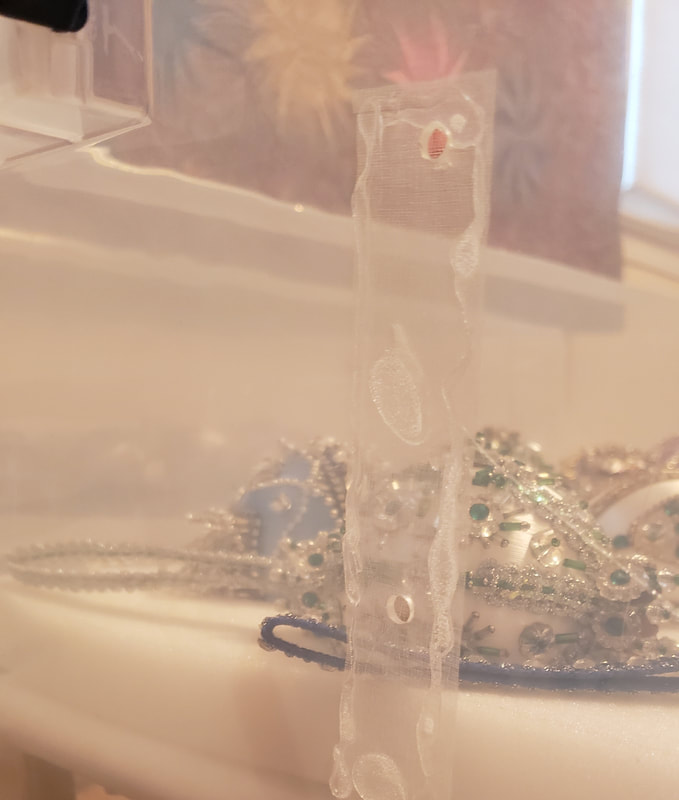 I was also worried about plastic off-gassing so I wanted to allow for some air circulation. I drilled 3 holes in each end and glued on a piece of organza so that bugs couldn't get in through the holes. That was probably overkill but, hey, it's me. 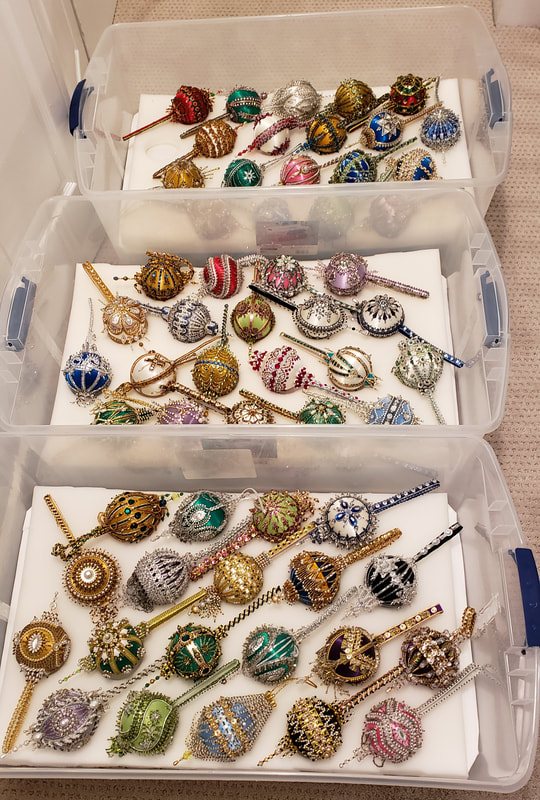 Here are the 3 bins packed and ready to go. I've shaken the bins and the ornaments are quite stable in there. Sometime before Thanksgiving, Mom and I will drive down to Newport News to deliver them to their new home.
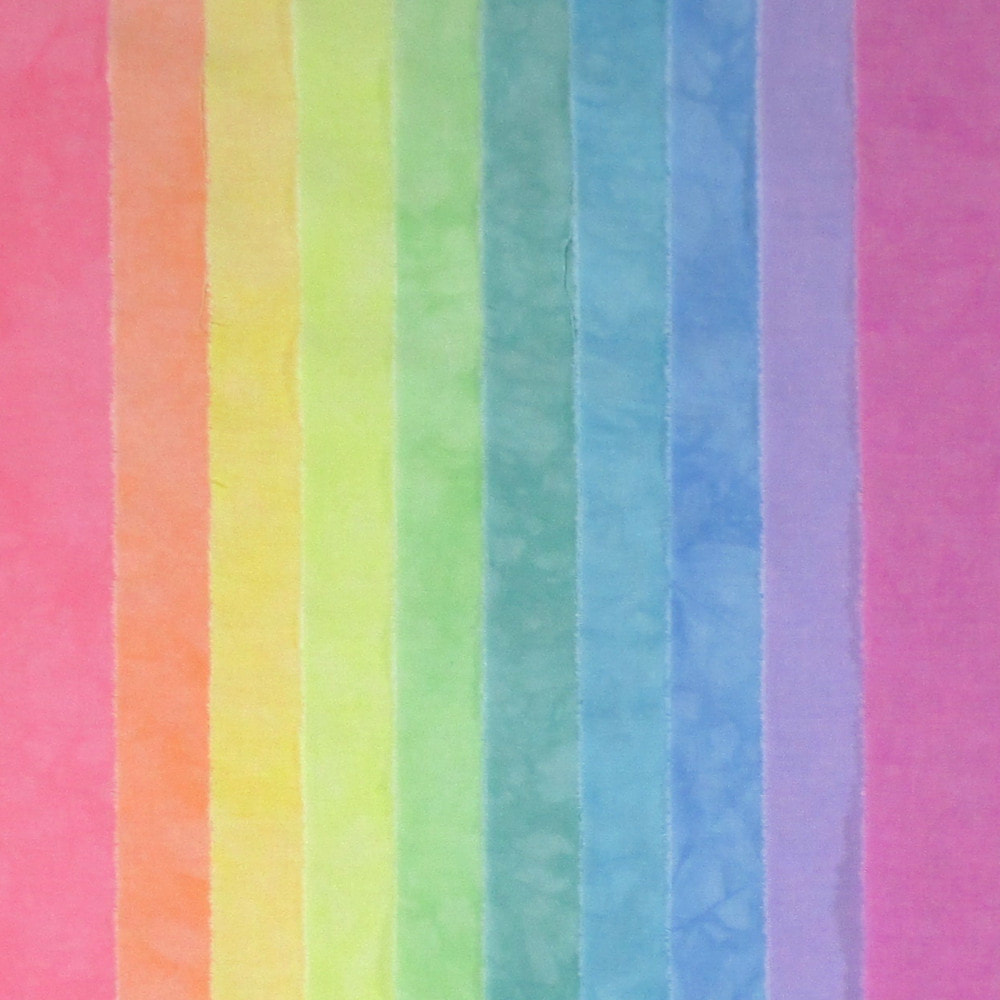
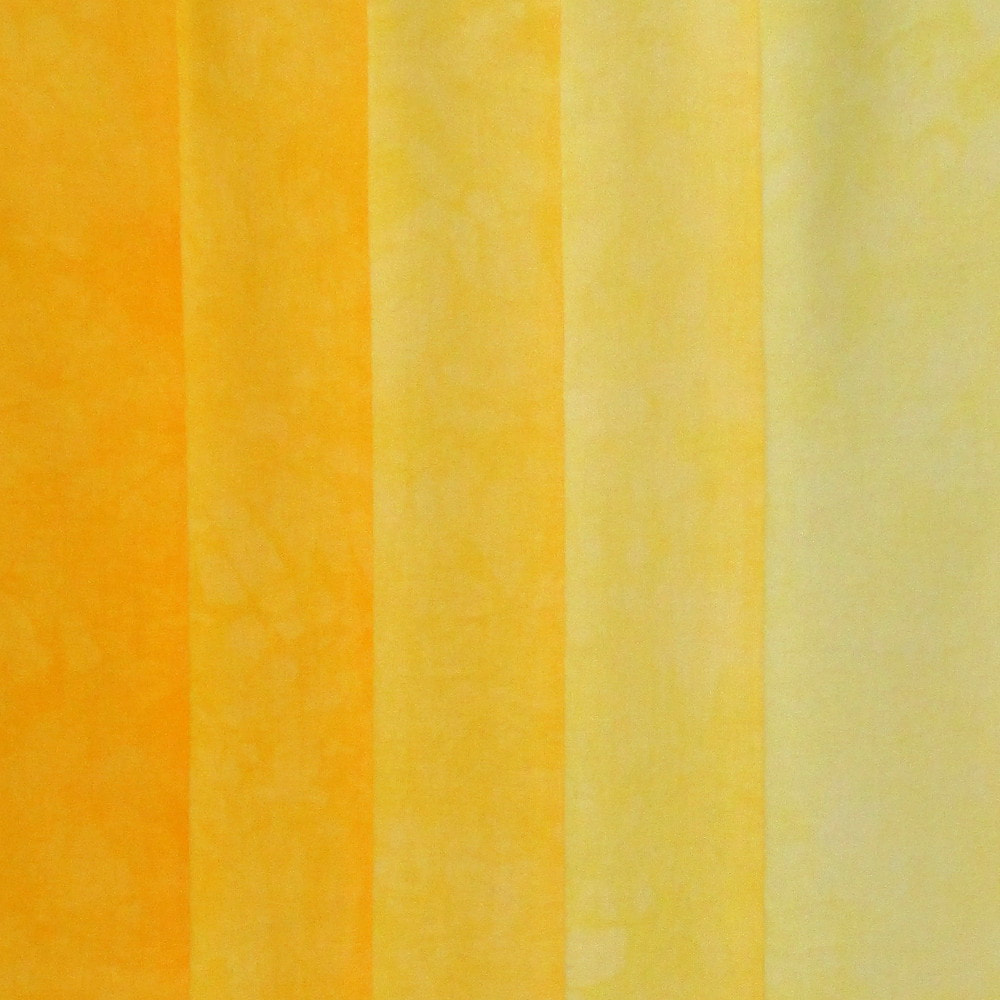
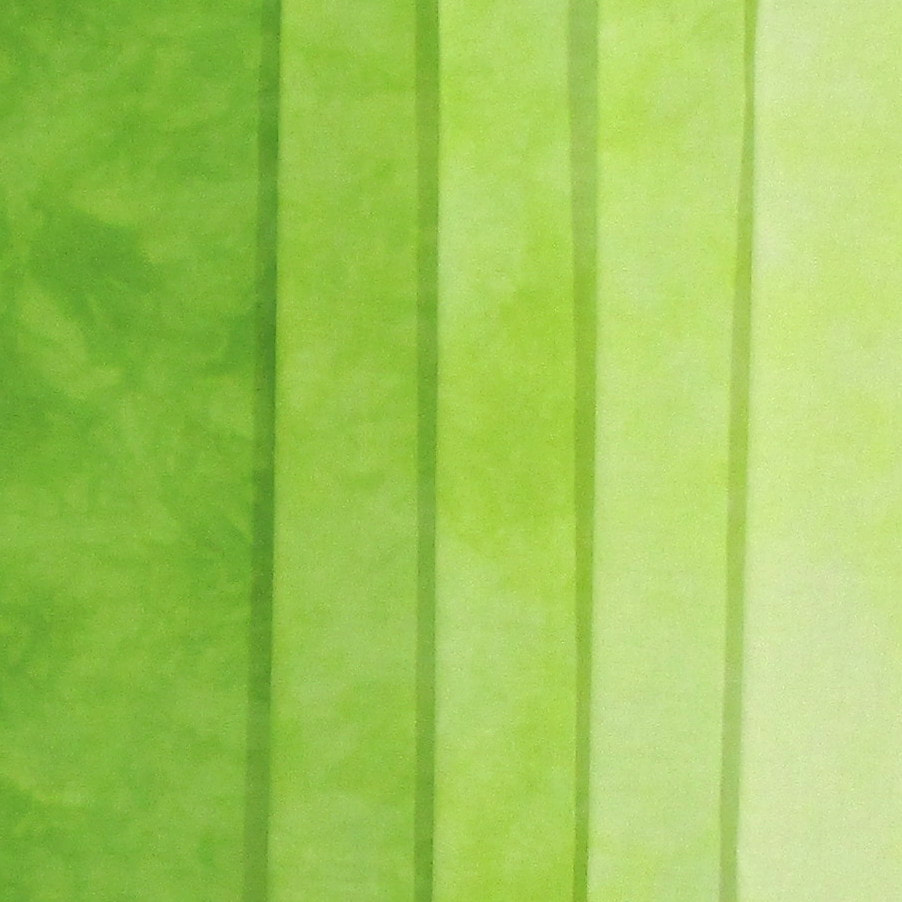
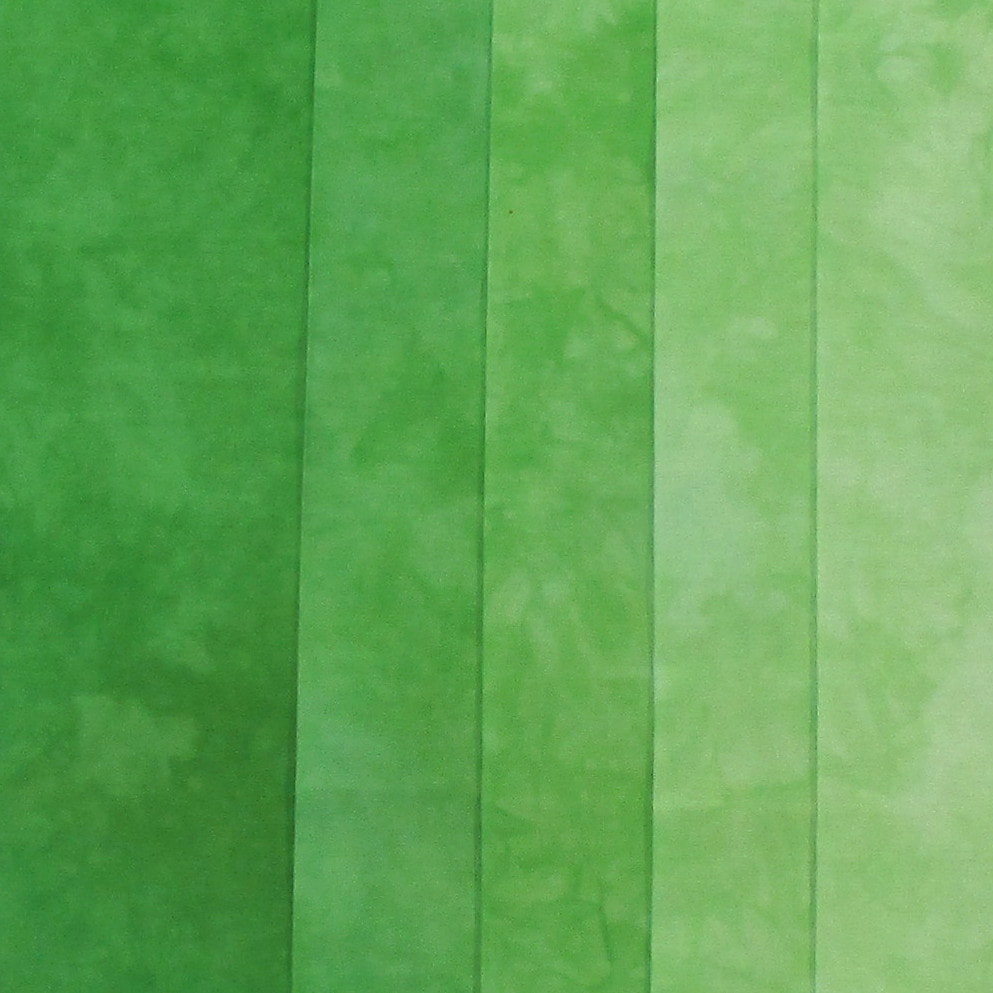
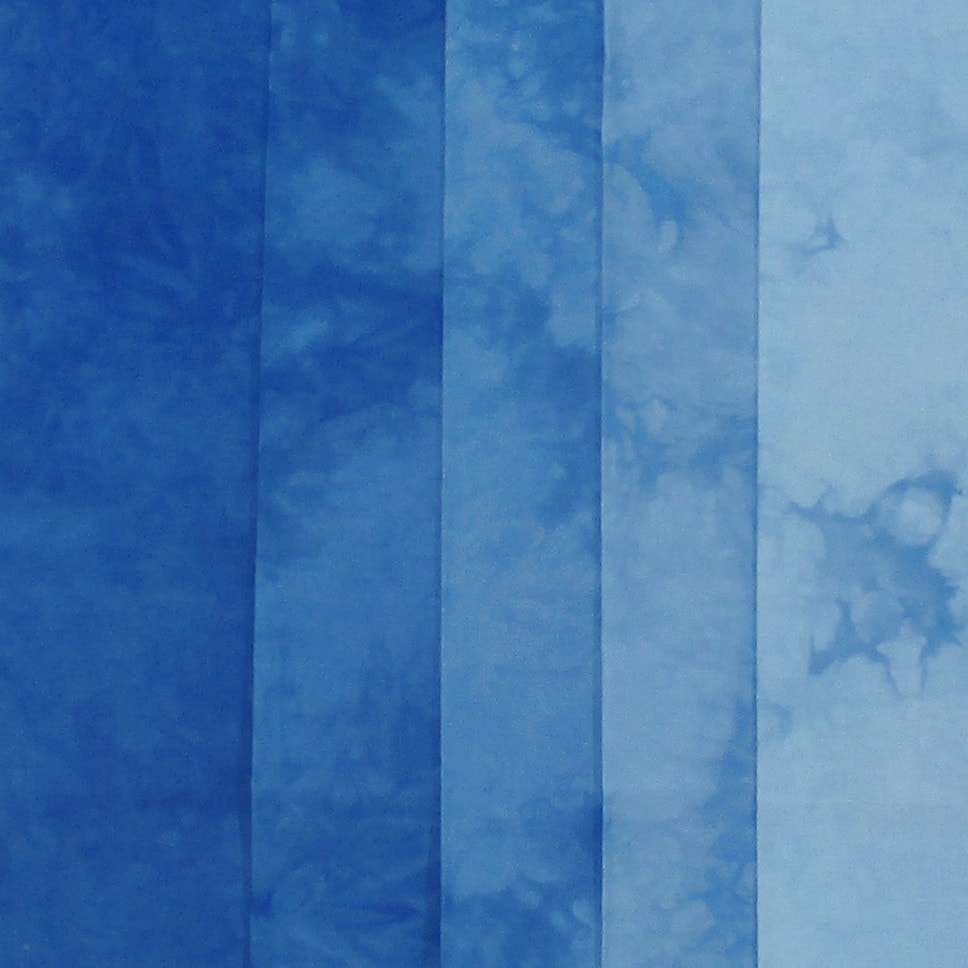
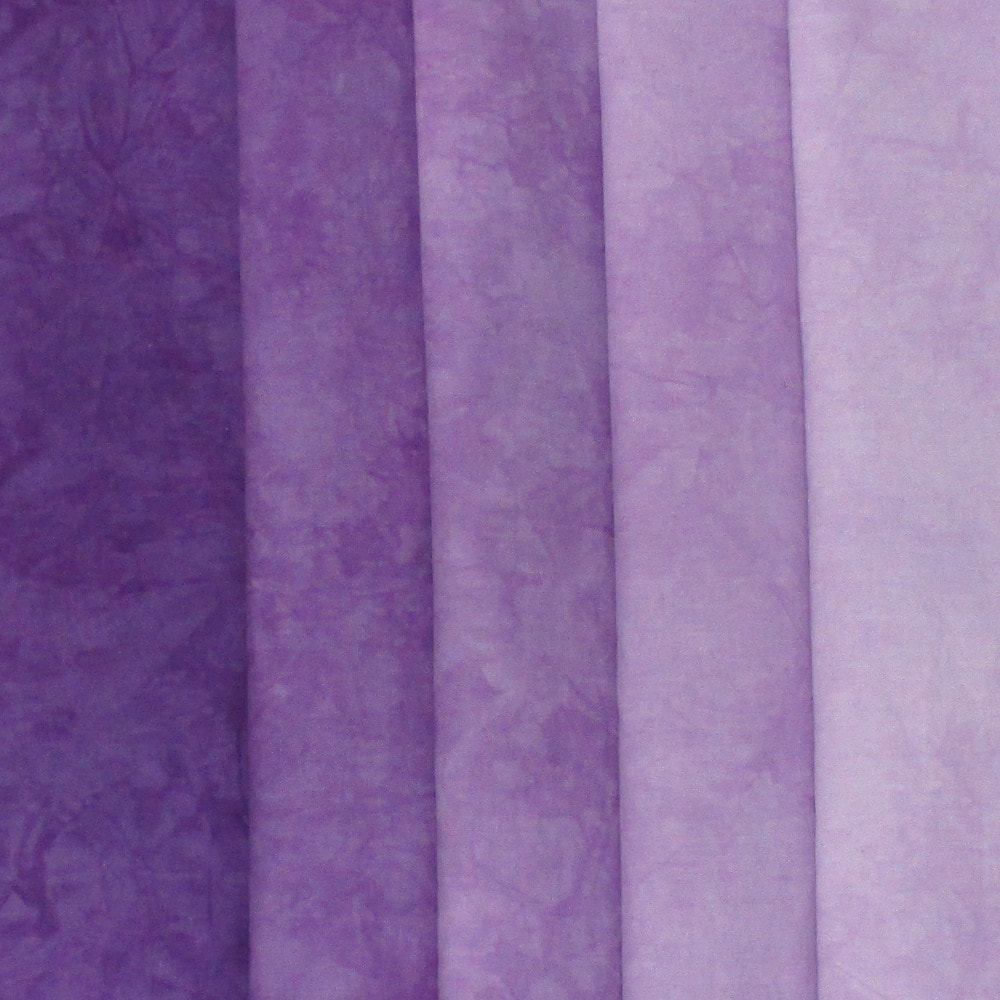
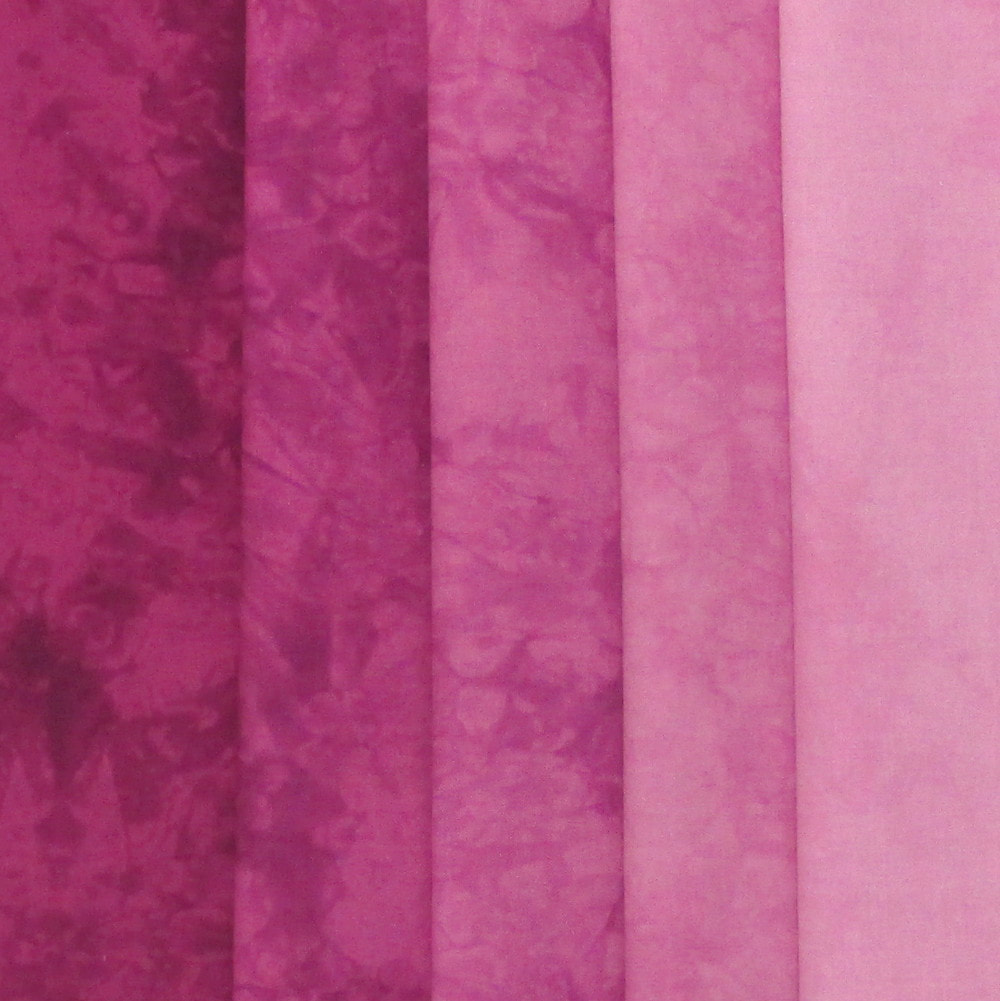
Very exciting. In case you are wondering what's going into that empty linen closet. It's surely not linens but you might get a whiff of yarn if you walk by it in the next few weeks. 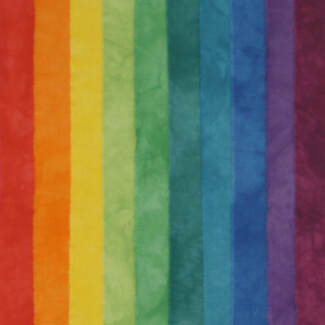 Color Wheel Basics - Back in Stock! This week we're talking about color palettes! First I'll talk about fabric but at the end I have some links for you that might help you pick color palettes for your projects. Before I ever even thought about selling hand dyed fabric, I took a class with Jean Ray Laury that was nothing short of transformative. That class kicked off a long period of reading books and researching color theory. It even led me to pester an art professor at the local college to bounce off my conclusions. We are taught to thing that there's just one color system (wheel) but actually there are several. My research led me to the Munsell System and that's what I used to develop my Color Wheel set of fabrics. This week I've restocked the Color Wheel "dark" Stash Packs and Fat Quarter sets. Color Wheel Stash Packs also come on Medium and Light values. There are Shades Packs for each of the 10 hues of the Color Wheel as well. The Color Wheel Fabrics are always 20% off! Fabric of the Week! Crayon Box Stash Pack is 20% off through Sunday! The Crayon Box Stash Pack is another set of fabric that's created from the Color Wheel colors but is not included in the permanent Basics sale. There are 20 textured fabrics. 10 are streaky fabrics, one in each of the 10 hues. The other 10 are mottled and are combination of 2 analogous hues. This week Crayon Box is 20% off through Sunday. Color Palette ToolsI know that lot of people like using color wheels to help select palettes for projects. I find them of limited value. For me, it's difficult to translate the bright red on a color wheel to a maroon that I might want to use. So I've found some online tools to help me out. Canva Color Wheel - works by you selecting a main color and the color combination that you want and then the tool picks the other colors for your palette. Coolors is a palette generator. It creates a 5-color palette from one color that you choose. It has more complexity than Canva and has a nice tutorial to walk you through how to use it. Color Space creates several different palettes from one starting color. Palette Generator creates a palette from any photo that you upload. I could play with this one all day! Design Seeds is for those who want to find a pretty palette that someone else had already created for you. 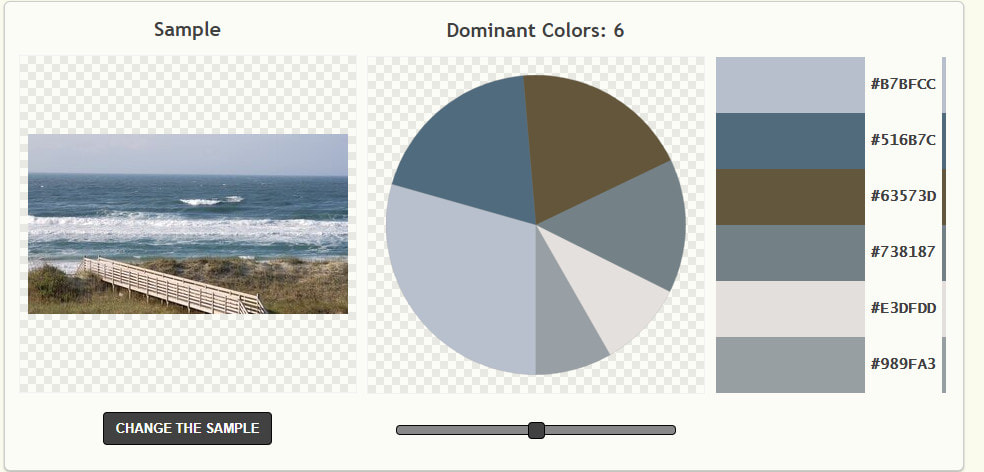 Here's a palette created by Palette Generator from a photo I took at the beach this summer. Have fun playing with these tools!
|
FeedsTo subscribe click the RSS Feed button and copy the URL of that page into your blog reader.
In Bloglovin you need to search "Colorways By Vicki Welsh" to find the blog. About Vicki
I'm Vicki Welsh and I've been making things as long as I can remember. I used to be a garment maker but transitioned to quilts about 20 years ago. Currently I'm into fabric dyeing, quilting, Zentangle, fabric postcards, fused glass and mosaic. I document my adventures here. Categories
All
Archives
May 2024
|


 RSS Feed