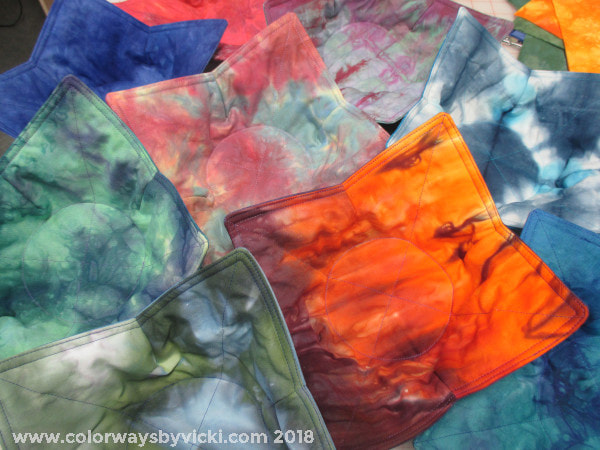
 They are done! All 11 sets (22 bowls) are done and ready for gifting....except for the 2 I'm keeping for myself.
I wrote a tutorial for the way I made mine. I was really disappointed with all of the other tutorials that I saw online. They looked very pretty in their styled photos but once I read through the steps I knew that none of them would hold up through one trip through the washing machine. I don't know about you, but when I microwave soup or oatmeal there's almost always overspill. These hot pad are going to get washed a lot so I added some steps to make them last. Get the tutorial here. 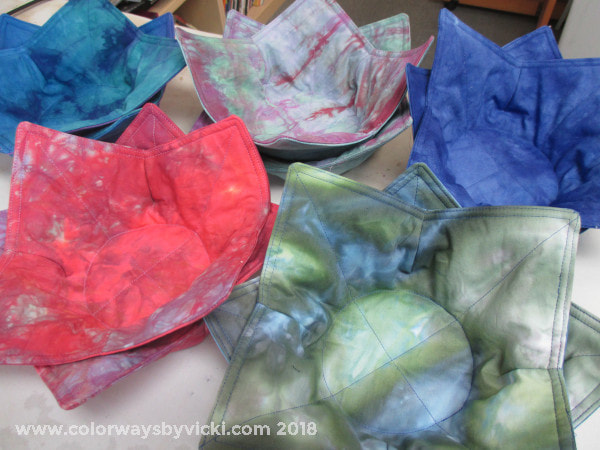 I've got a little factory going making a dozen sets of bowl hot pads. I was going to post some tutorial links but as I made my first prototype I realized that they wouldn't hold up well to frequent washing. So I've made some mods and will post my own tutorial tomorrow or Friday. I think they are going to be nice gifts!
 Eminence Shades Pack - 20% off! The fabric of the week this week is the Eminence Shades Pack and it's on sale for 20% off through Sunday! Eminence is a slightly grayed purple. Fat Quarter packs are ready to ship, larger cuts will be custom dyed for you. New Gradients!I'm very excited to introduce two new gradients this week. Georgia Peach is a floral-inspired gradient with bright green, peach and peachy-red. Kashmir is a very rich combination of black, gray gold and rust.  Georgia Peach Gradient  Kashmir Gradient Riverside is a recently added Gradient that sold out quickly. If you were waiting for some for yourself, it's now back in stock! 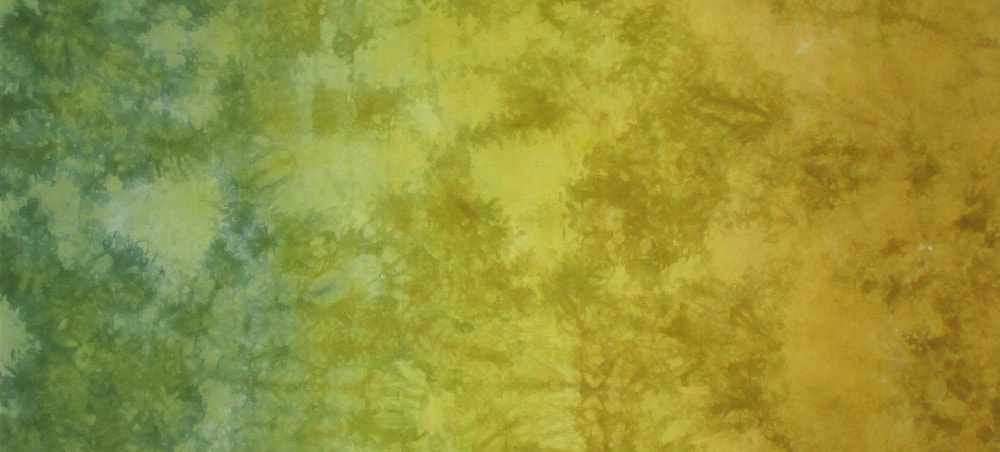 Riverside Gradient We had a great weekend of sewing at quilt club and I got the last 2 of my new veteran quilt patterns made up. 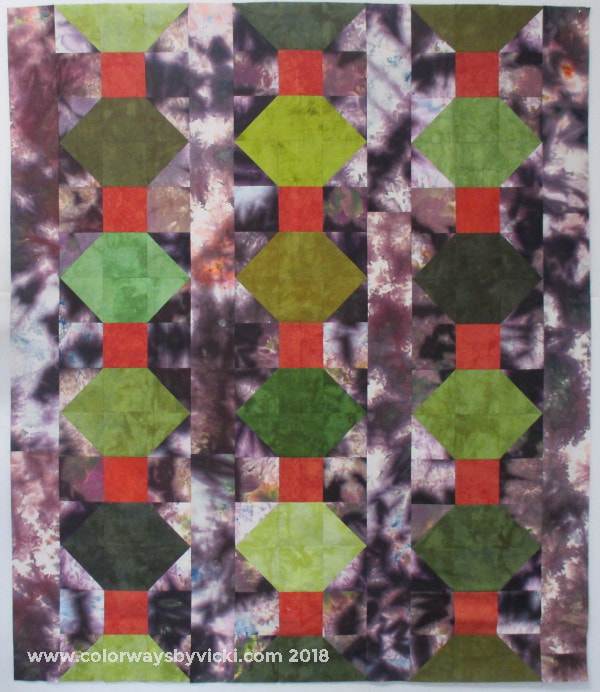 I'm working on these because I'm doing a program on veterans quilts for our January meeting and I want to have 4 easy patterns to share. The colors in this photo aren't quite right. The background one of my Galaxy fabrics and I love these for backgrounds. It's actually a lot more purple than this photo shows. The greens are greener and the orange is brighter in real life. I think this would look really cool in scrappy tans for a background, blue lanterns and red squares with a red binding. I cut it out one evening and sewed it together in about 5 hours. 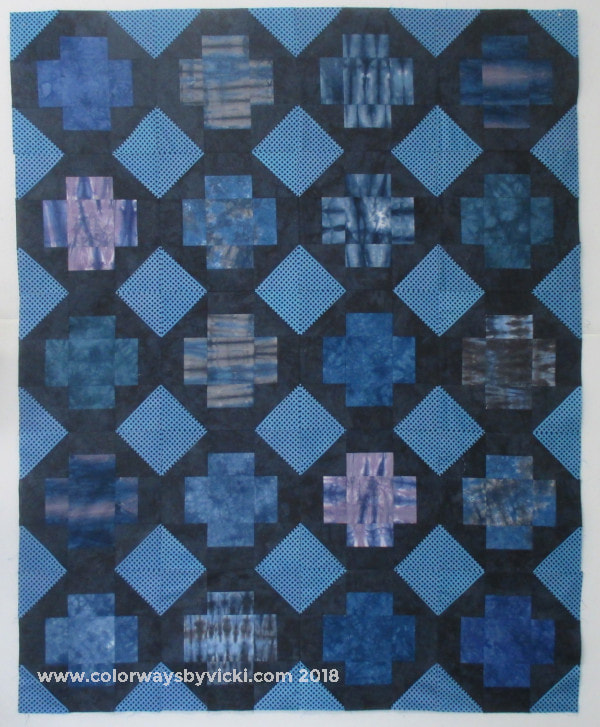 This is the last of the 4 and I love it. It's simply 20 12"blocks. I had an overdyed black -on-white that I used for the background, the dark is dyed navy blue and the centers are from the Midnight Stash Pack. One Stash Pack was plenty for this quilt. I also pieced this in about 5 hours. Next I will write up instructions for them and will post them in January. 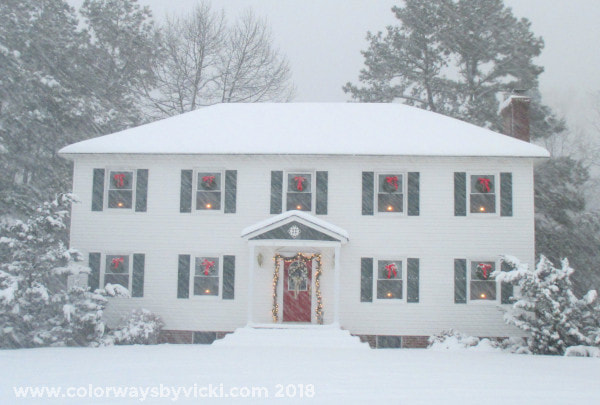 The weekend finished off perfectly with the lovely snow storm that hit the Southeast. (I refuse to legitimate the bogus habit of the Weather Channel of naming winter weather systems. It was just snow.) It's a rare event in Virginia but we were gifted the second highest December snow levels in Richmond at 11.5". We measured 10" in front of the house. That's the most in this area in December since 1908 and I'm glad we were here to see it. 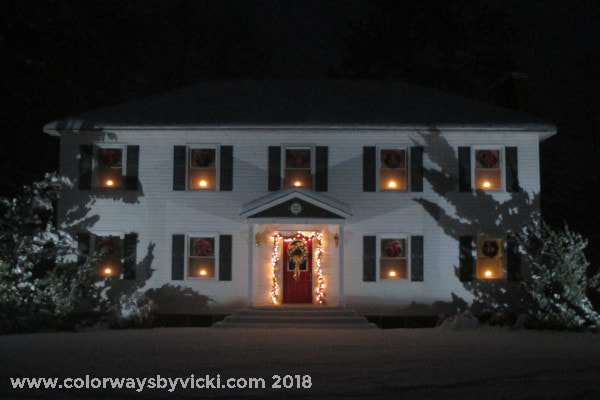 I've been hoping for the opportunity to get these photos for 20 years! I even moved all of the cars out of the cars when the snow started so that I could take a photo without vehicles. Maybe I'll have to print them on fabric for next year's postcards.
 Kimber's Custom Constellation Dream Catcher by Savannah Tuten How's this for something different? I was so happy to receive these photos from Savannah Tuten of Cactus Flower Creations. Savannah makes custom designed dream catchers and for this one she added strips of the Twilight Gradient.  You can see the strips of fabric along with ribbons, yarn and strips of lace. 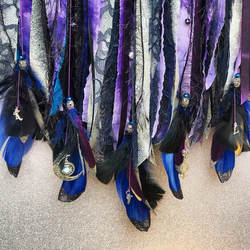 She finished it off beautifully with feathers and charms. You can find Savannah on Instagram and Facebook at Cactus Flower Creations.
For sharing, Savannah received a 20% coupon for the shop that's good for 3 months! If you have made anything with my hand dyed fabric I hope you will consider sharing it in the Customer Gallery. The only rule is that projects have to be complete. It doesn't have to be made totally from hand dyed fabric, just include a recognizable amount. Now that the Christmas postcards are done I'm spending the remainder of my December mostly working on veterans quilts. I'm going to do a program for Country School Quilters in January and want to design a few relatively easy patterns to share. 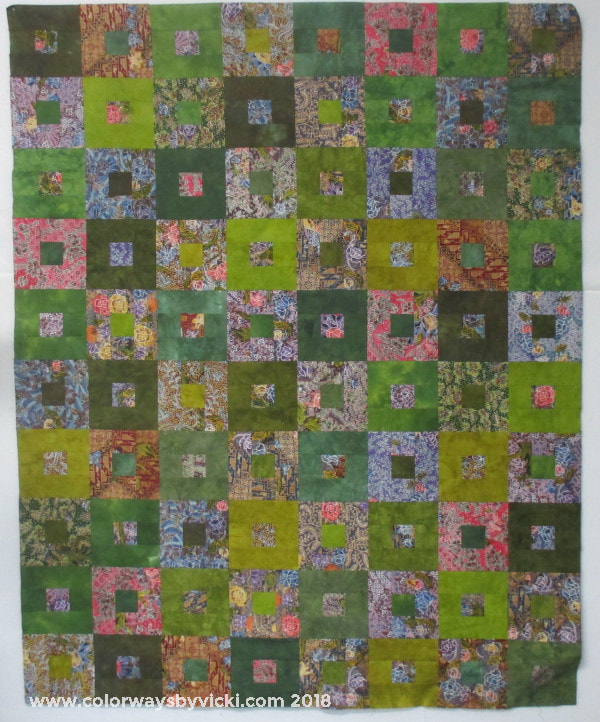 This current focus all happened because of this quilt that I made with the Indonesian batik scraps. It was so much fun to make a small quilt for a change that I decided to make a few more. Plus we've gotten some feedback from the hospital department that distributes our quilts and that really inspired me to focus on these quilts for a while. 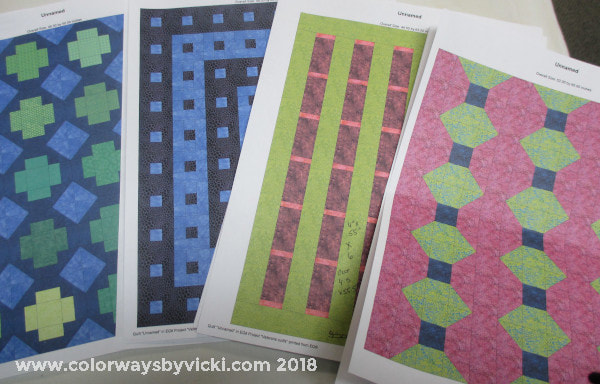 Here are some of the design ideas that I'm working on. I'll make at least one top from each one and then cut up some kits to have at my program next month. 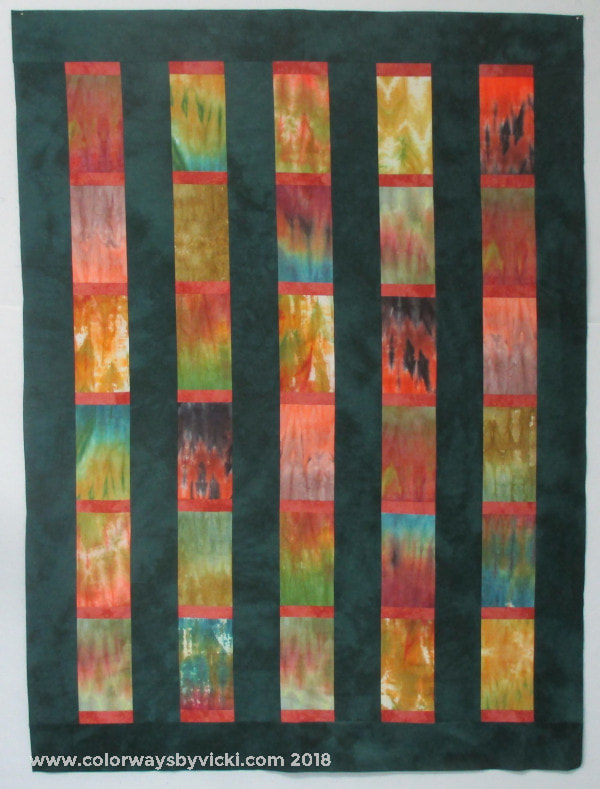 I sewed this one together very quickly yesterday. Once it's quilted I will use the orange fabric in the bars for the binding. The feature fabrics are my "waste fabrics" that I love so much! I'm thinking that this would look great in a larger quilt using shibori fabrics. 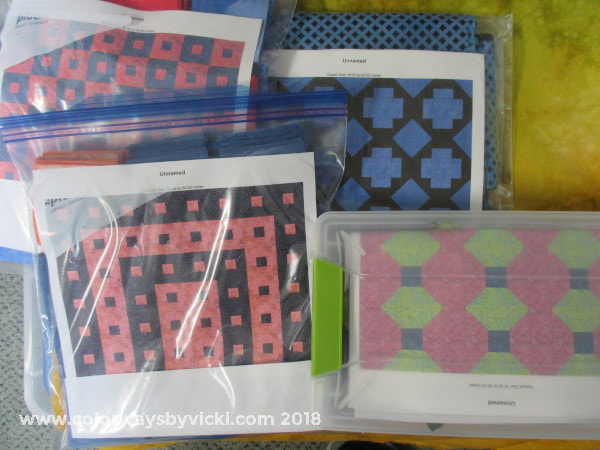 Here are 4 kits that I've cut out already. Today and tomorrow are sewing days with Country School so I hope to get the 2 on the right put together by Monday. If I can get those done I will have 4 quilt patterns to share in January. It will be even better if I get them quilted and bound.
We might even have a quilt-along on the blog next year for a veterans/QOV quilt. All of the Christmas cards are done! 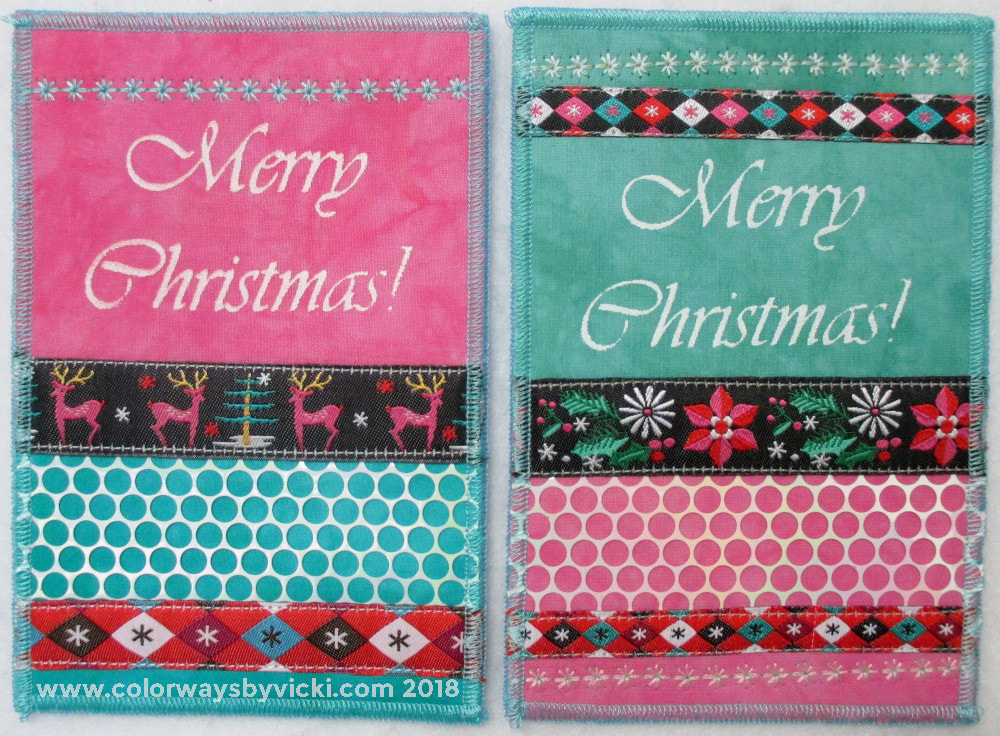 I don't have any in-process photos because I was so focused on finishing them that I forgot to take any photos. These started with a ribbon package from Renaissance Ribbons. I don't see this pack available anymore but I bought it for the reindeer. I like to give a deer-themed card to our hunting friends. This is pretty subtle but it's the best I could come up with this year.
The "Merry Christmas" is a silk screen that I made several years ago. It took up a nice hunk of real estate on the card so that I could feature the ribbons. The dotty material is Punchinella that I've had in my stash for YEARS and never used. Punchinella is also called sequin waste. This is what's left over when they make sequins! Around the time that I bought it, Punchinella was the new hot item in the crafting world. Scrapbookers and surface design people loved it. Like many of my supplies it's just another thing that I bought and never used. With this year's cards I set a goal of using some of those "special" supplies and I might have made a teeny tiny dent. I made 17 of these cards for a total of 78. Now it's time to start addressing all of them! 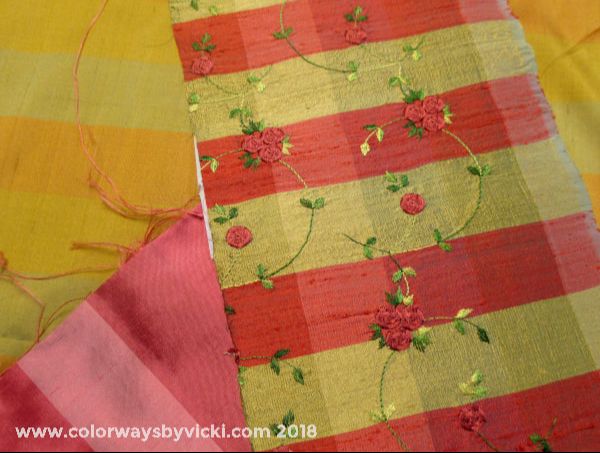 If you read yesterday's post you know I was digging into fabric bins this weekend looking for a stripe fabric. While I was in there I found these 3 silk fabrics. I know that they were given to me and I think that a friend might have brought them back from Thailand but I can't swear to it. The 2 solid stripes are about fat quarter size and the embroidered piece is less than a fat eighth. Since today is my best friend's birthday I thought I might be able to do a quick card for her that she wouldn't have seen on the blog yet. The nice think about beautiful fabrics is that they do all of the work. The design can be very simple. 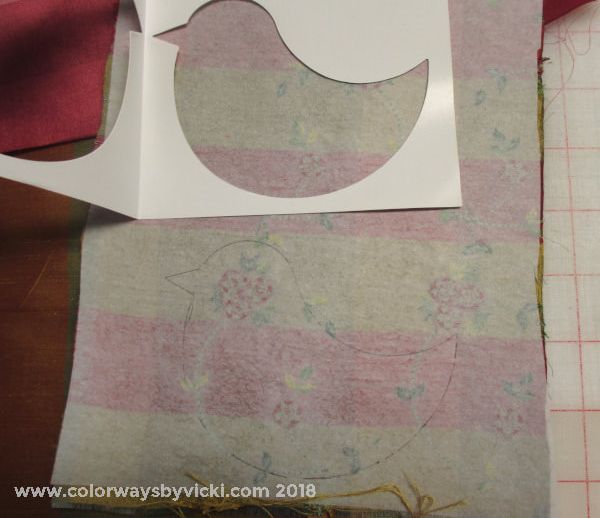 My design is incredibly simple! I have the bird GO! die so I cut a template from heavy card stock and traced the bird onto the fabric. I fused WonderUnder to the back of the fabric so that I could trace the shape onto the paper backing. I couldn't cut these with the Go! cutter because I would have not been about to do it without cutting random chunks from the fabric because there are 2 other birds on the die. By tracing and cutting by hand I was about to fit 6 birds on the fabric. The bird in this photo is the one that I used for Anne's card because I was able to get the 3 applique roses near where the eye would be. 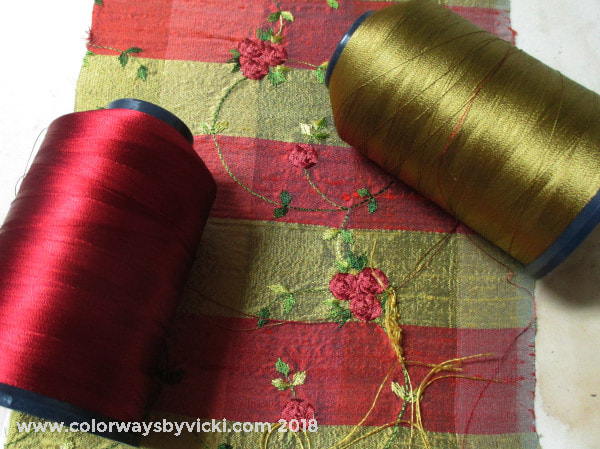 Then I had to decide on which fabric for the background and I did that by selecting the applique thread. I felt that using the red thread would make the best contrast between the bird and the gold background. 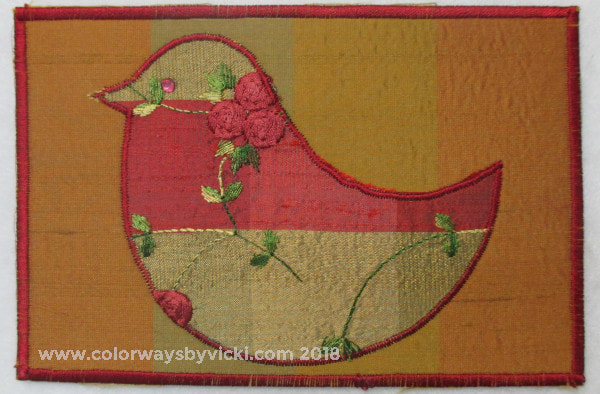 It really couldn't be much simpler than this! Some of the birds, like this one, got an extra crystal for an eye. I think my birds look very elegant. 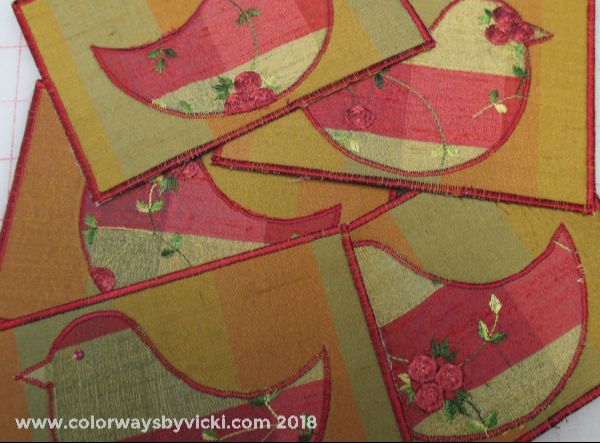 I made 6 of these cute little bird cards. I like it so much that I might have to find a pretty Christmas fabric and do this for one of my postcard designs for next year.
Happy Birthday Anne! I bought some new clothes recently and I have a rule that new clothes have to fit into existing spaces. So if a drawer is full I have to get rid of some items to make room for new ones. I can't stand clothes clutter. All of the new clothes fit fine because I had recently done a purge but as I was putting things away (including a new red tunic) I found another red tunic that I had never worn! Ugh, I hate it when I do that. What a waste! I know I had not worn it because the pockets were still stitched together and also I because I don't love it. But it's a perfectly good sweater/tunic and I thought that maybe I could make a Christmas sweater out of it. It is red, after all.  I remembered a sweater that I saw at a show recently that had 3 simple tree on it. I wanted and easy project and that seemed perfect. First I had to find the fabric. I wanted a plaid or stripe so I pulled out those bins and found this set of 3 woven ikat fabrics. (I also found something else for another quick project that I'll share tomorrow.) These are perfect for the look I want...more homespun, less sparkle. 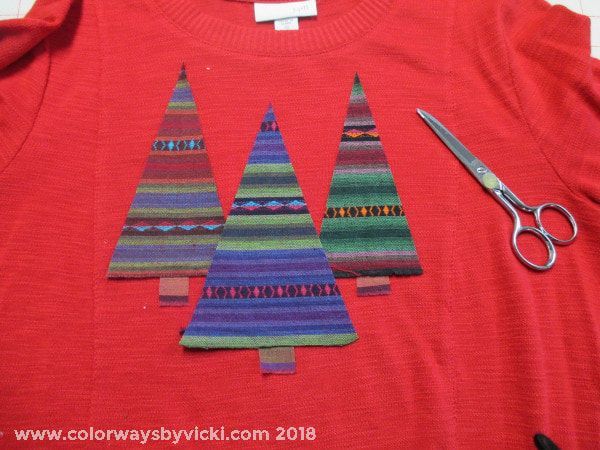 Had I planned this project properly I would have put some Mistyfuse on the back of the tree fabric before I cut it out, but I didn't do that. I just cut out the tree shapes, arranged them on the shirt and pinned them in place. Then I tried on the shirt to check/adjust placement. 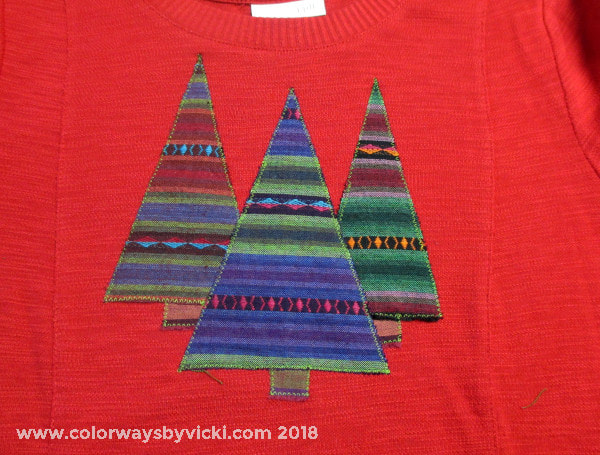 Once it was time to stitch I realized that i needed some sort of stabilizer or I'd stretch the sweater during the stitching. Had I taken more than 5 seconds to think about that I would have used Sulky Solvy as my stabilizer because it's so easy to wash out. But I didn't and the closest thing to hand was tissue paper. I pinned a big hunk of tissue paper to the back side of the sweater front and pinned it in place. I did do one test seam on a scrap of sweater fabric and once I had the stitch length and width just right, I zig zagged away. Start to finish, the whole effort (including cleaning up the plaid fabrics strewn everywhere) took less than 2 hours. Now I have something to wear to the quilt club meeting next week.
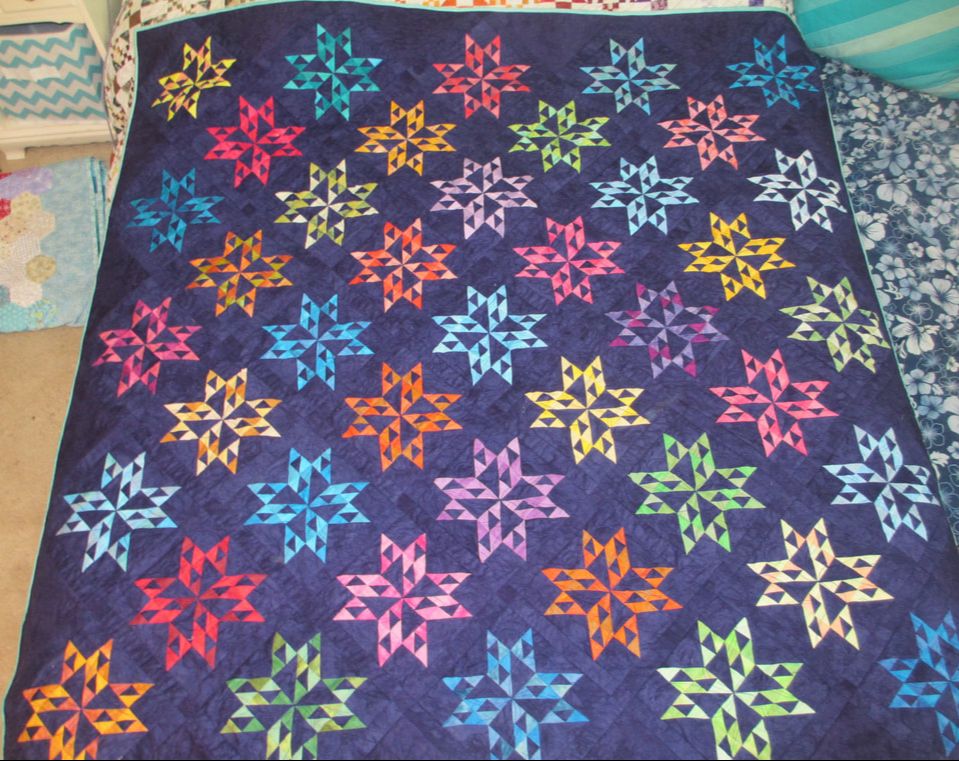 Stained Glass Stars by Katie Lewis Katie made this beautiful quilt using Stash Packs, hand dyed scraps and a custom dyed purple for the background. The block is an unnamed start block from Judy Hopkin's 501 Rotary Cut Blocks book. She made the quilt in 2018 Rainbow Scrap Challenge. 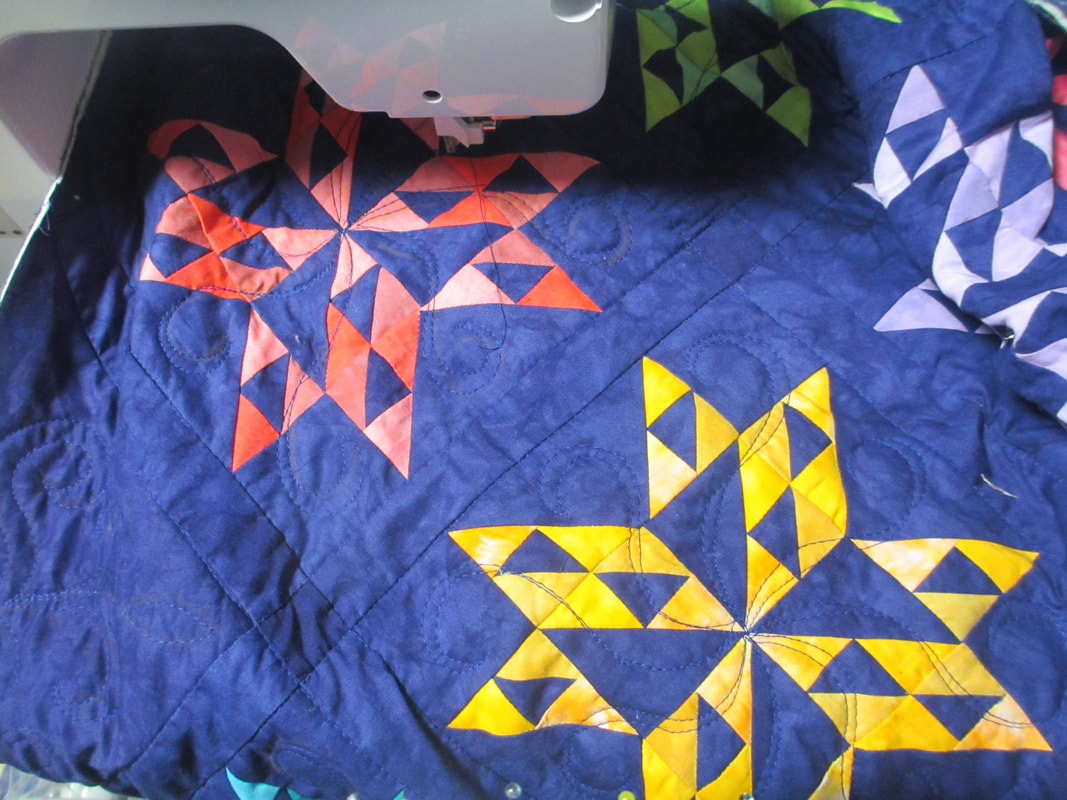 Katie does beautiful free motion quilting on her domestic machine....even big bed quilts! 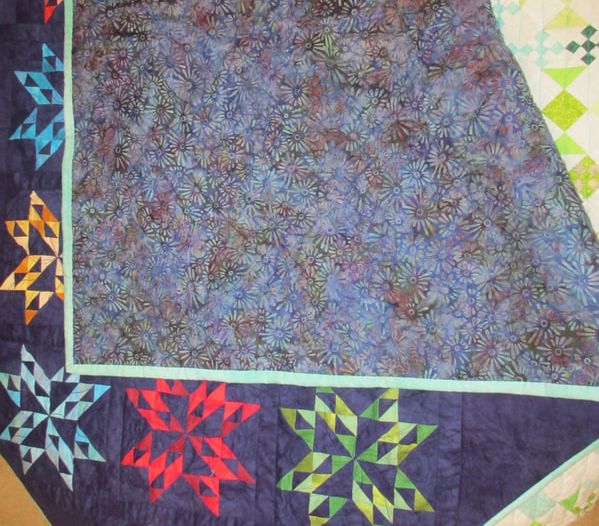 She chose a beautiful batik for the quilt back.
For sharing, Katie received a 20% coupon for the shop that's good for 3 months! If you have made anything with my hand dyed fabric I hope you will consider sharing it in the Customer Gallery. The only rule is that projects have to be complete. It doesn't have to be made totally from hand dyed fabric, just include a recognizable amount. |
FeedsTo subscribe click the RSS Feed button and copy the URL of that page into your blog reader.
In Bloglovin you need to search "Colorways By Vicki Welsh" to find the blog. About Vicki
I'm Vicki Welsh and I've been making things as long as I can remember. I used to be a garment maker but transitioned to quilts about 20 years ago. Currently I'm into fabric dyeing, quilting, Zentangle, fabric postcards, fused glass and mosaic. I document my adventures here. Categories
All
Archives
April 2024
|
 RSS Feed