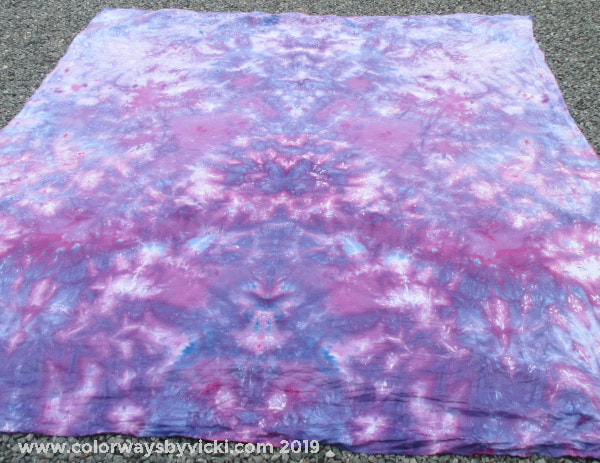
 The ice dyed fabrics turned out great. I'm going to show you the backing fabrics first. This one I Anne's from the red/blue/purple bin. When I load the backing fabric in the bin I always leave it folded in half so that I will get a mirror image effect. I think it's a little better than just all over mottled. 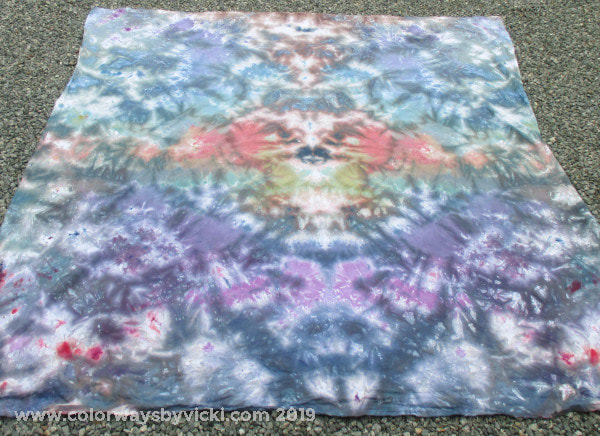 I put my fabric in the "rainbow " box and I expected a lot of brown but was really lucky to get this. 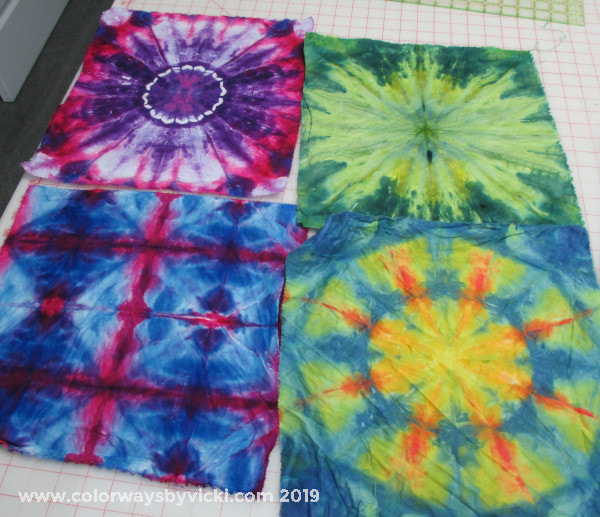 I had a couple of questions on Friday's post about the process and I thought I'd answer here for everyone. We soda soaked the fabric before we folded it. For the backing fabrics I arrange them in the bins and then pour over enough soda ash mixture to dampen the fabric. I generally leave my folded, wet fabric overnight to dry out a bit before dyeing so we did all the folding Wednesday and the dyeing Thursday. For dyeing I layer some ice, then sprinkle lots of dye (you have to wear a mask for this) and then add more ice. Then for a boost I sprinkle soda ash powder on top. I don't know if that actually does anything but I do it anyway. 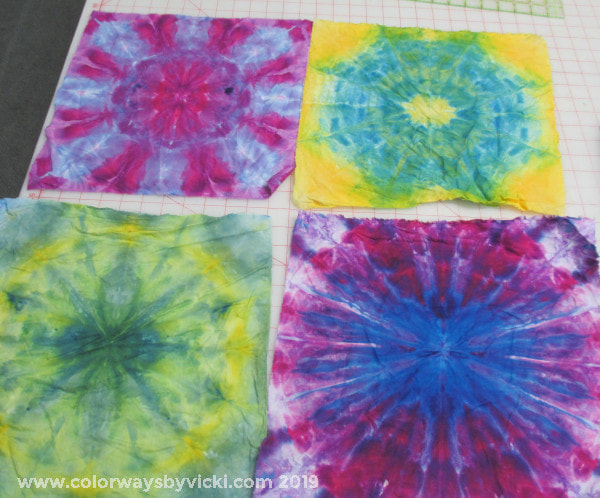 There are a total of 106 of these squares! I don't think we will have any problem picking winners for our quilts. I expect there will even be some left over for a baby quilt or two. Now I have to decide on a sashing color. I originally thought black but now I'm thinking gray or a grayish blue might be better. 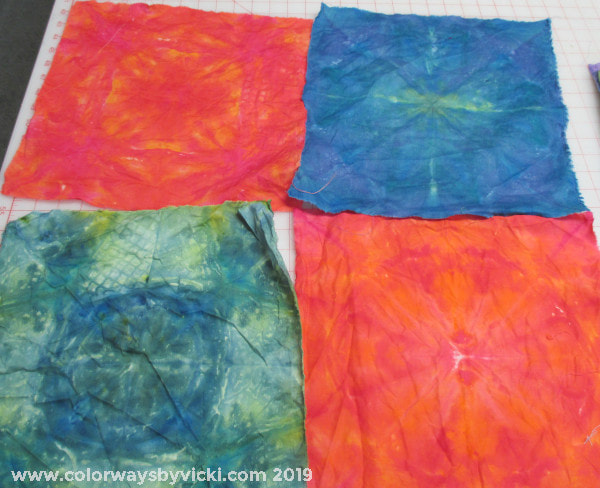 Of course there were some losers and that's OK. It's just more hand dyed fabric scraps for another project. 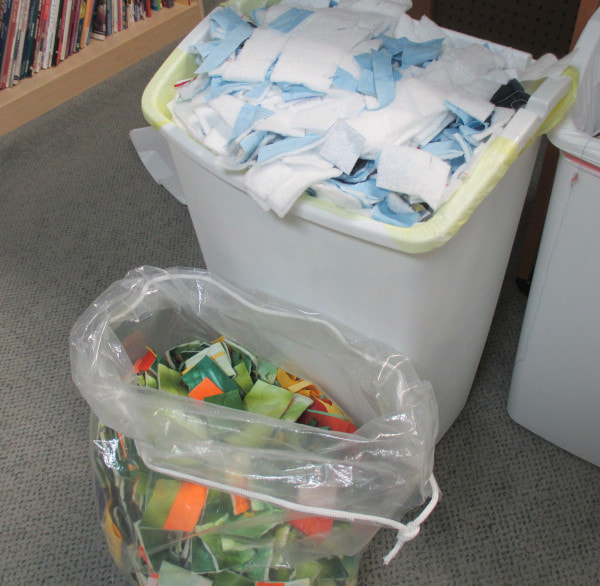 Meanwhile, in the sewing room, my batting trimmings bin is overflowing so during the night game last night I started cutting out some fabric for dog beds. I like it when I can divert something from going straight to the landfill.
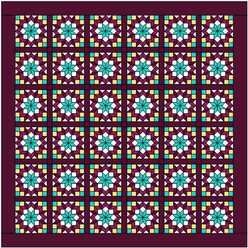 I was just relaxing and scrolling through Instagram when I saw a simple, but very cool, quilt made with ice dyed mandala blocks. It was really simple like this layout. The mandala pieces seemed to be about 12" square and it was sashed and bordered wiht solid fabric. I send the link to my friend, Anne, with a "we should make this" She replies "yes, I'm available this week" and here we are ice dyeing on the last hot day of the year (hopefully). Of course if I'm going to make a quilt like this it's going to be for my bed so it has to be a queen size. If the blocks are 12" I need 36. But what if I have to cut them down as small as 10"? Better make 49 just in case. But what if some are duds? Better make 60. That should do it. Anne wants a lap size quilt so she settled on 45. 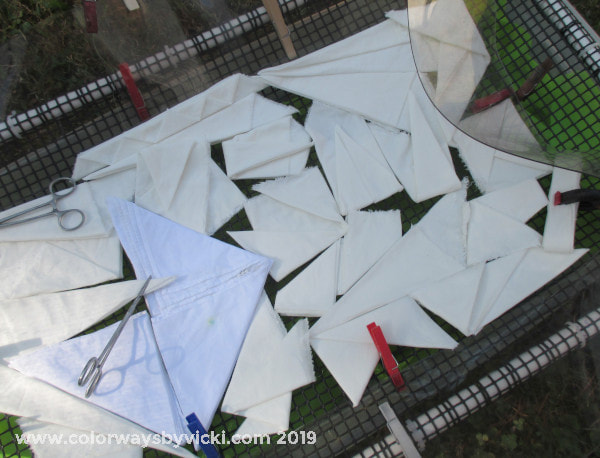 So we spent a few hours Wednesday folding lots of little fabric bits. She also had some bandannas and added in a few of those. We ended up with well over 100 items to dye. 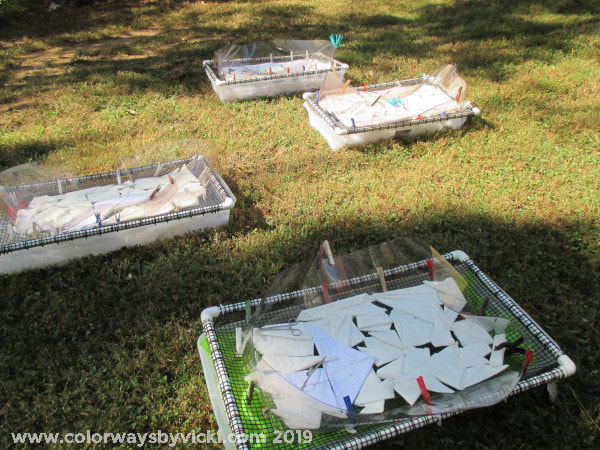 By Wednesday evening we had 4 bins ready to go. There fabric in the bottom of the bins too. Two of them are quilt backs that we hope will be the backing for our quilts. 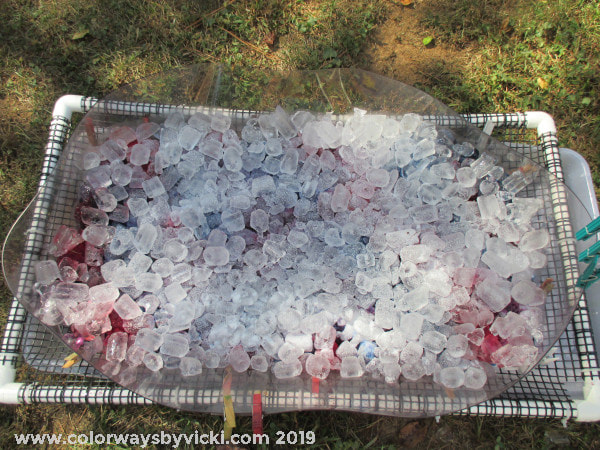 Here's one of the bins right after we set it up. The layers are ice, dye powder, more ice and finally a sprinkling of extra soda ash. By 4 in the afternoon they were about half melted. One bin is blue/red/purple, one is red/orange/yellow, one is blues/yellows and the last is a rainbow. The rainbow one has my quilt back so it might be brown but I'm hoping to see some of the individual colors in the backing. We'll see. It will be good either way.
Today we are taking down the CSQ quilt show and then going with Mom to see the Downton movie. After that I'll come home and wash all these gems out. We'll see the results next week. Today is "dyeing day" and that reminded me to share a new top that I dyed for myself last week. 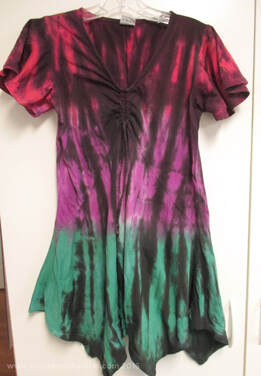 This is a top that I dyed a couple of years ago. It's the Flower Power Top from Dharma Trading. It's got several things going for it that I love. It's soft cotton knit, it's very comfortable, it's manchine washable and it's long enough to completely cover my hiney. I love wearing it with cropped leggings. The only thing I don't love about it is the sleeve but that's a minor complaint. This year I ordered a couple more with great plans to get them dyed and they have been sitting on the shelf for over a month. I finally got motivated last week. 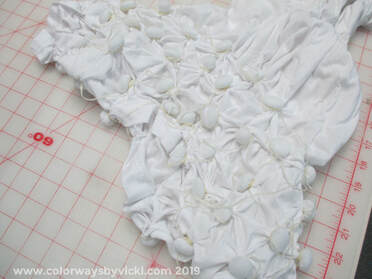 Last Tuesday I was invited on a road trip to the Virginia Quilt Museum and I didn't have to drive. I took along one of the tops, a bag of glass florist marbles and my waxed sinew. In the car I wrapped marbles in the lower half of the top. I did not tie each individual marble. I just wrap each one a few times and pull tight. That hold the marble in well enough. 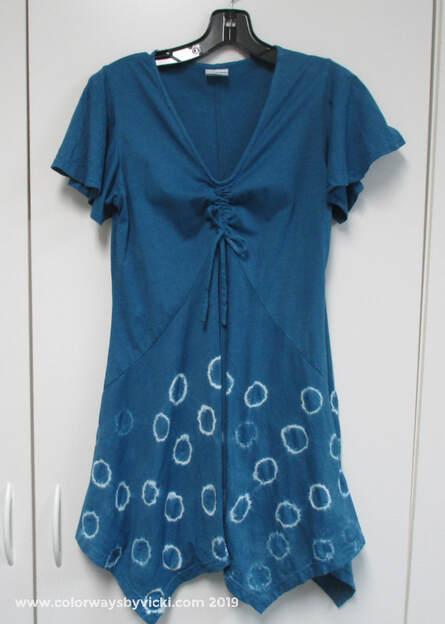 I usually do low water immersion but I wanted the color in this top to be smooth solid so I did a full immersion dye and I'm really happy with the way it turned out. What I love about Dharma clothing is that the thread used for construction is cotton so it dyes too. 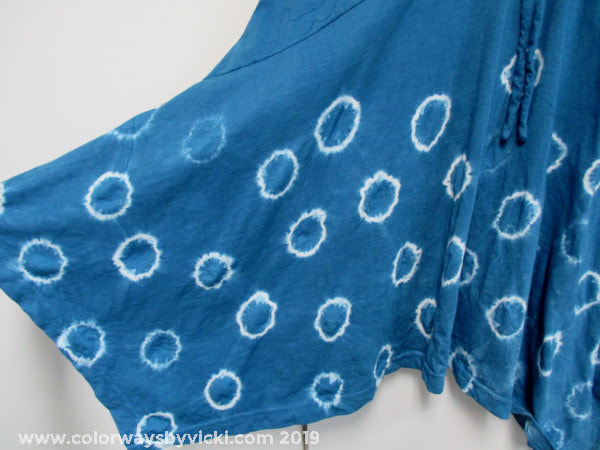 It took a lot less time that I expected to tie this dress and I'm glad I remembered that I had it to work on during the car ride. Now I need a design idea for the second one that I bought. 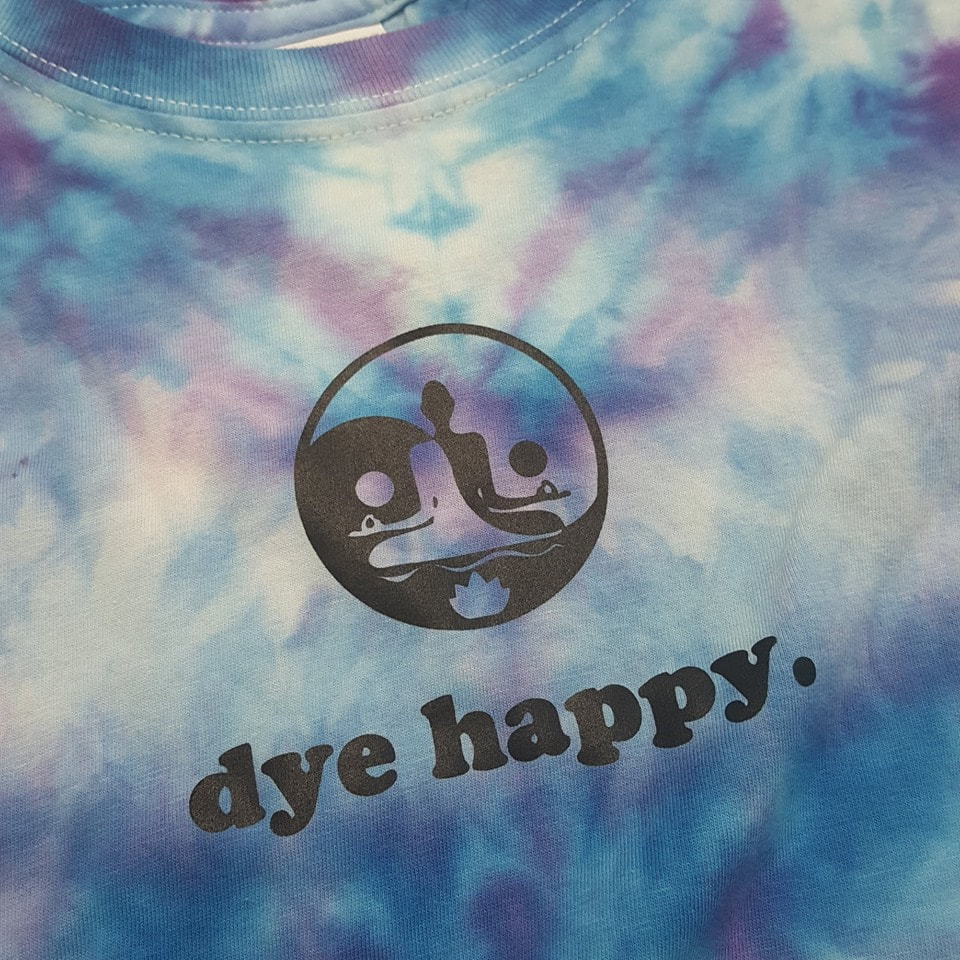 There's a little shop across from the Viginia Quilt Museum that sells kind of Bohemian clothing. I usually find something that I "need" in there. One of the things I needed this time was this tshirt that seemed to have been made for me! If you need one you can get it from Tie Dye Dan, a business in Harrisonburg.
 Gene commented on the Tuesday post about doing a Color Magnet tutorial. No need! There are several really good tutorials around the web on using this product. Before I share the list I will share some personal tips/observations.
1. I like this product best for screen printing. You get really sharp and crisp images. I think it was developed primarily for screen printing. It will work with stamping and stenciling but it will require a little more practice. 2. The magnet properties are really strong and it keeps working during the first rinse and even sometimes through the first wash. I generally washout my dyed fabrics with all colors together but when I use Color Magnet I do the first wash with like colors only. The magnet will continue to pick up loose dyes from the water so you have to be careful. Here are some tutorials to get you started. Videos from Jacquard, the makers of the product: Immersion Dyeing with CM Using the Color Magnet Pen with a stencil Color Magnet with Discharge Chemicals Other tutorials: Screen Printing Tutorial from Artistic Artifacts Stenciling Color Magnet from Dharma Trading Stamping Color Magic with Tjaps from Dharma Trading I hope you will give it a try. I love this product. It's so easy to use and I love the effects. 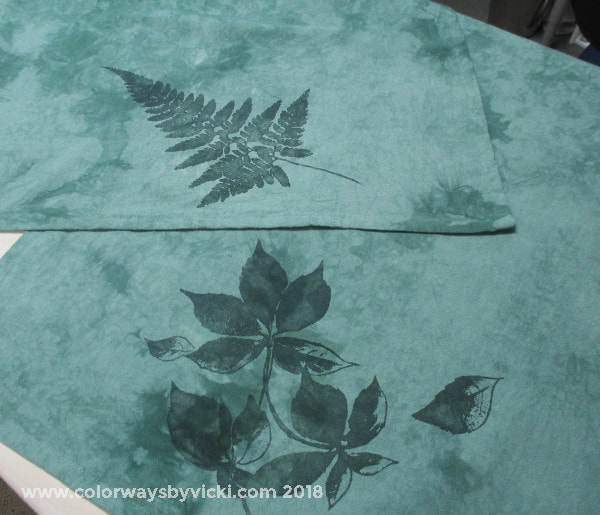 Before the bowl hot pads became my 2018 gift idea, I had planned to dye kitchen towels for everyone. Someone in one of my dye groups imported a bunch of them and offered them for sale. I decided to order a dozen but by the time I talked to myself about it and wanted to have "enough just in case", I bought 3 dozen! So it could be that I have a head start on my 2019 gifts. I dyed 2 past week just to see how they take they dye and then are wonderful. They are made well and even the thread in the hems dyes. I used Jacquard Color Magnet to screen the images. The Color Magnet causes the fabric to absorb more dye where it is printed. I could simply screen print the images after I dye the fabric and I will do that when i want the image in a different color. 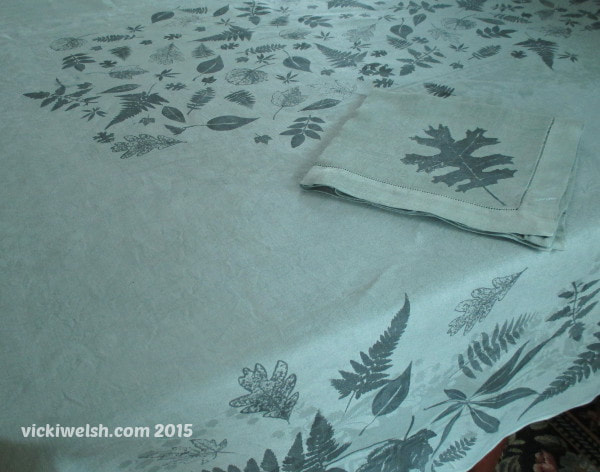 I've used Color Magnet before. You might remember this tablecloth that I printed with Color Magnet and the dyed . It took a lot of time to print that cloth but the effect was worth it.
Through the next year I'll use the new hand towels to play with different techniques and I should end up with a great stash of gifts. 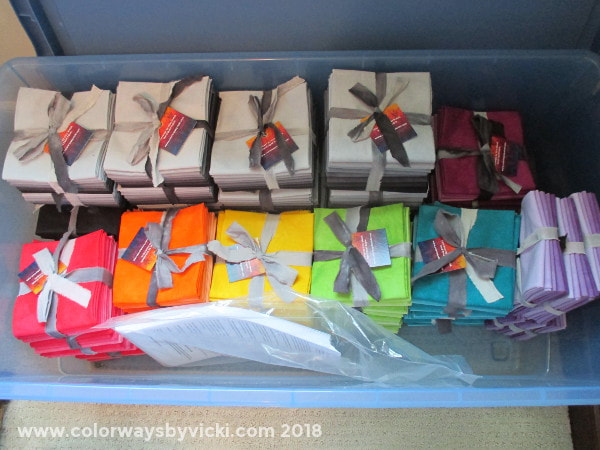 I keep talking about all of the dyeing that I'm doing to get ready for the AQS Virginia Beach show. I thought I'd give you a brief tour today. Now, keep in mind that my business is a little business and my inventory is basically stored in one closet and on one shelf in the office. I estimated that I needed double that amount of fabric for the show and consequently the whole house has turned into a warehouse! Chris is exceedingly patient about it. I lucked out that when Mom moved and unpacked she had several large plastic bins that she no longer needed. I brought them all home with me. I'm filling this one with Black Shades Packs and single color Color Wheel Shades Packs. It will be stuffed once I get all of the 10 Color Wheel colors done. There will be one more bin filled with the Color Wheel Shades and Stash Packs eventually. 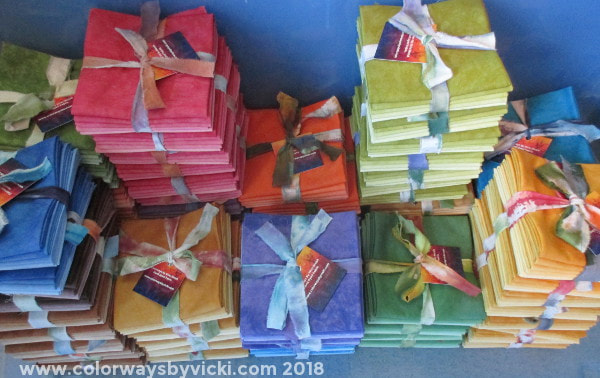 This bin is getting filled with all of the other colors of Shades Packs. 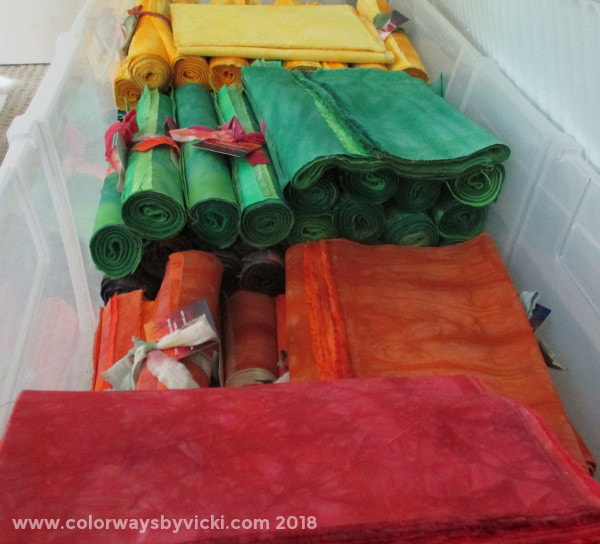 This is one of those bins designed for wrapping paper but I'm filling it with Stash Packs. I'll have to find another bin for overflow. 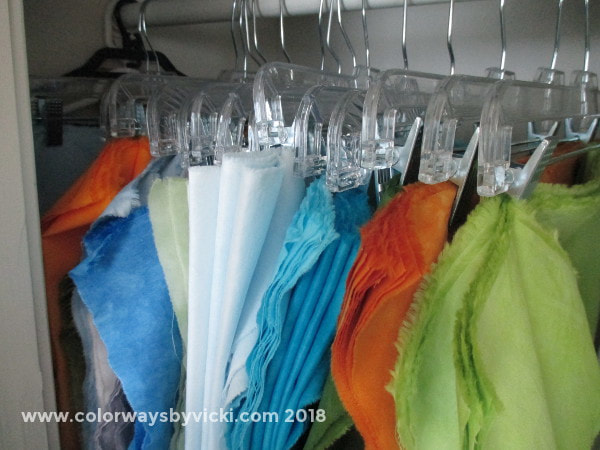 The guest room closet is filling up with Gradients. A month ago I was nearly panicked about how much I needed to do to get ready. Now that my bins, closets, living room sofa and other surfaces are filling I'm feeling better about it. I'm a little more than half way to my inventory goals.
But, I think now you can see why in the evenings all I can do is sit and hand stitch a bit. Tuesdays and Wednesdays are dyeing days so the amount of sewing (or anything else) happening on those days is about zero. But Chris is away for a couple of days on a fishing trip so I had 2 nights free to myself and set a goal of clearing away the moon mess. Last night about 11:00 I got the last one made. 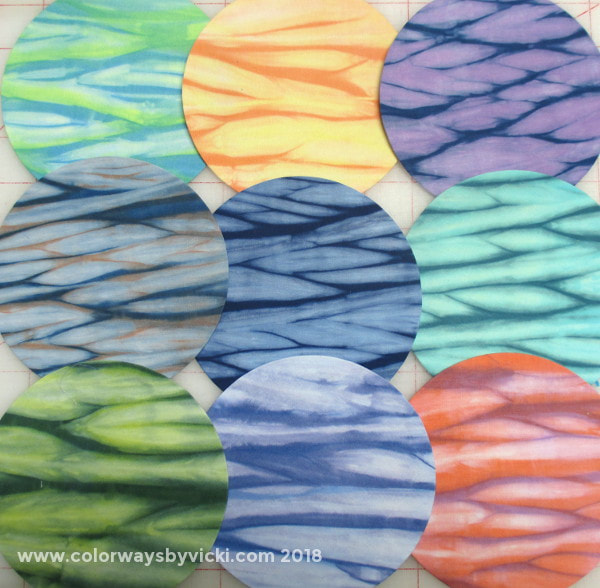 I don't have a specific number of moons that I wanted to make. I just made one from every piece of shibori that I had. These photos are some of my favorites. 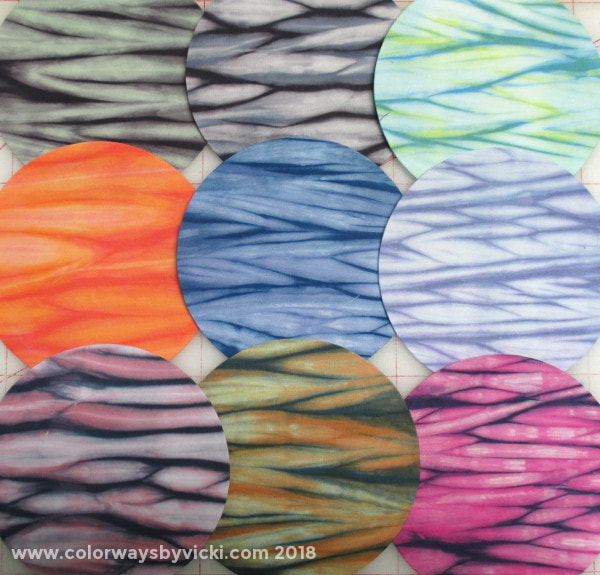 Every time I dye shibori for the shop I add a fat eighth to each pole for my own stash. I definitely dye mostly blue because that's what people want to buy. But I've gotten lots of other color combinations too. 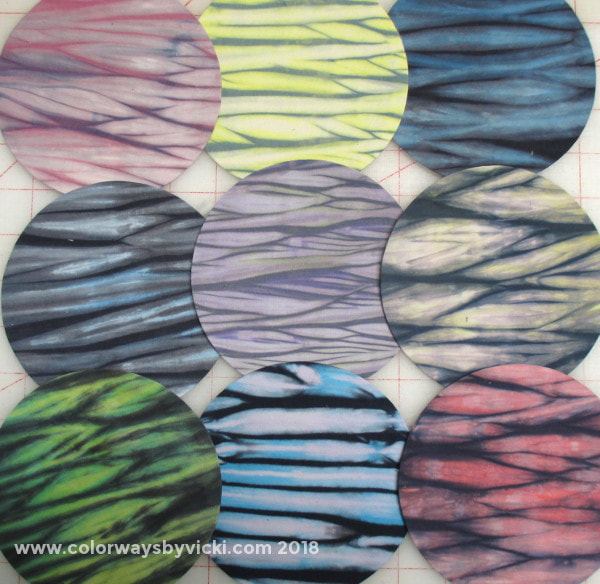 I double dye all of my shibori fabric. I dye once in the darkest color and then spread the fabric out on the pole a bit and dye in the second color. I get a bonus third color where those two blend. I think double dyeing makes it even more interesting. 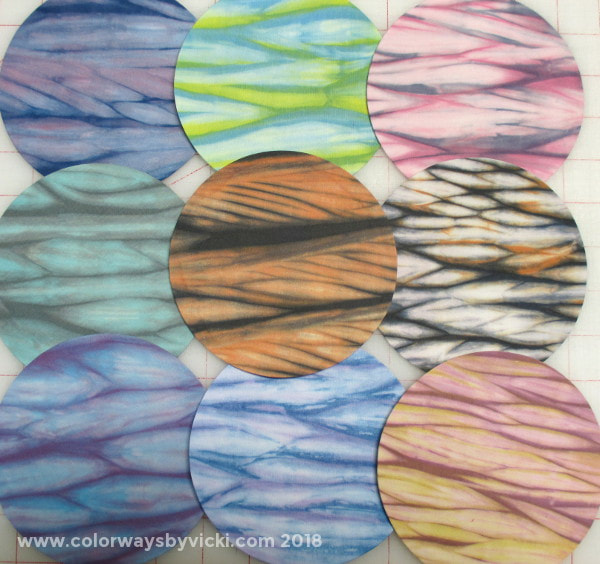 That orange and black one in the middle is my favorite of all of them. I did fussy cut several of them to get the colors where I wanted them. The one in the upper left corner is a prime example of that. It did waste a bit of fabric but it's not like I was actually using this fabric before I cut these out. 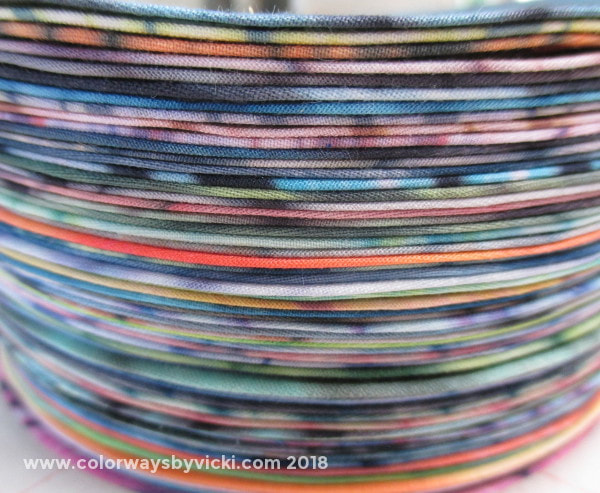 Here's the final stack. I think I have about 60 of them. I don't know if that too many or not enough because I haven't decided on a final quilt size. I'll just make blocks until I get tired of them. I'll be dyeing lots more shibori so I can always get more moons whenever I need them. Now I just need to settle on the block size and cut the backgrounds.
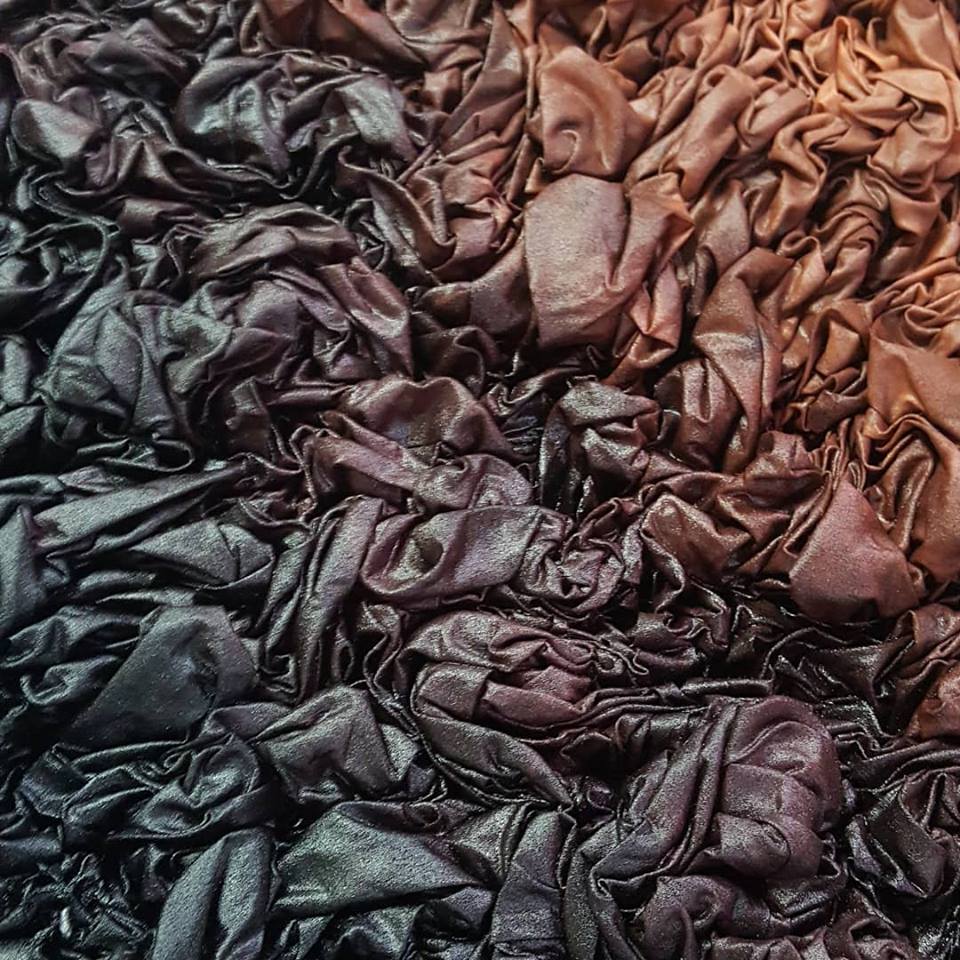 It's been a busy week around here! In the last 2 days I dyed about 110 yards of fabric and now I start the washout, soaking and ironing for the rest of the week. That's why I didn't post yesterday. But I did share this photo on Facebook yesterday. It's a sneak peek at a new gradient that will run from black to light brown. I've gotten some great suggestions for names and you are welcome to add your ideas in the comments. naming the gradients is one of the hardest part of my job! 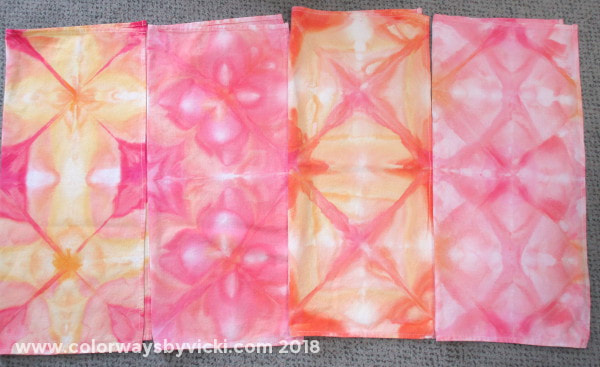 I actually have plenty of things to share on the blog but simply haven't had time (or energy) to edit the photos until today. These are things that I added to the ice dye bins last week. These for folded fabrics are napkins. They are going to be the inspiration for my next set of placemats. 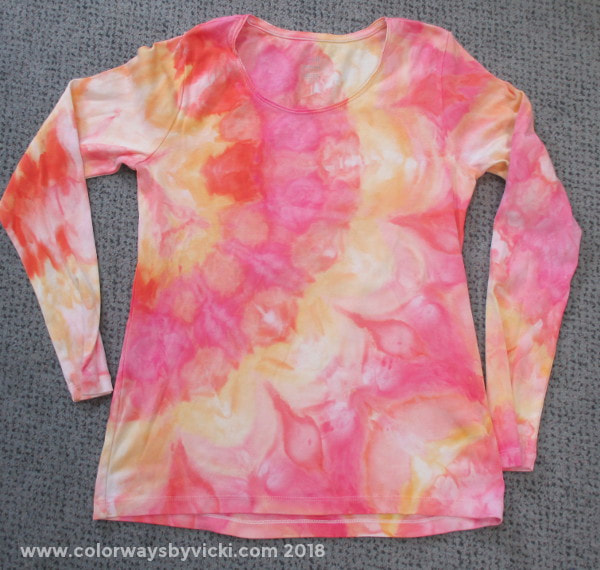 In the same bin as the fabric was this shirt. I love how the pattern turned out but it's got way too much yellow for me to wear. This one might get overdyed with a blue to turn it purple and green. That would be more in my color palette. I think to make it look right I would do a full immersion dye. That way the added blue would be even and the ice dyeing pattern would still be the dominant image. 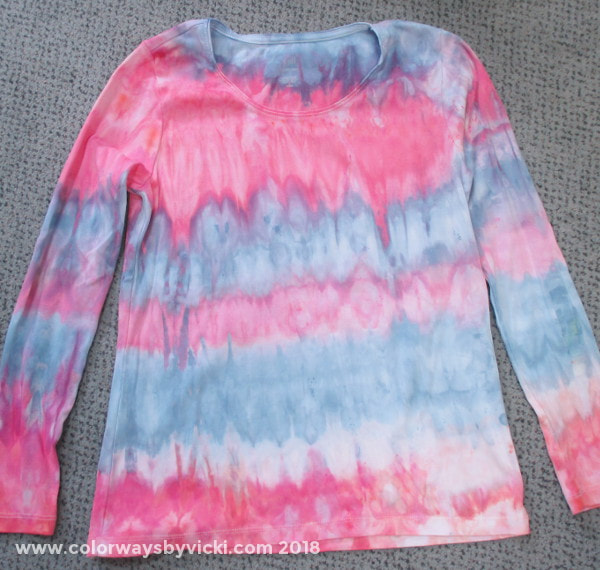 This one was in another bin and was supposed to be red and blue, not pink and blue. But I like it well enough and may leave it alone. 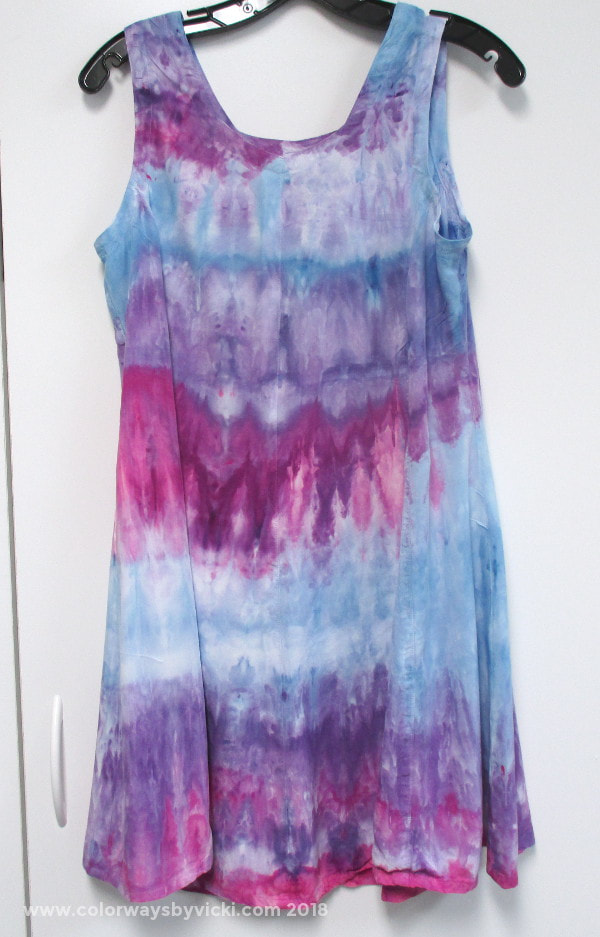 My favorite item from that session is this tunic/dress. I got it from Dharma Trading a couple of years ago and I don't think they carry it anymore. It's rayon and has a tie in the back. I'm going to shorten it about 4 inches and it will be perfect to wear with white or pale blue leggings.
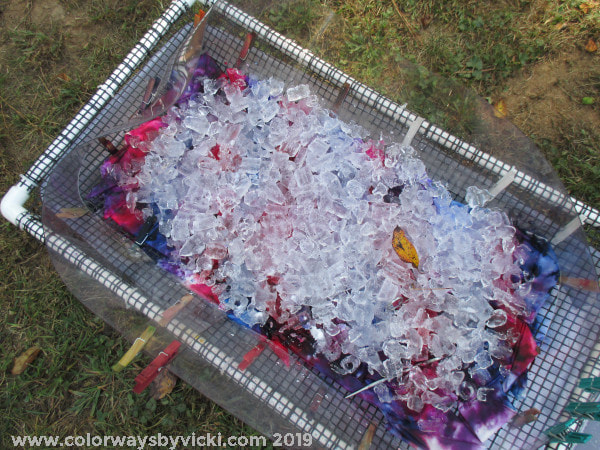
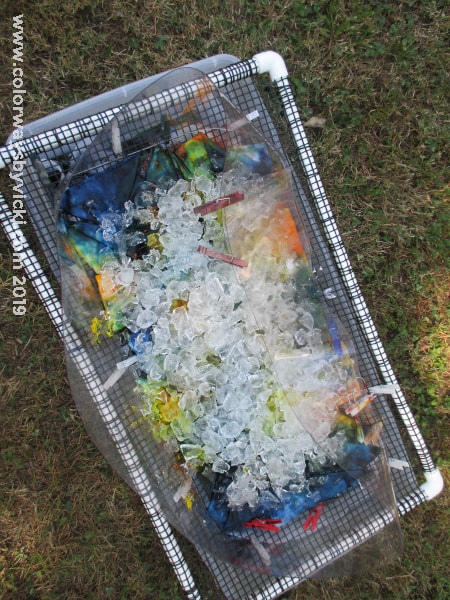
My life these days is almost 100% focused on dyeing fabric for the AQS Virginia Beach show in October. Since I haven't done a big show before I'm going in totally blind about what I need so I'm trying to make sure that I have too much. That means that every day is either a dyeing day, ironing day or planning day. Last week had 3 dyeing days because I decided to add in some ice dyeing and I thought I'd share my process for anyone who hasn't seen it before. 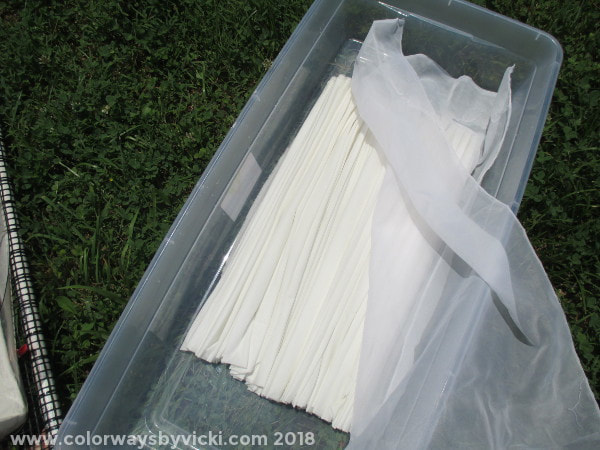 To be perfectly honest I don't really like ice dyeing but I love the results and there's really no other way to get them. Ice dyeing a pain in the neck. It's messier than regular dyeing, takes a lot longer to set up and wastes a TON of dye. I really couldn't abide the dye loss so a few years ago I started putting extra fabric in the bottom of the bin to catch the runoff dye and that's how I accidentally created some of my favorite fabrics, the Galaxies. It's a Galaxy fabric that is the feature fabric in my Antelope Canyon quilt. So I start by arranging 2 - 3 yards of fabric in the bottom of my bins. The sheer fabric over it is cut from old sheer curtains and helps to keep dye powder dots off the fabric and it works great. 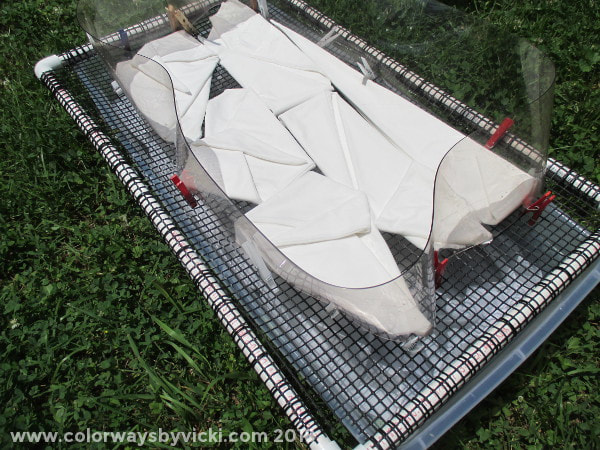 I had folded and soaked the fabric in soda ash several days before so I was ready to arrange the fabric on my screens. These screens are made with PVC pipe, plastic landscape cloth and zip ties. Next I surrounded the fabric with a wide plastic collar. Some people use cardboard but I had a roll of this heavy duty vinyl in the basement and this was a opportunity to use it. Don't ask where it came from because I don't know! Clothes pins keep it upright. Now it's ready for dye. 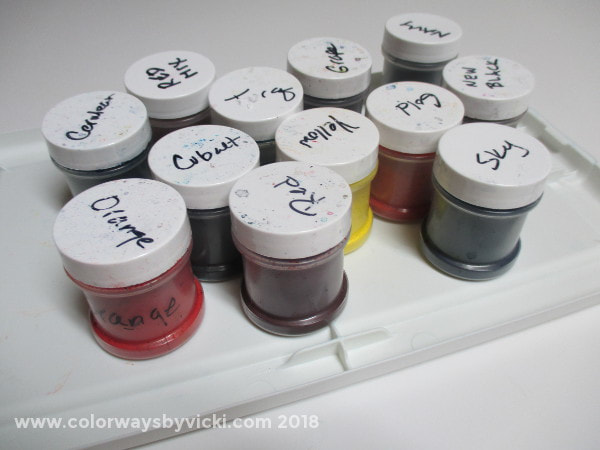 For my regular dyeing I use dye concentrates. The most, and probably only, dangerous part of dyeing is working with the dye powder because it gets airborne easily. I start my dye sessions by mixing the concentrates that I need for that day and then put the powders away. Ice dyeing requires working with powder so I load up some spice shakers with each of my colors and have them ready to go. While I'm using the powders I ALWAYS wear a mask. A caveat about safety, if you are a klutz like me the whole process can be fraught with danger. 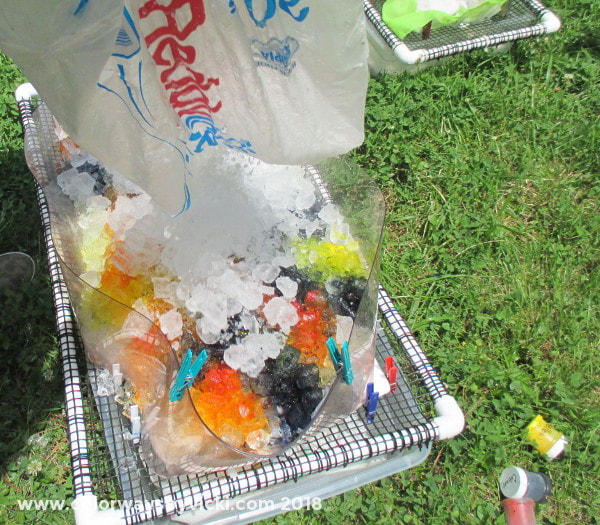 Because of my arm Chris had to help me out with this session. While he went to buy the ice I planned out the colors for each bin. He did all of the heavy lifting. I think that most people apply the dye directly to the fabric and then cover with ice. I like to put down a layer of ice, then sprinkle on the dye powders and the cover with more ice. I think it reduces the appearance of dye powder dots on the fabric. If you haven't figured out yet, dye powder dots are a giant pet peeve for me. This particular tray had 40 lbs of ice! 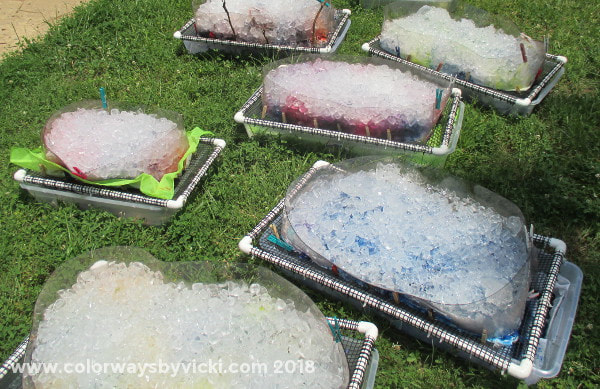 Here are 6 of the 7 trays hanging out in the sun doing their business. I like doing this outside because the ice melts faster and rinsing with the garden hose is so much easier! As soon as I get caught up on my ironing I'll have the new ones to share. The fabrics in the bottom of the bins turned out great too!
I'm very excited that I decided to try vending at the AQS show in Virginia Beach this October but it means a lot of prep work to get ready. I'm really enjoying planning the booth layout and what inventory that I need to have ready. I estimate that I will need about 800 yards (or more) for a show of this size. Next comes the challenge of figuring out what the make up of that inventory needs to be. 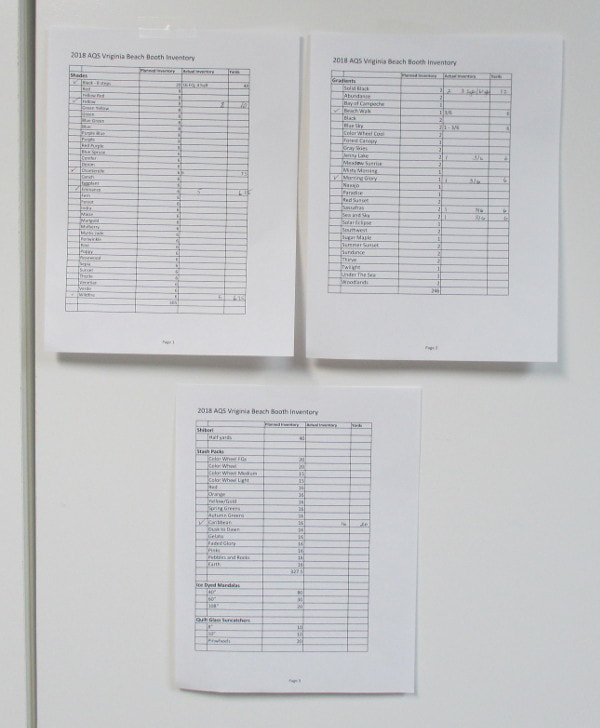 Of course I have spreadsheets! I'm keeping track of what I want to take and how much of it I have ready. I have storage bins all around the house (hidden as much as possible) to keep it all in for the next few months. But this means that I have to double the amount of fabric that I dye each week. 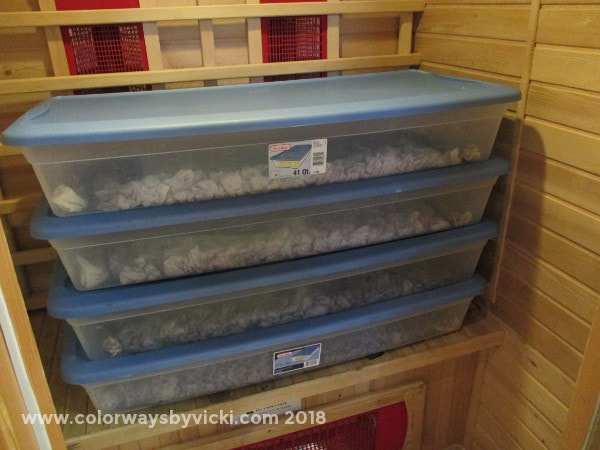 I used to dye on Wednesday, wash out on Thursday, soak Friday, rinse and dry on Saturday and iron on Sunday. Now I dye Tuesday and Wednesday and double all of the other schedules too. Now when I dye gradients I dye 2 of each: one for the internet shop and one for the show. These are Gray Skies and Black that I dyed yesterday. Yes, I batch in a sauna. Only because we have it in the basement. Chris used it for a while but decided he didn't like it. It's a GREAT dyeing tool! 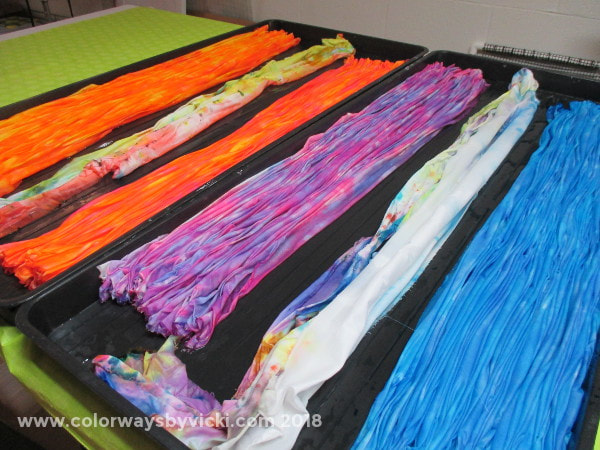 But that's not all! I'm also dyeing 4 new Reflections designs this week. These are all for the internet shop. They will not be at the show. So that's 40 yards Wednesday. 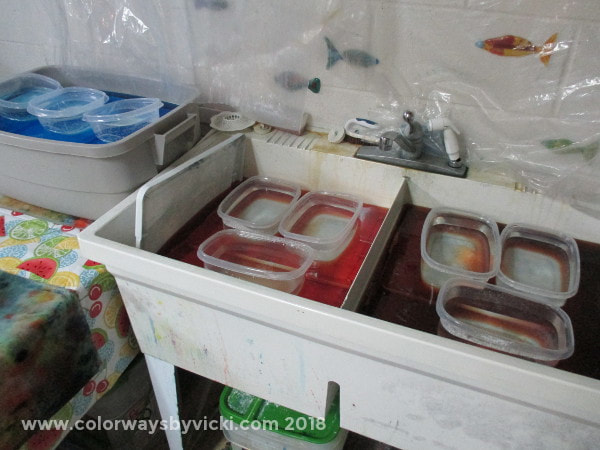 This is the washout and starting the soaking process for all the stuff I dyed Tuesday. This is about 43 yards of Shades Packs. For the Shades Packs I dye whatever customers ordered for the week and the same colors for the show. It's all pretty efficient and I'm building up the inventory faster than I expected. That's all really good but it does mean a lot less quilting and mosaic. I'm not complaining because I'm really enjoying the dyeing and show preparations but it does mean there's less good stuff for the blog. I don't think you want to see fabric dyeing photos every week! I may share some if it seems the least bit interesting but there are likely to be some skipped days this summer (like tomorrow) when I just don't have anything blog-worthy to share. Next week will be better, though, because it's Country School sewing this weekend and I'll get to work on my Antelope Canyon quilt again! 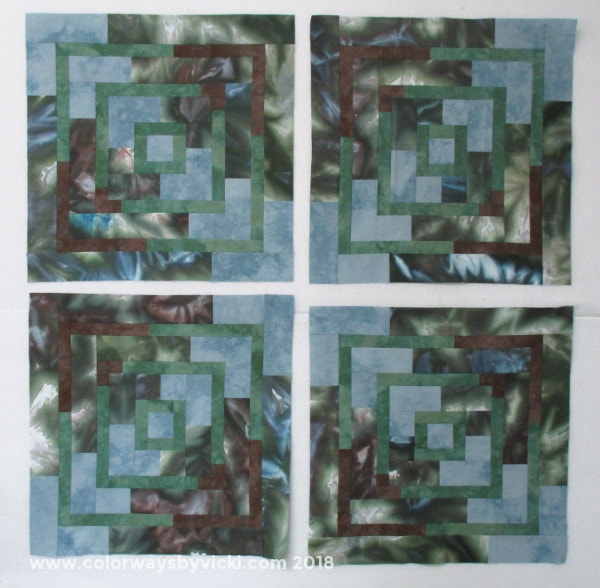 This is where I left off last month and I'm excited to work on it again. Plus Chris and I will finish off the Bosch series so I will make some applique progress....and I'm going to go hang out in my friend's pool. I'm so glad summer is finally here!
|
FeedsTo subscribe click the RSS Feed button and copy the URL of that page into your blog reader.
In Bloglovin you need to search "Colorways By Vicki Welsh" to find the blog. About Vicki
I'm Vicki Welsh and I've been making things as long as I can remember. I used to be a garment maker but transitioned to quilts about 20 years ago. Currently I'm into fabric dyeing, quilting, Zentangle, fabric postcards, fused glass and mosaic. I document my adventures here. Categories
All
Archives
May 2024
|


 RSS Feed