|
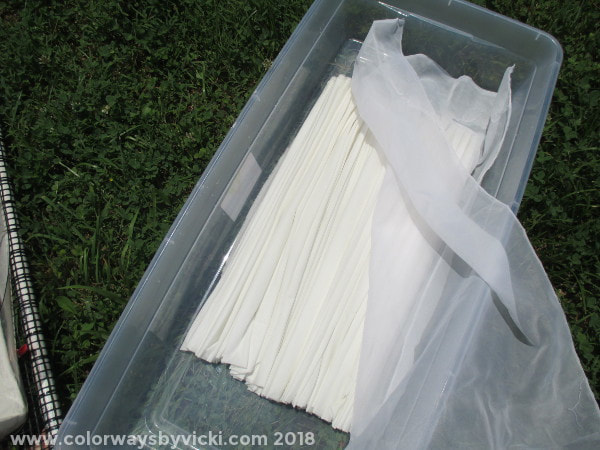
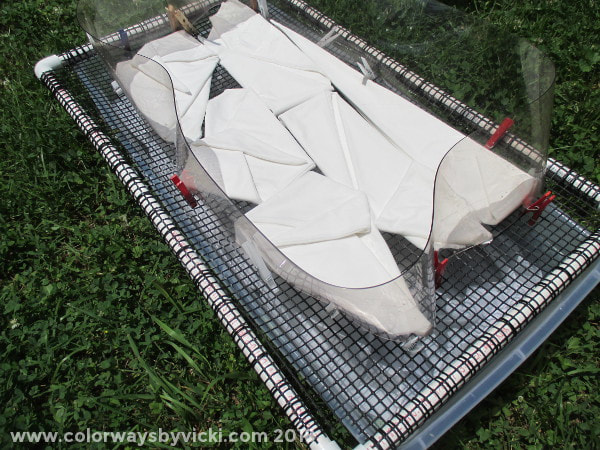
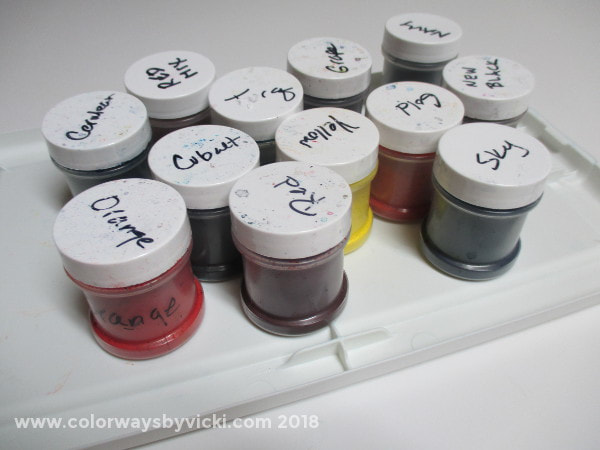
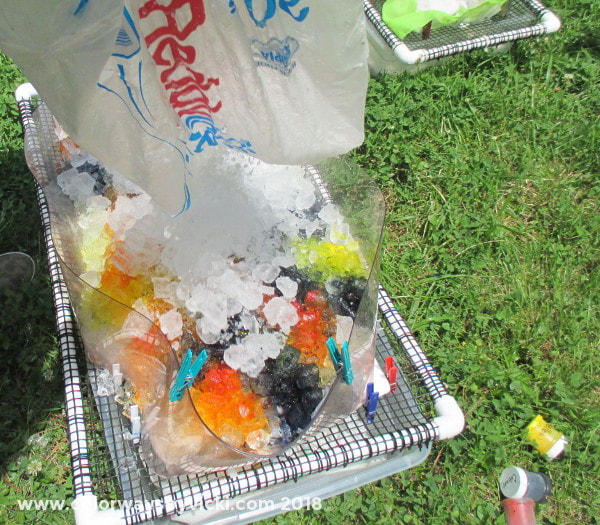
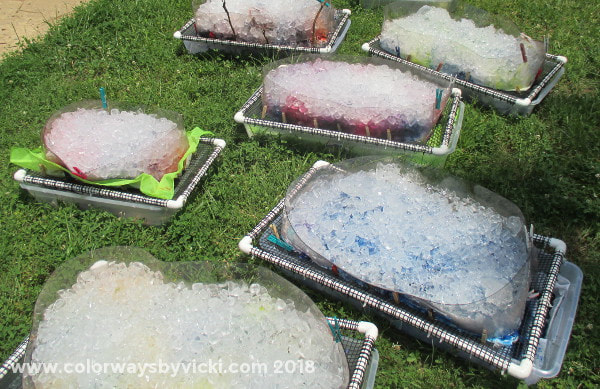
My life these days is almost 100% focused on dyeing fabric for the AQS Virginia Beach show in October. Since I haven't done a big show before I'm going in totally blind about what I need so I'm trying to make sure that I have too much. That means that every day is either a dyeing day, ironing day or planning day. Last week had 3 dyeing days because I decided to add in some ice dyeing and I thought I'd share my process for anyone who hasn't seen it before. To be perfectly honest I don't really like ice dyeing but I love the results and there's really no other way to get them. Ice dyeing a pain in the neck. It's messier than regular dyeing, takes a lot longer to set up and wastes a TON of dye. I really couldn't abide the dye loss so a few years ago I started putting extra fabric in the bottom of the bin to catch the runoff dye and that's how I accidentally created some of my favorite fabrics, the Galaxies. It's a Galaxy fabric that is the feature fabric in my Antelope Canyon quilt. So I start by arranging 2 - 3 yards of fabric in the bottom of my bins. The sheer fabric over it is cut from old sheer curtains and helps to keep dye powder dots off the fabric and it works great. I had folded and soaked the fabric in soda ash several days before so I was ready to arrange the fabric on my screens. These screens are made with PVC pipe, plastic landscape cloth and zip ties. Next I surrounded the fabric with a wide plastic collar. Some people use cardboard but I had a roll of this heavy duty vinyl in the basement and this was a opportunity to use it. Don't ask where it came from because I don't know! Clothes pins keep it upright. Now it's ready for dye. For my regular dyeing I use dye concentrates. The most, and probably only, dangerous part of dyeing is working with the dye powder because it gets airborne easily. I start my dye sessions by mixing the concentrates that I need for that day and then put the powders away. Ice dyeing requires working with powder so I load up some spice shakers with each of my colors and have them ready to go. While I'm using the powders I ALWAYS wear a mask. A caveat about safety, if you are a klutz like me the whole process can be fraught with danger. Because of my arm Chris had to help me out with this session. While he went to buy the ice I planned out the colors for each bin. He did all of the heavy lifting. I think that most people apply the dye directly to the fabric and then cover with ice. I like to put down a layer of ice, then sprinkle on the dye powders and the cover with more ice. I think it reduces the appearance of dye powder dots on the fabric. If you haven't figured out yet, dye powder dots are a giant pet peeve for me. This particular tray had 40 lbs of ice! Here are 6 of the 7 trays hanging out in the sun doing their business. I like doing this outside because the ice melts faster and rinsing with the garden hose is so much easier! As soon as I get caught up on my ironing I'll have the new ones to share. The fabrics in the bottom of the bins turned out great too!
Karen Brennan
6/15/2018 04:52:28 pm
I love it when you do these tutorials. Looks like fun in the sun. I know it is a lot of work. Your fabrics are the most varied and beautiful I have seen. Hurray for a helpful husband. They are gold. Heal fast.
Mary Anne
6/15/2018 06:17:23 pm
Reading this and seeing the bins on the lawn made me wonder if you have neighbours that live close enough to see - and wonder - what you're up to. When we lived at our previous house I went through a rust dyeing binge and had all sorts of 'interesting' things hanging on the line quite often. Our poor neighbour finally asked what on earth I was doing. He also was quite mystified to see me drying all sorts of different sizes of women's clothing, when he knew full well I was the only woman in the house! He needed to satisfy his curiosity about that one too.
Rena M
6/15/2018 08:43:53 pm
Love your setup for dyeing large pieces. When I ice-dye, I put ice on top of fabric, sprinkle on dye powder, then spritz with water to dampen the powder. It makes the powder stick better so it doesn't blow off (& get on neighboring trays) when I put my trays out in the sun and gives it a bit of head start in dissolving the powder. Thanks for your tutorials!
Edith
6/17/2018 08:01:07 pm
Thanks for all of the info. Ice dying is the only sort of dyeing that I’ve thought about to work on at home but I’m not sure about investing in the dyes. I wonder if I could try it with old fashioned Rit! It’s interesting you don’t like the powder dots. I bought some fabric in Florida that celebrated them! The fabrics were a base color and then lots of dots of other colors. Your fabrics are beautiful and I will be buying some soonish depending on my budget.
patty
6/18/2018 07:43:17 am
I am anxious to see the results from this batch of dyeing.
Kristin F
6/21/2018 09:33:51 am
Thank you for posting this info about your set up. What a brilliant idea for the PVC frames and landscape cloth. It's also a great idea to lay fabric at the bottom to catch the excess dye. Comments are closed.
|
FeedsTo subscribe click the RSS Feed button and copy the URL of that page into your blog reader.
In Bloglovin you need to search "Colorways By Vicki Welsh" to find the blog. About Vicki
I'm Vicki Welsh and I've been making things as long as I can remember. I used to be a garment maker but transitioned to quilts about 20 years ago. Currently I'm into fabric dyeing, quilting, Zentangle, fabric postcards, fused glass and mosaic. I document my adventures here. Categories
All
Archives
July 2024
|
 RSS Feed