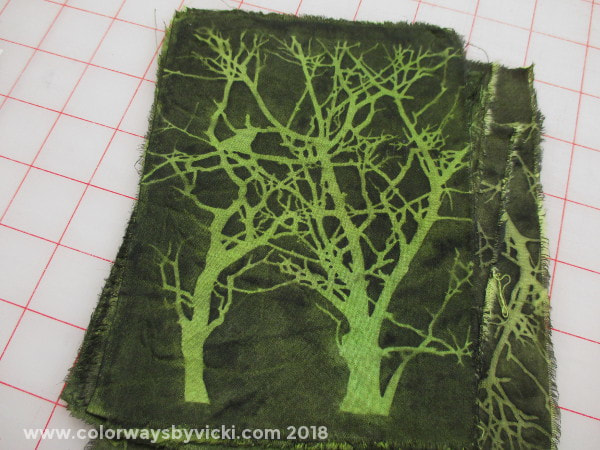
 I needed a birthday card for my nephew (and several other male birthdays coming up this year). I try to avoid sending flowers and glitter to the boys that aren't into flowers and glitter. So I riffled through my stash of sun prints from last summer and came up with these. 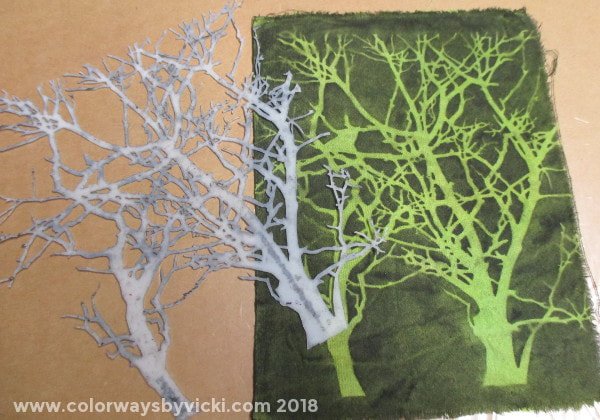 This is the stencil I used to sunprint these cards. I can't find that particular stencil online but I found these, some of which will work just as well. These were some of the most successful sunprints that I did last summer but I've been completely stumped as to what to do with them. There's nothing like a deadline to fix a creative block. 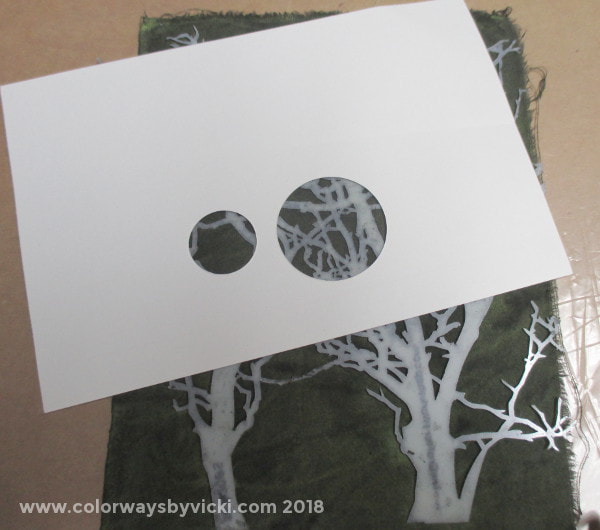 I decided on adding a moon behind the trees. There was a time when I would have done that the hardest way possible like cutting out the background and putting a fabric behind the holes. But I've learned a few things from my friend, Estelle, like how to mask designs. I cut a circle out of an index card. (There are 2 circles because I cut this with one of my Go! Cutter dies and it has these 2 circles next to each other.) By putting the stencil back on the fabric to cover the tree I could place the circle over that and apply some other color to the background. 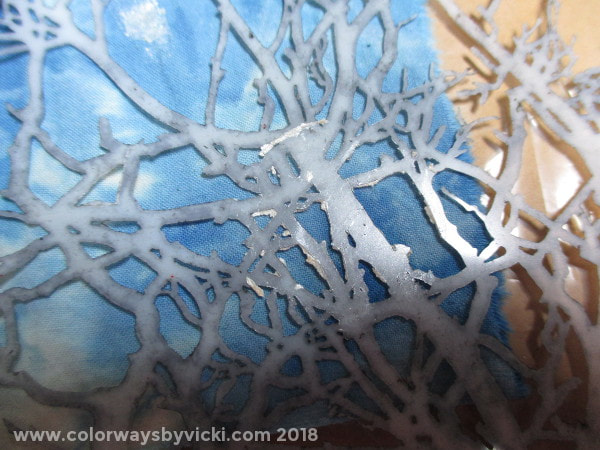 The other thing I've learned from Estelle is to practice! When we used to do our technique exploration days I would always start with a big piece of fabric and an idea. Meanwhile Estelle would start with some small scrap and test her idea first. It took a while but I eventually caught on to her methodology and that's what I did here. I thought I wanted the background to be done with Shiva Paintsticks but you can see here that all that did was jam up the crevices in the stencil. Painting turned out to be the right approach. 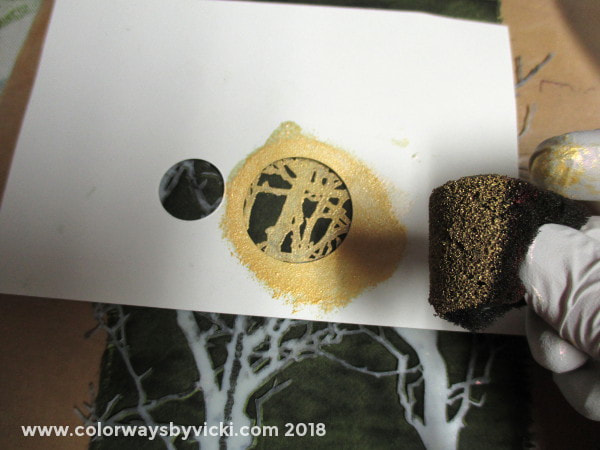 I tore the sponge off of a cheap paint brush to use as a daubber. 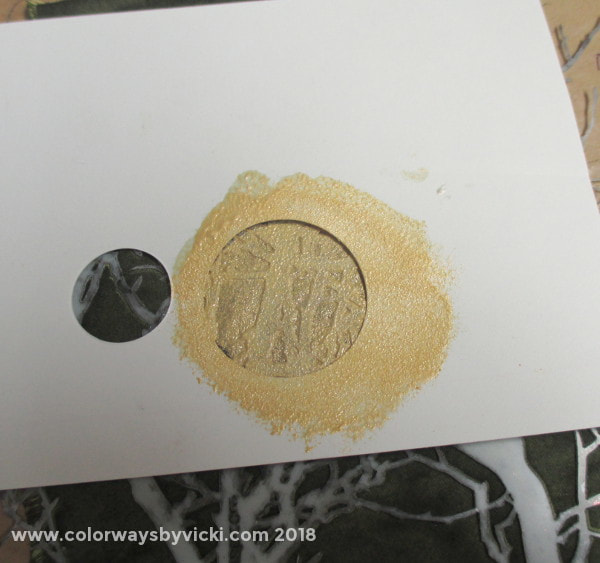 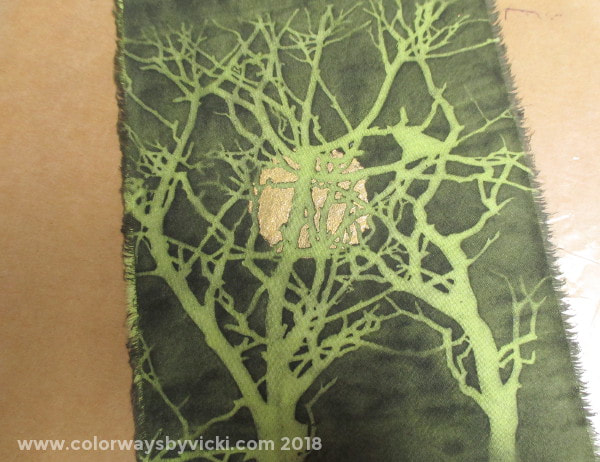 Voila! A moon! The only problem with this approach was that there was a gap between the circle cut out and the fabric because of the thickness of the stencil. The result of that is that my moon isn't a perfect circle and this was the time to remind myself that this is a postcard and it's good enough. In hindsight I might have gotten a better result if I had placed the circle against the fabric and the stencil on top of that. This is one of the things I love about working on postcards. They are great lessons for learning new techniques or improving my skills and I get something productive in the process. 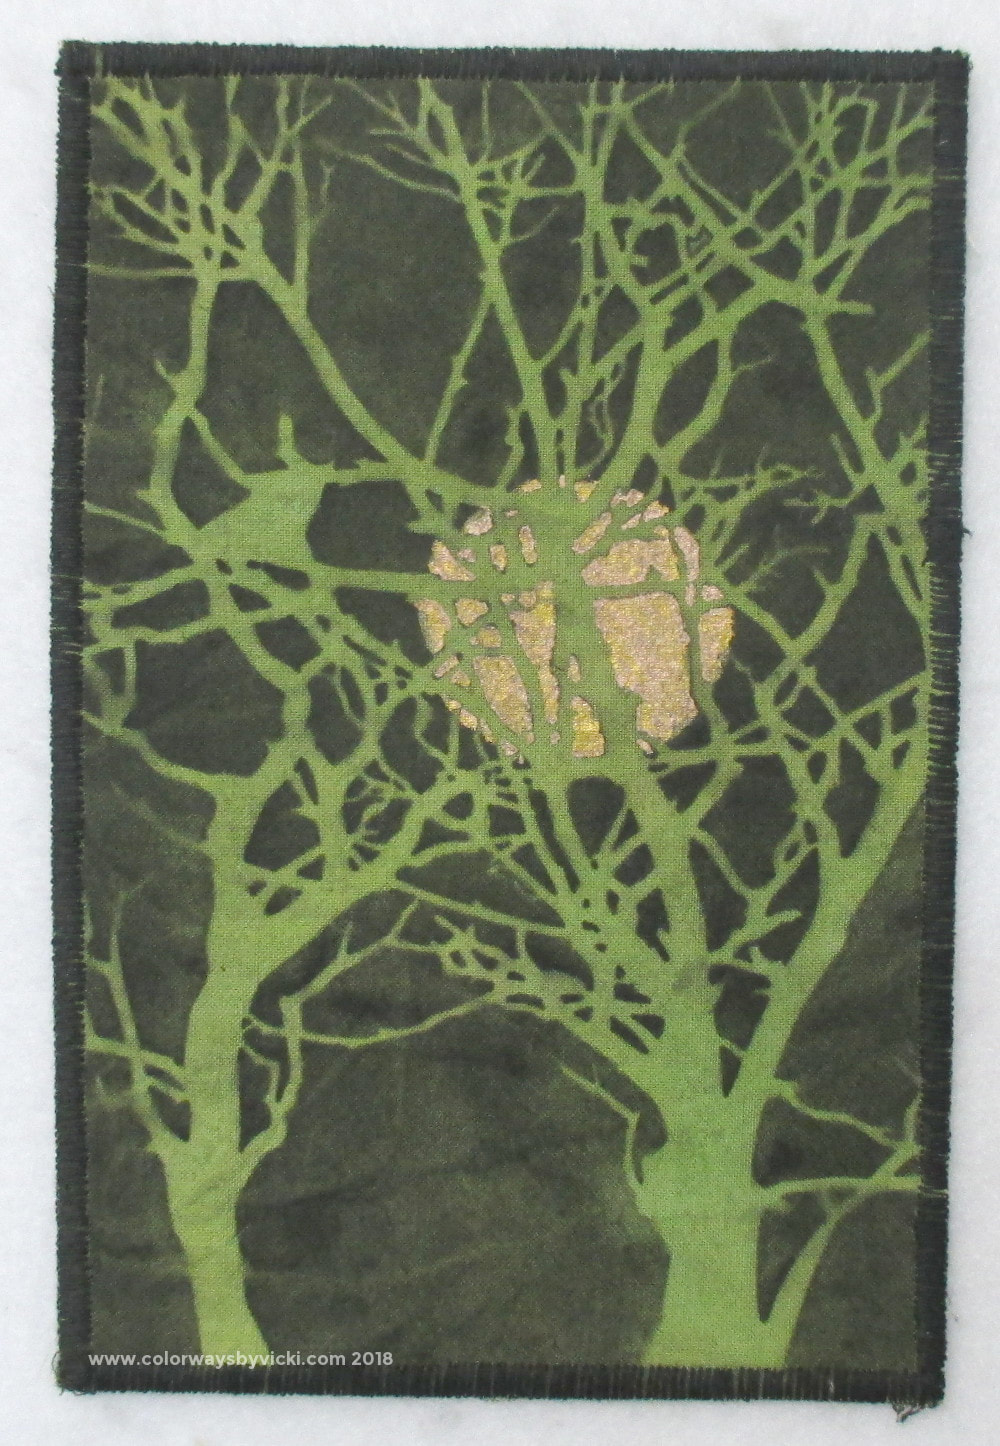 After I fused the trees to the postcard base I then spent a long time thinking about what stitching I could add to the card. I feel like I'm cheating if I don't add stitching but I just couldn't think of anything to add. I finally realized that they are done as they are. A black stitched edge finished them off. 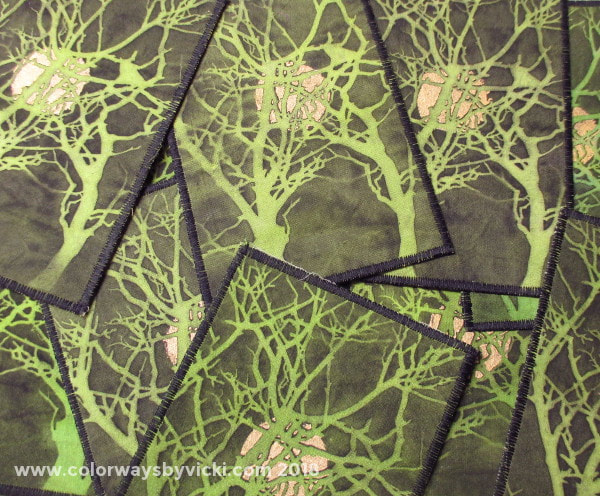 No need to just make one. Nine is better!
Anne
3/29/2018 11:59:05 am
I💚this!! 3/29/2018 09:49:46 pm
I love the softness of the imperfect moon behind the trees. That method of masking is pure genius.
patty
3/30/2018 07:31:52 am
Those postcards are wonderful! The trick of adding the moon is genius! Have a wonderful Easter!
Kristin F
3/30/2018 09:44:49 am
Really pretty postcards!
sharon
3/30/2018 09:54:15 am
Wow! 3/30/2018 07:00:30 pm
vicki, these postcards are just fantastic. so realistic. in my eyes you stopped at the right place. i'm so glad you share these with us. great job. patti in florida 3/30/2018 07:42:59 pm
Love the postcards, and thank you for the story behind getting the moon to rise! Comments are closed.
|
FeedsTo subscribe click the RSS Feed button and copy the URL of that page into your blog reader.
In Bloglovin you need to search "Colorways By Vicki Welsh" to find the blog. About Vicki
I'm Vicki Welsh and I've been making things as long as I can remember. I used to be a garment maker but transitioned to quilts about 20 years ago. Currently I'm into fabric dyeing, quilting, Zentangle, fabric postcards, fused glass and mosaic. I document my adventures here. Categories
All
Archives
July 2024
|
 RSS Feed