|
I decided to start off the new year but finishing up the puppy quilt with the label. My plan was to give it to her today when she visits but that plan has changed a bit. I was visiting a quilt buddy yesterday and she asked if I was bringing the puppy quilt to show-and-tell. I had completely forgotten my obligation to show my quilts at club meetings first! My friend will have to wait a week or so before she receives her quilt, but she will get to see it today when she visits.  I used to do very simple printed labels that I created in Powerpoint. They took less than an hour to design and print. Then my sister-in-law taught me to Zentangle and then I found Wild Gears and my label-making turned into one more hobby. You can see the labels that I've made in my Zentangle gallery. Anyway....Wild Gears has a set called Strange Shapes and it has a gear that looks like a dog bone and I had to use that as the base for the label for this quilt. I always start by practicing with different gears to pick the pattern that I want. I settled on the blue one. 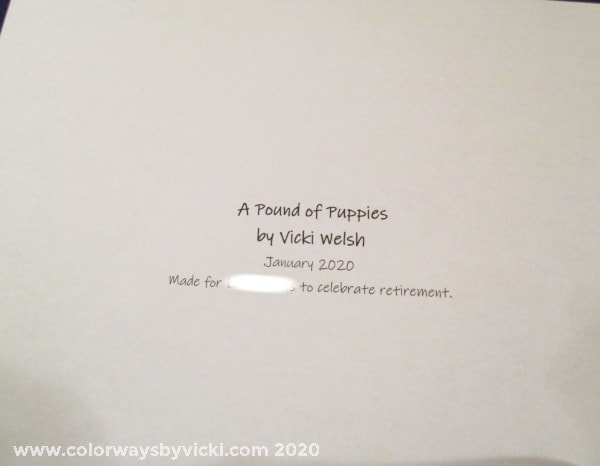 The next step is to print the wording. I generally spend way too much time here playing with fonts and searching for new fonts on the web. But, for once, I kept it simple. I keep the file open on my computer in case I mess up the drawing and have to print another. 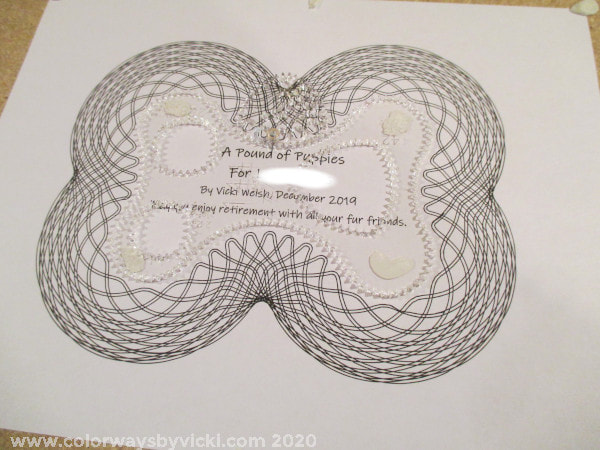 I was good this time and got the drawing right on the first try! No fancy pen here. This is my favorite black pen from Dollar General. The base gear is the dog bone and the traveling gear is a triangle. Usually I'd stop here but then I remembered that I might have a stamp I could add. I headed to the basement to search through the bins of stamping supplies. 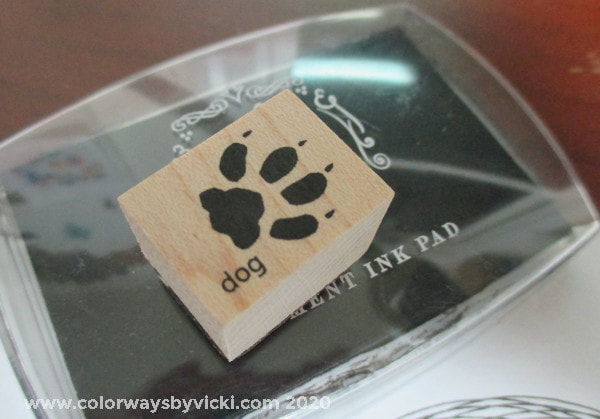 My memory is not totally shot. I did have a dog paw stamp! 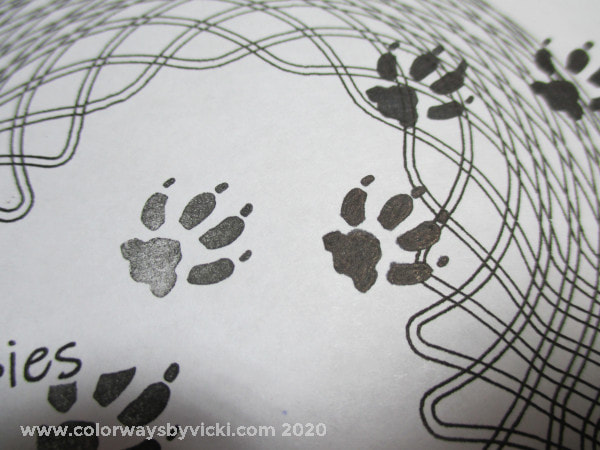 My ink pad is a little old but I just went back and inked in the print with a fine point Sharpie to get them totally black. 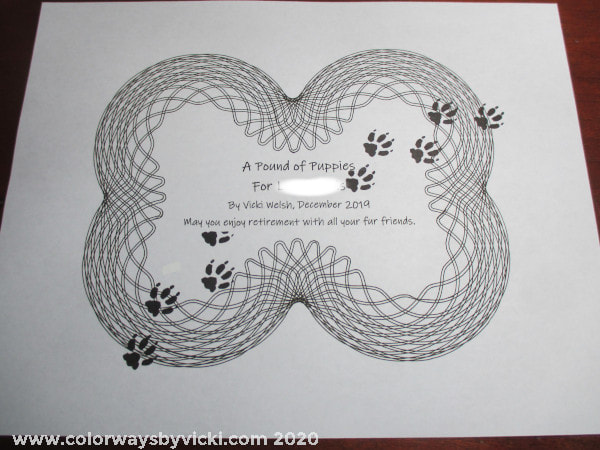 Now I'm happy. The next step was to photocopy the label to pre-treated fabric. I use Bubble jet Set on Pimatex for my printable fabric. I usually prepare 2 yards or more at a time so I have a stack or printer sheets ready to go. 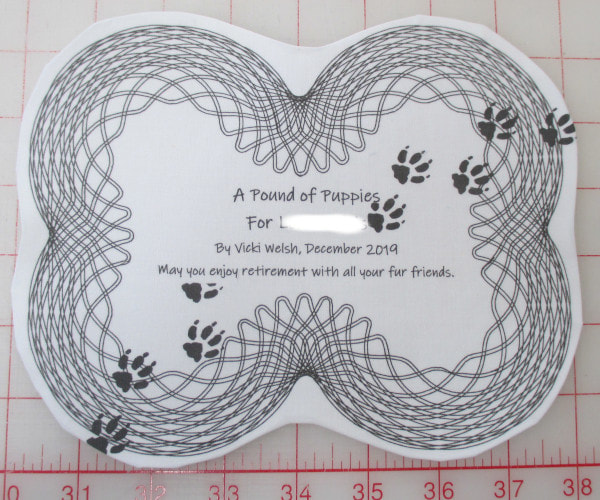 I line my labels by fusing a piece of white fabric to the back and then turn the edges against the lining. That blocks the backing fabric color from showing through. This is ready to be stitched on today or tomorrow.
Pam
1/2/2020 12:01:35 pm
Wonderful
Mary Anne
1/2/2020 05:25:47 pm
That a perfect label! And you reminded me that I have a partial bottle of Bubble Jet Set cluttering up my stash that I need to actually use up. I can't remember just how many years it's been on the shelf and it's time I either tossed it or used it.
Gene Black
1/2/2020 07:41:27 pm
That is great. Thanks for sharing how you do the lining on the labels.
patty
1/3/2020 07:49:20 am
The label turned out great! You put as much thought in the label as you do the quilt.
Carmen N
1/3/2020 09:39:41 am
Your labels are so clever. You have mastered the gears and they add so much to your work! You get a blue ribbon from me! Comments are closed.
|
FeedsTo subscribe click the RSS Feed button and copy the URL of that page into your blog reader.
In Bloglovin you need to search "Colorways By Vicki Welsh" to find the blog. About Vicki
I'm Vicki Welsh and I've been making things as long as I can remember. I used to be a garment maker but transitioned to quilts about 20 years ago. Currently I'm into fabric dyeing, quilting, Zentangle, fabric postcards, fused glass and mosaic. I document my adventures here. Categories
All
Archives
July 2024
|
 RSS Feed